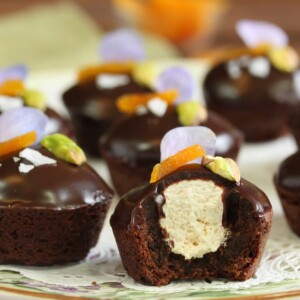
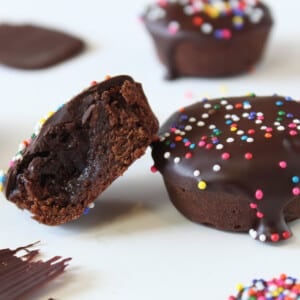
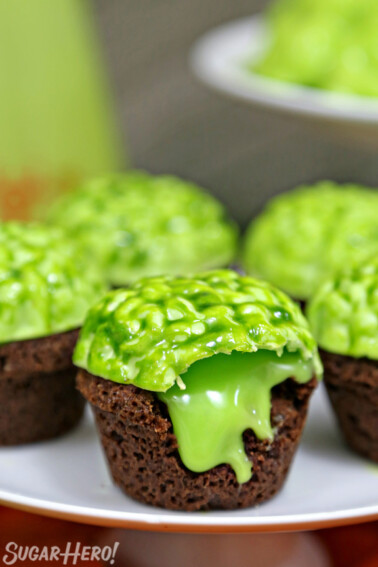
These Brownie Lava Bites are a dessert that’s fun for kids, but definitely suited to grown-ups! They have a decadent truffle center that stays soft and fudgy and are topped with bright sprinkles.

Pssst, remember lava cakes? The menu mainstay of classy dessert joints for the past decade or so?
For awhile it seemed they were everywhere—you couldn’t pick up a menu without seeing yet another variation of a lava cake. They may have become cliché, but I never truly got tired of them—how could you get tired of chocolate cake with a warm, gooey, flowing filling?
[Answer: if you have taste buds and a heart, you can’t.]Lava cakes had a good run, but all things must pass, and now I think they’ve been replaced by first cupcakes and now macarons as the dessert du jour. I’m not quite ready to give up on them, though. Viva la lava cake!

These petit fours aren’t exactly lava cakes, but they’re lava cake inspired. Lava cake adjacent, you might say. They start out as brownie bites, but before they’re baked, a truffle is poked in the center of the brownie batter, so that the inside stays soft and fudgy.

I made these brownie lava bites for some family friends. They have two adorable kids who are always happy to help taste test my candies and treats, and they always send me the sweetest thank you notes afterward. They’re so grateful every time, it just makes me want to bring them more desserts, more often.
If you want to get goodies out of me, all you have to do is butter me up with complements and charmingly misspelled thank yous. True story.
Anyhow, I was trying to think of what they might enjoy, and I was debating between brownies and truffles. Instead of choosing one or the other, I combined them in this recipe. Then added sprinkles. Because everything is better with sprinkles. The result is a dessert that’s fun for kids, but definitely suited to grown-ups too. Which is why those poor kids only got half a batch of these brownie bites, in the end. Ahem.

I topped these with melted tempered chocolate, because I wanted to be able to stack them and package them neatly. The chocolate topping was good, but if I were to make them and didn’t need to worry about stacking them, I would top them with ganache instead, for a nicer texture. I’ve written the recipe with a ganache topping, but if you need these to be sturdy enough to stack and pack, I recommend skipping the ganache and just dipping them in chocolate.
Nougat-Stuffed Brownie Bites

Truffle-Stuffed Chocolate Chip Cookies
Brownie Lava Bites
Ingredients
For the brownies:
- 2 oz unsalted butter, (4 tbsp), cubed
- 2.5 oz bittersweet chocolate, (about 1/3 cup), coarsely chopped
- 1/3 cup light brown sugar, packed
- 1 tsp vanilla extract
- 1 large egg
- 1.68 oz all-purpose flour, (1/4 cup + 2 tbsp)
- 1/4 tsp salt
For the ganache:
- 6 oz semi-sweet chocolate, (about 1 cup), coarsely chopped
- 1 cup heavy cream
Instructions
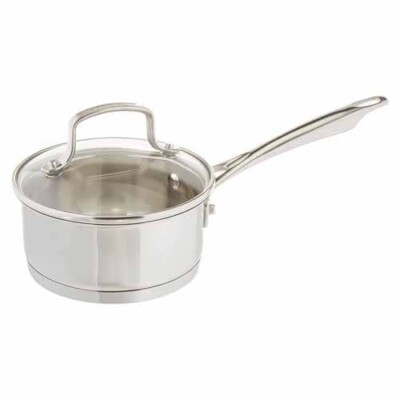
- Make the ganache at least an hour in advance of when you want to assemble the brownie bites. To make the ganache, place the chopped chocolate in a heat-safe bowl, and pour the cream into a small saucepan. Heat the cream over medium heat until it just begins to boil around the edges.
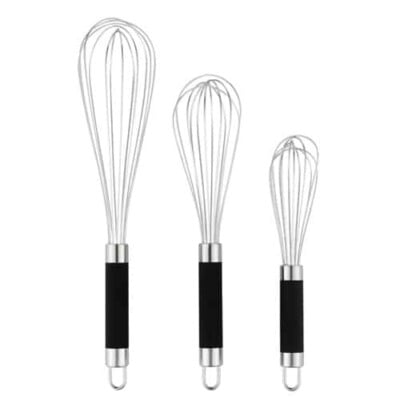
- Pour the hot cream over the chopped chocolate, and let it sit and soften for a minute. After a minute, begin to whisk the cream and chocolate together until the mixture is completely smooth and shiny. Press a layer of cling wrap on top of the ganache and refrigerate it until it is firm enough to roll into balls.
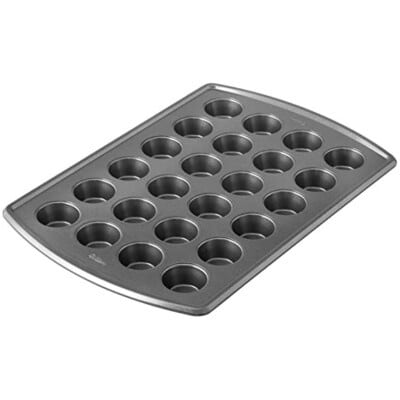
- Preheat your oven to 350 degrees Fahrenheit, and spray two miniature muffin trays with nonstick cooking spray.
- To make the brownies, combine the butter, chocolate, and brown sugar in a large microwave-safe bowl. Microwave in 30-second intervals, stirring after every 30 seconds, until the butter and chocolate are melted. The mixture will look grainy at this point.
- Stir in the egg and vanilla, and whisk until the mixture loses its graininess and looks smooth and shiny. Add the flour and salt and stir with a spatula just until it is incorporated. Use a teaspoon to fill the tins about 1/3 full of brownie batter—this should use up about half of your batter.
- Scoop the ganache into small balls, about the size of a nickel, and press a ball into the middle of each tin, on top of the brownie batter. You should have about half of the ganache left over. Use the remaining brownie batter to cover the ganache balls, so that they’re buried in the center of the brownie bites.
- Bake the brownie bites in the 350 degree oven for 13-16 minutes, until they’re puffed and set around the edges, and the tops spring back when you gently press on them. Some of the ganache make leak out the sides if they weren’t completely covered by brownie batter—that’s okay! They’ll still taste great. Cool them at room temperature for 10 minutes, then use a knife to carefully remove them from the tins and cool completely on a wire rack at room temperature.
- Once the brownie bites are cool, microwave the remaining ganache is short 15-second bursts until it’s melted, and stir it until it’s smooth. Dip the top of each brownie bite in the melted ganache and while the ganache is still wet, sprinkle the tops with the sprinkles or any other decorations. Let them set in the refrigerator for about 20 minutes.
- For the best taste and texture, serve Brownie Lava Bites at room temperature.
Measuring Tips
Our recipes are developed using weight measurements, and we highly recommend using a kitchen scale for baking whenever possible. However, if you prefer to use cups, volume measurements are provided as well. PLEASE NOTE: the adage “8 oz = 1 cup” is NOT true when speaking about weight, so don’t be concerned if the measurements don’t fit this formula.
Want to learn more about baking measurements and conversion?


Lava cake adjacent, I love it. These are so cute and sound delicious. I’d go for some ganache on top, too!
OMG ! i am in love with your blog ! i am soo trying out some of these !
Aw, thank you Erin!!
Is tempered chocolate like chocolate chips or like bakers melting chocolate ?
Hi Brooke,
Tempered chocolate is chocolate that has been heated and cooled to specific temps, so that it sets hard and shiny. You can read more about it here:
https://www.sugarhero.com/2013/03/how-to-temper-chocolate-an-illustrated-tutorial/
A shortcut would be to use chocolate candy coating (like candy melts, aka summer coating or confectionery coating) instead. The flavor’s not the same, but it sets up hard and shiny and is stable at room temp.
Hope this helps!
I’m a little worried that I’m turning into your creepy internet stalker, as I’ve made a lot of your recipes lately, but I came back (again), this time hunting for something to take to a party, and I was not disappointed! I think these will be my go-to party dish now, as they are cute, not too involved, and pack a decent dose of chocolatey goodness!! My ganache didn’t end up roll-able, so I melted in about 2oz more of 85% cocoa chocolate, which gave it a deeper colour and firmed it up a bit (what is sold as “dark chocolate” in Australia is usually only 45% cocoa unless otherwise specified, so probably why the ganache looked a bit anaemic). In fact, I have another batch in the oven just to use up the extra ganache (ahem, that I couldn’t finish myself!).
Thanks, love your work!
Haha, you’re not a stalker, we’re internet friends! (unless you’re, like, in a tree outside my window or something…) So glad that these worked for you! My dark chocolate is typically around 65%, which is information I should probably start adding to the recipes…whoops. 🙂
Can I make these in normal size muffin pans? Would you double the recipe?
You definitely can, and yes, I would double the recipe! You will also need to bake them longer, but I can’t give you a precise time since I haven’t tried it. I’d just watch them closely while baking.
Can these be frozen? I sense that I will have a dessert emergency and will want to have them at the ready!
Haha a woman after my own heart! Yes definitely, I would recommend freezing them in a freezer-safe container or zip-top bag to help keep them fresh. They’re probably best within a few months, and I’d let them defrost on the counter at room temp for a few hours before enjoying them. 🙂 Maybe a quick zap in the microwave if you like them warm? Sounds like a good emergency plan!