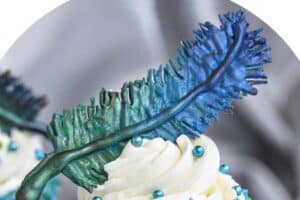
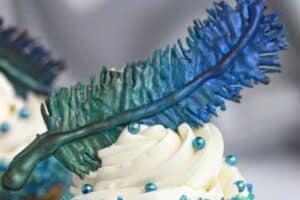
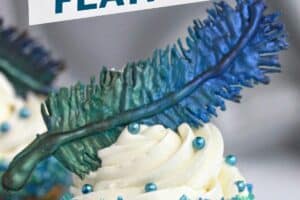

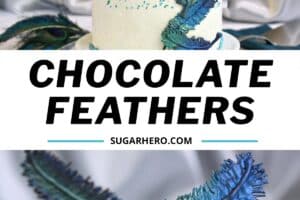

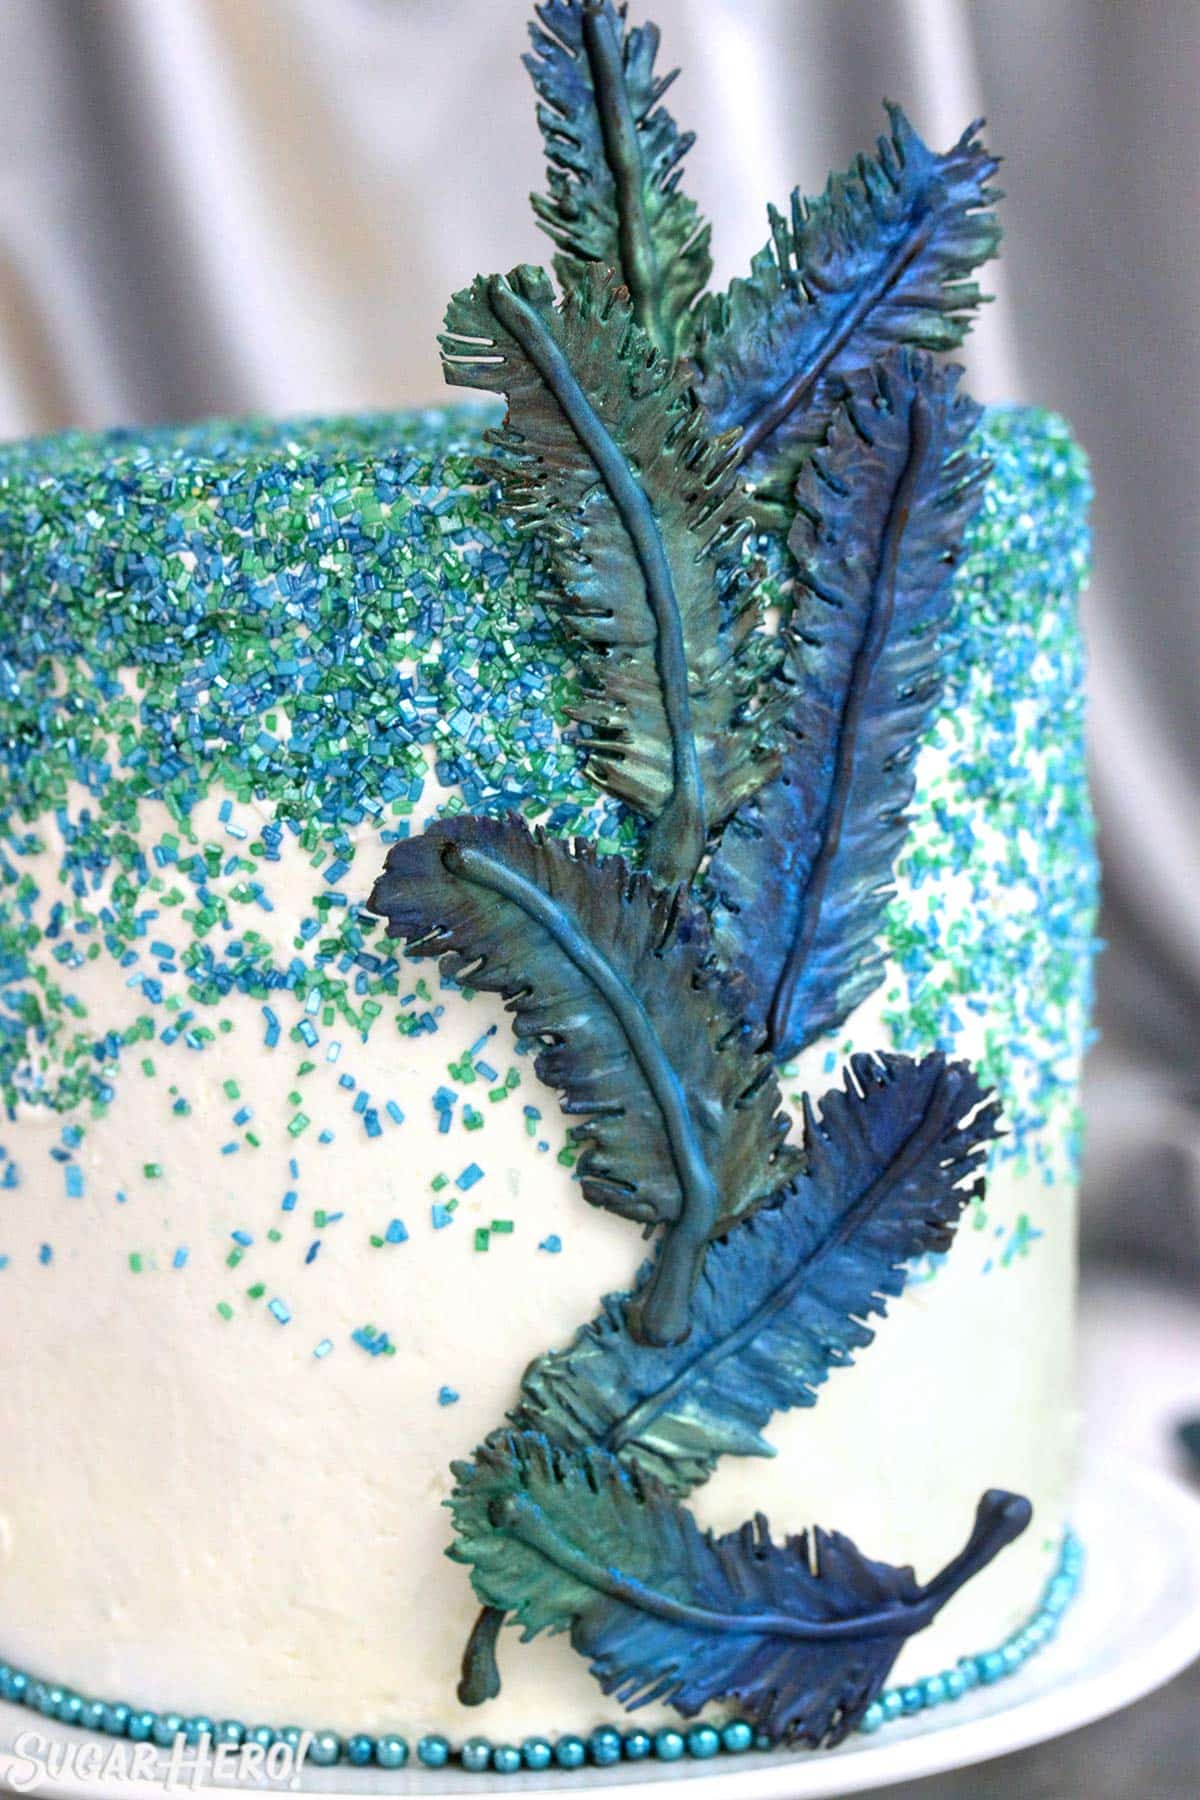
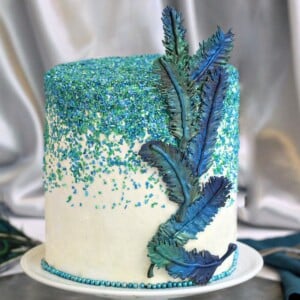
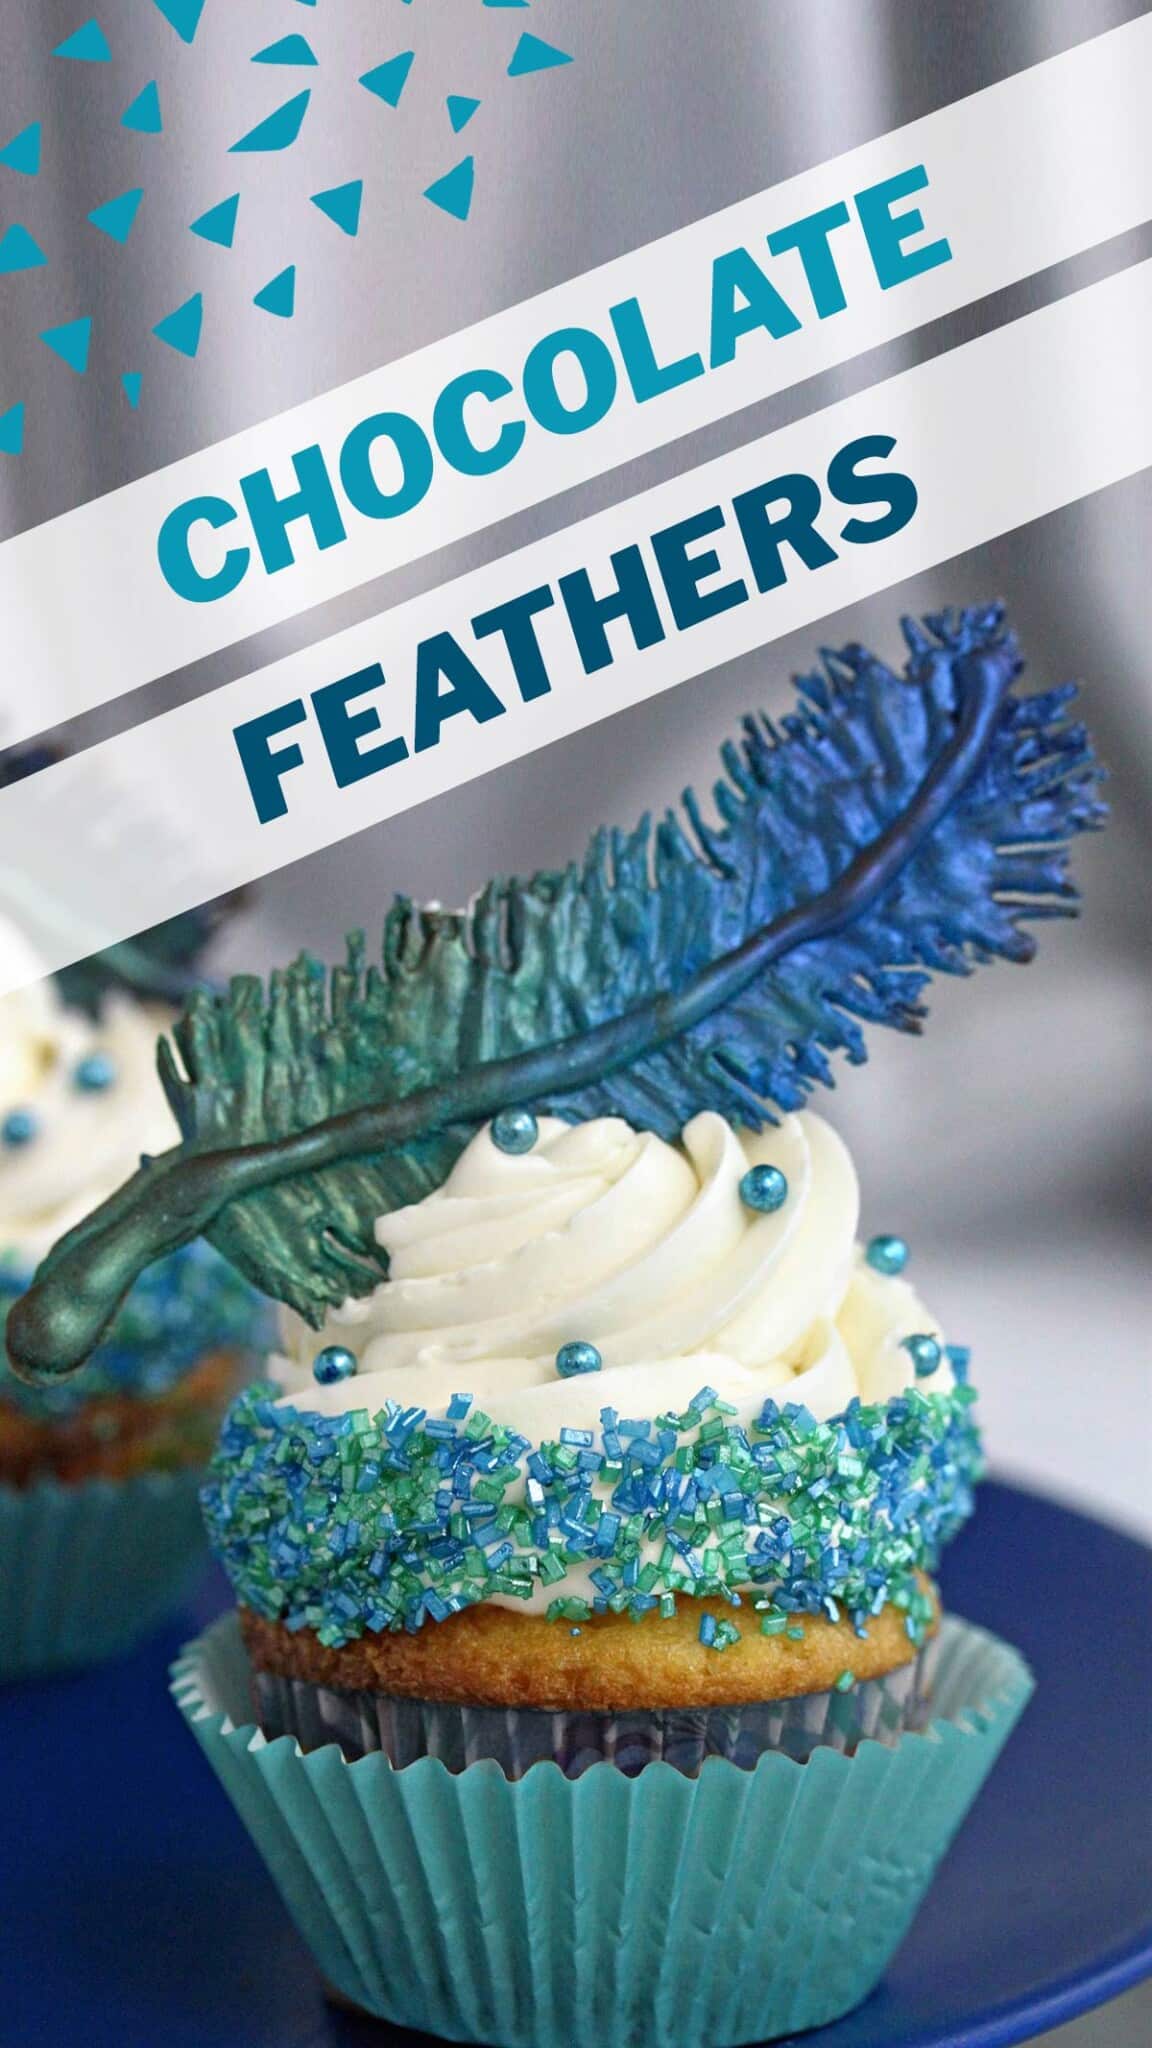
Chocolate feathers are a beautiful way to add a touch of drama to any dessert. You can add these easy edible feather decorations to cakes, cupcakes, tarts, and much more.
🎂 Chocolate Feathers for Cake Decorating
Cake decorating doesn’t have to be complicated to be beautiful. Sometimes, the simplest techniques are the most striking and effective. Some of our favorite cake decorating hacks include:
- rolling the sides of a cake in sparkling sugar or chocolate curls
- adding a ganache drip
- using candy to create patterns and designs
- making quick and easy chocolate decorations, like these chocolate feathers!
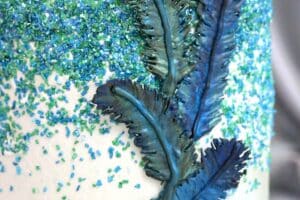
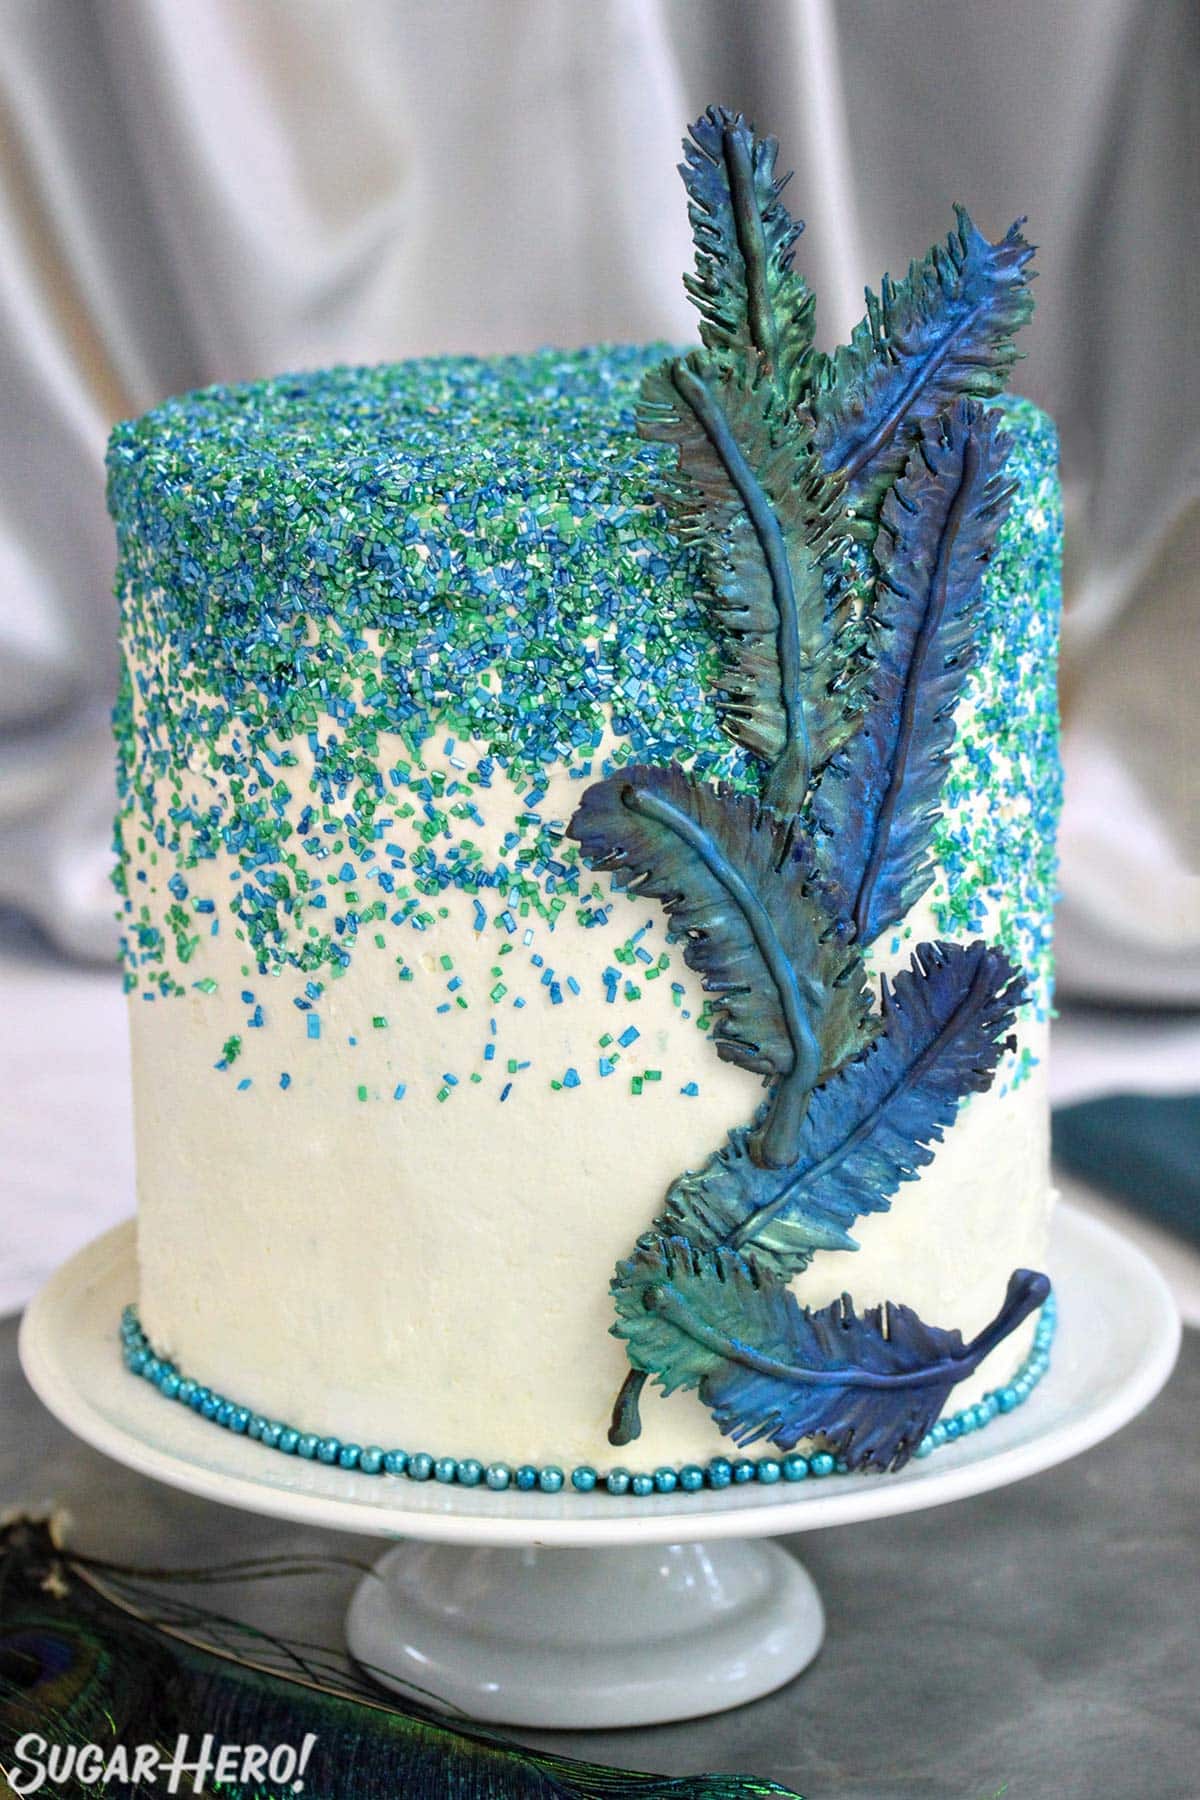
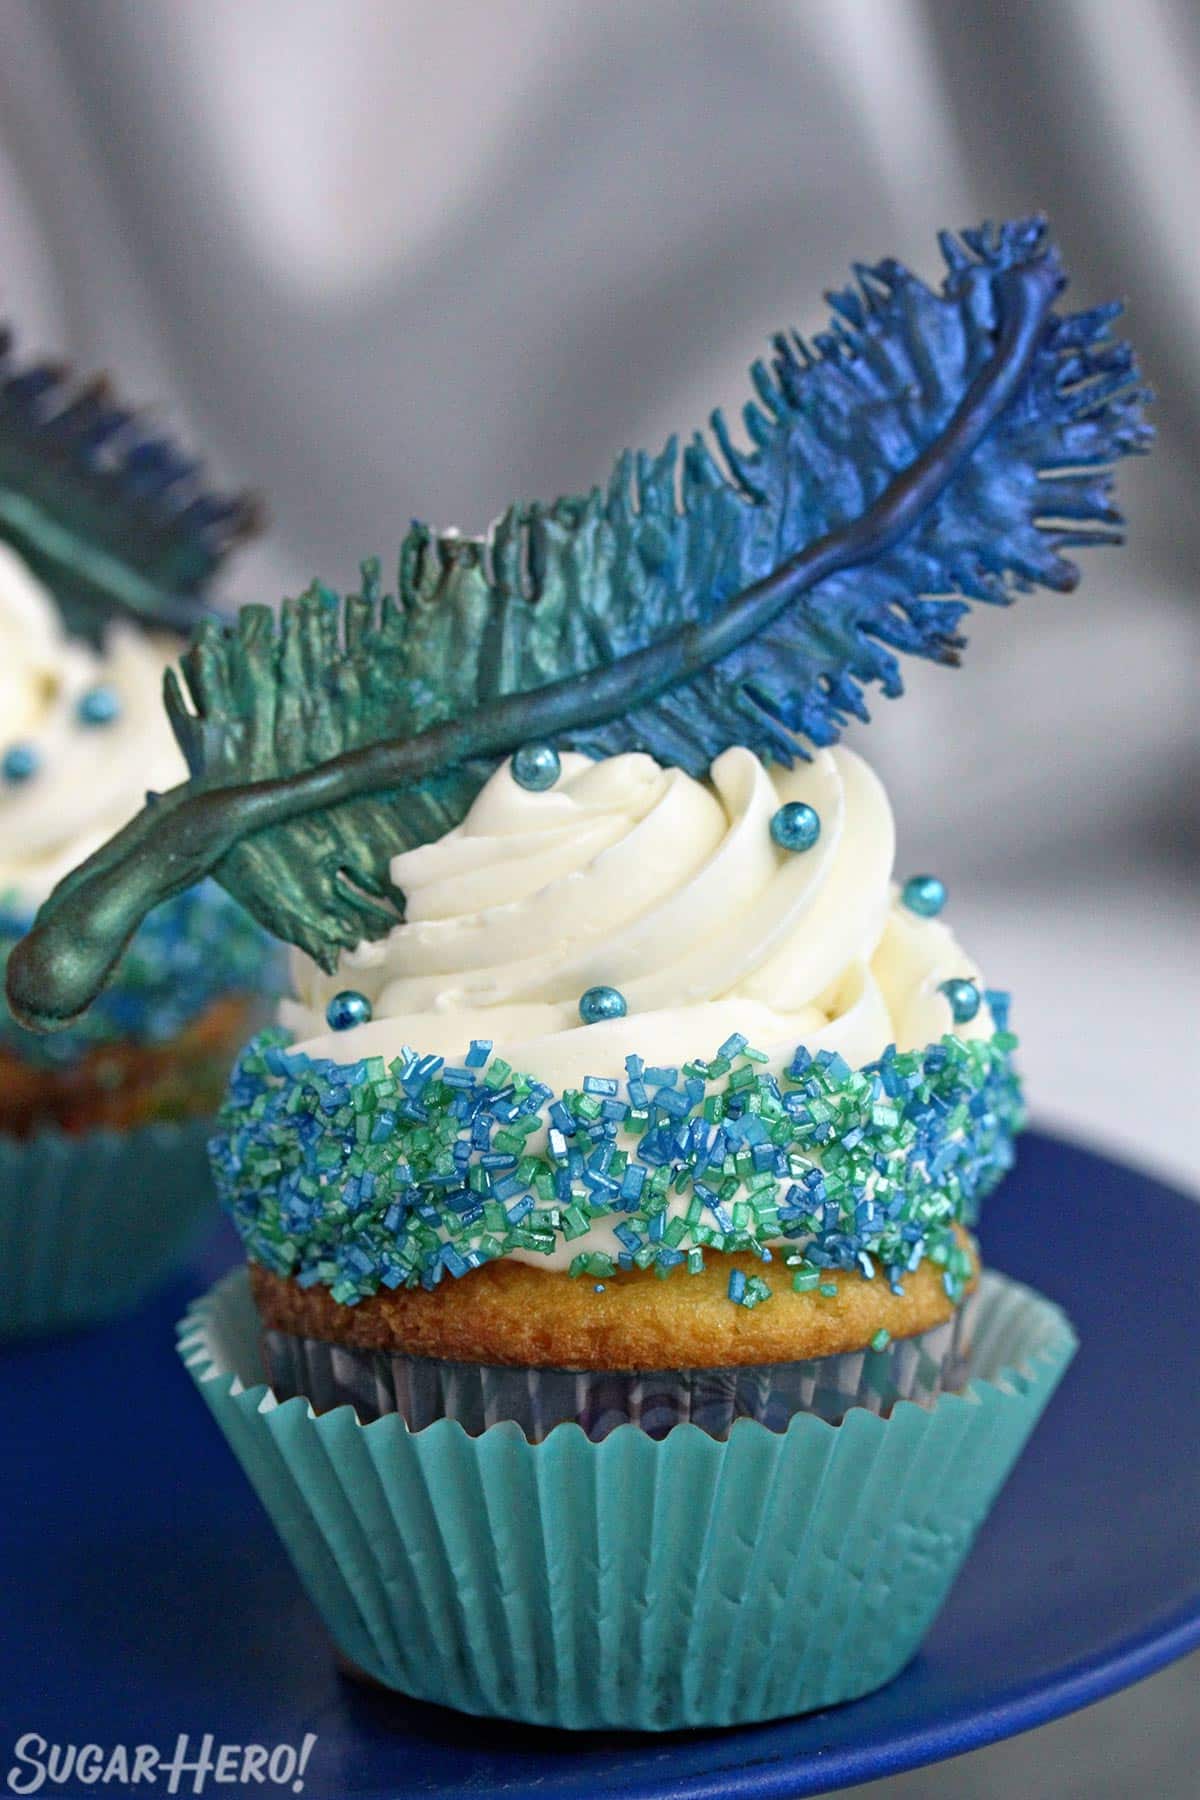
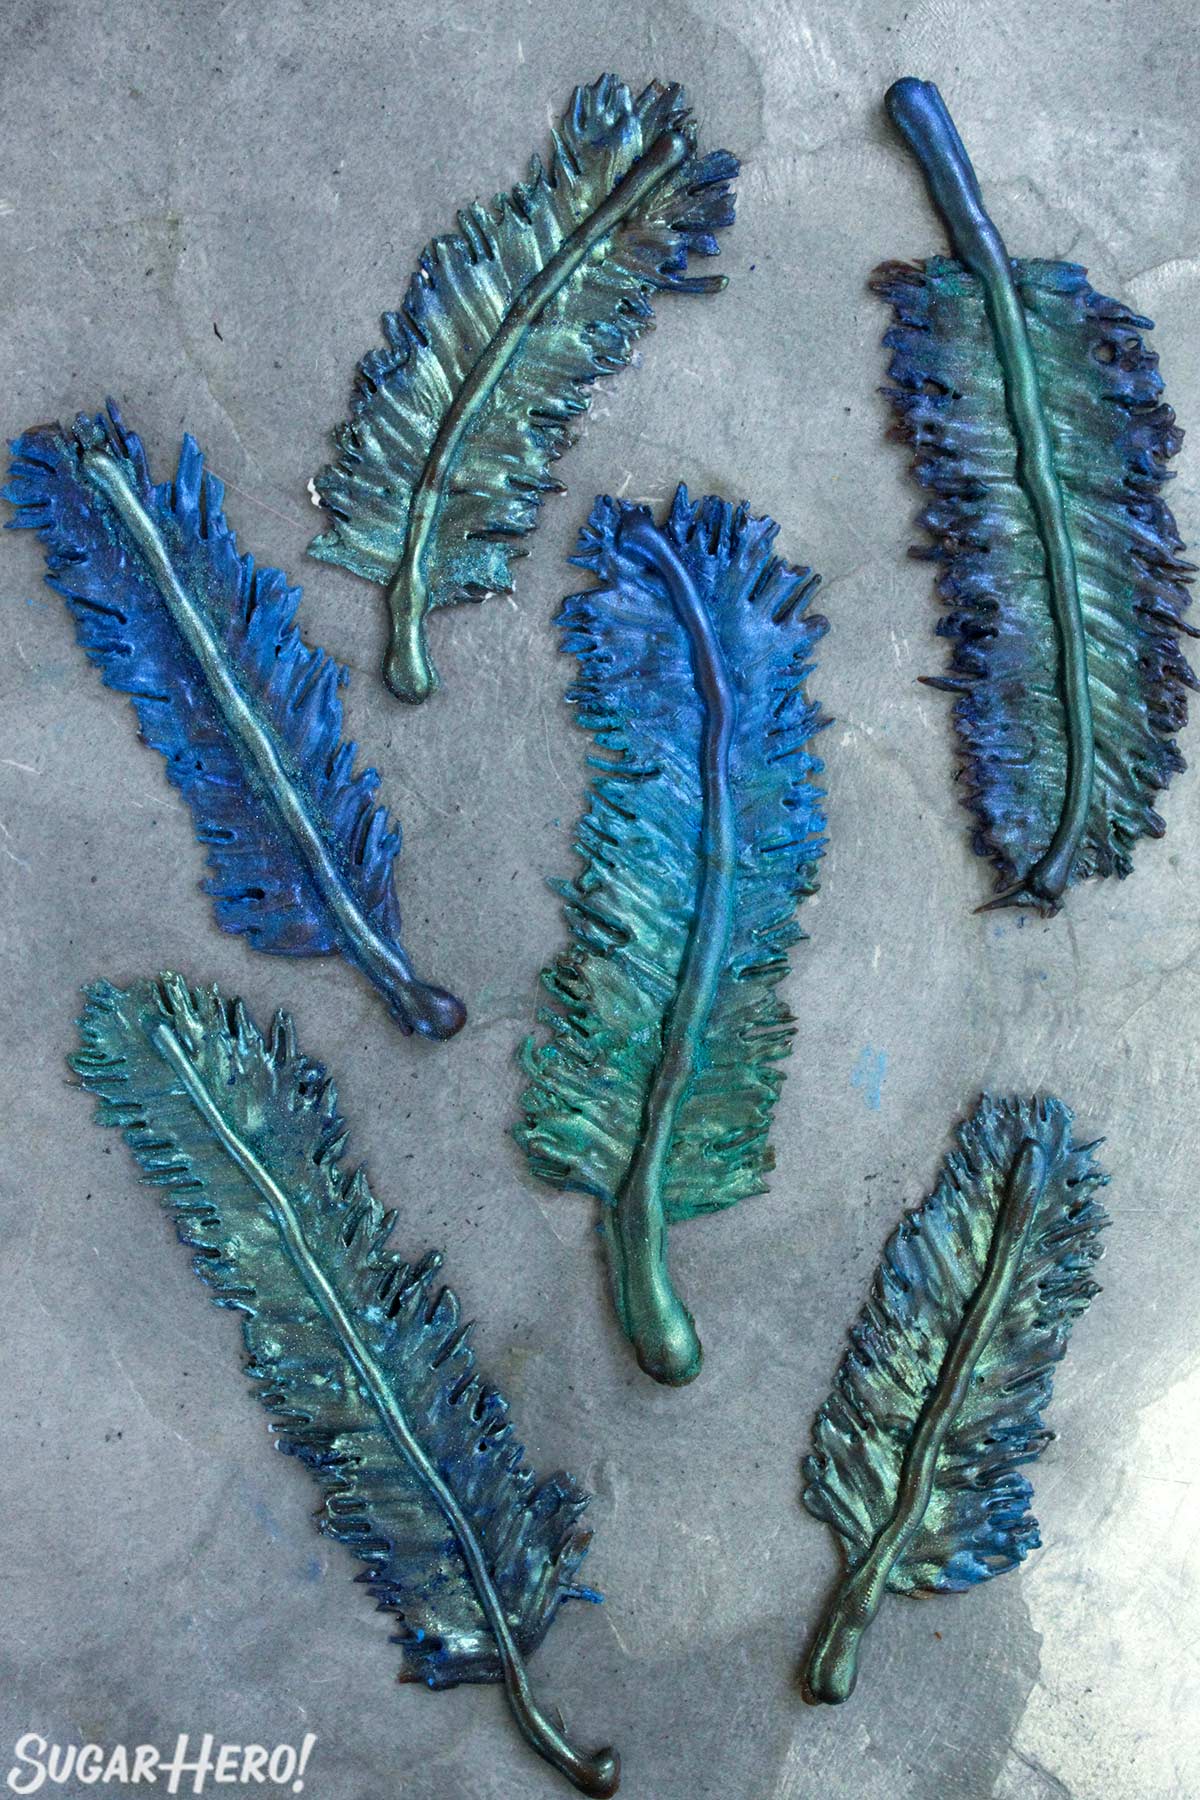
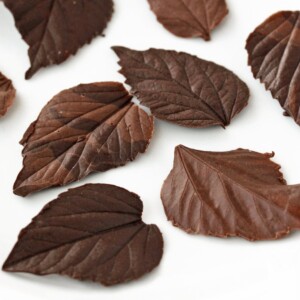
These chocolate feathers, like my chocolate leaves, are made from chocolate candy coating or tempered chocolate, and brushed with edible luster dust to make them glimmer and shine. They can be made weeks or even months in advance if stored properly, so I always make a few extra to have on hand when I want to whip out an impressive dessert with minimal effort.
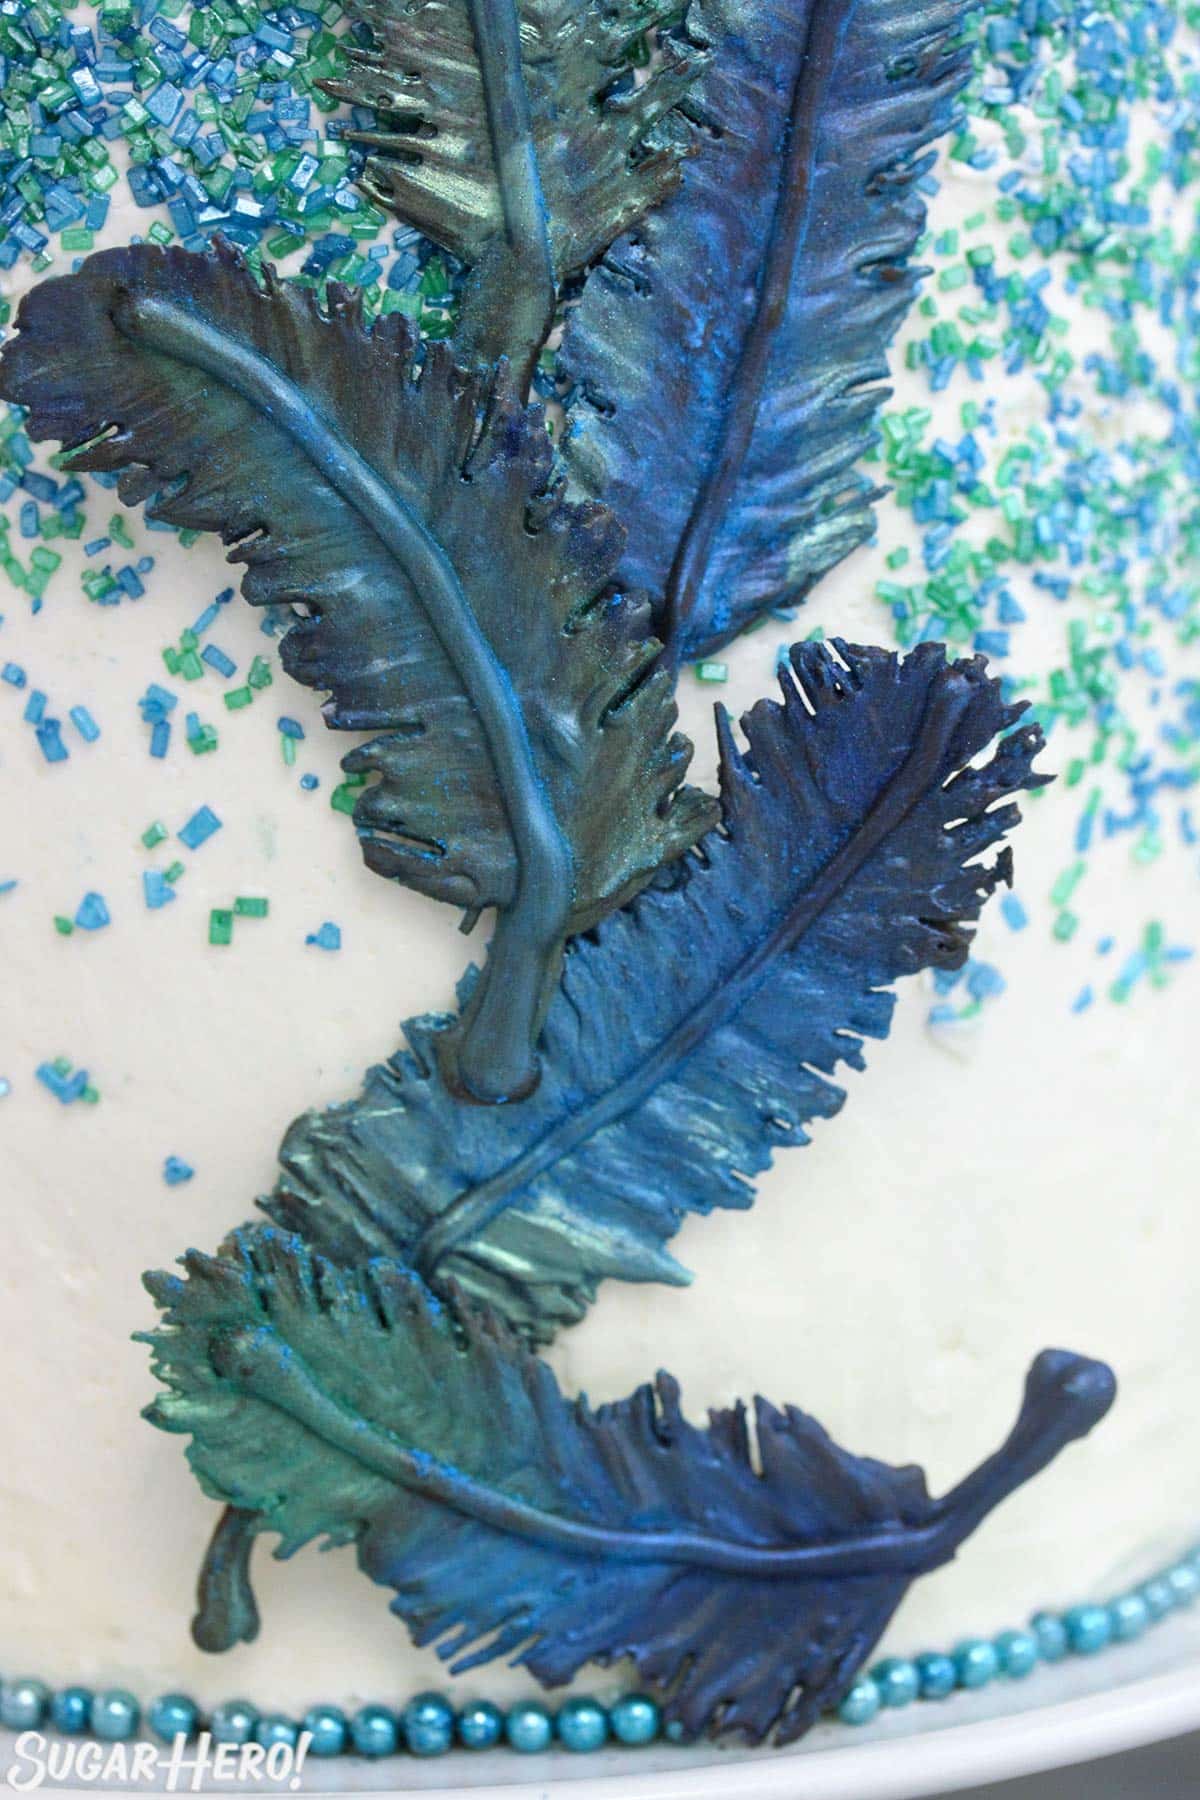
Chocolate feathers can be used to decorate any dessert, but I think they would look especially beautiful on fall-themed recipes like Pumpkin Spice Cupcakes, Brown Sugar Cranberry Cake, and Pumpkin Pound Cake.
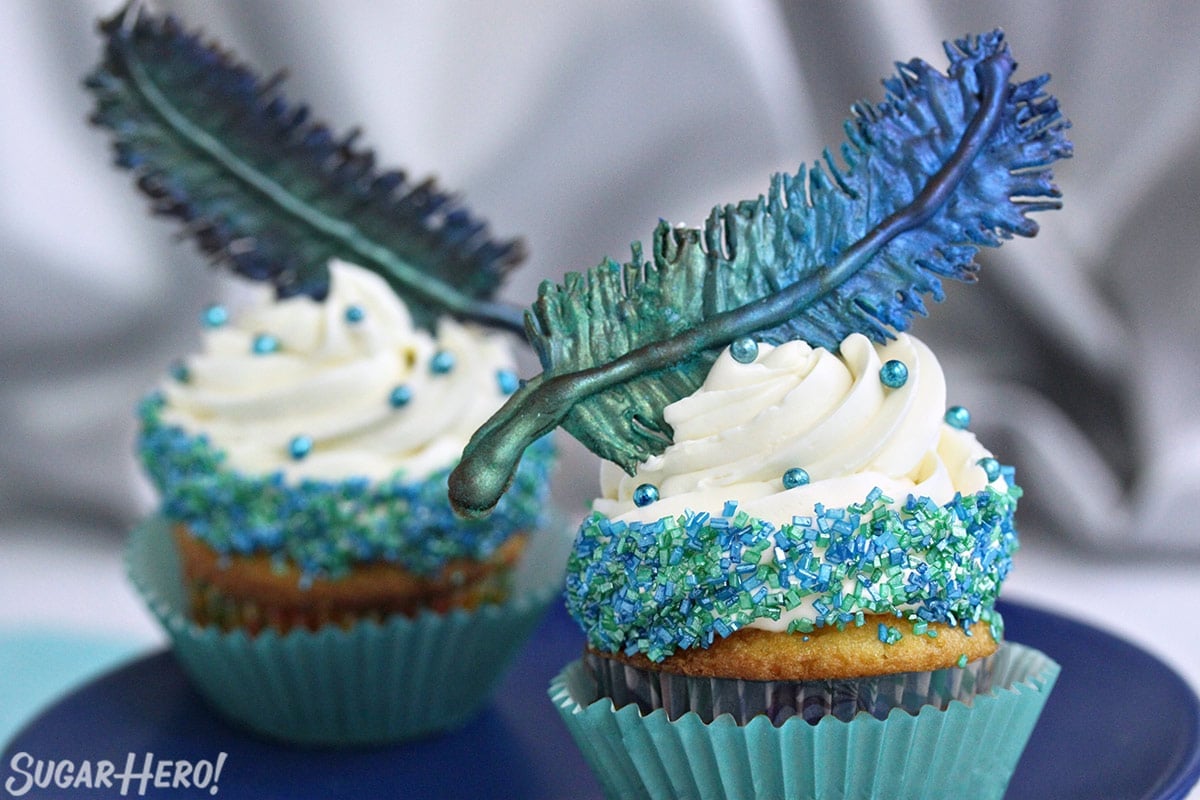
Table of Contents
🧾 What You’ll Need
The ingredient & equipment are minimal, but there are a few things you should know to get the best results! Here’s what you’ll need: (Links are affiliate links and I earn a small commission from qualifying purchases.)
Candy Coating (vs Chocolate)
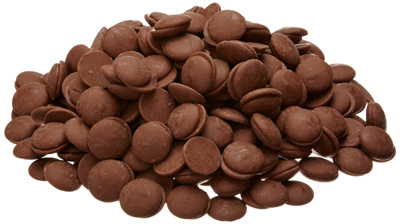
Yes, I call these “chocolate feathers,” but in most cases I do recommend using candy coating instead. Here’s why:
Real chocolate (like chocolate bars, or many types of chocolate chips) cannot simply be melted and used for decorations. It needs to be “tempered,” which is a process of heating and cooling the chocolate to certain temperatures so it stays hard and shiny once set. (Read more about how to temper chocolate here.) If chocolate is not tempered, it will most likely be soft, dull, streaked, or even grayish. That tastes fine, but it’s not appetizing! Tempering solves this problem, but it adds a lot of time and effort.
Candy coating, on the other hand, is designed to be used for dipping and decorations. It sets hard and shiny without the need for tempering, and can be re-melted and re-used again and again. It comes in a variety of colors, and is typically either vanilla flavored or chocolate flavored. I recommend Merckens, Ghirardelli, or Wilton brand.
There’s no doubt that real chocolate tastes better than candy coating, and for recipes where chocolate is the star, I would definitely recommend tempering real chocolate. But for chocolate feathers, which are most often used sparingly as a garnish on another dessert, I think candy coating is an easier, cheaper substitute, and that is why I recommend it in this tutorial.
If you prefer to use real chocolate, I recommend using at least 12 oz, because it is difficult to temper small amounts of chocolate. You will have extra chocolate left over after making the feathers. You can use it to make other decorations, like Chocolate Leaves, or make homemade chocolate bars, or dip truffles, or just pour it out on parchment and let it set, then re-use it another time.
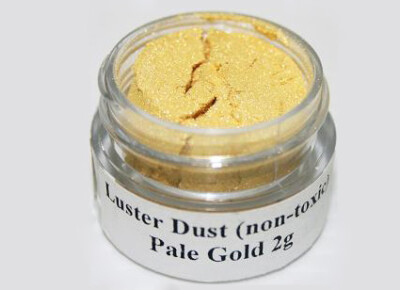
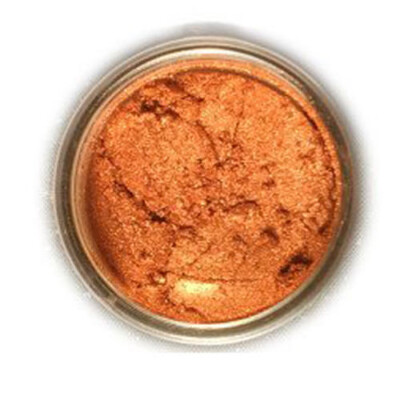
Edible Luster Dust
Luster dust is optional, but really makes these feathers pop! “Luster dust” typically refers to a type of powdered coloring with a metallic sheen (hence the name). Not all luster dust is created equal, however. If you want your feathers to be edible (as opposed to simply decorative) make sure you use edible luster dust. My favorite edible luster dust comes from The Sugar Art. Some dusts are not intended for consumption or are labelled “non-toxic” but not edible, so make sure you purchase the right dust for your needs.
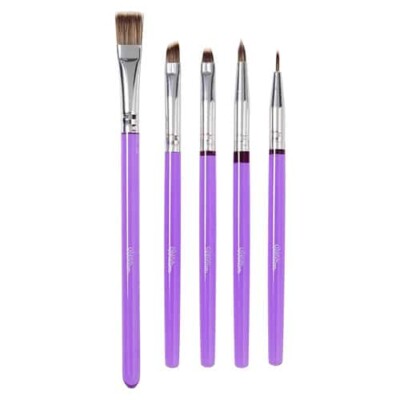
Food-Safe Paintbrush
You don’t have to buy a specific set of “food paintbrushes,” but you should use a clean brush that has not been used with real paint or other non-edible substances. I have a regular set of paintbrushes that I keep in the kitchen and use exclusively for food and decorating. Most craft stores sell individual brushes that you can pick up for a few dollars, or this affordable Wilton 5-piece set is specifically designed for decorating desserts.
📋 How to Make Chocolate Feathers
Once you’ve gathered everything, making chocolate feathers is a fast process. Grab a printable version of these instructions in the recipe card below.
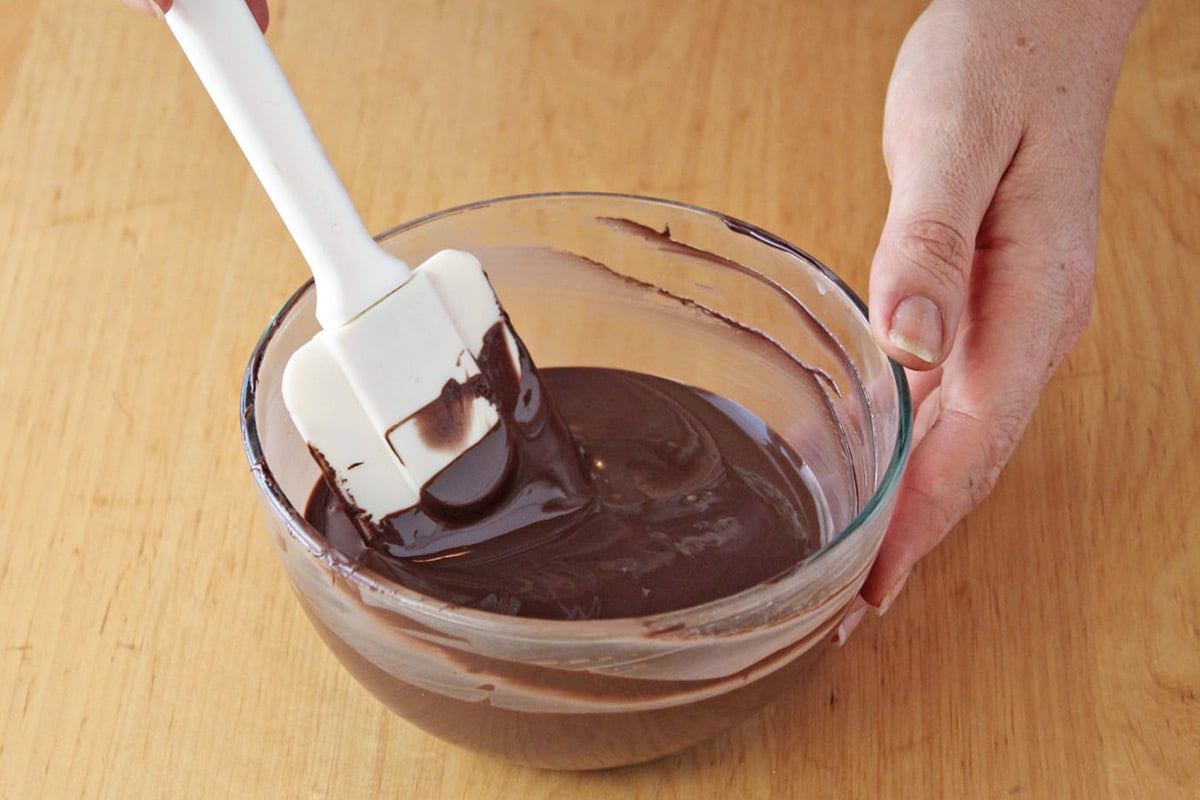
Melt the candy coating
- Place the candy coating in a microwave-safe bowl and microwave in 30 second increments, stirring regularly, until melted and smooth.
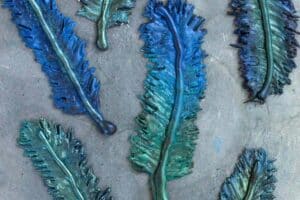
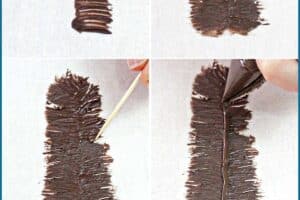
Paint a feather shape
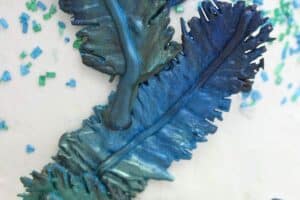
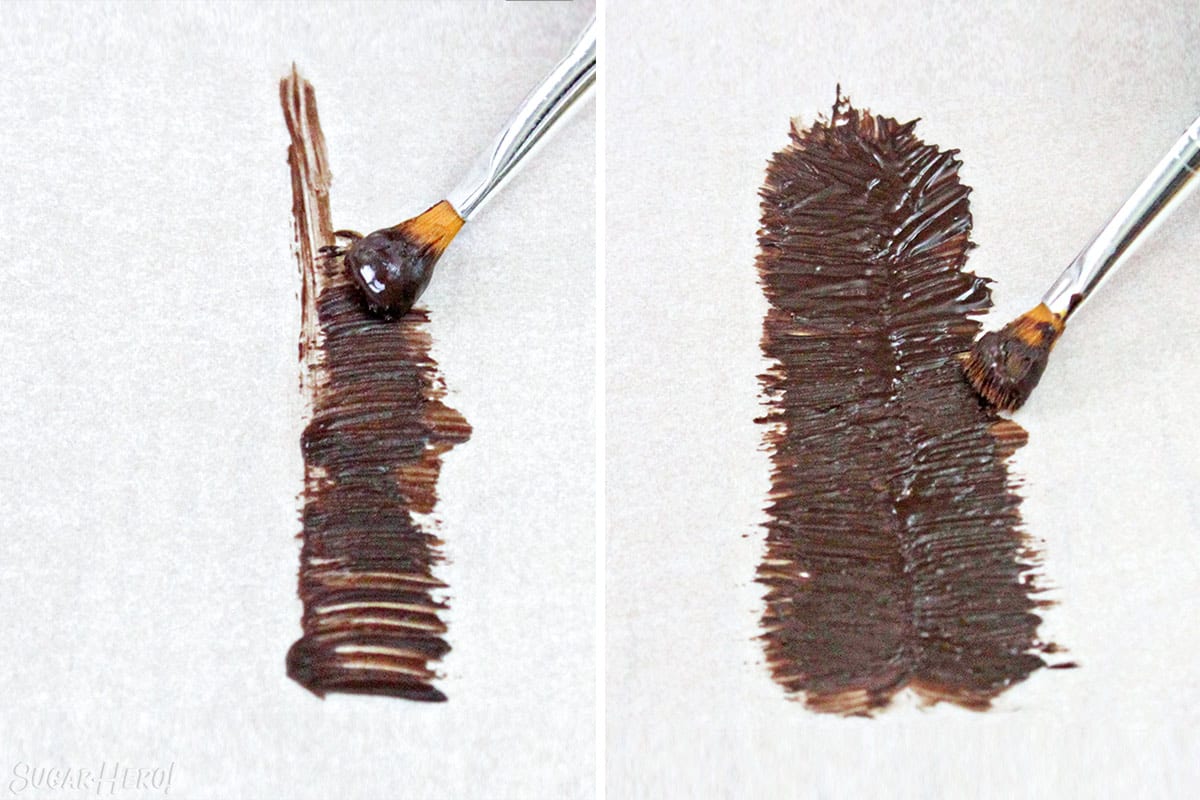
- Cover a baking sheet with parchment paper. Dip your paintbrush in the melted coating or chocolate, and lightly sketch out the length of the feather.
- Start making small brushstrokes out from the center. Use less pressure at the end of your strokes to create a feathered look. Once you’ve done the length of one side of the feather, repeat for the other side.
- Repeat this process several times to create a thick layer of chocolate.
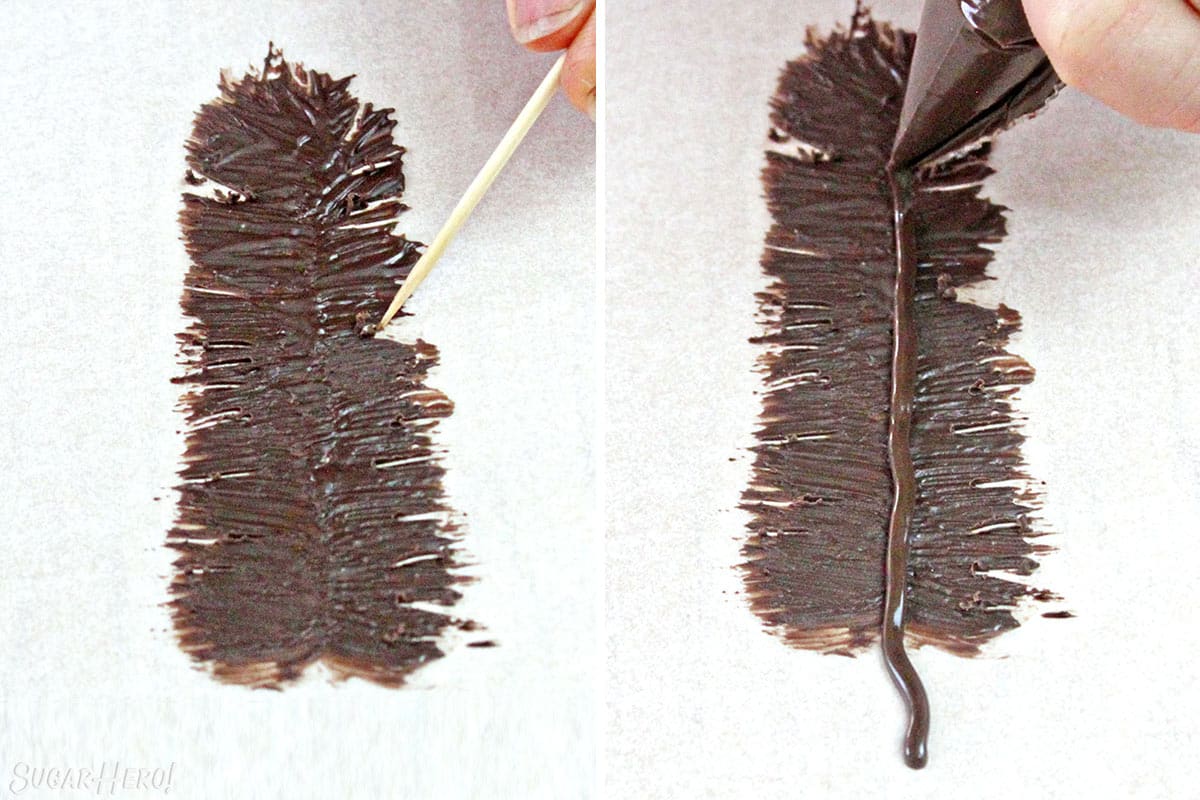
- While the chocolate is still wet, use a toothpick to scratch at the ends of the feathers to make them more ragged.
- Pipe a line of chocolate down the center of the feather, extending a bit from the end.
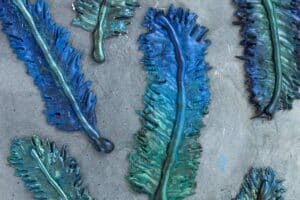
- Once all of the feathers have these lines, refrigerate the tray to set the chocolate, for about 10 minutes.
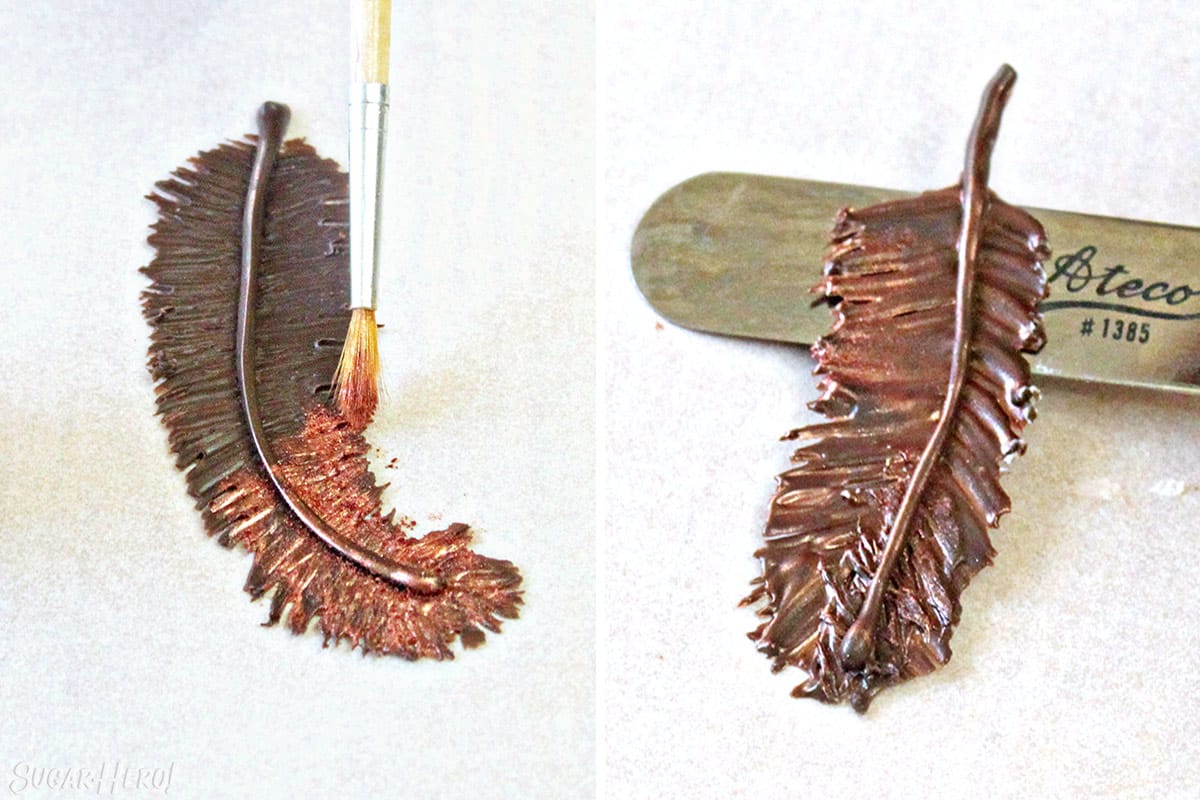
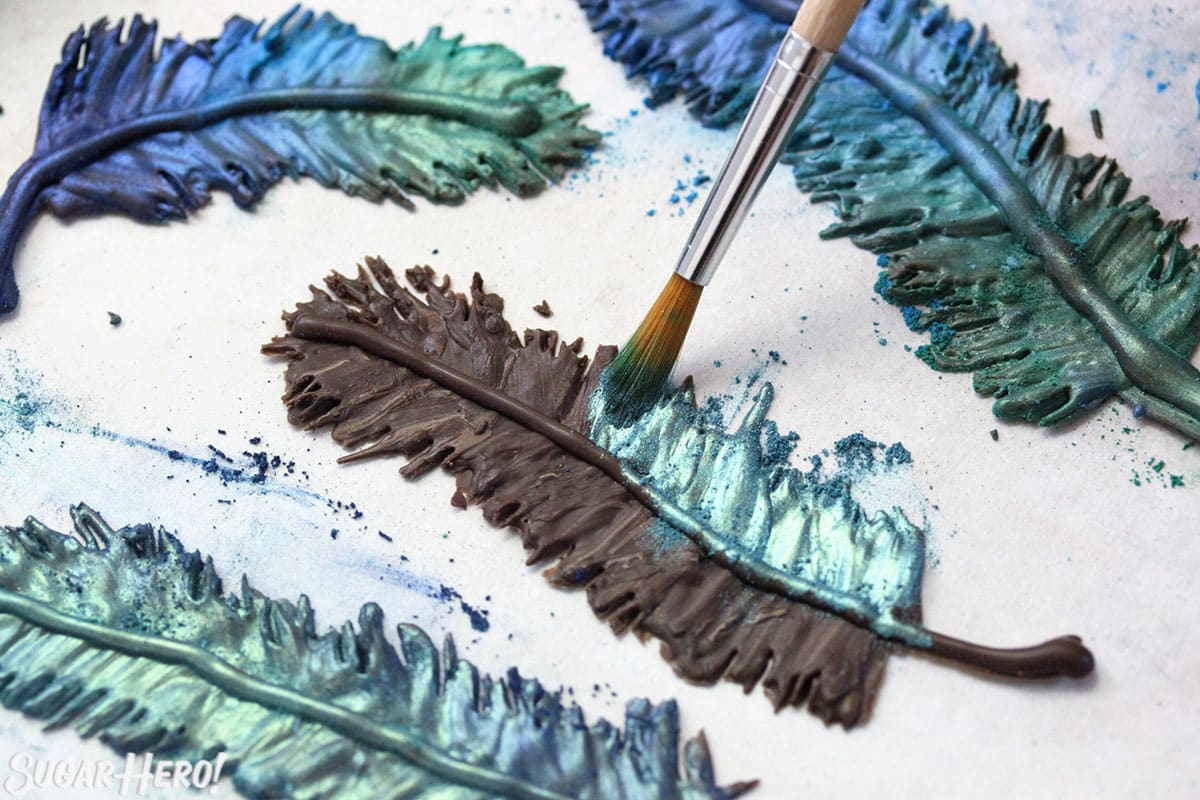
Decorate with luster dust
- If you want to add some sparkle to your feathers, use a dry brush to brush edible luster dust over the feathers once the chocolate is set.
- Handle the feathers with care! It’s easiest to move them when cold (so they are sturdier). Use a spatula so the heat of your hands doesn’t soften the chocolate.
💡 Tips and FAQs
💙 What to decorate with chocolate feathers
So you’ve made your chocolate feathers — now what? Use them as decorations on one of these desserts!
Chocolate Leaves
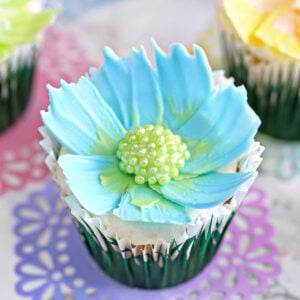
Easy Chocolate Flower Cupcakes
Don’t miss the step-by-step tutorial showing how to make Chocolate Feathers – check out the web story here!
Leave a Review!
If you make this recipe, let us know! Leave a ⭐️⭐️⭐️⭐️⭐️ rating on the recipe below, and leave a comment, take a photo and tag me on Instagram @elabau, or use #sugarhero on IG!
Chocolate Feathers
Ingredients
- 4 oz chocolate candy coating melts, or tempered chocolate
- Edible luster dust, to decorate (optional)
Instructions
- Cover a baking sheet with parchment paper. Place the chocolate candy coating in a microwave-safe bowl and microwave it in 30-second increments, stirring after every 30 seconds to avoid overheating. Stir until melted and smooth.
- Dip a food-safe paintbrush in the melted coating and lightly sketch out a line the desired length of your feather on the parchment.
- Dip the brush in chocolate and start making small brushstrokes out from the center of your guideline. Dip in the chocolate as often as necessary, using less pressure at the end of your strokes to create a feathered look. Once you've done the length of one side of the feather, repeat for the other side.
- One coat of chocolate will not be enough, so repeat this process several times, brushing over your earlier layers, until the chocolate is a thicker layer and no longer translucent.
- While the chocolate is still wet, use a toothpick to scratch at the ends of the feathers to make them more ragged. You can also remove larger sections of feather to create the natural gaps that many feathers have.
- After you have made all of the feathers you need, transfer the remaining melted coating to a paper cone or plastic bag with a small hole snipped in the corner. Pipe a line of chocolate down the center of the feather, extending a bit from the end. Once all of the feathers have these lines, refrigerate the tray to set the chocolate, for about 10 minutes.
- Optionally, to add some sparkle to your feathers, use a dry brush to brush edible luster dust over the feathers once the chocolate is set.
- These feathers are very delicate, so they need to be handled with care! Remove them from the tray when they are fresh from the refrigerator—the cold chocolate will be more sturdy than room temperature chocolate. I find it easiest to lift up the parchment with one hand underneath, and with the other, run a metal spatula under the feather and lift it from the parchment that way.
Video
Measuring Tips
Our recipes are developed using weight measurements, and we highly recommend using a kitchen scale for baking whenever possible. However, if you prefer to use cups, volume measurements are provided as well. PLEASE NOTE: the adage “8 oz = 1 cup” is NOT true when speaking about weight, so don’t be concerned if the measurements don’t fit this formula.
Want to learn more about baking measurements and conversion?
Nutrition


Beautiful!!! This cake looks like a New Years’ Eve Top-hat to me. Thanks for posting such an easy and beautiful way to make your own chocolate feathers!!!!
It kind of does!! Thanks for commenting. I’m so glad you enjoyed the tutorial!