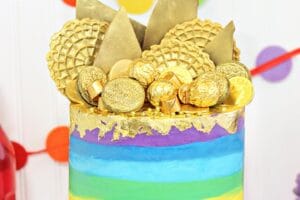
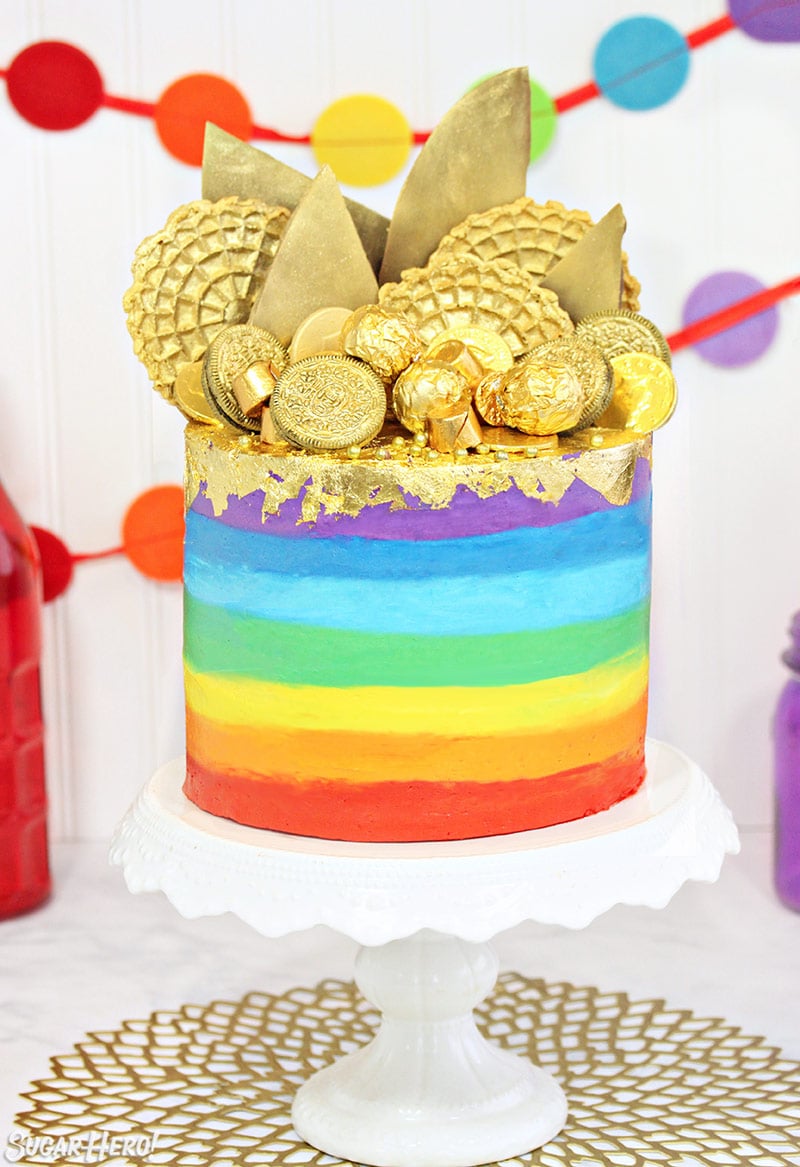
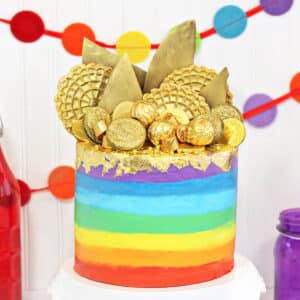
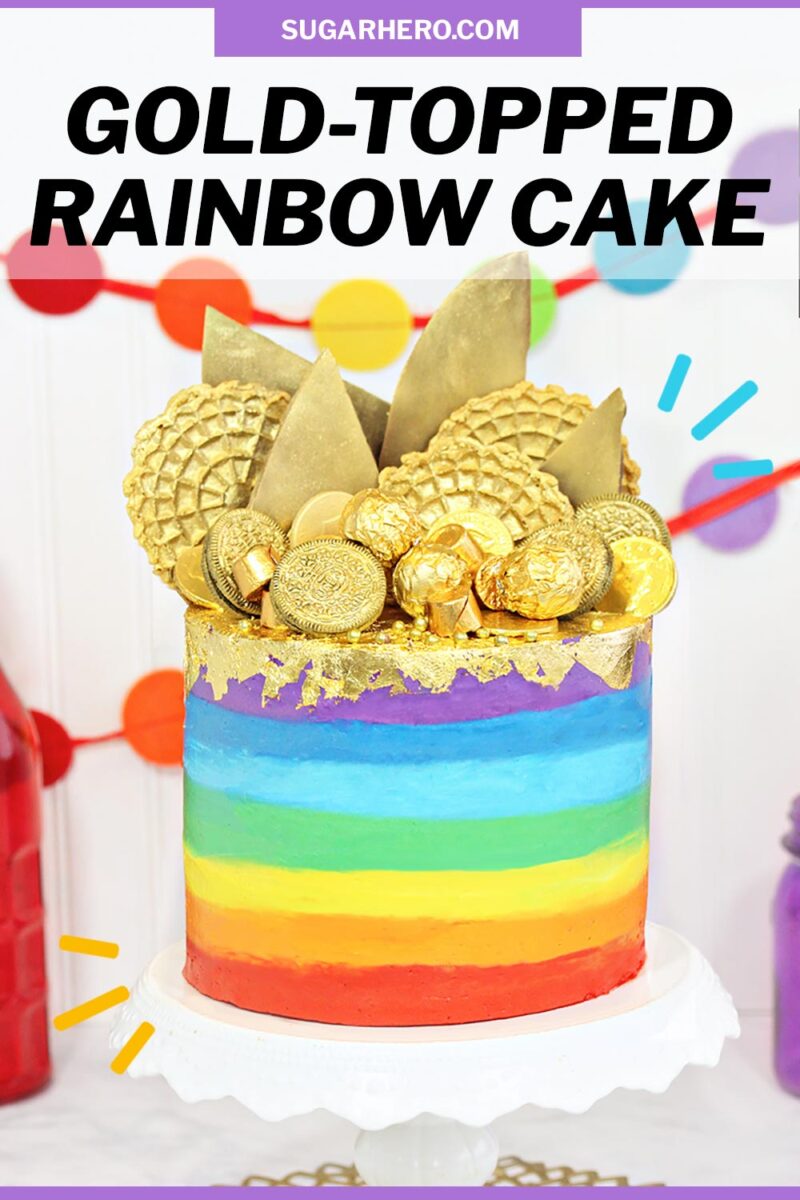
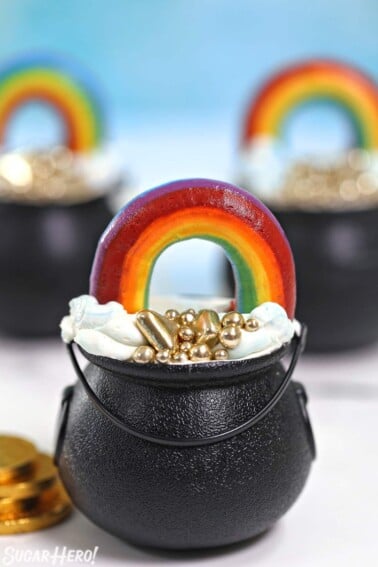
If you’re looking for an over-the-top celebration cake, this Gold-Topped Rainbow Cake is for you! It features eight layers of lemon cake, seven layers of rainbow frosting, and one incredible assortment of edible golden goodies. Perfect for St. Patrick’s Day or any big party!
🌈 Rainbow Layer Cake with Gold Decorations
Although St. Patrick’s Day was the original inspiration for this gold-and-rainbow cake, please don’t put it in the “seasonal” box — this is absolutely an any-occasion dessert! I would be happy to eat this anytime–how about a rainbow birthday party? Baby shower? Wedding? Retirement party? Wake? Yes, yes, yes, yes, and YES!
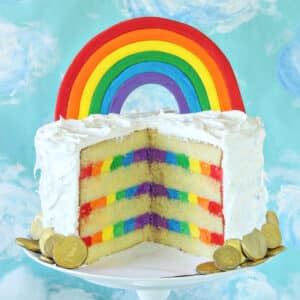
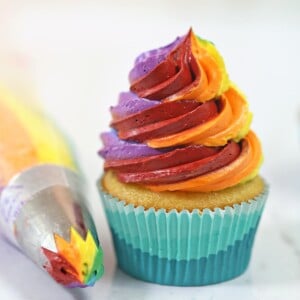
Here at SugarHero, we’re no stranger to rainbow cakes (see also: Rainbow Mousse cake, Rainbow Cake with Rainbow Frosting, and Rainbow Frosting Swirls) but this just might be the ultimate rainbow cake. So let’s stock up on food coloring and start baking!

💛 Why You’ll Love This Cake
The stunning decorations completely make this cake, but don’t be fooled by the bling–everything is designed to be flexible, and this cake doesn’t require a ton of precision or technique.
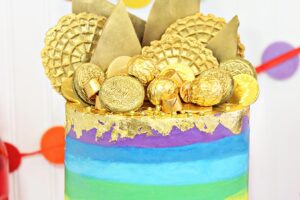
The watercolor stripes around the cake look really striking, but they’re not terribly hard to do, especially if you give yourself a little grace to make mistakes and smudge the colors a little bit. I often think this blended color technique looks even better when you mix them more and they’re more organically blended. (“Organically blended” is another word—like “rustic”—that is code for “it’s not perfect, but who cares?” Sneaky sneaky.)
The gold decorations are piled on top, willy-nilly, and their entire function is to dazzle! Sparkle! And distract from any big mistakes! *fancy jazz hands* Seriously, though, there’s no wrong way to arrange the decorations on top, and the fact that the top of the cake is completely covered is a great excuse to not worry about precision when finishing the tp of the cake. Who cares what it looks like when you’re about to dump two tons of delish sparkling goodies on top?

🧾 What You’ll Need
There is a lot going on, decoration-wise, so you’ll want to make sure you have a few supplies on hand before you begin! You can always simplify or modify the decorations, but here are some things you’ll need if you want to create the full gold-topped experience. (Links are affiliate links and I earn a small commission from qualifying purchases.)
- Food coloring: You’ll get the best results using gel food coloring, which creates a bright, vibrant color without needing to use a ton of coloring. I like Americolor brand.
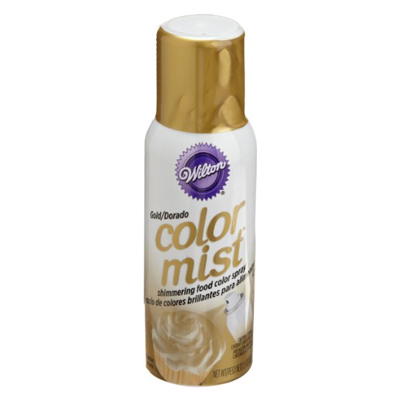
- Gold spray: To color the chocolate and cookies, use an edible gold spray like Wilton’s ColorMist or PME Gold Spray.
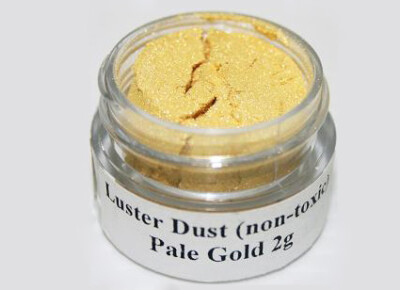
- Gold luster dust: Luster dust can be used in addition to or instead of gold spray, depending on what you’re able to find in your area. Be sure that any luster dust you use is food grade and edible, and not simply “non-toxic.” I found the combination of spraying with gold, and then painting some luster dust on top, gave the chocolate and cookies the best bright metallic shine.
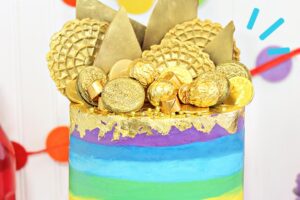
- Gold decorations: any gold-wrapped candies or sprinkles will work! I used Ferrero Rocher candies, Rolo candies, foil-covered chocolate coins, and gold pearl sprinkles.
- Gold leaf: if you choose to use gold leaf, there are a few things to look for when purchasing, so check out the section below for tips!
- Thermometer: A thermometer helps you monitor the temperature of the buttercream, so that it turns out nice and creamy. If you are new to using a thermometer, check out my guides for how to use a thermometer and how to test and calibrate a thermometer correctly.

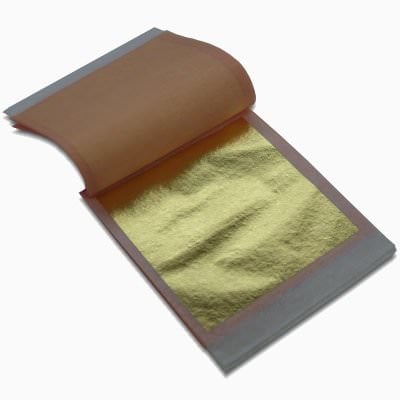
✨ Choosing Gold Leaf
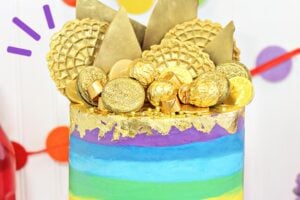
This cake is topped with a thin layer of gold leaf, and it makes a huge difference in the final result. For special occasions, when you want your dessert to really POP and have a huge dramatic impact, there is nothing better than gold leaf! Luster dust and sprays and such make things gold-ish, but there is no substitute for the real thing.
When you’re looking for gold leaf, make sure that you’re buying 23 karat or 24 karat gold leaf sheets marked specifically as “edible.” If you’re doing an internet search, you’ll probably find other gold sheets, used for embossing and decorating, and they’ll be cheaper, because they won’t be food-grade. So you will have to spend a few more pennies to get the good stuff, but it’ll be worth it.
And if you’re wondering, “What does gold leaf taste like?” the answer is…absolutely nothing. It’s wafer-thin, totally flavorless, and I would bet my last sheet of gold leaf that no one would be able to taste it in a blind taste test.

And at the end of this process? After you go to the trouble of coloring the frosting, assembling this beast of a cake, and tracking down gold goodies of every persuasion, what are you left with? Only a spectacularly tall, spectacularly bright, spectacularly spectacular layer cake sure to dazzle any person–or leprechaun–around. For more amazing rainbow desserts, take a look at this Rainbow Dessert Round-Up!

🌈 More Rainbow Desserts You’ll Love
- Rainbow Mousse Cake
- Pastel Rainbow Gelatin Cups
- Rainbow Cake Push-Up Pops
- How to Make A Fondant Rainbow
- Buttercream Rainbows
Rainbow Cake with Rainbow Frosting
Rainbow Frosting
Leave a Review!
If you make this recipe, let us know! Leave a ⭐️⭐️⭐️⭐️⭐️ rating on the recipe below, and leave a comment, take a photo and tag me on Instagram @elabau, or use #sugarhero on IG!
Gold-Topped Rainbow Cake
Ingredients
For the Lemon Cake:
- 14 oz granulated sugar, (2 cups)
- 1 lemon, zested
- 16 oz cake flour, (4 cups), sifted
- 1 tbsp baking powder
- 1 tsp salt
- 3 oz powdered lemon gelatin, like Jell-O, not sugar-free
- 8 large egg yolks, at room temperature
- 1 1/3 cups milk, at room temperature
- 1 tsp vanilla extract
- 1 tbsp lemon extract
- 8 oz unsalted butter, at room temperature
For the Lemon Buttercream:
- 8 large egg whites, at room temperature
- 21 oz granulated sugar, (3 cups)
- 1/3 cup water
- 1/3 cup lemon juice, freshly squeezed
- 1/4 tsp cream of tartar
- 1 lb unsalted butter, soft to the touch but still cool
- 1-2 tsp lemon extract
- Pinch of salt
- Assorted gel food coloring, I like Americolor brand
For the Gold Decorations:
- 24 karat edible gold leaf
- Edible gold spray
- Gold luster dust, edible
- 8 oz semi-sweet chocolate, or chocolate candy coating
- Oreo cookies, or other cookies
- Gold-wrapped candies , like Ferrero Rocher, Rolos, and chocolate coins
- Assorted gold pearls, or other gold sprinkles
Instructions
To Make the Lemon Cake:
- Preheat the oven to 350 F. Line four 8-inch cake pans with parchment rounds, and spray the parchment and pan sides with nonstick cooking spray.
- Combine the sugar and lemon zest in the bowl of a stand mixer, and rub them together between your fingers until the sugar is moist and fragrant with lemon. Add the cake flour, baking powder, salt, and lemon gelatin powder to the bowl, and fit it with a paddle attachment. Mix the ingrdients on low speed for about a minute to combine the dry ingredients.
- Lightly whisk together the egg yolks and about a quarter of the milk (it doesn’t have to be a precise measurement) and the vanilla and lemon extracts, and set aside for now.
- Add the remaining milk and the softened butter to the large mixing bowl and mix on low speed until the dry ingredients are moistened. Turn the mixer to medium speed and mix for a minute and a half.
- Add the egg yolk mixture in three batches, mixing for 20-30 seconds after each addition, until you have a smooth batter. Scrape the bottom and sides of the bowl with a rubber spatula, and give the batter a few more stirs to make sure everything is incorporated. Divide the batter evenly. If you want to be precise, each pan should get about 13.5 oz batter.
- Bake the cakes for 25-27 minutes, rotating them from top to bottom and back to front halfway through. Bake until the sides just start pulling away from the pan, and a toothpick inserted into the center comes out clean.
- Let the cakes cool on a wire rack for 10 minutes, then gently turn them out and let them cool completely. I find it’s easiest to cut and stack cakes that have been chilled, so if you have time, wrap them with plastic wrap and put them in the freezer for at least 30 minutes, until they are firm but not frozen all the way through. If you are making these in advance, they can stay in the freezer for up to several weeks. Let them partially defrost, until they are firm but not rock-hard, before assembling.
To Make the Lemon Buttercream:
- Place the room temperature egg whites in the very clean bowl of a large stand mixer fitted with the whisk attachment. Place the water, lemon juice, and sugar in a medium saucepan over medium-high heat and stir until the sugar dissolves. Once the sugar is dissolved and the mixture has come to a boil, insert a candy thermometer and cook until it reaches 245 degrees F.
- While you are waiting for the sugar syrup to reach the proper temperature, begin beating the egg whites. (I usually start beating them when the temperature is around 225 degrees.) Turn the mixer to medium speed and beat until the whites look foamy. Stop the mixer briefly and add the cream of tartar. Turn the mixer back on and begin to beat on medium-high speed until the whites are stiff but not crumbly. You can turn the mixer off if the egg whites are finished before the syrup is ready.
- When the whites are stiff and the sugar syrup is 245 degrees, turn the mixer back on to medium-high and pour the syrup into a cup or pitcher with a spout. Slowly and carefully pour the hot syrup down the sides of the bowl into the egg whites while the mixer is running. The whites will rise in volume. After all of the syrup is added, let the mixer run on medium speed until the sides of the bowl feels barely warm, which may take anywhere from 10-20 minutes. The whites should be very glossy, white, and shiny, with stiff peaks.
- Once the egg white mixture has cooled to room temperature, gradually add the butter bit by bit until it is all incorporated. Scrape down the sides of the bowl with a spatula. The egg white mixture will deflate and might look soupy. If it looks soupy or broken, continue to beat the mixer on low or medium speed until it comes back together. (This is why it’s important to use butter that’s soft but cool: butter that is too warm will just liquefy and make soupy buttercream.) If it resists coming together, refrigerate the bowl briefly, for about 10 minutes, then continue beating until it smooths out.
- Once the frosting has come together, add the salt and lemon extract to taste. The buttercream can be made in advance and kept at room temperature if you’re going to use it the same day, or refrigerated. If it’s been chilled, let it sit at room temperature until it softens, then re-whip it to get the fluffy texture back before you use it.
To Assemble:
- Divide the frosting into 7 portions. Color each portion a different color using gel food coloring. (I used red, orange, yellow, green, light blue, dark blue, and purple, and those are the colors I’ll reference in these instructions. You can use different colors if you wish.) Place each color in a disposable pastry bag, and snip off the tip.
- Place the chilled cakes on cardboard cake rounds. If any of the cakes have a rounded top, gently trim off of the top so that they’re flat. Use a sharp serrated knife to slice each cake in half. Place the bottom layer of your cake on a cake turntable.
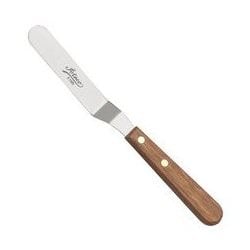
- Place about 3/4 cup of red frosting in the center of the cake, and use a metal offset spatula to spread it into an even layer out to the edge of the cake. It’s fine if some frosting extends beyond the edge. Place a second cake round on top, and repeat the process with orange buttercream. Continue layering the cakes and frosting, working through your rainbow colors, until you have an 8-layer cake, finishing with purple on top. Spread a very thin layer of purple frosting on the top, and use your spatula to smooth the sides of the cake, spreading the frosting that has extended over the edges around the cake. Fill in any bald spots with a bit more frosting—the goal is just to have a very thin layer of frosting covering the entire cake, to seal in any crumbs. Refrigerate the cake for 30-60 minutes, to firm it up.
- Once the cake has chilled, take your piping bags of frosting colors and thick pipe stripes around the side of cake, positioning them so they correspond to the colors on the inside. Finish with purple on the top. Take a metal offset spatula and smooth out the top of the cake, then clean it off and hold it gently against the sides of the cake. Turn the turntable while you hold the spatula against the side. Make a few rotations, until the frosting smooths into an even layer and the colors blend together a little bit. Chill the cake again for about an hour before decorating. You want the frosting to be set before you add the gold leaf.
To Decorate:
- To add the gold leaf to the top of the cake, you’ll want a razor or similarly clean, pointy object, and a big fluffy brush—you can use either a makeup brush or a paint brush, but make sure that it’s new and doesn’t have any makeup or paint on it! Some gold leaf is sold on transfer paper, and if that’s the case, it’s easy to use—just separate the paper from the rest of the pack, press the gold side on top of the cake, then peel the transfer paper off. Use a big fluffy brush to press the leaf onto the cake. Repeat until the entire top of the cake is covered with gold leaf. Extend it a little bit down the sides of the cake as well.
- If your gold leaf is sold as loose leaves, you’ll need to be more careful. Hold the packet of gold leaves close to the top of the cake, and use a razor, knife, or other precise object to slide the leaf from the paper onto the cake. Don’t use your hands, and don’t do this in a windy area—gold leaf is very delicate and easily crumples, blows away, and sticks to human skin. It’s okay if it wrinkles, just use the big brush to press it onto the cake—some texture in the gold actually looks good!
- If you want to decorate with chocolate shards, melt the chocolate candy coating or semi-sweet chocolate in the microwave. Cover a baking sheet with parchment or waxed paper, and pour the melted chocolate onto the paper. Spread it into a thin, even layer, and refrigerate for 15-20 minutes, until set. Cut it into large shards.
- Use edible gold spray or edible gold luster dust to color the chocolate shards gold. You can also spray or paint assorted cookies gold—I used Oreos and Pizelles.
- Finally, it’s time to decorate! Stick the chocolate shards into the top of the cake. Add various gold cookies, candies, and sprinkles around it, so that it looks like it’s bursting with golden goodies. For the best taste and texture, serve this cake at room temperature.
Video
Measuring Tips
Our recipes are developed using weight measurements, and we highly recommend using a kitchen scale for baking whenever possible. However, if you prefer to use cups, volume measurements are provided as well. PLEASE NOTE: the adage “8 oz = 1 cup” is NOT true when speaking about weight, so don’t be concerned if the measurements don’t fit this formula.
Want to learn more about baking measurements and conversion?
Nutrition
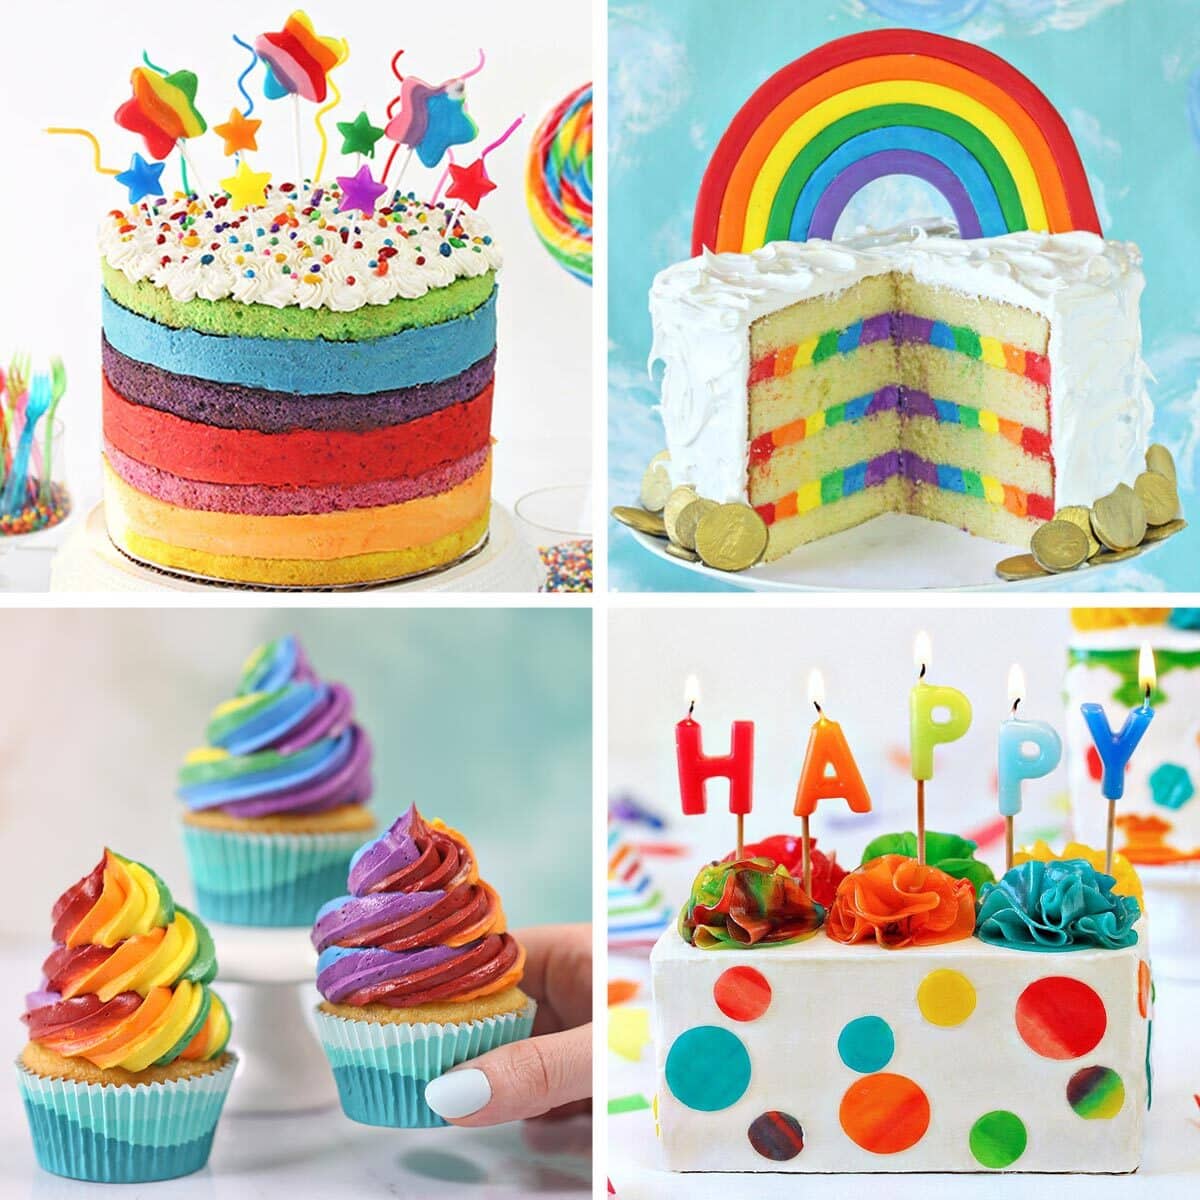
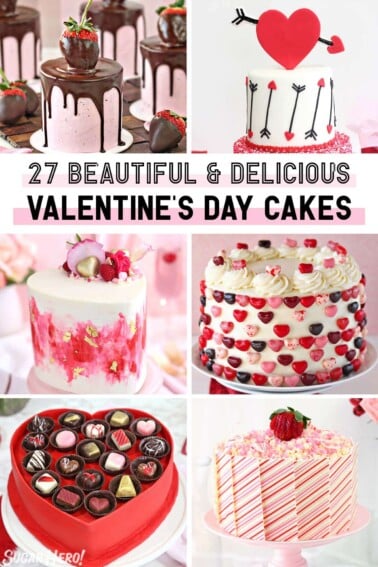
🌈 COLORFUL RAINBOW DESSERTS 🌈
We’ve rounded up 23 of our FAVORITE rainbow dessert recipes & ideas that are sure to make you smile — click here to get all the recipes!


This cake is over the top gorgeous!!!! You make it seems so easy, too!!!
Thank you Casey! You are too kind 🙂
This cake is absolutely gorgeous!! I know my kids would go crazy for it!!
Yes! This cake is definitely a favorite for kids!