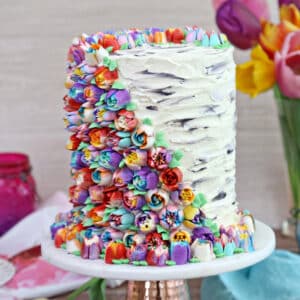
This Spring In Bloom Layer Cake is an extra-tall spring cake COVERED with gorgeous frosting flowers! It’s filled with lemon curd and raspberry jam, and bursting with bright and colorful buttercream blooms. It looks and tastes like spring!

Super Tall Spring Layer Cake
I’m not sure how to say this without sounding conceited, but I am obsessed with how this cake turned out. OB-SESSED. I know it’s not a great look to pat yourself on the back on your own blog, but I can’t help it…I’m seriously smitten with this super-tall cake!

I’m calling it a “Spring in Bloom Layer Cake” because everything about it just screams SPRING to me. From the moist vanilla cake layered with lemon curd and raspberry jam to the riotous rainbow of flowers bursting from the base of the cake, it makes me grin like a fool every time I look at it. And if that isn’t the ultimate function of a dessert, I don’t know what is. Desserts should make us HAPPY, and this cake definitely delivers on that front.

Equipment You’ll Need
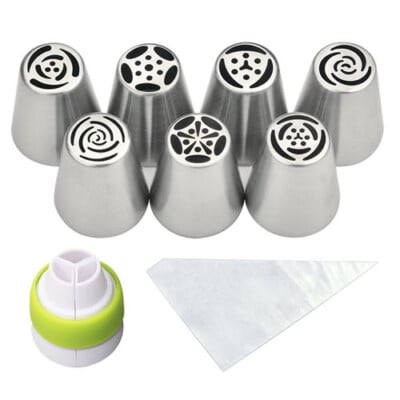
I have a few tricks to making this cake. Well, the first one isn’t a trick so much as an important piece of equipment. I made the flowers using Russian Piping Tips, which I’ve talked about on Facebook Live and Instagram quite a bit.
If you’re not familiar with them, they’re large piping tips that are designed to produce frosting flowers with just 1 squeeze of the piping bag. It’s genius! They come in all sorts of different designs, so if you buy a set you can produce a number of different flowers quickly and easily. I bought this set, which has 7 different tips, and if you look at the picture below you can see some of the variety of different shapes of flowers available.
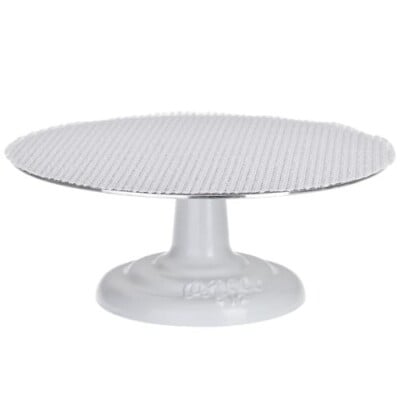
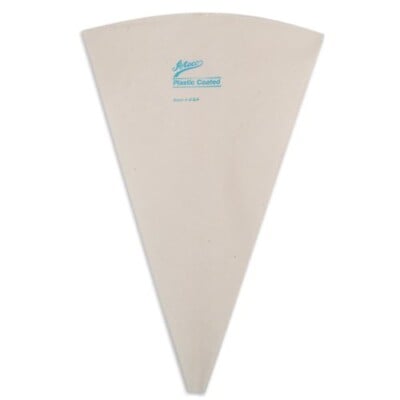
Other Recommended Equipment:

How to Fill the Piping Bags
The second trick to making the flowers look amazing is this technique for filling piping bags. Up until recently, I’ve always done things the old-fashioned way: by using a spatula to stuff different colors of frosting into a piping bag. It works, to a point, but it’s sometimes messy and hard to predict the final outcome of the flowers.
But now I’ve started using a piece of plastic wrap and layering my frosting colors on that. Once the frosting is rolled up and stuffed into the piping bag, it pipes like a dream. The best part is, it’s really easy to control how the final flowers look—you’ll know what colors will be on the inside and outside, and in what proportions. More bonuses: it also keeps your piping bags much cleaner, and it’s easy to switch between colors. Win-win-win! So that explains why all of my flowers have 4-5 different colors in each bloom–I went crazy with this technique!

Make the Flowers in Advance
I made all the flowers in 1 marathon session, and piped them directly on a baking sheet covered with waxed paper. After the flowers were piped, I refrigerated the sheet to chill them. They get REALLY hard, which makes it easy to pop them off the baking sheet and transfer them to the side of the cake.
There are a lot of benefits to this method: you are working with firm flowers, so there’s less chance of accidentally smooshing them. You can easily control placement, and move them around if necessary, and also you can make sure that similar flowers are not all clumped together. And while you CAN pipe directly onto the sides of a cake, the angle makes it difficult to get perfect flowers, so doing it on a flat baking sheet will probably be much less frustrating and more successful for you.
Finally, you can make these in advance! So if you’re attempting this cake, you’ll be able to break up the work into multiple days, which is always a godsend when assembling a big cake.

How to Assemble the Spring In Bloom Cake
So the actual decorating went like this: slap some white frosting on the cake, using rough strokes to resemble tree bark. (Another bonus: no need to slave over getting smooth frosting!) Add streaks of gray, because we’re going for that birch tree look. Pop those pre-made flowers onto the cake, and finally, fill in with some green leaves here and there—basically wherever the cake looks a little naked.
Stand back, give yourself a giant pat on the back, then post a million Instagram stories to have other people give you pats on the back as well.

And here’s an inside view of the cake! I assembled it with cake boards and dowels, since the fillings were a little soft and I was worried about the stability of the cake otherwise. The great thing about this method, aside from peace of mind, is that it’s really easy to slice the cake into manageable, not-too-giant slices when it’s actually time to serve it.


Although the cake is giant and a bit over-the-top, the slices themselves are reasonable, and the lemon and raspberry flavors make it very light and refreshing. This is absolutely a cake to feed a big crowd, although you could always half it (or just use the technique with a different recipe!) to make more manageable servings.

Happy spring, and happy eating, my dears!
 Flower desserts you’ll love
- Easy Chocolate Flower Cupcakes
- Fondant Flower Cupcakes
- Chocolate Rose Cupcakes
- Strawberry Swirl Bundt Cake
- Giant Rose Cake
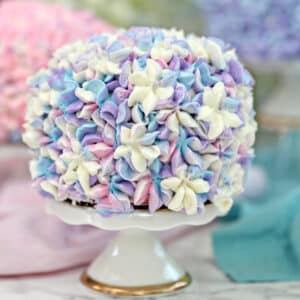
Hydrangea Cakes
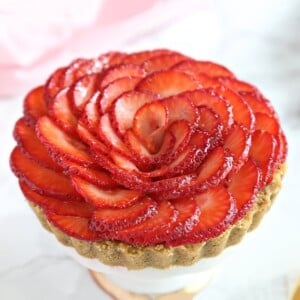
Strawberry Rose Tarts
Spring In Bloom Layer Cake
Ingredients
For the Cake:
- 10.5 oz granulated sugar, (1 1/2 cups)
- 12 oz cake flour, (3 cups)
- ¾ tsp baking powder
- ¾ tsp baking soda
- 3/4 tsp salt
- 2 large eggs, at room temperature
- 8 oz sour cream, at room temperature
- 1 TBSP vanilla extract
- 9 oz unsalted butter, at room temperature
For the Buttercream:
- 8 fl oz pasteurized liquid egg whites, (1 cup)
- 32 oz powdered sugar, (8 cups)
- 3/4 tsp salt
- 32 oz unsalted butter, at room temperature
- 2 TBSP vanilla extract
- Assorted gel food coloring
For the Assembly:
- 20 oz lemon curd, store bought or homemade
- 14 oz raspberry jam, the stiffer the better—do not use a very loose jam
Instructions
To Make the Cake:
- Preheat the oven to 350 F. Line three 6-inch cake pans with parchment rounds, and spray the parchment and pan sides with nonstick cooking spray.
- Combine the sugar, cake flour, baking powder, baking soda, and salt in the bowl of the stand mixer fitted with a paddle attachment. Mix on low speed for about a minute to combine the dry ingredients.
- Lightly whisk together the eggs, a quarter of the sour cream, and the vanilla extract, and set aside for now.
- Add the remaining sour cream and the softened butter to the large mixing bowl, and mix on low speed until the dry ingredients are moistened. Turn the mixer to medium speed and mix for a minute and a half.
- Add the egg mixture in three batches, mixing for 20-30 seconds after each addition, until you have a smooth batter. Scrape the bottom and sides of the bowl with a rubber spatula, and give the batter a few more stirs to make sure everything is incorporated.
- Divide the batter between the three pans and bake at 350 F for 35-40 minutes, until the sides just start pulling away from the pan, and a toothpick inserted into the center comes out clean.
- Let the cakes cool on a wire rack for 10 minutes, then gently turn them out and let them cool completely. I find it’s easiest to cut and stack cakes that have been chilled, so if you have time, wrap them with plastic wrap and put them in the freezer for at least 30 minutes, until they are firm but not frozen all the way through. If you are making these in advance, they can stay in the freezer for up to several weeks. Let them partially defrost, until they are firm but not rock-hard, before assembling.
To Make the Buttercream:
- Combine the whites, powdered sugar, and salt in the bowl of a large stand mixer fitted with a paddle attachment. Mix everything together on low speed, until the sugar is moistened and no dry patches remain. Turn off the mixer, scrape down the sides and bottom of the bowl with a spatula, then turn the mixer to medium speed. Beat on medium for 5 minutes.
- After 5 minutes, turn the mixer to medium-low and start adding the softened room temperature butter, a few tablespoons at a time. Once all of the butter is incorporated, add the vanilla extract and mix it in. Stop the mixer and scrape down the bottom and sides once more. Turn the speed to medium and beat the buttercream for 10 minutes. At the end, you’ll have a frosting with a wonderfully light and creamy texture.
To Make the Flowers:
- Remove about 4 cups of frosting and set aside—this will be the white frosting used to decorate the cake.
- Color 1 cup of frosting green for the leaves, and set aside for now.
- Divide and tint the remaining frosting different colors for the flowers. You can do as many or as few colors as you like, but for a really beautiful assortment, I recommend a variety of at least 5-6 different colors for the flowers.
- Cover a baking sheet with waxed paper or parchment paper.
- To make multi-colored flowers, lay out a piece of plastic wrap about 16 inches long. Spread a rectangle of frosting on the plastic wrap, about 10 inches by 6 inches. Take a second color of frosting and spread it on top of the first. If desired, add a third or even a fourth color on top. Roll the frosting over itself to make a cylinder. Grasp the ends of the plastic wrap in each hand, and twirl it quickly so the frosting is burrito-shaped and the ends of the plastic are tightly twisted.
- Fit a large piping bag with one of your Russian piping tips. Snip off one of the plastic wrap “tails” and insert the frosting cylinder into the piping bag, snipped-side down.
- Hold the piping bag perpendicular to the baking sheet, about ½-inch above the sheet. Squeeze with steady pressure until the frosting comes out and forms a flower shape. Stop squeezing, then lift the tip so that the frosting tapers off into flower petals. Repeat until you run out of frosting, then make another plastic wrapped packet with different colors, and use a different tip. Repeat this process until the baking sheet is filled with an assortment of flowers of different colors and shapes. Refrigerate the tray for about an hour, until the flowers are very firm.
To Assemble:
- Place the cake rounds on cardboard cake circles. Using a large serrated knife and a gentle sawing motion, slice each cake round into 3 layers.
- Fit a piping bag with a coupler or a large round tip, and fill it with white buttercream. Place the base layer of one of the cakes on a cake turntable. Pipe a circle of frosting around the outside edge of the cake layer. Fill the layer with lemon curd, spreading it to the edges of the frosting circle—the frosting acts like a barrier to prevent the lemon curd from seeping through the edges of the cake.
- Top the cake round with a second cake layer, and make a second frosting circle around the edge. This time, fill the inside of the cake with raspberry jam all the way to the edge.
- Top the cake with the third cake layer. Cover the top and sides with a very thin layer of frosting—this is the crumb coat, which locks crumbs into the frosting and also provides some stability to the cake.
- Set the first cake aside, and repeat the procedure with the second and third cake layer. At the end, you should have 3 assembled 6-inch cakes on cake cardboards.
- To tier the cake, we’ll use dowels between the layers to add support. You can use “real” cake dowels, lollipop sticks, or even extra-large straws (like boba tea straws.) Push 4 dowels or straws into one of the cakes in a rough square shape, pushing them all the way down until they hit the cake cardboard on the bottom. Leave a few inches between each dowel to help distribute the weight. Using a marker, make a mark on each dowel to show where the top of the cake hits, pull it out of the cake slightly, then cut the dowel with scissor right where your mark is. Push it back down into the cake—it should be flush with the top of the cake, not sticking out. Add a squirt of frosting on top of the cake in between the dowels, then carefully place a second layer on top of this base layer.
- Repeat the dowel process with the second layer, until you have 3 cakes stacked on top of each other. Add a thin layer of frosting along the sides to smooth it out, then refrigerate the cake for an hour, until the crumb coat is very firm.
- Once firm, it’s time to decorate! Add a thicker layer of white frosting all along the top and sides of the cake. Use rough horizontal strokes with your offset spatula to create the texture of tree bark going along the sides of the cake. Tint a small amount of frosting to a dark gray, and add dark gray streaks along the sides and top to give it a birch pattern.
- Remove the tray of buttercream flowers from the refrigerator, and use an offset spatula to slide them off of the baking sheet and press them onto the freshly frosted cake in whatever pattern you desire. If you work quickly, you can do it all at once, but if the flowers start to get too soft, return them to the refrigerator or freezer to firm up before continuing.
- Finally, fit a piping bag with a leaf tip and fill it with green frosting. Add leaves in between the flowers and along the edges.
- For the best taste and texture, serve this cake at room temperature.
Recipe Notes
Measuring Tips
Our recipes are developed using weight measurements, and we highly recommend using a kitchen scale for baking whenever possible. However, if you prefer to use cups, volume measurements are provided as well. PLEASE NOTE: the adage “8 oz = 1 cup” is NOT true when speaking about weight, so don’t be concerned if the measurements don’t fit this formula.
Want to learn more about baking measurements and conversion?
Nutrition
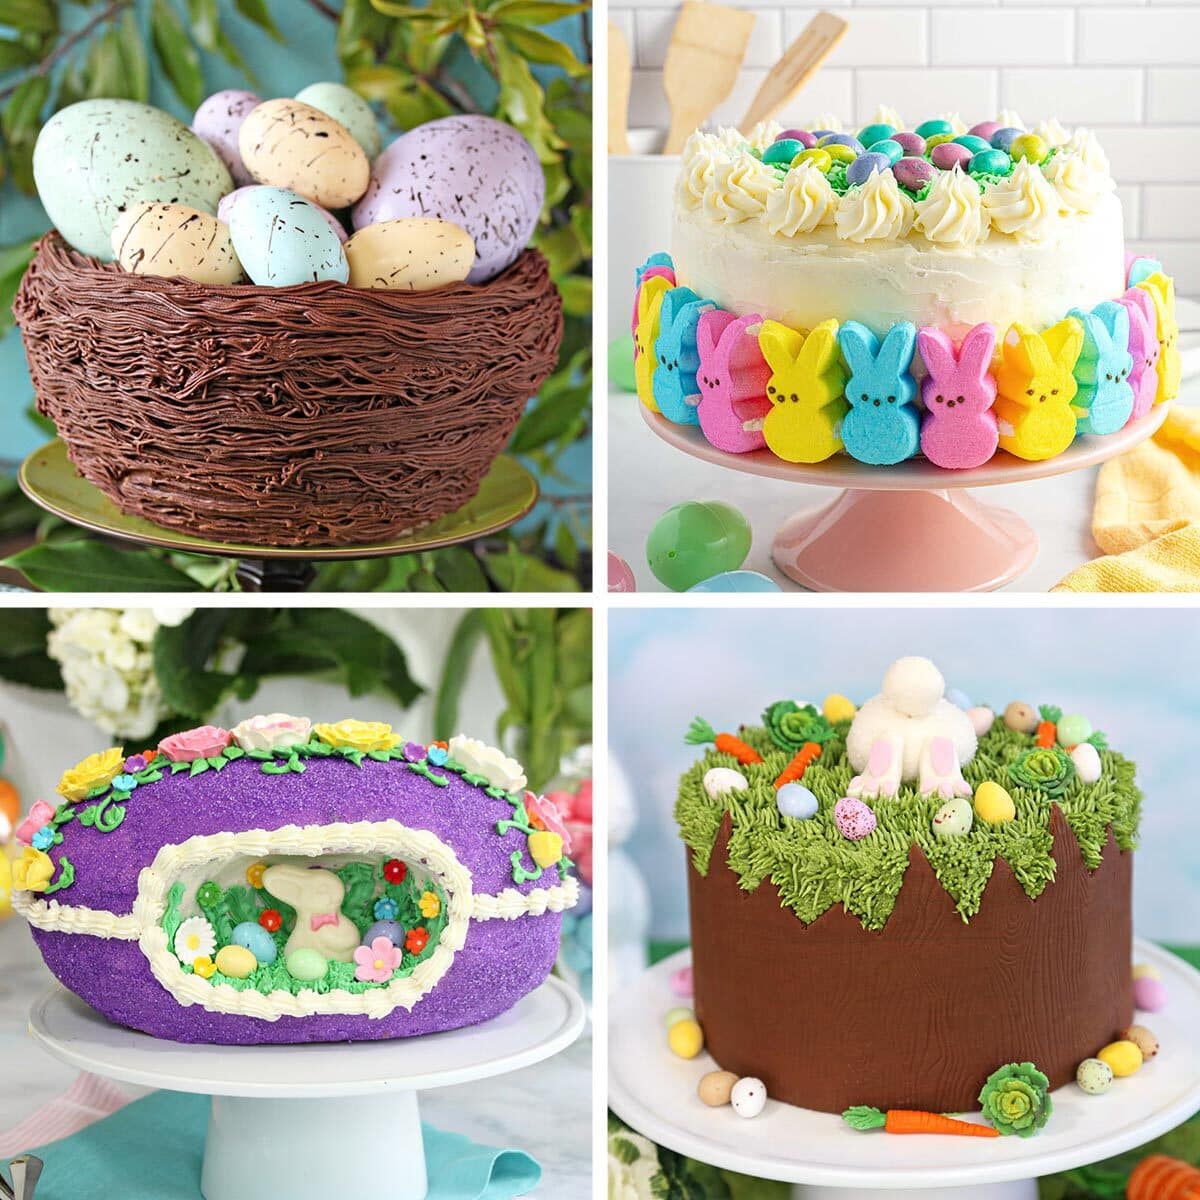
EASTER CAKE RECIPES 🐇
We’ve rounded up 35 adorable Easter cake recipes that will make your holiday extra-special — click here to get all the recipes!


Beautiful cake! My question is how do you cover a cake that is that tall?
Hey Megan, thank you so much! I am curious do you mean cover the cake with buttercream, or cover it to store? Feel free to email me and let know, and I would love to help you how I can! Thanks!
If we don’t have 6 inch cake pans, is there a way to make this with 9 inch pans instead?
Hi love the tutorial,
I have a question Iam making a 6 in cake the cake is chocolate can I cover it with ganache and then cover it with buttercream to do white grey and yellow stripes? Thank you.
Hi Samira,
Yes, covering ganache with buttercream is fine. I would make sure that the ganache is very firm before covering with BC, and you might need a thick layer of frosting so that the chocolate color doesn’t come through, but I don’t see why it would be a problem. Good luck, and let me know how it goes!
I am going to make this cake for my daughter’s 40th birthday. My question is about the liquid egg whites. I have farm fresh eggs from my own chickens, and have never purchased other egg products. Can I use my own egg whites, or is there some secret to the store bought liquid egg whites?
Hello Jo. Happy 40th birthday to your daughter! You have a great question. The biggest difference between your farm fresh eggs and the store bought egg whites is pasteurization. Most people don’t like to eat raw eggs due to the potential for salmonella or other bacterial contamination. My recipe for the Easiest Swiss Meringue Buttercream does not call for heating the egg whites, so I definitely recommend using the store bought whites for this recipe. However, if you’d like to use your farm fresh eggs I’d recommend trying my regular recipe for Swiss Meringue Buttercream. This recipe does require heating the egg whites and will make the eggs safe to eat for you and your guests. Swiss Meringue Buttecream All the best in your baking adventures!
Can you comment on which gel colors you used? Exact brand and name of each color?
Hi Mary! For this cake I used Americolor brand gel coloring. Unfortunately I didn’t keep note of the “formulas” to make each color, but in general these are the colors I typically use: lemon yellow, orange, super red, burgundy, soft pink, leaf green, sky blue, regal purple, and violet.
Thank you so much! That is the exact info I needed. I am curious also if you remember what Americolor you used to create the dark grey for the tree birch look? Trying to recreate your cake design for a baby shower (: I am very appreciate of the excellent recipe and tutorial!
Hi Mary. I added a little of Americolor Super Black until I got a lovely grey. I hope that helps!