
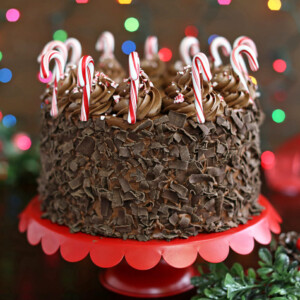
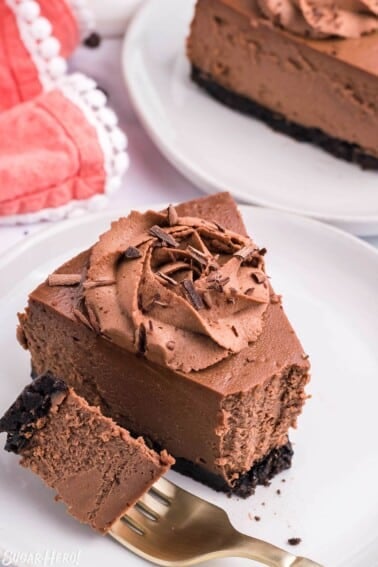
This Chocolate Candy Cane Cake is a rich chocolate cake, filled with a minty candy cane frosting and covered with chocolate curls. It makes a fabulous Christmas cake!

If you ask me, candy canes should ONLY be used for baking projects. They’re so boring to eat on their own, but so fabulous when used to give a minty texture and crunchy flavor to desserts! I used candy canes in the minty frosting filling AND as easy decorations on the outside of this fun and festive Chocolate Candy Cane Cake.
Also, if you love peppermint you’ll love my Candy Cane Hearts. They’d make an adorable embellishment for this or any other holiday cake like my Peppermint Mocha Mousse Cake and Candy Cane Cheesecake!

This cake combines two of my favorite things: chocolate and more chocolate–wait, make that chocolate and mint. It starts with a rich chocolate cake, layered with a light and fluffy peppermint buttercream.
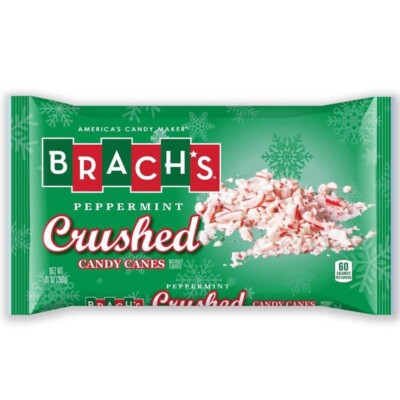
For the candy cane component, I actually used candy cane bits as opposed to crushing up whole candy canes. I love this shortcut, because crushing up candy canes is a huge pain! It takes way too long, the pieces are always unevenly sized, and somehow candy cane dust manages to get everywhere in my kitchen and on my clothes. Not to mention the fact that they start to stick together immediately! Using candy cane bits makes the process much faster and less annoying, plus they seem to have more staying power and take longer to get sticky. But if you can’t find the bits, you can always go old-school and just crush up candy canes for the filling.

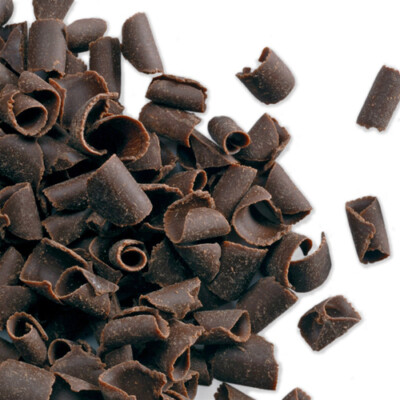
On the outside, I went for chocolate overload, with both chocolate buttercream and chocolate curls. You could skip the curls, but why would you want to?? It’s a lot of chocolate, yes, but since when is that a problem? Besides, the peppermint balances it out and keeps it from becoming too rich. Simple mini candy canes pressed into the rosettes on top are the perfect finishing touch.

🎂More Chocolate Cakes You’ll Love
- Box of Chocolates Cake
- Pumpkin Chocolate Mousse Cake
- Mint Chocolate Chip Layer Cake
- Black Forest Cake
- Chocolate Orange Cake

Candy Cane White Hot Chocolate

Chocolate Truffle Peppermint Crunch Cookies
Chocolate Candy Cane Cake
Ingredients
For the chocolate cake:
- 6 oz unsalted butter, at room temperature
- 5.25 oz granulated sugar, (3/4 cup)
- 5.6 oz brown sugar, (3/4 cup)
- 3 large eggs, at room temperature
- 1 TBSP vanilla extract
- 12 fl oz buttermilk, (1 ½ cup), at room temperature
- 8 oz all-purpose flour, (2 cups)
- 3 oz unsweetened cocoa powder, (1 cup)
- 1 1/2 tsp baking soda
- 3/4 tsp salt
For the frosting:
- 6 fl oz pasteurized liquid egg whites , (3/4 cup), see Note below
- 24 oz powdered sugar, (6 cups)
- ½ tsp salt
- 24 oz unsalted butter, (3 cups), at room temperature
- 1 TBSP vanilla extract
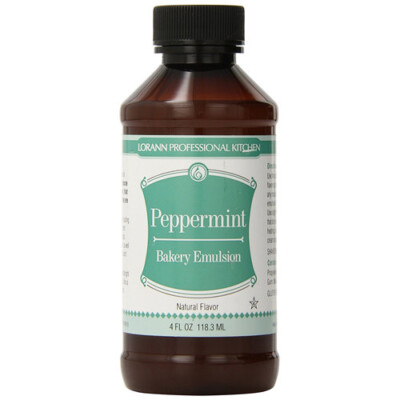
- 2 tsp peppermint extract
- 6 oz unsweetened chocolate, melted and cooled
- 1 cup candy cane bits
- 3 cups chocolate curls , or chocolate sprinkles
- 12 miniature candy canes, see Note below
Instructions
To Make the Cake:
- Line three 9-inch cake pan with parchment and spray with nonstick cooking spray. Preheat the oven to 350 F.
- Add the butter and both sugars to the bowl of a large stand mixer fitted with a paddle attachment. Beat them together on medium-high speed, until light and fluffy, about 5 minutes. Add the eggs one at a time, beating well after each addition. Add the vanilla extract, and beat well until everything is fully incorporated.
- In a separate bowl, sift together the flour, cocoa powder, baking soda, and salt. With the mixer running on low, add a quarter of the sifted flour mixture. When the flour streaks have almost all disappeared, add a third of the buttermilk to the mixing bowl. When that’s incorporated, continue to add the drys and wets in an alternating pattern, ending with the dry ingredients.
- When the dry ingredients are nearly incorporated, stop the mixer. Scrape down the bottom and sides of the bowl with a rubber spatula, and finish mixing the cake by hand. Divide the batter between the prepared pans, and smooth it into an even layer. Bake the cakes for 22-25 minutes, until a toothpick inserted into the center comes out with just a few moist crumbs attached. Cool the cakes completely before using.
To Make the Frosting and Assemble:
- Combine the whites, powdered sugar, and salt in the bowl of a large stand mixer fitted with a paddle attachment. Mix everything together on low speed, until the sugar is moistened and no dry patches remain. Turn off the mixer, scrape down the sides and bottom of the bowl with a spatula, then turn the mixer to medium speed. Beat on medium for 5 minutes.
- After 5 minutes, turn the mixer to medium-low and start adding the softened room temperature butter, 1-2 tablespoons at a time. Once all of the butter is incorporated, add the vanilla extract and peppermint extract and mix it in. Stop the mixer and scrape down the bottom and sides once more. Turn the speed to medium and beat the buttercream for 10 minutes.
- Divide the buttercream in half. Add the candy cane bits to have of the frosting, and mix in the melted, cooled unsweetened chocolate to the other half.
- To assemble the cake, place one layer on a cake cardboard, and put it on a cake turntable, if you have one. Scoop half of the candy cane frosting on top of the cake, and spread it into an even layer. Place a second cake layer on the frosting, and spread the remaining candy cane frosting on top of the cake. Finally, add the third cake layer on top. Spread a very thin layer of chocolate frosting all over the top and sides of the cake—this is the “crumb coat,” to lock in any stray crumbs from the cake. Refrigerate the cake briefly, for about 30 minutes, so the crumb coat can firm up.
- Spread a thicker layer of frosting along the top and sides of the cake. It doesn’t have to be perfectly smooth, because we’re going to cover up any imperfections! Place the chocolate curls or chocolate sprinkles in a large shallow pie tin or bowl. Hold the cake in one hand, keeping it over the pie tin, and use the other hand to scoop up handfuls of chocolate sprinkles and press them into the sides of the cake, letting the excess drop back into the container.
- Transfer the remaining chocolate frosting to a piping bag fitted with a star tip, and pipe rosettes of frosting all along the outer edge of the cake. Press a mini candy cane into each rosette, and serve!
Recipe Notes
Measuring Tips
Our recipes are developed using weight measurements, and we highly recommend using a kitchen scale for baking whenever possible. However, if you prefer to use cups, volume measurements are provided as well. PLEASE NOTE: the adage “8 oz = 1 cup” is NOT true when speaking about weight, so don’t be concerned if the measurements don’t fit this formula.
Want to learn more about baking measurements and conversion?


This looks absolutely insane! Just please clarify – ‘3 oz 1 cup unsweetened cocoa powder’? Does this mean 3oz=1cup OR 3oz+1 cup? I’m guessing the former…
Oh, sorry for the confusion! The 1 cup is an alternate measurement for people who don’t use a scale for baking, but it was written in a confusing way. So you’re correct, you should either weigh out 3 oz or use 1 level cup of cocoa powder. I’ve clarified the recipe, thanks for the comment! And please let me know how the cake turns out if you give it a try.