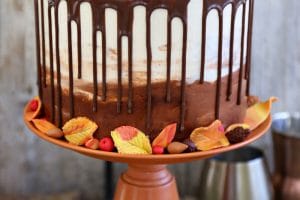


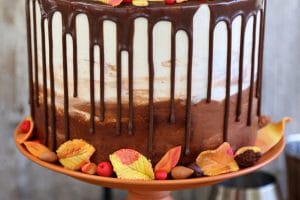
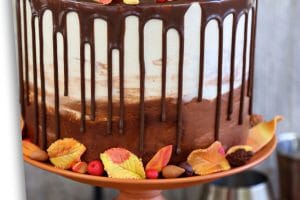

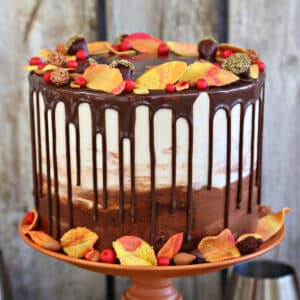
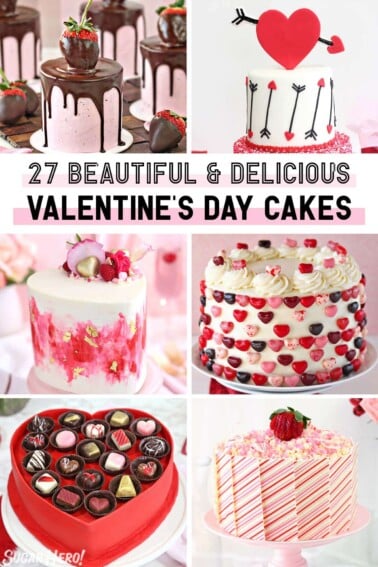
This Festive Fall Layer Cake is the perfect way to celebrate autumn! A rich chocolate cake is filled with a caramel-pecan filling, and topped with gorgeous, edible fall decorations!

This Festive Fall Layer Cake was a happy accident, if making a giant layer cake could ever really be considered an accident.
Here’s the deal. I do a live broadcast, called The SugarHero Show, on the SugarHero Facebook page every Sunday. Sometime the show is cooking through a recent recipe I’ve posted, sometimes it’s a reader request, and sometimes it’s a cake decorating technique. Sometimes it’s well-thought out and planned in advance, and sometimes it’s a day-before seat-of-my-pants type deal.

This Festive Fall Layer Cake was definitely a seat-of-my-pants one, and I was finalizing the design and figuring out all of the elements the night before. (Planning? What’s that?) I intended it to be just a decorating tutorial, but as I went through the broadcast I got a ton of requests for the full recipe–so here ya go!
It’s a long one, but the good news is that you can modify it with a cake mix, or your favorite fast frosting recipe, or just use some of the fondant decorating ideas to add a fall touch to any other dessert you might have on hand already. Cupcakes? Tarts? Mini pies? ANYTHING can use a fondant leaf, acorn, or pine cone, right?!

The cake is a new favorite I’ve tried. It’s a riff off Yolanda Gampp’s chocolate cake recipe. I wanted to try a sturdier chocolate cake, for carving and layering, and this one did not disappoint! It’s hefty and solid while still being very moist and flavorful. The frosting is the same Brown Sugar Swiss Meringue I used for the recent cranberry cake, and I love the cozy caramelized flavor it adds to the cake.
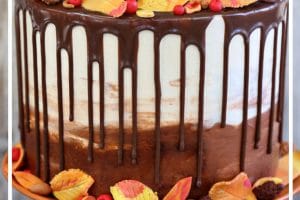
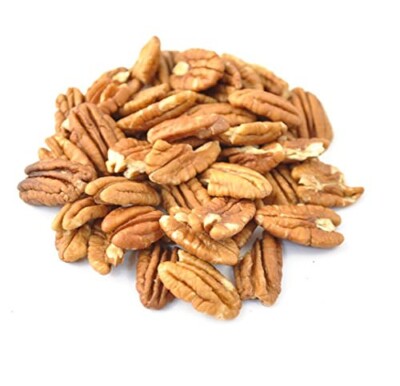
In between the layers I added some frosting, a big handful of toasted pecans, and a generous dollop of salted caramel sauce…with extra flaked sea salt, of course! Just a word of warning: you’ll want to follow the recipe’s suggestions and use a thick jarred caramel sauce, and also be sure to use a frosting “dam” as detailed in the instructions…otherwise you might have the sides of your cake springing a caramel leak, and you will be very sad indeed. Also, you can always mix the caramel sauce INTO the frosting if you’re worried about cake stability.

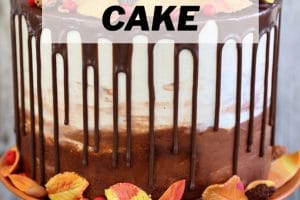
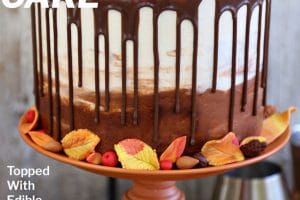
For decorations, I went with a classic chocolate drip, and then went to town making all sorts of fun fondant accessories…fall berries, spiky pine cones, glitter-topped acorns, and marbled fall leaves! It was really fun, and the end result was a gorgeous array of edible autumn delights.

If you’d like to see a video of me decorating this cake from beginning to end, here’s the FB Live video tutorial. Enjoy, and happy Thanksgiving to my friends celebrating it this week!

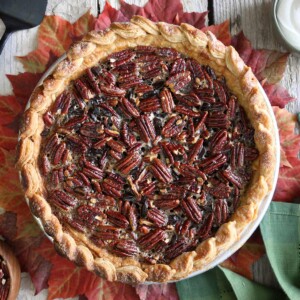
Deep-Dish Pecan Pie
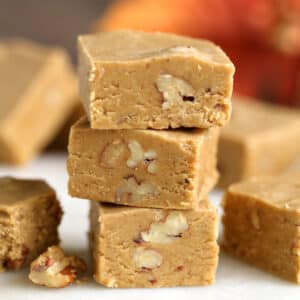
Pumpkin Fudge
How to Make a Festive Fall Layer Cake – Live Video!
Festive Fall Layer Cake
Ingredients
For the Chocolate Cake:
- 3 cups water
- 4.5 oz unsweetened cocoa powder, (1.5 cups)
- 18 oz all-purpose flour, (4 cups)
- 1 TBSP baking soda
- 3/4 tsp baking powder
- 1 1/2 tsp salt
- 12 oz unsalted butter, at room temperature
- 26.25 oz granulated sugar, (3 3/4 cups)
- 6 large eggs
- 2 TBSP vanilla extract
For the Brown Sugar Buttercream:
- 9 large egg whites
- 16 oz brown sugar
- 24 oz unsalted butter, softened but still cool
- ½ tsp salt
- 2 tsp vanilla extract
- Brown gel food coloring, I used Americolor Chocolate Brown
For the Decorations and Assembly:
- 1 cup thick salted caramel sauce, use thick jarred variety, not thin squeeze bottle variety
- 2/3 cup toasted pecans, coarsely chopped
- Large-flaked sea salt
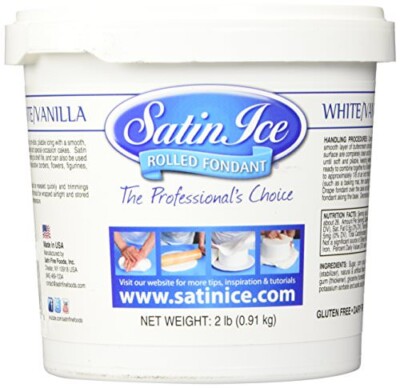
- 12 oz white fondant
- Assorted gel food coloring, I used Americolor Lemon Yellow, Orange, Red, Ivory, and Chocolate Brown
- Light corn syrup
- Gold sparkling sugar
- 9 oz chocolate candy coating melts, see Note below if you want to use real chocolate
- ½ cup heavy cream
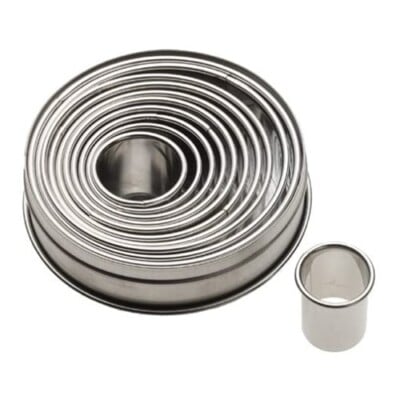
- Round cookie cutters
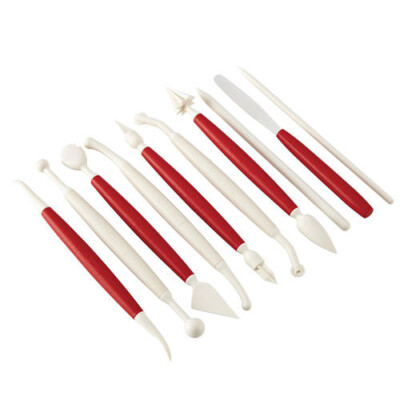
- Fondant tools, optional but useful!
Instructions
To Make the Chocolate Cake:
- Preheat the oven to 350 F. Line three 8-inch cake pans with sides at least 2” high with parchment rounds, and spray the insides with nonstick cooking spray.
- Pour the water into a medium bowl and microwave until it starts to simmer, 3-4 minutes. Add the cocoa powder and whisk well, until all of the dry cocoa dissolves and you have a thick cocoa mixture. Cover the bowl with plastic wrap to prevent water from evaporating, and let it sit until warm but not burning hot.
- In a large bowl, sift together the flour, baking soda, baking powder, and salt, and set aside.
- Combine the butter and sugar in the bowl of a mixer fitted with a paddle attachment, and beat on medium speed for 8-10 minutes, until very light and fluffy. Add the eggs two at a time, beating for about a minute between each addition, then mix in the vanilla.
- Alternate adding the dry ingredients and the cocoa mixture in batches, beginning and ending with the dry ingredients. Finish by scraping the bottom and sides of the bowl with a rubber spatula to mix the cake batter well.
- Divide the batter between the prepared pans—if you have a kitchen scale, each pan should get about 31 oz of batter. Bake at 350 F for 50-55 minutes, until the cakes spring back when lightly pressed with a fingertip and a toothpick inserted into the center comes out with just a few moist crumbs attached.
- Cool the cakes completely before using them. They can be made in advance and kept, well-wrapped, in the refrigerator for a week or in the freezer for several weeks. Allow them to partially defrost before assembling.
To Make the Brown Sugar Buttercream:
- Combine the egg whites and the brown sugar in the bowl of a large stand mixer, and whisk them together. Choose a small saucepan that lets you fit the base of the stand mixer snugly into the top of the saucepan, add a few inches of water to the saucepan, and bring the water to a simmer over medium heat.
- Place the mixing bowl on top of the saucepan of simmering water, making sure that the bottom isn’t in contact with the water, and heat the egg white mixture. Whisk frequently so that the egg whites don’t cook. Continue to heat the whites until they are hot to the touch, and when you rub a bit between your fingers, you don’t feel any grittiness from the sugar. Once the whites are hot, transfer the mixing bowl to your mixer and fit it with a whisk attachment.
- Beat the whites on medium-high speed until they are a shiny, stiff, voluminous meringue, and are no longer warm to the touch—feel the outside of the bowl, and make sure that it is around room temperature. Depending on your mixer and the temperature of your environment, this may take up to 15-20 minutes.
- Switch to a paddle attachment, and reduce the speed of the mixer to medium-low. Add the softened but cool butter in small chunks, a tablespoon at a time, making sure to wait in between additions. It may separate or look a little gloopy at this point—this is normal! Once all of the butter is added, increase the speed again and whip until it comes together and is light and fluffy. If, after 5 minutes, it hasn’t come together, refrigerate the mixing bowl for 5-7 minutes, to cool the mixture down, and whip it again until it has thickened and is smooth and silky. Add the vanilla extract and salt.
- The buttercream can be made in advance and kept at room temperature if you’re going to use it the same day, or refrigerated. If it has been chilled, let it sit at room temperature until completely soft, then re-whip it to get the smooth texture back before you use it.
To Make the Fondant Decorations:
- Divide the fondant into 5 portions. I recommend wearing food-safe gloves when coloring fondant, to prevent staining your hands. Dust a work surface with powdered sugar, and pat a fondant portion out into a disc. Put a few drops of gel food coloring in the center, and fold the edges over the coloring so you have a ball of fondant.
- Knead it like bread dough so the coloring is dispersed throughout the fondant—at first you will see streaks, but keep kneading and soon the fondant will be an even color. Add powdered sugar to your palms if they start to get sticky, and add more coloring if desired until you get a shade you like. I made 5 shades: yellow, orange, red, light brown, and dark brown.
- To make the berries: take a small pinch of red fondant and roll it between your hands until it is a round ball. If you have fondant tools, use the pointed star tool to press a star-shaped hole in the top of each berry. (You can also just use a toothpick or ice pick for a round hole.)
- To make the pine cones: take an almond-sized piece of light brown fondant and roll it into an oval shape. Use scissors or kitchen shears to snip small triangles into the fondant, pulling them out slightly so they fan outward from the center. Do this around the whole piece of fondant so it looks like a pine cone.
- To make the acorns: take an almost-sized piece of dark brown fondant and roll it into a ball, then pinch one end of the ball so it comes to a point like the base of an acorn. Take a second, smaller piece of fondant and roll it into a ball, then flatten it out so it’s a thin round disc. Press this on top of the acorn to form the acorn cap. Brush the cap with a thin layer of corn syrup, and roll it in gold sparkling sugar.
- To make the leaves: Pat the yellow fondant out into a circle about 3-4 inches wide. Pat the orange fondant out to a similar size and lay it directly on top. Take a few strips of red and brown fondant and lay them on top—we only want streaks of these darker colors, so we’ll use less of them. Roll the fondant out until the colors fuse together, then mash it up into a ball and roll it out again to get a marbled effect. Roll until the fondant is less than ¼-inc thick.
- Use round cutters to cut leaf shapes out of the fondant, or use a paring knife to cut them. If you have fondant tools, use the veining tool to press veins into the leaves, and to fray some of the edges. Make a variety of sizes and shapes of different leaves.
- Crumple a piece of parchment and spread it out on a baking sheet, flattening it a bit but letting its crumpled texture remain. Rest the leaves on the crumpled parchment so that they will dry with an organic, flowing texture. Let them dry for at least 2-3 hours for the best results, or even overnight.
To Assemble and decorate:
- Place the cake rounds on 8-inch cardboard cake circles.
- Fit a piping bag with a coupler or a large round tip, and fill it with buttercream. Place one layer on a cake turntable. Pipe a circle of frosting around the outside edge of the cake layer. (The frosting acts like a barrier to prevent the filling from seeping through the edges of the cake.)
- Spread a thin layer of frosting in the middle of the cake, coming about halfway up to the top of the frosting border. Scatter half of the toasted pecans in the center, and top with half of the salted caramel sauce, spreading it out until it reaches the frosting ring around the edges, but make sure that none is spilling over the sides. Sprinkle a big pinch of flaked sea salt on top.
- Top the cake round with a second cake layer, and repeat the filling process again. Finally, add the last cake layer. Cover the top and sides of the cake with a very thin layer of frosting—this is the crumb coat, which locks crumbs into the frosting and also provides some stability to the cake. Refrigerate the cake for 45-60 minutes, until the crumb coat is set and the cake feels firm and stable.
- If the buttercream has started to get spongy, re-whip it briefly until it is smooth and silky. Take a third of the remaining frosting and tint it a deep brown color.
- Spread a thick layer of the ivory-colored frosting on the top of the cake, and on the top half of the sides. Take the dark brown color and spread it along the sides of the bottom half of the cake.
- Use a metal offset spatula or bench scraper to smooth out the frosting on top, and then run it slowly along the sides to smooth out the frosting and blend the light and dark colors together. Once the frosting is smooth, refrigerate the cake for another 60 minutes or so, to firm up the frosting.
- Combine the chocolate candy coating and the cream in a medium bowl, and microwave for 1 minute. Whisk well, and if any chunks of chocolate remain, whisk again briefly until it is completely melted and smooth. The chocolate glaze should have a fairly thin texture, and if you dip a spoon in and let excess drip out, it should almost immediately blend back into the glaze in the bowl.
- Transfer the chocolate to a squeeze bottle with a narrow tip. Squeeze a dime-sized amount of glaze along the top edge of the cake, and nudge it gently so it starts to slide down the side. Repeat right next to the first drip, and continue around all the edges of the cake. Squeeze the remaining glaze into the center of the cake, and use a small spatula to smooth it into an even layer that joins with the outer ring. Let the glaze set for 10 minutes in the refrigerator, or 20-30 minutes at room temperature, so that it’s not completely soft and liquid when adding the decorations on top.
- Top the cake with the fondant decorations you made, and if desired, add some to the base of the cake as well. For the best taste and texture, serve this cake at room temperature.
Recipe Notes
Measuring Tips
Our recipes are developed using weight measurements, and we highly recommend using a kitchen scale for baking whenever possible. However, if you prefer to use cups, volume measurements are provided as well. PLEASE NOTE: the adage “8 oz = 1 cup” is NOT true when speaking about weight, so don’t be concerned if the measurements don’t fit this formula.
Want to learn more about baking measurements and conversion?


This is my first time watching one of your videos. I loved your down-to-earth style and how you explain things, and give lots of helpful tips. I also appreciate that when you didn’t like how something looked, you showed how to scratch it and try it again! I’m looking forward to trying this cake. Thank you!
Hey Deidra, Thank you so much! I really appreciate that! Thanks for following along!
Let’s see if a smaller photo file will attach…
Deidra! This looks SO GOOD! Thanks for sharing a picture! 😀
Love this tutorial! I made the Cale and the fondant decorations. I am ready to do the icing today, but both of my mixers have plastic bowls, so what is the best way to heat the egg whites and brown sugar?
Hey Julia, Alternately, you can use a different bowl or an actual bain marie and then transfer the mixture to a mixing bowl once it’s heated. I would love to hear how it goes once you are finished with the cake! I am excited you are making it!
Simply stunning. Thank you for creating something so inspiring!
Hey Mary, I am so glad you enjoyed it so much! Thank you, I really appreciate it!
i was a bad cook last year but after searching on internet about recipes now i know and have learnt to differentiate between main course appetizers and all these kind of recipe i really loved it and thank you alot for contributing indirectly in my life 🙂 love the recipe 🙂
Hey Mary, I am thrilled to hear that! Thank you so much for your feedback!
I choose two extravagant cakes to make every year for Thanksgiving. Almost always, even I’m widely impressed b/c they come out ridiculously good. Here’s how I felt about this one. The fondant was amazing. I had never made or used it before, so I made the marshmallow fondant. I decided to hand paint them with the food coloring, mixing colors in a palette like paint, and they came out better than I expected – so pretty, plus it tastes great.
The cake however, was not my favorite. The chocolate recipe was….weird. The cake itself came out dense, which I was a little surprised with all that water…but maybe that was why (I had never seen putting water in a cake before and definitely not that much water). It was disappointing b/c homed cakes these days on Pinterest are often so moist and light. The buttercream was good, but what a long, dramatic way to make it – really? I’ve made buttercream before that was light and delicious without all the crazy. For the caramel, I just used my own recipe. What saved me were the beautiful decorations. What I will take away from this recipe and thank the bloggerr for is the marshmallow fondant – it was super easy to make, and I may use it for Christmas. Thanks.
Hey Raychel, I am so glad to hear you enjoyed the fondant so much! Your decorations look amazing, I am thrilled to hear it worked out so well! As for the cake portion, I am sorry to hear it came out dense. It is based off of a devils food cake, so it isn’t uncommon to include water. It is supposed to be a more sturdy cake, however if it was too dense it sounds like we could work through some things. I would love to help you troubleshoot, however it is hard to know exactly what went wrong without more details about the ingredients and procedure. Feel free to email me, and I would love to troubleshoot further with you! Thanks so much for your feedback!
great recipe always wanted to try it, now i got it right here so i’m gonna try it and let you all know how was it 🙂 thanks
I didn’t see where it said to divide the buttercream to make a light and dark frosting.
Hi. I just double checked the recipe. If you go to the “Instructions” in the recipe card, you’ll see a section with the subheading “To Assemble and Decorate”. Step 5 in that section says, “If the buttercream has started to get spongy, re-whip it briefly until it is smooth and silky. Take a third of the remaining frosting and tint it a deep brown color.” I hope this helps!