These Pie Milkshakes are proof that pie and ice cream don’t have to simply be shared on the same plate, they can be combined!

Pi Day is here, it’s finally here! The day I have been planning for all month, and the day normal people aren’t even aware exists! Sweet Pi Day. I wrote about a Grapefruit Meringue Pie yesterday, but today, in honor of Pi Day, I want to share a milkshake recipe.
[If this blog were high-tech, you’d hear a record scratch sound effect right now.]Let me ‘splain. See, there are two kinds of people in the world. There are those who are content to merely eat delicious things, and then there are those who see delicious things and think, “I wonder what those would taste like blended together?”

Yeah, I went there. And I want you to come along.
In honor of Pi Day, I decided to try using frozen mini pies to make an over-the-top milkshake.
I knew it would be something a little different. Something involving ice cream. And a blender. And me throwing my head back and grunting like Tim Allen on Home Improvement. (Dated reference much?)

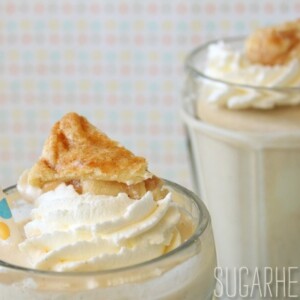
So I decided to turn the sweet little mini pies into Pie Milkshakes. It’s pretty much exactly what you’re thinking: Pie. Ice cream. Maybe a splash of milk to thin things out. I tried two different methods: blending everything together in the beginning, or making a vanilla milkshake, then pulsing in the pie at the very end. I wasn’t sure which method would yield the best results, but for me, adding the pie at the end was the clear winner.
For the first method, I blended an entire mini apple pie with ice cream and a bit of milk and let the blender run until it was smooth(ish). The final milkshake had a very strong—almost uncanny!—apple pie flavor, but the texture was a little off. It was a little gritty due to the crust, and it just didn’t have the luscious milkshake texture I was looking for.

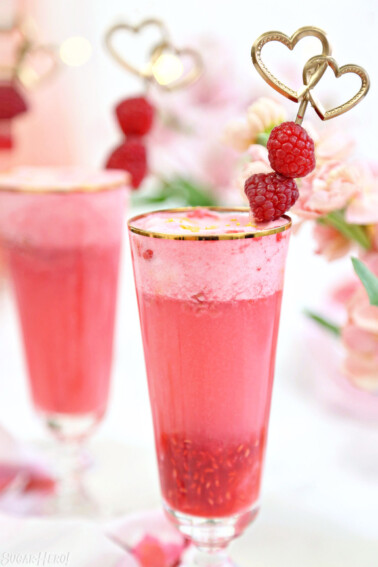
The second time, I made a thick vanilla milkshake, then added a whole cherry berry pie and pulsed the blender a few times to break up the fruit and the crust. The shakes turned a gorgeous purple color, and they were delicious. Like, amazing. Like, I was giving myself snaps and props and self-high-fives all alone in the kitchen.
Your enjoyment of this shake might depend on your tolerance for lumps in your drinks, but as a lump-lover, I thought these were perfect. They retained their thick, creamy milkshake texture, but they also had chunks of cherries and blueberries, and crunchy bits of crust. These aren’t sip-from-a-straw shakes, they’re “dig your spoon down in there and hunt for gold” shakes. I loved how each sip and each bite was a little different, but all had elements of sweet vanilla, tart berries, and buttery crust.
 Pretty sure all of my drinks will be garnished with a little mini pie slice from now on.
How are you celebrating Pi Day?

💗More Milkshake Recipes to Try
- Oreo Milkshake
- Unicorn Milkshakes
- Frozen Hot Chocolate
- Epic Chocolate Peanut Butter Milkshakes
- Chocolate-Covered Pretzel Milkshakes
Blueberry Crumble Pie

Strawberry Hand Pies
Pie Milkshakes
Ingredients
- 3 large scoops vanilla ice cream, slightly softened
- 2 oz milk, optional, depending on softness of ice cream
- 1 miniature pie, baked and cooled (Mini pies are usually 4-5" or you can substitute large slice of pie)
Instructions
- Scoop the ice cream into a blender. It should be soft enough to scoop, but not too runny or melted. Start blending the ice cream. If it’s pretty soft you won’t need to add any milk, but if it’s difficult to blend add the milk, scrape down the sides of the blender, and blend until you have a thick, smooth milkshake. The goal is to add as little milk as possible to get a great texture, unless you happen to like really runny milkshakes.
- Break the miniature pie into several chunks and add it to the blender. Pulse the pie into the milkshake, blending for 1-2 seconds at a time. You just want to break up the berries and the crust, not pulverize them. Stop when you can still see some chunks of fruit.
- Pour the milkshake into glasses, garnish with whipped cream if desired, and serve immediately.
Recipe Notes
Measuring Tips
Our recipes are developed using weight measurements, and we highly recommend using a kitchen scale for baking whenever possible. However, if you prefer to use cups, volume measurements are provided as well. PLEASE NOTE: the adage “8 oz = 1 cup” is NOT true when speaking about weight, so don’t be concerned if the measurements don’t fit this formula.
Want to learn more about baking measurements and conversion?
Nutrition
Click Here to Print or Email this Recipe!
——————————————-

P.S. I thought you might enjoy seeing this sad little behind-the-scenes snapshot. As I was getting positioned to take the overhead shot above, my big, clumsy delicate, graceful foot knocked over one of the glasses. Tragedy! I resisted crying over spilt milkshake, and instead took a bunch of pictures of the carnage. I thought it would be fun to show the “real” setup behind all the perfectly posed shots.
Here are a few things to note about this picture:
A. My very fancy backdrop is a piece of poster board taped to a piece of foam board. Classy!
B. I use these heavy-duty clips from Home Depot for everything. I most often use them to secure a foam board that I use to bounce light from the window. Best $3 I ever spent.
C. See that white peeking out from under the berries? Paper towel. I didn’t have enough berries to fill the bowl so I padded a little. (Hold the jokes, you.)
D. This lollipop-looking thing would be the whipped cream & pie garnish. To get everything to stay put, I piped the cream onto a parchment-covered baking sheet, stuck on the pieces of pie, and then froze the cream so that it would hold its shape and not melt while taking pictures. The pie made the frozen cream too heavy to float on top of the milkshakes, so I added a skewer through the bottom to hold up the whipped cream. It’s a nifty trick, but I had to come clean, in case any of you tried the garnish at home and got frustrated.
E. A few years ago I painted a bunch of wooden boards different colors, and I have gotten so much use out of them. They’re easy and cheap and a great change from my boring old tabletop.
So those are my true confessions! What behind-the-scenes trickery do you like to use with your photos?


Yay! Now I know what to do with my leftover Coconut Key Lime Pie. It would taste delicious blended with some coconut ice cream. And the peek behind the scenes is great for a novice food photographer like me. I need to get some of those boards.
Oh my gosh, get some! They’re big squares of plywood from Home Depot or Lowe’s and they cost about $5. You can paint each side a different color, effectively doubling your number of boards. It adds some much-needed variety to pictures!
Pi Day or not, I want, I mean I NEED some pie shakes in my life. These look gorgeous and I can’t wait to whip some up in my kitchen. I love the mini pie garnish you have on top of the glass. oh…my, I’m drooling over here.
Thank you Amy! Is it weird that I was most excited about the teensy-tiny pie garnish? It’s the little things in life sometimes. 🙂
Oh yum, what an amazing sounding milkshake! I love your photos too!
I need a pie shake…like yesterday. This is going on the list. YUM!