


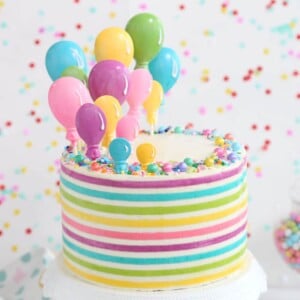
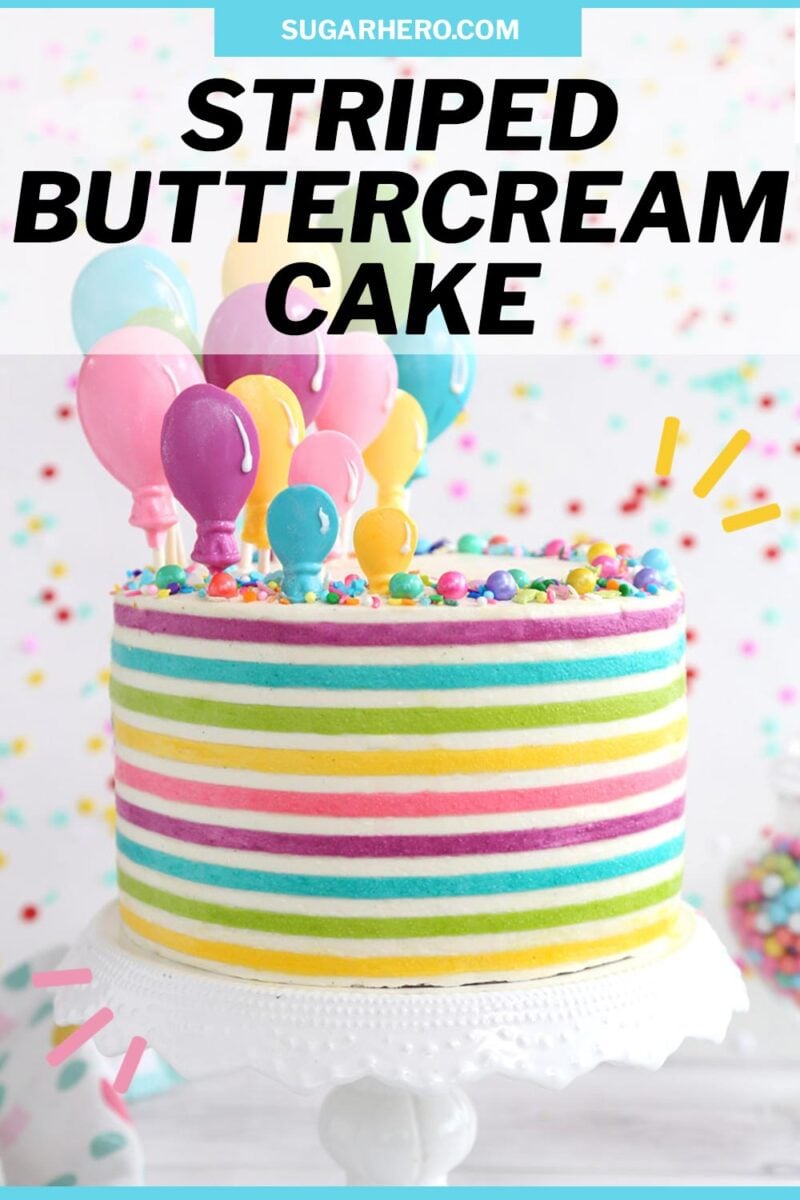
Is there anything more fun than Buttercream Stripes on a Balloon Cake?! The striped cake trend is all the rage these days, and it adds a bit of whimsy to any cake design. This bright and cheerful cake features buttercream stripes, candy balloon toppers, and multicolored buttercream inside to make the ultimate birthday party cake!

Pastel Celebration Cake
I am capital-O OBSESSED with buttercream stripes. They’re endlessly versatile, easy to dress up or down, and are equally at home on classy wedding cakes and kid’s birthday cakes.
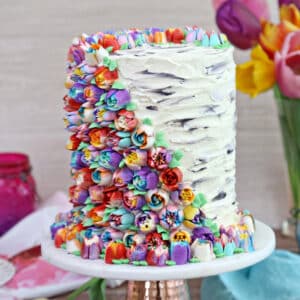
I’m also a sucker for bright and colorful desserts (like this towering Spring in Bloom Cake, these watercolor Unicorn Cakes, or this pinkalicious Circus Animal Layer Cake), so when I first started plotting how to incorporate stripes into a cake design, I knew I wanted it to be make-your-eyes-explode colorful.


Making Buttercream Stripes
Hands down, the best part about incorporating buttercream stripes into your cake design is that your friends and family will think you’re a wizard! True story. The stripes are so seamless, so perfectly neat and tidy, that folks who do not bake will be convinced you have magical stripey powers. (Do NOT show them this blog post if you want to keep this illusion alive!)
But you and I–and I guess everyone else reading this right now–know that it’s actually really simple to make buttercream stripes. It takes a bit of time, sure, but fortunately, there’s no actual magic required.

The process is fairly straightforward: smooth the sides of your cake with a thick layer of buttercream. Drag an icing comb around the sides of the cake, creating ridges. At first the design will be rough and patchy, but continue to go around the sides of the cake, washing the comb off frequently, until you’ve made neat, solid ridges.
After a quick chill, you can fill in the ridges with the buttercream colors of your choice. Use a flat scraper around the sides to remove excess colored frosting, and your stripes are revealed! (This was the quick and dirty version. Of course there’s greater detail in the recipe down below, and a whole video showing how it’s done!)

Tools for Buttercream Stripes
The simple truth is you need just a few tools to do some buttercream stripe sorcery in your kitchen.
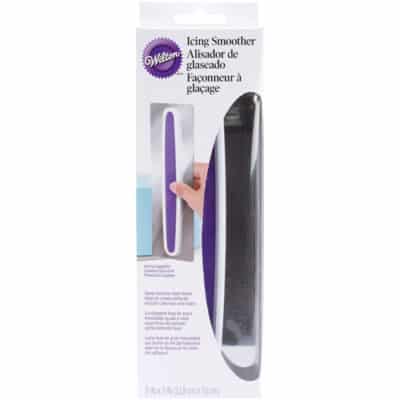
- An icing smoother. Before we make stripes, we need to be sure the sides and top of our cake is as even as possible. Enter the icing smoother! This is also what’s used to remove excess colored buttercream later.
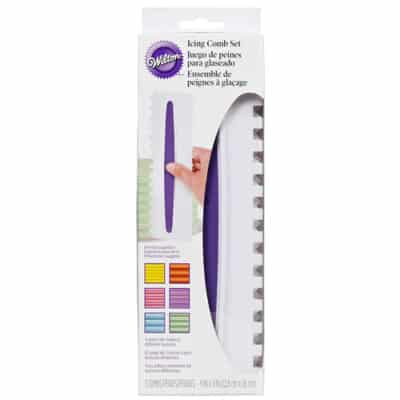
- An icing comb. Look for one with square cutouts to make stripes. Also, be sure that your comb is at least as tall as the cake you’ll be frosting. A short icing comb is much harder to work with, because you’ll have to line up the stripes, and that is tricky. Boo.
- Buttercream, and lots of it. This recipe uses my Easiest Swiss Meringue buttercream, and it calls for a BIG batch. It’s so much easier to make stripes if you have a thick layer of frosting to work with! Lots of will get scraped off in the process, but trust me, you’ll be glad to start with a generous amount.

Making Candy Balloons
Colorful stripes deserve an equally colorful cake topper, so I went with homemade candy balloons in a variety of colors. At first my plan was to freehand the balloon shape with melted candy coating, but after a few wonky experiments I knew that I needed to use a candy mold. No one wants “misshapen amoebas on a stick” on top of their birthday cake!
I used the balloon mold from this candy mold party pack to make the cake toppers. The mold produces a fairly large balloon, so to make smaller ones, I just filled the mold less full. Filling it half- or even quarter-full allowed me to make balloons in a variety of sizes, perfect for the ascending balloon cake design!

A few more balloon notes: I mixed the colored candy melts with some white candy melts, to tone down the color and make it slightly more muted/pastel.
I also brushed the tops with pearl dust. This is optional, but it made the candy balloons really gleam and sparkle in the light–just like the real thing!

Candy and Sprinkle Decorations
My FAVORITE part about finishing a cake has got to be picking out the perfect sprinkles to go along with it! As you know, the official SugarHero motto is “More is always better,” so in that spirit, I chose approximately a gazillion different sprinkles from my shelves to go on this cake.
I recommend using a variety of colors and sizes to finish this off. I first pressed shimmery Sixlets around the edges of the cake, then added some medium-sized sprinkles like candy pearls and small bits of rock candy. Finally, I added small stars, candy shapes, jimmies, and nonpareils to fill in the empty space and really make the cake look complete.

We haven’t even TALKED about the inside of the cake yet! This cake is made with three 8-inch cakes, each split in half to yield six thinner cake layers. I wanted to have 5 layers of buttercream (one for each color of stripes) to mimic the thin stripes on the outside. You can construct the cake however you’d like, though, so if you want less buttercream (gasp!) feel free to leave the 3 cake layers intact and just do 2 layers of frosting.

I hope you love this cake as much as I do! Please let me know how it goes if you give it a try, and tag me @elabau or hashtag #sugarhero on Instagram so I can see it!
🎂 More Fun Party Cakes
Spring In Bloom Layer Cake
Birthday Present Mini Cakes
Leave a Review!
If you make this recipe, let us know! Leave a ⭐️⭐️⭐️⭐️⭐️ rating on the recipe below, and leave a comment, take a photo and tag me on Instagram @elabau, or use #sugarhero on IG!
Striped Buttercream Balloon Cake
Ingredients
For the White Cake:
- 16 oz granulated sugar, (2 ¼ cups)
- 16 oz cake flour, (4 cups)
- 2 TBSP baking powder
- 1 1/4 tsp salt
- 6 fl oz large egg whites, (from about 6 eggs)
- 1 1/2 cups milk
- 1 TBSP vanilla extract
- 9 oz unsalted butter, at room temperature
For the Frosting:
- 8 fl oz pasteurized liquid egg whites, (1 cup, see Note below)
- 32 oz powdered sugar, (8 cups)
- 1 tsp salt
- 32 oz unsalted butter, at room temperature
- 2 TBSP vanilla extract
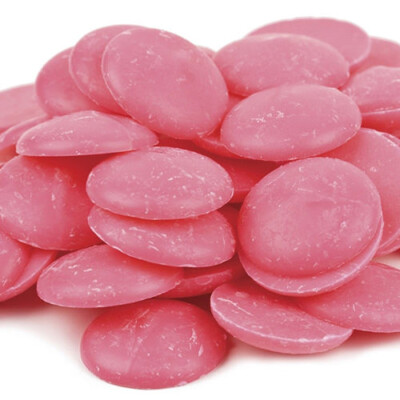
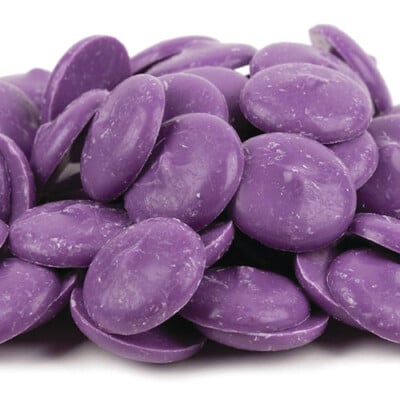
- Assorted gel food coloring, I used Americolor Yellow, Electric Purple, Turquoise, Pink, and a mix of Electric Green and Avocado Green
For the Candy Balloons:
- 8 oz candy coating melts, assorted colors
- Balloon Candy Mold
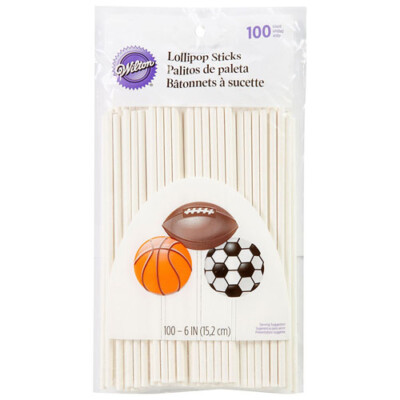
- Lollipop sticks
Equipment and Decorations:
- Assorted sprinkles, Sixlets or other colorful candies
- Icing Smoother
- Icing Comb
Instructions
To Make the White Cake:
- Preheat the oven to 350 F. Line three 8-inch cake pans with parchment rounds, and spray the parchment and pan sides with nonstick cooking spray.
- Combine the sugar, cake flour, baking powder, and salt in the bowl of the stand mixer fitted with a paddle attachment. Mix on low speed for about a minute to combine the dry ingredients.
- Lightly whisk together the egg whites and about a quarter of the milk (it doesn’t have to be a precise measurement) and the vanilla extract, and set aside for now.
- Add the remaining milk and the softened butter to the large mixing bowl and mix on low speed until the dry ingredients are moistened. Turn the mixer to medium speed and mix for a minute and a half.
- Add the egg white mixture in three batches, mixing for 20-30 seconds after each addition, until you have a smooth batter. Scrape the bottom and sides of the bowl with a rubber spatula, and give the batter a few more stirs to make sure everything is incorporated. Divide the batter evenly between the three pans. If you have a kitchen scale, fill each pan with 20 oz of batter.
- Bake the cakes at 350 F for 30-35 minutes, until the sides just start pulling away from the pan, and a toothpick inserted into the center comes out clean. If the sides have completely pulled away from the pan, the cakes are probably overbaked.
- Let the cakes cool on a wire rack for 10 minutes, then gently turn them out and let them cool completely. I find it’s easiest to cut and stack cakes that have been chilled, so if you have time, wrap them with plastic wrap and put them in the freezer for at least 30 minutes, until they are firm but not frozen all the way through. If you are making these in advance, they can stay in the freezer for up to several weeks. Let them partially defrost, until they are firm but not rock-hard, before assembling.
To Make the Frosting:
- Combine the whites, powdered sugar, and salt in the bowl of a large stand mixer fitted with a paddle attachment. Mix everything together on low speed, until the sugar is moistened and no dry patches remain. Turn off the mixer, scrape down the sides and bottom of the bowl with a spatula, then turn the mixer to medium speed. Beat on medium for 5 minutes.
- After 5 minutes, turn the mixer to medium-low and start adding the softened room temperature butter, 1-2 tablespoons at a time. Once all of the butter is incorporated, add the vanilla extract and mix it in. Stop the mixer and scrape down the bottom and sides once more. Turn the speed to medium and beat the buttercream for 10 minutes. At the end, you’ll have a frosting with a wonderfully light and creamy texture. It can be used right away, or stored in the refrigerator for up to two weeks, or the freezer for up to two months. If you have chilled the frosting, let it come to room temperature COMPLETELY and then beat it for several minutes to smooth it out and restore its texture before using it.
To Make the Candy Balloons:
- Melt the candy melts individually in their own bowls in the microwave. Spoon some melted coating into the balloon candy molds, tapping it gently against the countertop to remove any air bubbles. Insert lollipop sticks and turn them so they’re completely submerged.
- Freeze the candy for 10 minutes, or refrigerate for 20, until completely firm. Once set, the candy should pop right out of the mold! Brush the balloons with pearl dust, if desired, and add a thin line of white candy coating along the edge to look like the shine of a balloon.
- Repeat with more candy coating to make other colors and sizes of balloons. (To make smaller balloons, just fill the molds less!) I used 14 balloons on my 8-inch cake, and made a few extras in case of breakage. I found I used more smaller and medium-sized balloons than large balloons.
To Assemble and Decorate:
- Separate out 5 portions of frosting, each about 3/4 -1 cup, into individual bowls. Color the frosting with gel food coloring, until you have a vibrant yellow, green, pink, purple, and turquoise. Fit a piping bag with a large round tip and fill it with white frosting.
- Slice each cake round in half so you have six rounds total. Place an 8-inch cake on a cake cardboard and place it on a cake turntable. Pipe a layer of white frosting around the outer edge of the cake—this acts like a barrier to prevent the colored frosting from seeping through.
- Place a big dollop of yellow frosting on the cake layer—about a generous ½ cup—and use a metal spatula to spread the frosting into a layer going all the way out to the edge so it meets the white buttercream border.
- Top the cake round with a second cake layer, and repeat the frosting process again, this time with a different interior color. Continue to layer the cake this way, until you’ve used all 5 colors and 6 cake rounds.
- Cover the top and sides of the cake with a very thin layer of white frosting—this is the crumb coat, which locks crumbs into the frosting and also provides some stability to the cake. Refrigerate the cake for 30-45 minutes, until the crumb coat is set and the cake feels firm and stable.
- Cover the top and sides of the chilled cake with a thicker layer of white frosting. Aim for this layer to be about ½-inch thick. This will seem like WAY too much frosting, but trust me! Most of it will get scraped off during the process, but it’s easier to start with a thicker layer. Use an icing smoother to smooth out the sides and top of the cake as much as possible. It’s not important that it be perfect.
- Next, use an icing comb to make ridges on the cake. Hold the comb against the side of the cake, straight up and down but angled back close to the side of the cake, rather than perpendicular to the side. Slowly turn the cake as you scrape off the first layer of frosting.
- The first one or two times you use the comb, the stripes will look very patchy and rough. This is normal! After every pass, wipe or wash off the comb so it’s clean, then fit the comb into the grooves and turn it around the cake again. After a few more turns, your stripes should be looking pretty good! If you uncover bare cake areas during this process, you can always add more frosting with a spatula and then go around again with the icing comb.
- Once your ridges are made, freeze the cake for 30 minutes, or refrigerate for at least 60, until the cake is VERY firm.
- Transfer your remaining colored buttercream into individual piping bags, and snip off the tip to make a medium-sized opening. Pipe one color into the hollow part between each buttercream stripe on your cake. It’s fine if the lines aren’t perfect or if they go over onto the white portion. Repeat until you’ve filled every ridge with colored buttercream.
- Use the straight-sided scraper to go around the sides of the cake, smoothing it out. At first, it will smear the colors over the sides, but keep turning (and cleaning the scraper between turns!) Gradually you will remove the excess colored buttercream, and reveal the beautiful, clean white stripes underneath. Since the cake was very well chilled, you don’t have to worry about the white buttercream smearing or getting messed up!
- Once you’re happy with your stripes, run a sharp paring knife around the top of the cake to slice off any excess frosting and make the top perfectly smooth. You can heat the knife in hot water to make this easier and neater, if you’d like.
- Finally, it’s decoration time! Add your candy balloons to the top, then gently press a ring of sprinkles and candy around the edges of the cake.
- Like most cakes, this one is easiest to slice when cold, but has the best taste and texture when enjoyed at room temperature. Leftovers can be kept well-wrapped in the refrigerator for up to a week, but cake is always best when enjoyed within a few days.
Video
Recipe Notes
Measuring Tips
Our recipes are developed using weight measurements, and we highly recommend using a kitchen scale for baking whenever possible. However, if you prefer to use cups, volume measurements are provided as well. PLEASE NOTE: the adage “8 oz = 1 cup” is NOT true when speaking about weight, so don’t be concerned if the measurements don’t fit this formula.
Want to learn more about baking measurements and conversion?
Nutrition
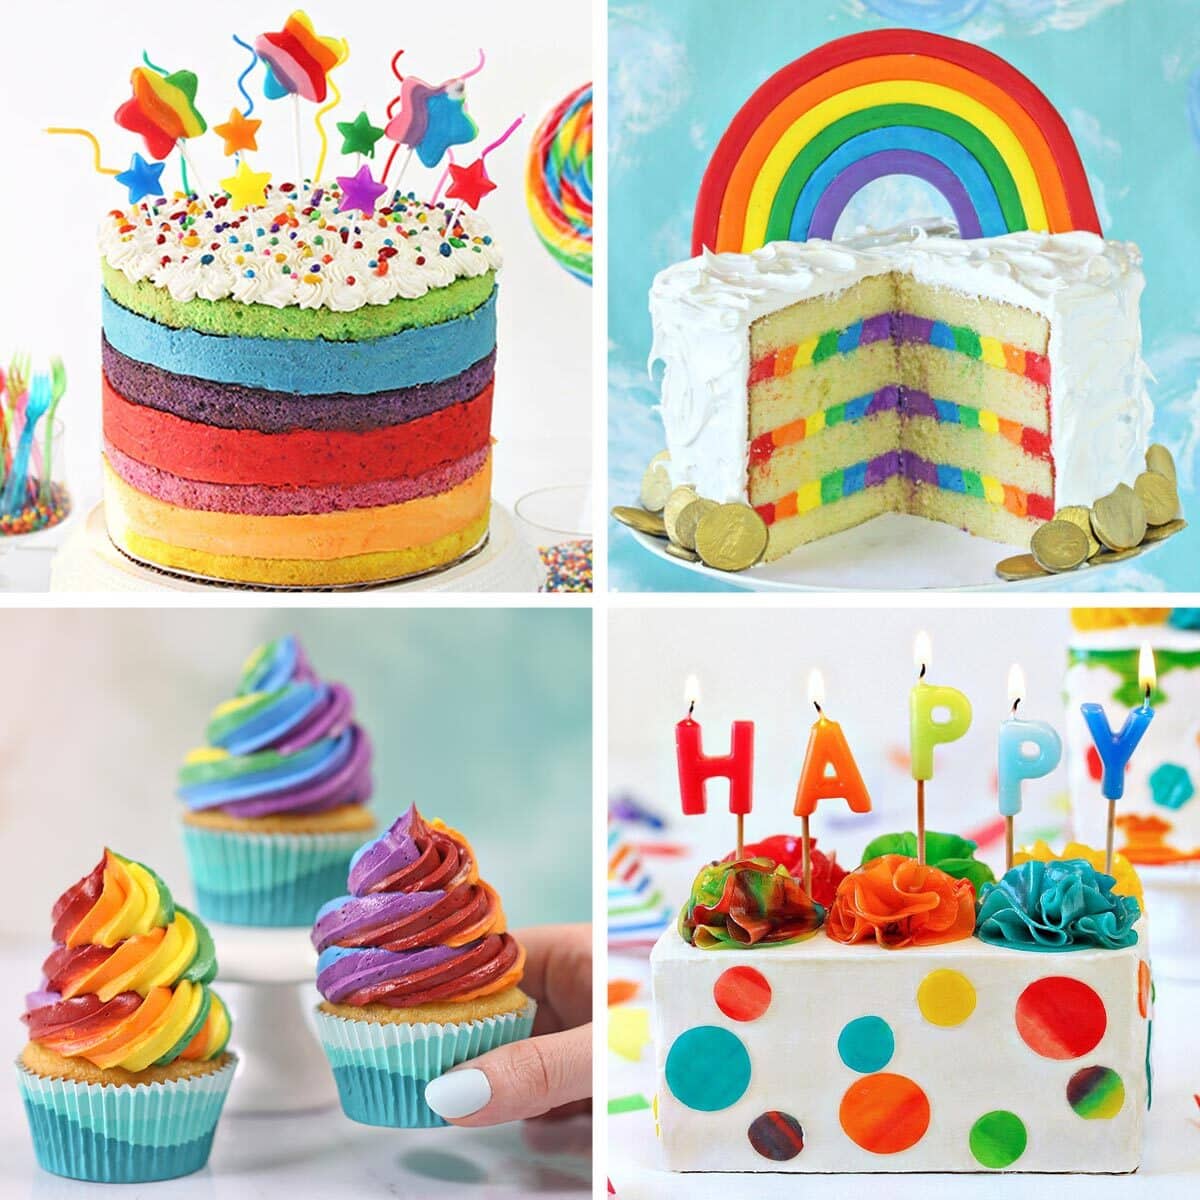
🌈 COLORFUL RAINBOW DESSERTS 🌈
We’ve rounded up 23 of our FAVORITE rainbow dessert recipes & ideas that are sure to make you smile — click here to get all the recipes!


This looks awesome! Can’t wait to make it!!
Hey Bethany, Thanks so much for your feedback! I would love to hear how it goes, and to see pictures!
Thanks! And I will definitely let you know how it goes!
Looks awesome!
I would like to make it for my grandson third birthday in March.
Hey Nurit! I would love to hear how it goes, and see pictures! Happy Birthday to your grandson!
Hi,
I’m currently trying this but I can’t get clean lines with the comb. The lines break and the frosting pulls away. How did you avoid that happening?
Hey Lydia, I’m sorry to hear that! Are you using the frosting from the post? Just to clarify are you having a problem with the colored lines or the white lines?
Such a pretty cake! I tried it myself and just need more practice on the striping technique. I really loved the flavor of the cake layers (not too sweet, which is great when paired with buttercream frosting!), but mine came out a little too dry and crumbly. Any recommendations for solving that problem?
Hey Beth, chances are it may have been baked a little too much or the temperature was too high. My recommendations would be to buy an oven thermometer to see if your oven is accurate. I would also suggest to check it about 5 minutes before the recommended time, it sounds like it may have been over baked a bit. Let me know if you have any other questions! I would love to hear how it goes, and see pictures!
Thank you for your recipe! Not bad for the first time
Hey Donika, That looks AMAZING! I love it, thank you so much for sharing!! I am so glad to see it worked out so well!
WHY YOU SO GOOD, SUGAR HERO!??? Hehe. Love this cake so much! I gotta practice my striping… XO
Hey Lyndsay, thank you so much I really appreciate that! Yes, I would love to see what you make!! xoxo
Where have you been all my life? Made this for my 3 year old grandaughters birthday….took pictures at every stage and then blew it at the end and didn’t get a final..! I have baked all my life and am now disabled and can only do so every so often however I am in charge of my youngest 3 grandaughters birthday cakes (custom orders of course)and the frosting are always so sweet. This was amazing! Not only was the cake delicious but I got compliments especially on the frosting forever! Also I would just like to add that your directions are very easy to follow. Thank you!
Hey Melanie, I am so glad to hear you loved it!! This is my go to frosting as well. I am so happy to hear you found it and love it like I do! Sounds like you are doing a great job at being a grandma!!
I love your SMB! I use it all the time. I was wondering if I could use a white chocolate ganache instead of the SMB and get the same results with the striping?
Hey Karen, I haven’t tried it myself so I can’t say for sure. I think the most important thing is making sure the base layer is really hard after being chilled. My guess is it should be fine because I know ganache does get firm after being chilled then again I can’t say for sure. I would love to hear how it goes if you give it a try! I am so glad to hear you love the SMB!!
Great recipe. I made this cake for my daughter’s 4th birthday and all 20 kids and their parents loved it. Thank you for sharing. I went with the traditional swiss merengue recipe tht you had as we live in hot climate area and I didn’t want to take a chance with the raw eggs. I wish I could have shown you the photo of the cake. May be next time. Started following you on FB.
Mansi, I’m so thrilled to hear that! Thank you for sharing and I wish I could see a picture as well. 🙂 Happy birthday to your daughter!