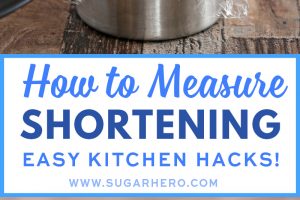
Shortening is a necessity in many baking recipes, but it can be tricky to measure correctly! Here are a few different methods for measuring shortening easily and neatly.

Easy Tricks to Measure Shortening
There are a few constants in life: Death. Taxes. And the fact that shortening is a pain in the neck to measure!
Don’t get me wrong, shortening is a great baking ingredient. It can add some much-needed to stability to frostings, and is perfect in homemade pan release.
But the fact remains that it can be annoying to work with. It leaves a greasy residue on kitchen equipment, and because it often comes in a big tub, measuring shortening properly can be tricky. But we have a few suggestions to help you measure shortening with no muss and no fuss, so you can start baking in no time!

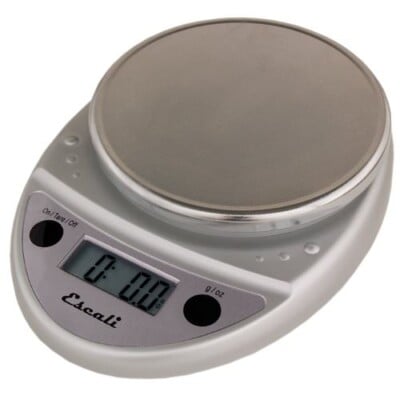
Method 1: Use A Kitchen Scale
This one might sound obvious, but all too often people forget to reach for their kitchen scale! If you have a scale, it’s the easiest and fastest way to measure shortening. If you’re looking to buy one, this kitchen scale is affordable and reliable.
To measure a smaller quantity of shortening on a kitchen scale, cover the top of the scale with plastic wrap, waxed paper, or parchment–basically, anything to prevent the scale from getting dirty! Measure out the quantity of shortening you need, then pick up the plastic wrap by the corners to form a little pouch, and transfer it off the scale and set it aside until you’re ready to use it.
If you need a large quantity of shortening, you’ll want to measure it into a bowl, but for small amounts, plastic wrap is cheap and convenient. Flip the shortening out of the wrap when you’re ready to use it, and it comes out cleanly and easily without any mess.
The important thing to know about measuring shortening is that it does not weigh the same as butter. Butter has additional water in it, so it weighs more, and you can’t assume that 1 cup of shortening weighs 8 oz like butter does.
Kitchen Tip: Weighing Shortening
A cup of shortening weighs 6.75 oz (~190 grams)

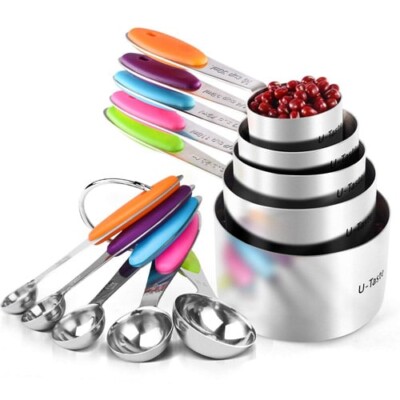
Method 2: Use Measuring Cups Lined with Plastic Wrap
No kitchen scale? No problem! Humble measuring cups will still work!
Since shortening is so greasy, and such a pain to clean off of kitchen gear, I like to minimize that task whenever possible. Instead of measuring shortening directly into a cup, line it with plastic wrap first. The plastic wrap keep the cup clean, and makes the shortening much easier to remove at the end.

When you’re ready to add the shortening to your recipe, just lift the shortening out using the plastic wrap as handles. Your cup is still clean, and you can easily add the shortening to the recipe in one big piece!

Kitchen Tip: Avoid Air Bubbles
One of the biggest challenges of using measuring cups is avoiding air pockets in the shortening. Make sure that after you add a spoonful of shortening to the cup, you press down firmly and spread it around just a bit to remove air pockets between layers.

Method 3: Water Displacement
“Water displacement” may sound a bit mysterious or confusing, but it’s a fancy name for a very simple concept!
This method comes from earlier generations, when kitchen scales weren’t the affordable and ubiquitous tools they are today. It’s a testament to the resourcefulness of cooks, and also a handy kitchen hack to know in a pinch!
We’ll use the example of wanting to measure out 1/2 cup of shortening. To use water to measure your shortening, fill a measuring cup with at least 3/4 cup of cold water. Be sure that the quantity of water you use is larger than the quantity of shortening that you need to measure.
Now, mentally add 3/4 cup (the water measurement) and 1/2 cup (the amount of shortening you need). That equals 1 1/4 cup. So add shortening to the cup of water until the water line reaches 1 1/4 cup. The shortening has displaced the water by 1/2 cup, so you KNOW that you now have 1/2 cup of shortening!
You can use this technique to measure any quantity of shortening you need. Just remember to use cold water (so the shortening doesn’t start to melt!) and use more water than shortening, so the shortening can be fully submerged in the water.
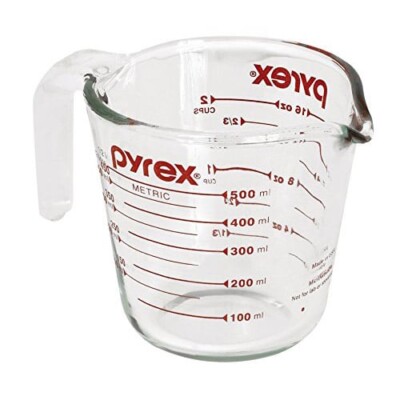


My mom taught me the water displacement method when I was a kid. But an even easier method to measuring shortening this way is if you need 1/2 cup of shortening, grab a one-cup measuring cup. Fill the cup with water to the 1/2 cup line. Now grab a spoon or knife and start filling that cup with shortening until the water reaches the one-cup measurement, pressing down each time to get the air bubbles out. The shortening will stay under the water. When you have your measurement, use the back of the spoon or knife to keep the shortening in the cup while you drain the water. Works for peanut butter, too!
That is genius–I love the draining water out of the cup trick! Thanks for sharing, Susan! 😀
If my recipe calls for 8oz. of butter & 8oz. of shortening (Crisco), how much Crisco should I put in my recipe (1/2 cup? 1 cup?)?
Hi Joanne, 8 oz is a little more than 1 cup of shortening. If you don’t have a scale to weigh it out, I would do 1 cup plus 2 TBSP and call it good!
Really great tips, but when measuring on the scale, why not just measure it in a separate bowl or something to avoid wasting plastic?
Here is the funny thing, my shortning per 250 ml cup is only 166 gr… is that a problem?
Hi Veronika, that’s a bit odd, since a 250 ml cup is actually a little larger than an American 8-oz cup, I wouldn’t have expected it to weigh even less than the American cup. Is it possible that the shortening was not packed in when you measured and there were some air pockets? My other thought is that a difference in brands might account for some of it. I typically use Crisco shortening, but it is possible that other types–especially if we’re talking about different countries having different products–might have a different mass.