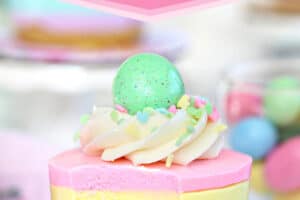


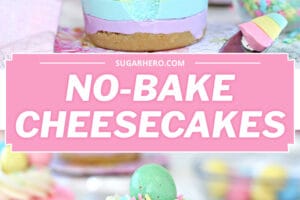


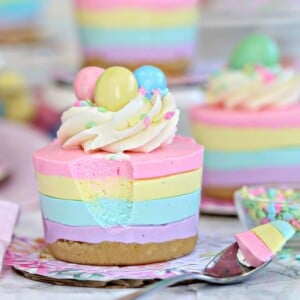
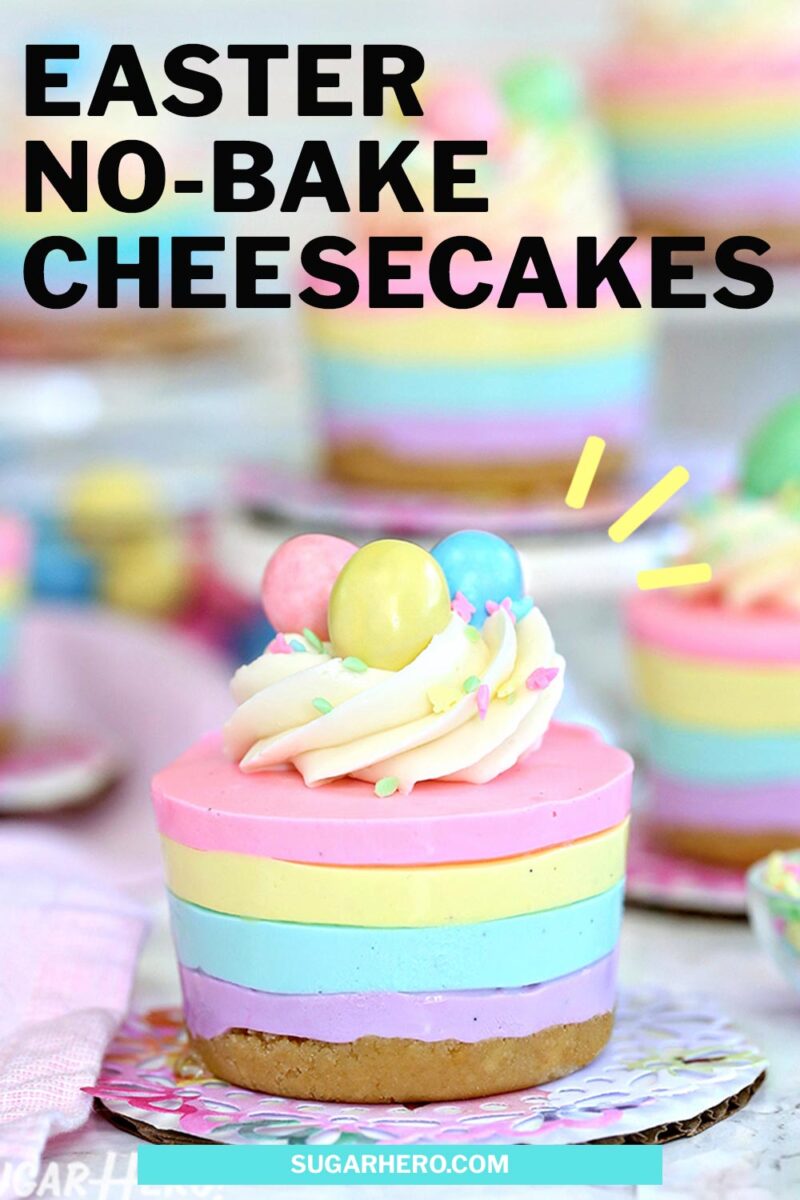
These No-Bake Mini Cheesecakes are the perfect no-sweat, no-effort Easter dessert. They’re cute and easy pastel striped cheesecakes, with no baking required!

Table of Contents
Easy Easter Cheesecakes
When it comes to popular Easter desserts, you probably usually think of things like carrot cake, fresh fruit tarts, and fun candies like peanut butter eggs and truffles.
Cheesecake probably isn’t the first thing that pops into your mind…until now. Once you make these adorable, easy Easter No-Bake Cheesecakes, you’ll want to make them an Easter tradition for your family year after year.
Since this recipe was first published in 2017, it has been liked, shared, and pinned hundreds of thousands of times, and gotten more rave reviews than any other Easter recipe on SugarHero. Readers love how beautiful and easy the cheesecakes are, and I’ve heard from many people that they have become a yearly spring staple at their family celebrations!
If you want more gorgeous spring desserts, don’t miss our Pastel Rainbow Gelatin Cups, Hydrangea Cakes, Easy Chocolate Flower Cupcakes, or Cherry Blossom Petit Fours!

Why You’ll Love These Easter Cheesecakes
There are so many reasons you’ll fall in love with these beautiful pastel-striped cheesecakes! Here are just a few of their charms:
- They’re easy – no baking required! (more on this below)
- They can be made in advance and kept in the freezer for over a week
- They’re a crowd pleaser – who doesn’t love cheesecake?
- They’re mini sized, so no need to mess around with slicing a whole cheesecake
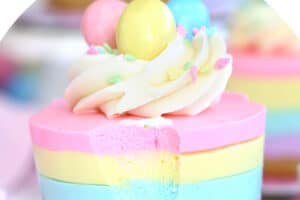
- The pastel colors makes them perfect for Easter
- The light and fresh texture goes well with berries, whipped cream, etc

What’s a No-Bake Cheesecake?
Another reason to love this recipe? They are not your traditional cheesecakes! These no-bake babies have a soft and fluffy texture, closer to a cream cheese mousse than to the ultra-dense New York Style Cheesecake.
A traditional cheesecake can feel indulgent, yes, but also very heavy. These are a gateway cheesecake, perfect for convincing cheesecake skeptics and for delighting long-time cheesecake lovers alike.
No-bake cheesecakes contain a lot of cream cheese, which gives them that signature tangy cheesecake flavor. But instead of adding eggs and baking the cheesecake, this recipe uses gelatin to provide stability and body, and whips heavy cream into the cream cheese mixture to lighten the texture. If cheesecakes typically feel too dense or heavy for you, a no-bake cheesecake might be the perfect recipe for you!

🧾 What You’ll Need
Ingredients
Here’s a summary of what you’ll need to make these mini cheesecakes. You can find more detailed information in the recipe card down below. (Links are affiliate links and I earn a small commission from qualifying purchases.)
- Shortbread cookies: the crust is made from buttery shortbread cookies. You can also use graham crackers or another type of cookie, but you may need to adjust the amount of melted butter in the crust to account for different crumb textures.
- Unflavored gelatin: Gelatin gives the cheesecakes stability and helps them keep their shape at room temperature. If you don’t want to use gelatin, you can assemble and serve the cheesecakes in glasses or parfait cups. See the FAQ below for more information and alternatives.
- Cream cheese: Use full-fat bricks of cream cheese–do not use “lite” or fat-free cream cheese, and don’t use the whipped variety in tubs. Make sure the cream cheese is at room temperature before beginning.
- Granulated sugar: The granulated sugar adds just enough sweetness to balance out the tangy cream cheese. And no worries about grittiness–it dissolves perfectly so there’s no grainy texture.
- Heavy cream: You can use either heavy cream or whipping cream in this recipe. The recipe also lists “whipped cream,” which is optional and used for decorating.
- Vanilla bean paste: I love vanilla bean paste for its bold vanilla flavor, but you can substitute vanilla extract, or another flavored extract like lemon, orange, almond, or coconut.

Equipment
- Silicone muffin pan: The #1 piece of equipment you’ll want is this silicone jumbo muffin pan. A silicone pan is a must for easily unmolding the cheesecakes, and this pan makes perfect individually sized desserts. It also has straight sides, which look really nice, and the soft silicone is easy to work with.
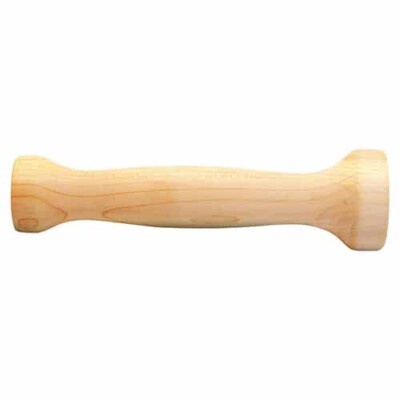
- Tart tamper: If you often make cheesecakes, tarts, or graham crusts, you’ll also want to pick up a tart tamper. They’re cheap and will give you perfectly even crusts, every time!
📋 How to Make Easter No-Bake Cheesecakes
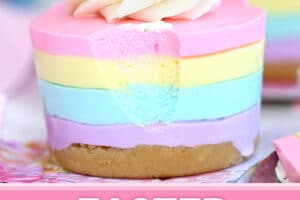
The keyword with this recipe is SIMPLE. It’s made with just 1 batch of cheesecake tinted 4 different colors, layered on top of each other, one after the other, no chilling required in between. Score! Here’s a quick summary of how everything comes together:

Procedure
- Make shortbread crust. Make a quick crust from crushed shortbread cookies and melted butter. Press it evenly into the silicone muffin pan cavities.
- Hydrate the gelatin. Combine unflavored gelatin and cold water, and mix them together. Let it sit for a few minutes so the gelatin absorbs the water.
- Start the cheesecake filling. Mix the softened cream cheese, sugar, lemon juice, flavorings, and room temperature cream until nice and smoooooth. The mixture should be room temperature.
- Heat the gelatin. Microwave the firm gelatin for a few seconds until it is liquid, warm to the touch (not hot), and free of lumps. Mix it into the cream cheese mixture.
- Divide and color the filling. Divide the cream cheese into 4 parts, and color each one a different color.
- Layer the filling. Layer the colors on top of each other on the crust.
- Freeze. Place mold in the freezer until the cheesecakes are very firm.
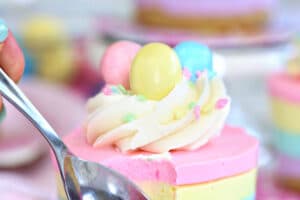
- Unmold, thaw and decorate. Pop them out of the pan, and decorate! The final touch is a swirl of whipped cream, a pinch of Easter sprinkles, and a candy egg or two (or three).

💡 FAQs and Troubleshooting
Here are the most common questions we get about this recipe. If you have questions or are having trouble with the cheesecakes, take a look and see if this answers your question. If not, you’re welcome to leave a comment below so we can help troubleshoot!
Yes and no. The gelatin helps stabilize the cheesecakes so they hold their shape at room temperature. If you want them to look like the picture, unmolded and holding their layers on a plate, then yes, you should use the gelatin. If you want to make the cheesecakes in small jars or glasses, so you don’t have to unmold them, then you can omit the gelatin (and water) and you should be good to go!
I have not tried this recipe with agar-agar and can’t promise that it will work the same. If you have successfully made it with a gelatin substitute, I would love it if you would leave a comment so other readers will know.
Of course! I love this pan because it produces really beautiful smooth, straight sides on the cheesecakes, but it’s by no means a necessity in making this recipe. You could use:
• a different silicone pan
• a traditional mini cheesecake pan
• a traditional jumbo muffin pan
• a traditional regular muffin pan
If you do not use a silicone pan, you will want to line the sides with something to make sure you can easily remove the cheesecakes later, because the cheesecakes will stick to the sides of the pan. This can be strips of acetate sheets, parchment or waxed paper strips, or even cupcake liners. Your choices might produce a textured result on the sides of your cheesecakes, but the taste will still be the same!
Absolutely! An 8″ or 9″ springform pan works great. Make the recipe as directed (no need to double the ingredients), and layer everything into the larger pan instead of dividing them between small cups.
To set a larger no-bake cheesecake, simply chill it in the fridge for 4+ hours (overnight for best results) and enjoy! It’s not necessary to freeze it the way you would with the smaller cups.
Texture problems are often temperature problems. To make sure the cheesecake batter isn’t too thin when layering, make sure that the gelatin is warm and fluid, but not hot, when mixing it into the cheesecake. The cheesecake mixture should be smooth but still have body when you mix it together. If it does seem really liquidy, wait a few moments for it to thicken before you start layering. You can also refrigerate it briefly between layers if you think you’re going to have problems with the colors mixing during layering.
To prevent the cheesecake from being too thick to layer nicely, just make sure that the gelatin is nicely warmed before you add it to the cheesecake, and that the cheesecake mixture is at room temperature so it won’t start to set too quickly.
Do not replace unflavored gelatin with flavored gelatin. The flavored variety contains less gelatin than a packet of unflavored and will effect the stability of the dessert. Furthermore, flavored gelatin has a lot of sugar in it which will change the texture of the no-bake cheesecakes.
If you’d like, you can make the mini cheesecakes in advance and freeze them until your ready to use them. After the 2-hour setting period in the freezer, you can either:
1. Wrap the entire mold. Keep the cheesecakes in their mold, wrap the outside of the mold really well with plastic wrap, and then place them back into the freezer to fully harden.
2. Wrap individually. Unmold the cheesecakes after the 2-hour setting time, wrap them well with plastic wrap, and place them in the freezer again.
I’d recommend removing them from the freezer the night before you need them, and thawing them overnight in the refrigerator to be sure they are completely thawed by the next day. Finish decorating the tops just before serving.

These Easter No-Bake Cheesecakes are such a beautiful spring dessert, and are sure to be the hit of your Easter table. If you like these, you’ll also love some of our other Easter desserts, like these adorable Spring Chick and Easter Basket cupcakes, delicious Peanut Butter Easter Eggs, and fun Bunny Cake.
💜More Pastel Easter Recipes
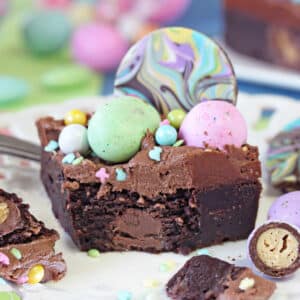
Frosted Easter Brownies
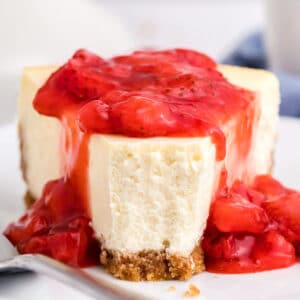
New York Style Cheesecake
Leave a Review!
If you make this recipe, let us know! Leave a ⭐️⭐️⭐️⭐️⭐️ rating on the recipe below, and leave a comment, take a photo and tag me on Instagram @elabau, or use #sugarhero on IG!
Easter No-Bake Mini Cheesecakes
Ingredients
- 6 oz shortbread cookies, approx. 12 round cookies
- .5 oz unsalted butter, (1 TBSP), melted
- 2 TBSP cold water
- 1 packet unflavored powdered gelatin, 1/4 oz, or 2.5 tsp, see Note below
- 1 lb cream cheese, full-fat, at room temperature
- 3.5 oz granulated sugar, ½ cup
- ½ tsp lemon juice
- 1 tsp vanilla bean paste, can substitute vanilla extract
- Pinch of salt
- 1 cup heavy cream, at room temperature
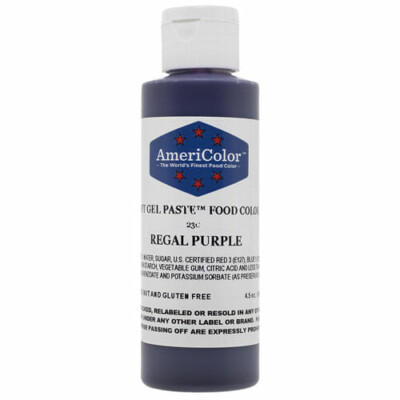
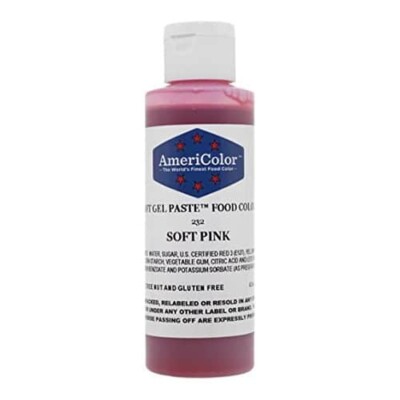
- Assorted gel food coloring, 4 colors recommended, I use Americolor brand
- ½ cup whipped cream, to decorate
- Candy eggs, to decorate
- Sprinkles, to decorate
Instructions
- Make the crust. Place a jumbo silicone muffin pan on a baking sheet. Blitz the shortbread cookies in a food processor, or crush them in a plastic bag with a rolling pin until they’re fine crumbs. Mix them in a small mixing bowl with the melted butter.
- Fill pan with crust. Divide the shortbread crumbs between the 6 cavities in the muffin pan, and press them firmly into the bottom of the pan to form your cheesecake crust.
- Hydrate gelatin. Place the cold water in a small bowl, and sprinkle the gelatin on top. Whisk them together, then let the bowl sit for 5 minutes so the gelatin can hydrate and absorb the water.
- Beat cream cheese. Meanwhile, put the room temperature cream cheese in the bowl of a large stand mixer fitted with a paddle attachment, and beat it until it is smooth, creamy, and free of lumps. (A hand mixer can also be used.)
- Add ingredients to cheesecake filling. Add the sugar, lemon juice, vanilla bean paste, and salt. Mix well, scraping the bottom and sides of the bowl occasionally. With the mixer running on low speed, gradually add the room temperature heavy cream, mixing until everything is smooth and well-combined.
- Heat gelatin. Once the gelatin feels very firm, microwave it for 10-15 seconds, until fully melted, liquid, and warmer than room temperature but not hot. Use a small whisk or spoon to stir the gelatin and ensure it's lump-free. Add the warm liquid gelatin to the room temperature cheesecake filling and mix it in by hand, scraping the sides and bottom well. Note: Temperature will effect the final outcome of the cheesecakes. If the gelatin is not warm enough, and/or the cheesecake mixture is too cold, the gelatin might begin to set before it is evenly mixed into the filling and could cause gelatin clumps.
- Divide and color cheesecake filing. Divide the cheesecake into 4 portions (each should be about 7 oz, if you want to measure them out.) Stir a drop of gel food coloring into each one and mixing until the color is smooth and uniform.
- Top crust with first layer of cheesecake. Take your first color and divide it between the 6 cavities—I found it was fastest and easiest to use a cookie scoop, but you could use a regular spoon, or even pipe the cheesecake in if you want to be really precise. Spread it into a smooth layer with the back of a spoon, then add a second color on top of the first.
- Work quickly to finish layers. Continue to layer the cheesecake colors until all 4 of them have been added to the pan. It's important to work fairly quickly during this step, so the cheesecake colors don't start to set too much and become difficult to spread.
- Freeze. Smooth the tops of the cheesecakes, then place them in the freezer for at least 2 hours to firm up — they should feel very solid to the touch before you try to unmold them. The exact time will depend on the temperature of your freezer.Note: If you're making the mini cheesecakes in advance, wrap the outside of the mold really well with plastic wrap to prevent freezer burn, and place them back in the freezer until you're ready to use them. Thaw the cheesecakes overnight in the refrigerator the day before you need them before unmolding them.
- Unmold the cheesecakes. Press from the bottom of one of the silicon cavities and turn it upside-down, pushing the cheesecake out into your hand. Repeat until all the cheesecakes have been unmolded. The cheesecakes can be refrigerated for several days after being unmolded. Defrost and decorate just before serving.
- Defrost and decorate. Let the cakes sit at room temperature for 30 minutes to warm. Then top each cheesecake with a swirl of whipped cream, a pinch of sprinkles, and a few candy eggs, if desired. Serve chilled but not frozen.
- Storage. Store the cheesecakes, well-wrapped, for 4-5 days in the refrigerator.
Video

Recipe Notes
Measuring Tips
Our recipes are developed using weight measurements, and we highly recommend using a kitchen scale for baking whenever possible. However, if you prefer to use cups, volume measurements are provided as well. PLEASE NOTE: the adage “8 oz = 1 cup” is NOT true when speaking about weight, so don’t be concerned if the measurements don’t fit this formula.
Want to learn more about baking measurements and conversion?
Nutrition


This was my fourth year making these for Easter! The first time I made them my family loved them so much, they asked for them every year since. 🙂 I use silicone molds and they turn out perfect every time. I want to start experimenting with different colors too. Thank you for an amazing recipe!
Hi Hilda! That makes me so happy. So glad they’ve become a family tradition for you. You’ll have to let me know what other colors you try. I’d love to see pics. All the best to you.
These mini cheesecakes are just so beautiful! The taste ,the exterior are equally amazing. Thank you for this amazing recipe ❤️
Hi Andrea! I’m so glad you enjoyed the recipe. Thank you for the lovely comment. Happy baking!