These Chocolate-Covered Raspberries have an amazing sweet-tart flavor and are perfectly juicy when you pop them into your mouth over and over again! Don’t be shy, dig in!

Move over, chocolate-covered cherries. There’s a new chocolate-covered candy king: chocolate-covered raspberries.
Think about it: why should cherries have all the fun? Because if we’re being honest, maraschino cherries are waaaay less fun than fresh raspberries. They’re painfully sweet, barely related to their fresh cherry cousins, and are comprised of approximately 68% red dye, 30% sugar, and 2% actual cherry. Fresh raspberries, on the other hand, have an amazing sweet-tart flavor, a perfectly juicy texture, and are just begging to be dipped in fondant and smothered with semi-sweet chocolate. Their wish is my command.

So yes, despite their name, these aren’t simply raspberries that have been dipped in chocolate. You’re all smart cookies, and probably don’t need a recipe for that. Instead, I’ve added the intermediate step of dipping the raspberries in melted fondant, which is how chocolate-covered cherries are made. After a period of sitting, the hard fondant coating liquefies, so that the raspberries are surrounded by a sweet fluid inside of the chocolate shell. It’s more precarious for your clothes and dignity when you bite into them, sure, but it’s also more delicious. And isn’t that a worthy trade-off?
I’ve created a super-scientific flow chart to illustrate this complicated process:
 No recipe needed, am I right?
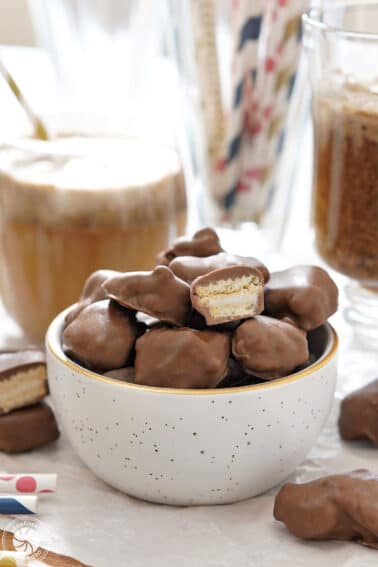
I apologize for the glut of pictures, but I couldn’t stop myself from taking dozens (hundreds! thousands!) of shots. I love the contrast between the fresh berries and the glossy satin of the chocolate coating—it so perfectly represents the contrasting flavors and textures of the candy.

These pictures were taken about 12 hours after the candies were made, and as you can see from the cut candies, the fondant had started to liquefy but obviously hadn’t fully liquefied yet. I like it because you can actually see the fondant layer in the candies, while also getting a sense of how juicy they will become. They’re fully liquid and ready to eat after about 2 days, and I’d say they’ll last about 5 days total (refrigerated) assuming you start with berries that aren’t near their expiry date in the first place.
Of course, if you just can’t wait the 2 days before eating them, they’re still delicious, and the fondant layer just adds a bit of soft sweetness to the candy. So if you’re not one for delayed gratification, don’t let the waiting time deter you—you can skip it entirely.

Berry season is coming to an end all too soon, but you can make the best of the remaining season by trying this candy before it’s too late. I promise, you may never look at cherry cordials the same way, once you’ve tried it with fresh raspberries instead. The combination of soft, fresh berry, sweet juice, and rich chocolate is amazing.

And why stop with raspberries? I imagine this would work equally well with blackberries or boysenberries. (I’m a little unsure about blueberries, but I imagine there’s some enterprising sugarhero out there who should give it a try and report how it goes.) If you’re not too scarred by maraschino cherry associations, you could even try it with pitted fresh cherries and see what a fantastic difference it makes to use flavorful, fresh produce. The recipe is multi-step and somewhat time consuming, I admit, but it’s also a real showstopper, and I think it will become one of my summer traditions.

Don’t miss our collection of Fun Valentine’s Day Dessert Ideas – see the whole web story here!
🍬More Candy Recipes You’ll Love

Chocolate Covered Strawberries

Chocolate-Dipped Frozen Bananas

Chocolate-Covered Raspberries
Ingredients
For the Raspberries:
- 60 large ripe raspberries, from about 12 oz
- 1 ½ lbs semi-sweet chocolate
- 2 lbs fondant, recipe follows
- pink gel food coloring, optional
- Raspberry Flavoring, optional
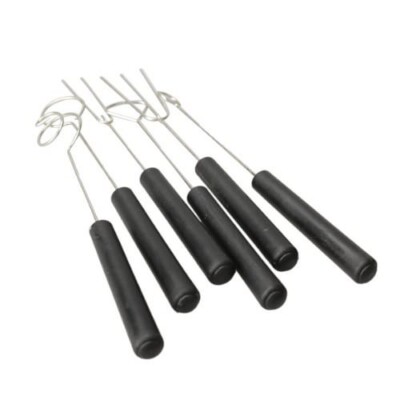
- Chocolate thermometer, for tempering, optional but recommended
For the Fondant:
- 1/2 cup water, (4 oz)
- 1/2 cup light corn syrup, (5 ½ oz)
- 4 cups granulated sugar, (1 lb 12 oz)
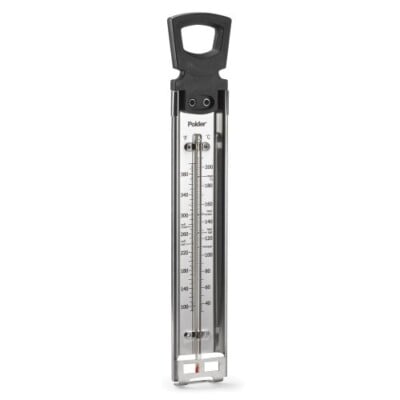
- Candy thermometer
Instructions
To Make the Fondant:
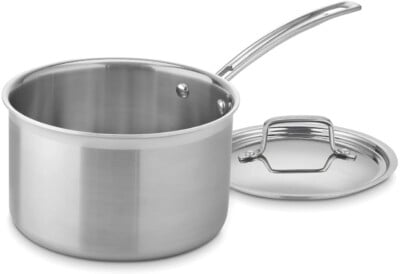
- In a 4-quart saucepan, combine the water, corn syrup, and granulated sugar. Stir until the sugar dissolves, then wash down the sides of the pan with a wet pastry brush to prevent sugar crystals from forming. When the sugar syrup comes to a boil, insert a candy thermometer.
- Cook the syrup, without stirring, until the thermometer reaches 238° Fahrenheit (114°C). Pour the syrup into the bowl of a large stand mixer, but do not scrape down the sides and bottom of the saucepan. Insert the candy thermometer, and let the syrup cool, undisturbed, at room temperature until it reaches 120° Fahrenheit (49°C). Depending on the temperature of your room, this may take an hour or more.
- Once at 120°F, start mixing the fondant on medium-low speed using the paddle attachment. It will gradually become thick and opaque, and after about 10 minutes it should have a thick, sticky dough texture. Once the fondant holds its shape, scrape it out of the bowl, shape it into a ball, and cover it with cling wrap until you’re ready to use it.
- If the fondant starts to get dry and crumbly when mixing, lightly wet your hands and gather the fondant into a ball. Dust a work surface with powdered sugar and knead the fondant like bread dough until the texture has smoothed out, any crumbliness is gone, and it is supple and pliable.
- [Alternately, if you don’t have a mixer, you can pour the fondant out into a 9×13-inch pan and mix it by hand. Use a stiff plastic or wooden spoon to stir the fondant in a figure-8 pattern. Swirl the spoon through the candy, then gather it all together in the center of the pan and repeat. During this process, the clear, sticky syrup will gradually become more creamy and opaque. Continue to stir the fondant as it becomes thicker, until eventually it is stiff and difficult to stir.]
To Make the Raspberries:
- Cover several baking sheets with parchment or waxed paper. Fill the bottom pan of a double boiler with water, and bring it to a simmer. Place the fondant in the top pan of the double boiler and place it over the simmering water. Heat the fondant, stirring frequently, until it is liquid. Add a candy thermometer and continue to heat the fondant until it reaches 160° Fahrenheit (71°C).
- Remove the pan from the heat and stir in 1-2 drops of pink food coloring and a drop or two of raspberry flavoring, if desired. (Both are optional—I like the touch of flavor and color, but you can easily omit them or substitute another extract, like vanilla or almond, instead.) Drop a raspberry into the fondant, and press it down with dipping tools or a fork until it is submerged. Scoop it out of the fondant and let the excess drip back into the bowl. Set it down on the covered baking sheet, and repeat with the remaining raspberries.
- If the fondant starts to get too thick, place it back over the water bath to warm it, and add a spoonful or two of water if necessary to thin it to a dip-able consistency. Let the raspberries sit at room temperature for 10 minutes, until the fondant is completely set and hard.
- To temper the chocolate, remove at least a quarter of the chocolate (about 6 oz) and set it aside—it doesn’t have to be a precise amount. Chop the remaining 3/4 chocolate into small pieces, and place in a microwave-safe bowl.
- Microwave the chopped chocolate in 30-second intervals, stirring after every 30 seconds. Once melted and smooth, insert the chocolate thermometer and make sure that it has reached a temperature of 115° Fahrenheit (46° C) on the thermometer. If it’s not close to that, heat it in short bursts until it reaches the right temperature.
- Add the reserved block of chocolate and stir it in. Continue to stir the chocolate frequently as the block of chocolate melts and the chocolate cools. When it reaches 90° F (32° C), test it to see if it’s in temper. Smear a bit of chocolate onto a piece of parchment. If it starts to set within a few minutes, your chocolate is in temper. If it remains wet-looking and does not set, continue to stir the chocolate and let it cool a few more degrees before testing again. Once tempered, remove any excess unmelted chocolate from the bowl and set aside to use at a later time.
- When you’re ready to dip, pick up a fondant-covered raspberry with your fingers, and dip the bottom into the chocolate, so that it comes about a quarter up the candy. Let excess drip off, then place it back on the baking sheet. Repeat until the bottoms of all the candies are dipped in chocolate—this will help prevent your candies from having holes in the bottom and leaking fondant everywhere. Refrigerate the trays for just a few minutes to set the chocolate.
- Use a fork or dipping tools to dip the raspberries completely in the chocolate. If any part of the raspberry remains uncovered, the liquefying fondant will leak out, so it’s important to dip the berries carefully and thoroughly. Let the chocolate set at room temperature. The fondant will start to liquefy quickly. After 12 hours it will be partially liquid, and after 24-48 hours it will be completely liquid.
- Store Chocolate-Covered Raspberries in an airtight container in the refrigerator. They will last about 5 days, but have the best texture within the first 3 days of making them.
Recipe Notes
Measuring Tips
Our recipes are developed using weight measurements, and we highly recommend using a kitchen scale for baking whenever possible. However, if you prefer to use cups, volume measurements are provided as well. PLEASE NOTE: the adage “8 oz = 1 cup” is NOT true when speaking about weight, so don’t be concerned if the measurements don’t fit this formula.
Want to learn more about baking measurements and conversion?


One of my favorite combinations. Chocolate and raspberry. Will definitely make these come this years raspberry season. I will be adding amaretto to the fondant to make it my ultimate favorite flavor combo.
I love that idea–chocolate, raspberry, and almond is an amazing combination! Let me know what you think when you give it a try. 🙂
These look out of this world delicious! I can hardly wait for raspberry season!
I included this in a roundup I did of decadent chocolate recipes! I’d love for you to check it out and share it on social media if you think your followers would like it! Here is the link:
http://hellocreativefamily.com/36-decadent-chocolate-recipes/
Thanks so much for creating such a delicious dessert!
Best Wishes,
Crystal
Thanks so much, Crystal, and that round-up looks great!
These look amazing!
I like your idea, what a simple way you design with raspberry and chocolates they look amazing and I love the combinations of raspberry and chocolates.
Oh my gosh, what a brilliant idea!! My favorite berry is raspberries and I can only imagine how wonderful these are!! I was actually all set to make chocolate covered cherries that I’ve been making for years, but I think I may just have to ditch the cherries and go with the fresh raspberries. One question–I make a fondant that is a solid fondant that gets wrapped around the cherries (called cream fondant). Do you think that would work in this situation? I’ve already made it and would love to use it if possible.
I absolutely love all your recipes and ideas!! Thanks for always coming up with really cute, interesting things 🙂
Kim
Hey Kim, I think that should work great! I am excited for you to try it and would love to hear how it goes, and see pictures! Thanks!