
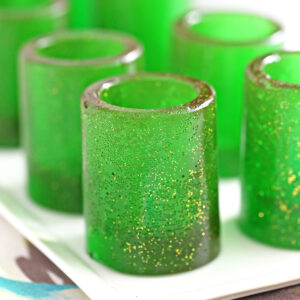
Now you can make your own Candy Shot Glasses out of sugar! Fill them with your favorite drink, whipped cream, mousse, or whatever else you’d like! They’re great for holidays and parties.

Candy Shot Glasses
Ever since I made my Candy Cane Cups a few Christmases ago, I’ve been itching to experiment more with my silicone shot glass mold. These molds are SO cool–you can use them with store-bought candy, like I did, or use them to mold chocolate, ice, rice crispy treats, gelatin into shot glasses…and on and on! It really is so versatile, and it’s a shame it’s taken me so long to pull the mold back out and play with it again.
Another fun thing you can do with a silicone shot glass mold is make candy shot glasses from scratch!
The previous candy shot glasses I made were done by melting store-bought candies together. It’s a neat trick–you can wedge a bunch of unwrapped hard candies into the mold, then bake it in the oven at 350 degrees F for a short time to fuse the candy together. Ta-da! Instant candy cups, no boiling sugar required. It’s a fun effect and works with almost any hard candy–starlight mints, butterscotch drops, and Jolly Ranchers all work well. For more precise information about how to make the cups using store-bought hard candy check out my Candy Cane Cups post.

Why Try Making Candy Shot Glasses From Scratch?
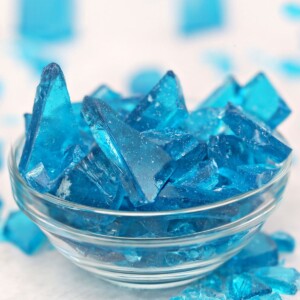
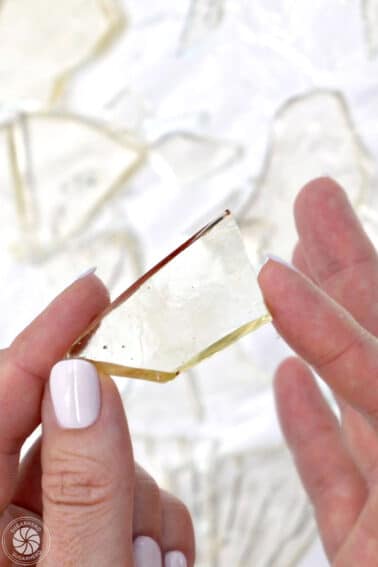
I wanted to try something different this time, so I made the candy cups completely from scratch. Making them from scratch (versus melting together store-bought candies) produces a shot glass with a clearer color, better texture (no seams between the candies!), and is potentially much cheaper. If you only want to make one color of shot glass, you might find yourself having to buy lots of packages of multi-colored candies just to get enough of the one you want! When I tried this recipe with green Jolly Ranchers, it took 16 green Jolly Ranchers to make a full shot glass…and that was just one! You also have the ability to completely customize the flavor and color of the candy shot glasses.

How to Make Edible Candy Shot Glasses:
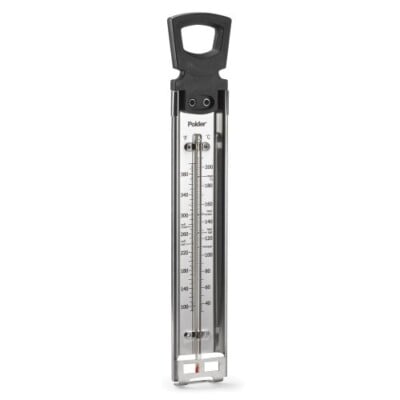
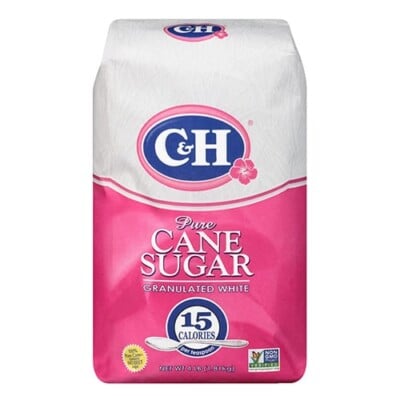
These homemade candy shot glasses are made with water, sugar, corn syrup, flavoring, and gel food coloring. That’s it! The water, sugar, and corn syrup are boiled together and monitored with a candy thermometer so they reach the proper temperature. (If you are new to using a thermometer, check out my guides for how to use a thermometer and how to test and calibrate a thermometer correctly.)
Once there, the flavoring and coloring is added. I wanted to give my glasses a little glitz, and I knew that my family would most likely not actually be chowing down on them, so I added some sparkling disco dust. If your group will likely devour the shot glasses, make sure to use a certified edible gold dust, or omit it entirely.
To reduce air bubbles in the final product, you’ll want to spray the inside of the silicone mold with a light layer of nonstick cooking spray, and also let the candy syrup stop bubbling before pouring it into the molds. You will still have a few air bubbles (it’s unavoidable!) but greasing the molds and letting the syrup rest for a few moments will eliminate the worst of them.

Fair warning, these shot glasses take awhile to cool and harden! If you want to make them in bulk, you’ll probably want to pick up several molds so you can do them all at once. It took 2-3 hours for them to be completely hard at room temperature, but refrigerating them can speed up this process.
Once they’re hard, it’s as simple as pushing each glass out from the base of the mold. The silicone, combined with the light layer of nonstick spray, means that there is no chance of these babies sticking to the mold. Just push, slide, and fill!

What to Put in Candy Shot Glasses:
Um…everything! Hah, but seriously, they’re very versatile. Contrary to the name, they’re good for so much more than just serving shots! In the past I’ve mostly used my glasses to serve warm beverages like hot chocolate (plain or spiked!) but honestly, any drink will do. You can also fill them with your favorite mousse, custard, pudding, whipped cream, or other spoon-able dessert.

What You’ll Need to Make Candy Shot Glasses:
The #1 thing you’ll need is a silicone shot glass mold! It’s affordable, lasts for years, and is safe in the oven, freezer, and every temperature in between.
You’ll also need a candy thermometer. There are expensive ones out there, but if you’re just starting out, here’s an affordable candy thermometer that I recommend.
💚More Candy Recipes!
Breaking Bad Blue Rock Candy
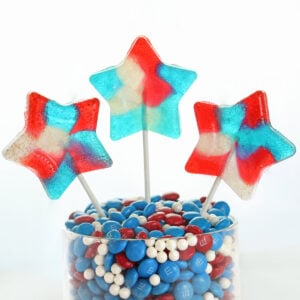
Easy Homemade Lollipops
DIY Candy Shot Glasses
Ingredients
- 8 fl oz water, (1 cup)
- 14 oz granulated sugar, (2 cups)
- 22 oz light corn syrup, (2 cups)
- 2 tsp mint extract
- 2 drops Green gel food coloring, I used Americolor brand.
- Silicone shot glass mold
- Candy thermometer
Instructions
- Prepare your silicone shot glass mold by coating the cavities with a very light layer of nonstick cooking spray. Place the mold on a baking sheet.
- Combine the water, granulated sugar, and corn syrup in a 4-quart saucepan over medium-high heat. Stir until the sugar dissolves, then wash down the sides of the pan with a wet pastry brush to prevent sugar crystals from forming. When the sugar syrup comes to a boil, insert a candy thermometer.
- Continue to cook the sugar syrup without stirring. When the thermometer reads 260 F, add the gel food coloring but do not stir it in—the bubbling of the candy will work to disperse the color.
- Cook the syrup until the thermometer reads 290° Fahrenheit (143° C). Remove the pan from the heat, and let the candy stop bubbling completely. This will probably take several minutes. Once it is still, stir in the mint extract.
- Carefully pour the hot sugar syrup into the prepared molds, filling them to the top of the cavities. Let the candy sit for 2-3 hours at room temperature, until completely cool to the touch and hard. To remove, press the candy up from the bottom of the mold, and twist slightly at the top to loosen the middle portion.
- Fill the shot glasses with your beverage of choice, or any soft treat like mousse, custard, or whipped cream! The will get sticky after use, so they can’t be saved and re-used later, but they are a very fun novelty for a party!
Recipe Notes
Measuring Tips
Our recipes are developed using weight measurements, and we highly recommend using a kitchen scale for baking whenever possible. However, if you prefer to use cups, volume measurements are provided as well. PLEASE NOTE: the adage “8 oz = 1 cup” is NOT true when speaking about weight, so don’t be concerned if the measurements don’t fit this formula.
Want to learn more about baking measurements and conversion?


I live in the uk can you tell me what product corn syrup is in this country thank you
You show the sour apple candy cup molds, but no recipe. I only see recipe for candy cane cup molds. Do I use sour apple candy melted to liquid?
Hi Debbie!
You can make these cups two ways–by melting hard candy (like Jolly Ranchers) to make the cups, or by making a sugar syrup and pouring that into the molds. Here’s the recipe to make them using a sugar syrup:
https://www.sugarhero.com/diy-candy-shot-glasses/#wprm-recipe-container-22594
The advantage of this method is that you can totally customize the flavor and color of the cups, and the resulting cups are also clearer, with fewer air bubbles.
If you did want to make these candy cups by melting hard candy, you’d use about 15-16 Jolly Ranchers per cup. Make sure that you really press them together, because their volume will reduce as the candy melts. Place them in a 350 F oven for about 10-12 minutes, checking them every 3-4 minutes. Remove when the candy is melted and just starting to bubble up. Let them cool completely before removing, and enjoy!
I am looking to make these, but as a scotch glass as part of a decoration on a cake. Curious if I use real scotch to fill the glass, that it won’t dissolve the sugar glass? Thanks for your help!
I want to make these with butterscotch drops. You mentioned after melting in the stove to put in the oven. Can you let me know what temp and how long please. I love your post on these homemade shot glasses. Thank you
Hi Holly. I’m so sorry my response has been delayed. Hopefully I’m not too late for your baking project! You’ll want to preheat the oven to 350 degrees F. Bake the candy cups in the preheated oven for 12-14 minutes, until the candy has melted together in the cups. You might start to see just a few small bubbles along the edges. Watch it carefully, because you don’t want the candy to turn bubbly and brown. Remove the pan from the oven and immediately use a knife or metal spatula to scrape off any candy that has melted outside of the cups. Use a metal spoon or the bottom of a flat cup to gently press on the candy, to remove any air bubbles and make a completely flat bottom. Let the cups cool completely before proceeding. Once cool, turn the cups inside out and gently pull and twist the candy cup out of the mold. Fill the cups with your favorite holiday cocktail, coffee, or hot chocolate. You can also fill them with whipped cream or mousse! Once filled, they will start to get soft and sticky, so it’s best not to fill them until right when you’re ready to serve them.
I plan to add these details to the DIY Candy Shot Glasses post, but you can also reference my Candy Cane Cups Post if you want more detailed instructions. All the best to you!
Hi we don’t have corn syrup in my country can I use hunny?? Thank you
Hi Maria. Honey is a lot different than corn syrup. I’ve never tried to replace it in this recipe, but I don’t think it would work very well. The best substitution would be glucose syrup which is common in many other countries. If you can’t find that, my second choice recommendation would be golden syrup. I hope that helps and that you can find what you need to make the recipe. Best of luck.
Hello! I can’t wait to try this recipe. What other flavorings would you consider other than mint? I was thinking about using the shot glasses with some kind of vodka drink
Hi Tana! Since vodka is flavorless, it will really depend on if you are serving flavored vodka or a mixed drink. To be safe, you could go with vanilla bean paste – it goes with practically everything. If you’re leaning toward a fruity drink, you might flavor the glasses with orange or lemon (I find that other fruity flavors like strawberry and raspberry taste kind of fake). I hope that helps. Best of luck with your project!