Tempering chocolate is a skill that’s invaluable if you want to do any sort of candy making. Even the simplest chocolate recipes can be improved by using this easy, reliable and relatively fast method of tempering chocolate.
🤎An Important Candy Making Skill
Today I’d like to do something a little different. I want to take off my chef’s apron and put on my tweed professor’s jacket (you know, the one with the corduroy elbow patches) and lecture talk about a subject near and dear to my sugar-lovin’ heart: tempering chocolate.
Tempering chocolate is a skill that’s invaluable if you want to do any sort of candy making. Even the simplest chocolate recipes, like chocolate-dipped strawberries, can be improved by using tempered chocolate. And not tempering chocolate can have dire consequences (well, relatively speaking…candy-making is usually pretty low stakes) on the outcome of your candies.
There are a lot of different ways to temper chocolate, but I definitely have a preferred method. It’s easy, it’s relatively fast, and it’s very reliable. I taught myself how to temper chocolate from reading many different sources, and it took me a lot of trial and error to figure out my favorite approach. Some methods were way too complicated and time-consuming, and some never worked for me at all. So, in the interest of sharing the wisdom and sharing the love, may I present The SugarHero Guide to Tempering Chocolate.

Table of Contents
❓But Why Should I Care About Tempering Chocolate?
See this disgusting pile of crumbly, white, streaky chocolate down there? That, my friends, is chocolate that has been melted and left to cool at room temperature. It has “bloomed,” meaning the fat has come to the surface of the chocolate. It’s not moldy, it’s not bad, and it’s not old. It’s just chocolate that is untempered, and untempered chocolate is chocolate that is just waiting to ruin all of your carefully-made treats. Beware.
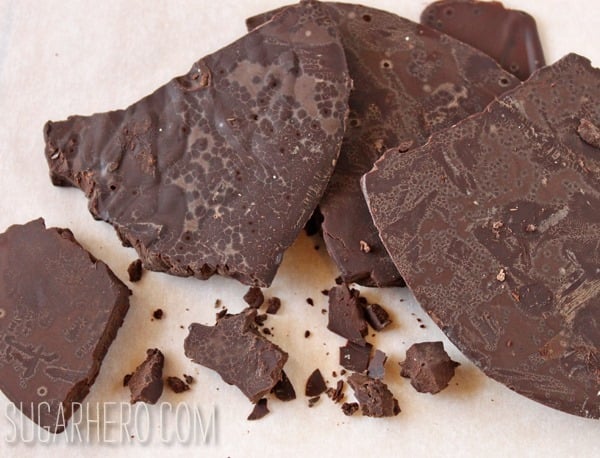
It might not happen every time, but when you don’t temper chocolate, you’re running the risk of having your chocolate candies become soft, easily melted, streaked, or mottled with white and gray patches.
You know how when you unwrap a fresh bar of chocolate, it’s glossy and beautiful? And if you break it in two, it comes apart with a crisp snap? THAT is how tempered chocolate looks and behaves, and that is what I want you to have for your own chocolates!

🥣Okay, I’m Convinced—What Equipment Will I Need to Temper Chocolate?
Tempering chocolate simply means that you heat it and cool it to a precise temperature. It’s not scary and it’s not complicated. Here’s a complete list of everything you’ll need:
- At least 1 pound of tempered chocolate. “Tempered chocolate” just means that it’s glossy and shiny when you open it—it hasn’t gotten dull or streaked like in the picture above. You need at least 1 pound because it’s difficult to temper chocolate in smaller quantities. 1 pound should be enough to dip 20-30 items, depending on their size. You can always scale up with this method. (If you have excess tempered chocolate, simply pour it out on parchment, let it harden, and then chop it up and use it for another recipe. When it comes to tempering, there’s no such thing as wasted chocolate!)
- A microwave and a microwave-safe bowl
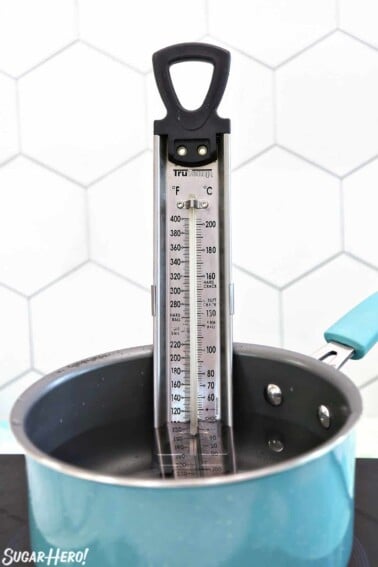
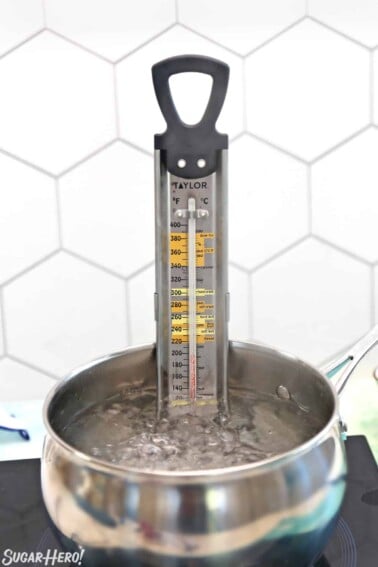
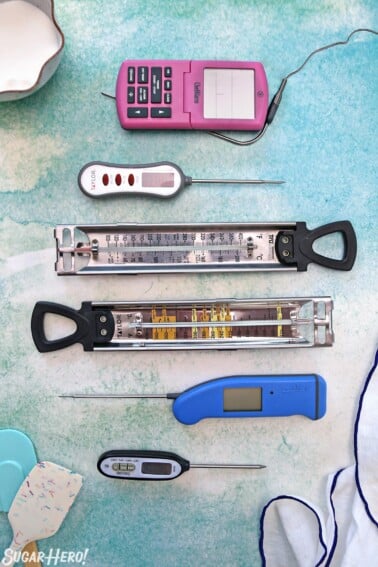
- A chocolate thermometer. I use this thermometer, which is $10 on Amazon. How sweet is that? You can also use an instant-read thermometer if it goes down to 80* Fahrenheit and measures in 1-degree increments. I never use them, though, so I don’t have a specific one to recommend.
- A spatula
- A cool-ish room. I find it fastest and easiest to temper when it’s in the 60s in my kitchen (16-18° C). When it’s in the mid-80s or above (29° C+) it takes a long time and is sometimes unreliable. So if possible, keep it cool!

🍫What Kind of Chocolate Should I Use?
People always ask what kind of chocolate they should use, which is a loaded question. I don’t think there’s a right and a wrong answer…well, Hershey’s chocolate bars are probably the wrong answer. (Chocolate snob, party of one.) But in general, I recommend starting with a semi-sweet or dark bar, not milk or white, and make sure it doesn’t have any extras like nuts, dried fruits, or spices. I don’t like to use chocolate chips, because most brands have a low percentage of cocoa butter and tend to get thick and clumpy when they’re at a workable dipping temperature. Choose something you like the taste of, but also something that’s not crazy expensive, especially when you’re starting out.
I most frequently use these big bars from Fresh & Easy. I don’t know who makes them, but when I started buying them a few years ago they all had the Callebaut logo on them, so at one time, I know Callebaut was their supplier. The logos are now gone so that might have changed, but I find that the chocolate is still decent. It tempers reliably, I like the taste, and between their reasonable prices and frequent coupons, it’s usually the most economical option for the home cook. Trader Joe’s also sells big “Pound Plus” bars that are pretty affordable.

📃Enough Chit-Chat. How Do I Temper Chocolate?
These instructions are for tempering semi-sweet or dark chocolate. If you want to temper milk or white chocolate, see the temperature variations down at the bottom.

- Start by dividing your chocolate up. Again, remember that you need to start with tempered chocolate. Any chocolate bar you buy should already be tempered, but variations of heat and storage might bring chocolate out of temper, so just be aware of what you’re using and give it a quick visual check to make sure it’s not bloomed. This method won’t work if you use chocolate that is not tempered.
- Separate out an amount equal to at least a quarter of the total chocolate—you can eyeball this amount, you don’t need to be too precise. Just make sure that you keep out at least a quarter of it—up to a third is okay too. Chop up 3/4 of the chocolate and leave the remaining quarter in one big block.

- Place the chopped chocolate in a microwave-safe bowl. Again, make sure you keep your big chunk of chocolate separate.

- Microwave the chocolate in 30-second intervals, stirring after every 30 seconds, until it’s melted and smooth.

- Once everything is melted, insert your chocolate thermometer and make sure that the chocolate reaches 115° Fahrenheit (46° C) on the thermometer. If it’s not close to that, heat it in short bursts until it reaches the right temperature.

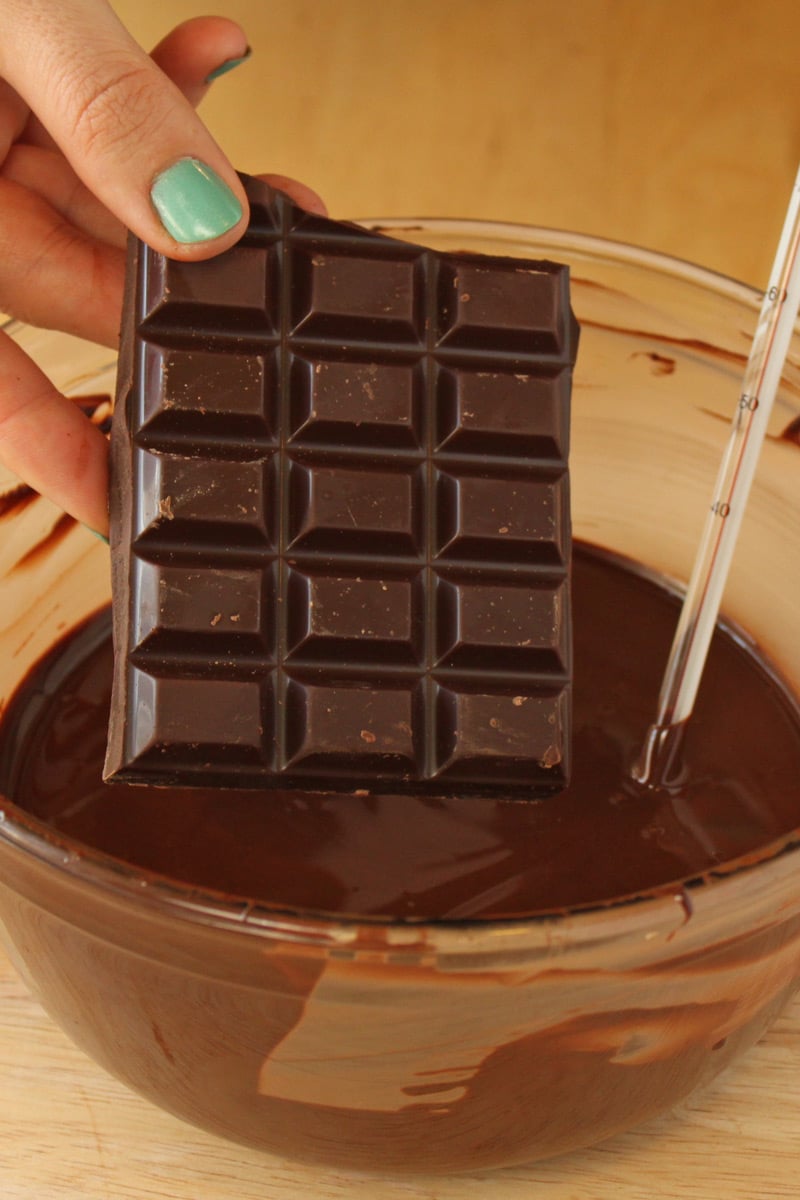
- Now it’s time to get tempering! Add your big chunk of tempered chocolate to the bowl of melted chocolate. Aqua nails optional but highly recommended.

- Stir the chocolate chunk into the bowl of melted chocolate. I like to use almost a scraping motion along the back and front, to encourage it to melt into the chocolate. Continue to stir the bowl frequently as the chocolate cools down.

- Keep stirring the big chunk of chocolate regularly, and keep an eye on that thermometer. When it reaches 90° F (32° C) it’s time to test out our temper and see if the chocolate is ready!

- My favorite way to test chocolate is just to smear a bit from the spatula onto a piece of parchment. If it’s tempered, it should start to set within just a few minutes. You will notice that the edges start to look firm first, and it looks a little bit more matte and less shiny. If it’s not tempered, it will stay wet-looking for a long time. If it’s not tempered at first, no worries! Just keep stirring and let the temperature drop another degree or two, and then try the test again. Depending on the chocolate you use and the temperature of your kitchen, it may not temper until it’s 89°, 88°, or even cooler.
Don’t refrigerate the chocolate
Don’t refrigerate the chocolate to speed up the setting process—this will screw up your results and won’t tell you if it’s tempered or not. Properly tempered chocolate will set quickly at room temperature (within approximately 4-6 minutes, depending on environmental factors).

- Once your test shows that the chocolate is tempered, remove any remaining pieces of the unmelted chocolate chunk and set them aside. If they stay in the chocolate, they will cool it down too quickly.

- Now you’re ready to get dipping! If the chocolate starts to get too thick and hard to work with as you’re dipping, warm it up in the microwave briefly. The trick to warming it up without taking it out of temper is to warm it up in tiny intervals. So microwave it for 5 seconds, and stir. If it’s not quite warm enough, try another 4-5 seconds and stir again. Warm it just enough so that you can work with it—you don’t want it to exceed 90° F. If you do accidentally take it out of temper, you’ll need to repeat the process—warming to 115°F, adding a chunk of tempered chocolate, then cooling to 90°F—all over again. But as long as you’re smart and cautious about re-warming, you should be fine!
💭Variations for Milk and White Chocolate
Milk and white chocolate both contain dairy solids, so they’re a little trickier to temper. They scorch more easily, and in my experience, have to be treated with a little more precision than dark chocolate. They also require slightly different temperatures while tempering. If you’re tempering milk or white chocolate, you can use the method above, but use these temperatures instead:
- Bring your melted chocolate to 110° F (43° C)
- After you have added your chunk of chocolate, cool it to under 87° F (30.6° C)
I hope this helps demystify chocolate tempering!


Thank you for posting this tutorial! I’ve done this myself many times and am thrilled to see it written up with actual details/temperatures (unlike how I’ve been doing it – hoping it works with fingers crossed).
I expect I’ll be linking to this soon in a few posts I have coming up!
Awesome, fellow Liz! So glad that this helps, and I’d love to see any sweets you make with tempered chocolate. 🙂
This is such a clear and informative tutorial! I’ve had issues with chocolate getting too cool and clumping up on me so I would always heat it up completely to re-melt it and it wouldn’t be tempered anymore – now I understand why! I’ll be making chocolate truffles soon and this will definitely come in handy. Thanks!
Long-time reader, first-time commenter. I was fascinated by this post because on the rare occasions I am HEROICALLY committed to dessert-making (I am not up to your standard!), I make truffles. I use the recipe from Joy, which includes various options for tempering chocolate, one of which (the microwave method) is very similar to what you describe here. I chose that one because it’s the easiest, and being me I take some shortcuts (I use my meat thermometer, whose markings start way above 88*, and I estimate how much around the dial would be about 90*; I don’t test whether the chocolate is at 115, I just heat it until the main batch is totally melted; and I don’t test whether it’s tempered – once it gets to 90* I just start using it). As you might imagine, once in a while I turn out to be wrong about the tempering (probably the testing step is the one I most need to add back in), but the vast majority of the time I get it right. (I have seen what my truffles look like with out-of-temper chocolate and I can definitely tell when it’s correct.) BUT here’s the point I specially wanted to make. I use ordinary semi-sweet chocolate (snobs say I have to use some fancy European brand, but if it has a high enough cocoa content, I just don’t see the difference, and I’m the pickiest person eating them), and – dum dum dum – I always use chocolate chips. I don’t doubt your point about their having additives, and I certainly concede that they were not recommended by Joy (I never thought about that, really), but I promise you that they melt and they temper. It may be that the additive is the cause of the fact that the chocolate frequently cools inconveniently quickly, so next time, I’ll give bar chocolate a try. I can’t say what the differences would be, but if all you have on hand is chocolate chips, you can definitely use them to temper chocolate for dipping.
Thank you so much for the comment! So do you use just plain Nestle or whatever store brand chocolate chips? I’ve never had any success tempering chocolate chips myself, and other sources I’ve read also recommend against them, so that’s why I said not to use them–but I’m really glad to know that it’s possible! I might give it another try next time I need tempered chocolate–you know, for the sake of science. 🙂 It may be that the chocolate chips I’ve tried in the past have been old and a little out of temper (I usually buy them in bulk) so it’s definitely worth giving it another shot. Thanks for reading, and for sharing your experience.
I can’t eat regular chocolate candy it has to be parve (non-dairy). As I adore chocolate I try to replicate things available like pepper mint patties, almond joy or almond mound, peanut butter treats etc. Chocolate has to be very fluid to dip these treats! I purchased an electric chocolate melting pot and it didn’t work. The chocolate wasn’t liquid enough. Of course! Silly me didn’t use the thermometer to monitor the temperature. I will try your very detailed and instructive method and will report on my results. Thank you very much for this wonderful website! Shalom!
Gloria, so happy to be able to help! I’d also suggest making sure you’re not using regular chocolate chips–I find they are much thicker when melted, compared to regular chopped bar chocolate. Please do let me know how it goes, and if you have any questions!
Thanks for this! But…I’m just wondering:
1) for those 4-6 minutes you’re waiting to see if it’s tempered..is it not going to cool the chocolate way down?
and
2) is there a better way to keep it at the 90 degrees? Such as a double boiler?
Hi Amanda! The chocolate does cool down a little while you wait to see if it’s tempered, but unless your room is very cold, it usually remains workable for awhile. As you become more comfortable with tempering, you’ll probably be able to tell pretty quickly whether the chocolate is tempered or not–you won’t have to wait the whole time to see if it sets, you’ll start to see the tell-tale signs around the edges after just a minute or so (and some people can just tell by the way the chocolate looks in the bowl, but I always like to be certain and do a little test.)
A double boiler can work, but it will probably heat the chocolate up too much if you keep it on there the whole time, so one thing to do is to keep the double boiler of hot water nearby, and place the bowl on the pan for a few minutes and stir to heat it, then remove it and keep dipping. Another trick is to put a heating pad on the lowest setting, and put a tea towel over it, then set the bowl on the heating pad. You might need to experiment to see how long you can leave your bowl on the pad and if it gets too hot that way, but it’s another method of trying to maintain a warm but not hot temp for you chocolate. 🙂 Hope this helps!
Elizabeth, of all the tutorials I’ve seen on chocolate tempering, this is by far the best! Thank you for taking the time to share how to temper chocolate in such a fun and informative way. As a heads up, I’m referring your tutorial to my blog readers at HomemadeForFriends.com when it comes to this topic. I don’t think anyone could talk about the subject better than you!
~ Melissa
PS: I especially loved the aqua nails tip 🙂
Haha, thank you so much, Melissa! Aqua nails make everything better. 🙂 So glad that the tutorial helped you. I remember being so confused when I started out, so my goal was to be as clear and non-confusing as possible. 🙂
I recently bought a spatula with a therometer installed in it. It is so easy to stir and check the temperature. You can find it on amazon.
Do you have a video tutorial? If not, can you make one? Pretty please!!
Hi Dina, I don’t have a video tutorial for this, although that’s a great idea! I’ll put it on the (very long) to-do list. 🙂
Can I put my chocolate dipped treats in the refrigerator after they’re completely set? Or does it ruin the process?
Hi Reem, It kind of depends on the temperature of your room and what you’ve dipped. If it’s something that can spoil, like fresh fruit, it should be refrigerated. If it’s something that is okay at room temp, like pretzels, then I usually prefer to leave them out…unless it’s very hot and the chocolate might melt. Refrigerating chocolate can cause condensation to gather on the outside of the chocolate and it sometimes loses its lustrous shine, so I prefer to keep them out of the refrigerator when possible. But if your situation requires refrigeration, it’s totally fine.
Thanks – this worked great for dipping our dark chocolate coconut balls for Christmas! I used a mix of dark chocolate chips (callebaut 54%) and a dark chocolate bar (70%).