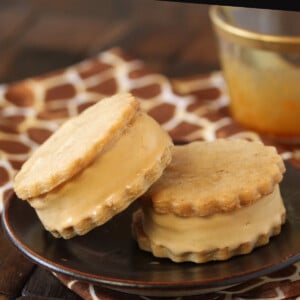
These Salted Caramel Ice Cream Sandwiches are perfect for those hot summer days when you need a little refreshing sweetness in your life. The caramel and salted ice cream with brown butter cookies is enough to make your mouth water!

If you’re a regular reader you know that I’ve been enjoying more than my fair share of ice cream this summer, and have even gone so far as to hyperbolically dub this the “Summer of Ice Cream.” (And if you’re new, please do the old click-and-drool to check out this summer’s flavors so far: peach honey, almond coconut fudge, and cinnamon crunch.)
I’m sharing three ice cream recipes this week, because: yum. And I’m starting with these salted caramel ice cream sandwiches, because: caramel. And salt. And brown butter cookies. And again, yum.

The cookies in this recipe are the same brown butter ones I used to make the ombre heart cookies back around Valentine’s Day. I was so obsessed with them, I never quite got them out of my mind and kept looking for opportunities to make them again. They’re the best of all cookie worlds: a roll-out cookie that holds its shape but stays soft, a cookie with a flavor mild enough to be paired with almost anything, but distinct and interesting enough to be delicious on its own. They’re pretty much the perfect cookie, and I look forward to shoe-horning them into other desserts at least twice more this year.

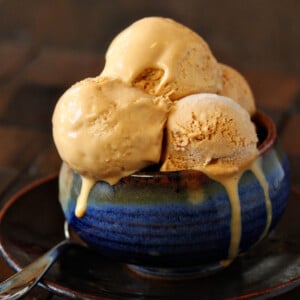
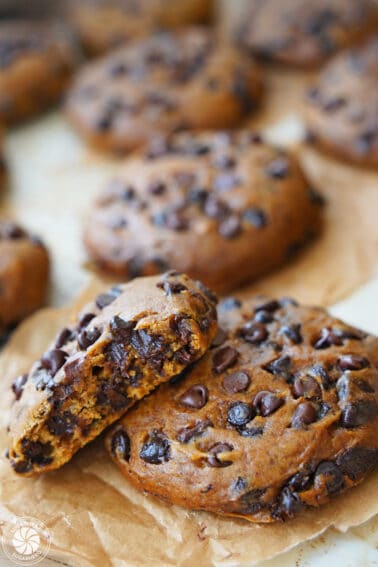
The real star of the show, though, is the salted caramel ice cream. It has a gorgeous caramel flavor, deep and dusky and dark and teetering just on the right side of burnt. The caramel might be too intense on its own, but when it’s tempered by lots of cream and milk, and paired with an earthy hit of salt, it’s marvelous.
And the texture. The texture! Can we talk about the texture, and about how hard ice cream you have to chisel out of the carton is the worst, and how soft, creamy, melting-just-slightly-around-the-edges ice cream is the best? This ice cream never gets rock-hard when frozen, so it’s scoopable straight from the freezer. That means every bite–every single bite, whether by spoon or by cookie or by finger–is creamy and soft. It also means that pictures have to be taken posthaste, otherwise you end up with glorious rivers of melting ice cream on your cookies, which might I say, is actually a very good thing indeed. (For the taste buds. Not quite as much for the photography buds.)

I’m usually a fan of mix-ins in my ice cream, but I thought this one was fantastic just the way it is. If you do want to class it up a little, David Lebovitz has a great recipe for Salted Butter Caramel Ice Cream that includes little shards of homemade caramelized sugar. Once they’re frozen with the ice cream the sugar melts, leaving you pockets of gooey caramel sauce scattered in your ice cream. It’s pretty epic in its own way. But for me, the ice cream and the brown butter cookies together were enough. Were more than enough. Were just about perfect.

💓More Cool Treats

Salted Caramel Bars
Caramel Apple Cake with Salted Caramel Buttercream
Salted Caramel Ice Cream
Ingredients
- 5 large egg yolks
- 2 cups heavy cream
- 1 cup milk
- 1 1/2 cups granulated sugar
- 1 tsp vanilla extract
- 1/2 tsp salt
Instructions
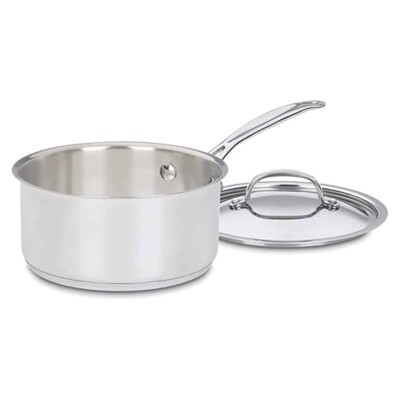
- Place the egg yolks in a medium bowl and set aside. Combine the cream and milk in a small saucepan, and heat it over a low burner until warm, but not boiling.
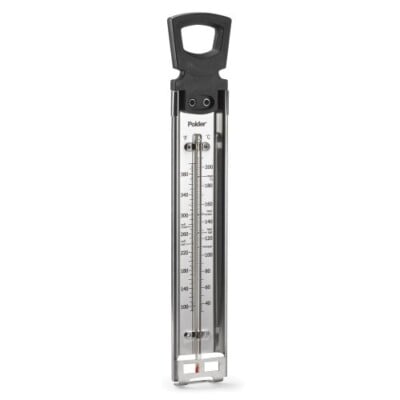
- While the cream and milk are heating, place the sugar in a medium saucepan over medium heat. Stir the sugar occasionally as it starts to melt, and continue to stir it occasionally while it liquefies and caramelizes. Eventually it will go from being colorless, to light golden, to a dark brown color. Cook it until it is dark brown and and starts to smell like caramel–if you don’t cook it enough, your ice cream won’t have that distinctive caramel taste, so don’t be afraid to take it until it is actually brown. At the same time, you don’t want to burn it, so be on high alert once you start smelling sugar.
- When it’s caramelized, slowly and carefully add the warm cream to the sugar, and whisk it in. This will create a lot of steam and bubbling, so watch your hands during this step. Continue to whisk until any lumps of sugar have dissolved. Let it come to a simmer, then remove the pan from the heat. Whisk the egg yolks while you slowly pour in about a third of the hot cream mixture, whisking constantly so the eggs heat up but don’t cook during the process.
- Now return the saucepan to the heat and start whisking the cream while you pour in the hot egg mixture. Continue to whisk as the custard cooks, and cook it until it thickens slightly and coats the back of a spoon. If you want to use a candy thermometer, you’re shooting for 175 F (80C).
- Take the pan from the heat and strain the ice cream custard through a fine mesh strainer into a bowl. Whisk in the vanilla extract and salt, then continue to whisk occasionally as it cools. Once at room temperature, press a layer of cling wrap on top of the custard and refrigerate it until it’s completely chilled. (To speed up the process, you can place the bowl over an ice bath and whisk it as it cools down.)
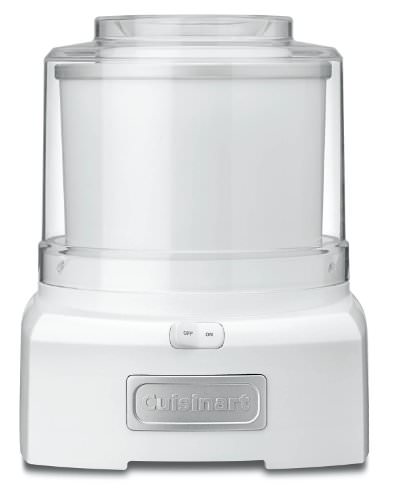
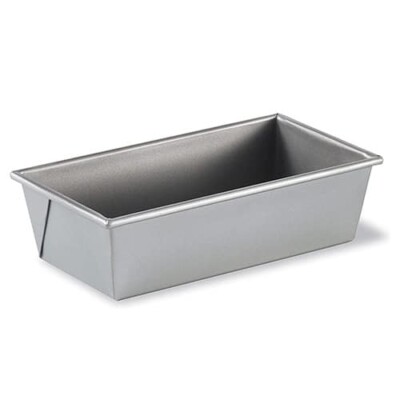
- When the custard is chilled, place a loaf pan in the freezer. Churn the ice cream according to your ice cream maker’s instructions. Scrape the ice cream into the loaf pan and smooth it into an even layer. Cover the ice cream with cling wrap, and return to the freezer to firm up completely.
Measuring Tips
Our recipes are developed using weight measurements, and we highly recommend using a kitchen scale for baking whenever possible. However, if you prefer to use cups, volume measurements are provided as well. PLEASE NOTE: the adage “8 oz = 1 cup” is NOT true when speaking about weight, so don’t be concerned if the measurements don’t fit this formula.
Want to learn more about baking measurements and conversion?
Nutrition
Brown Butter Cookies
Ingredients
- 6 oz unsalted butter, (3/4 cup), cubed
- 9 oz all-purpose flour, (2 1/8 cups)
- 2 tbsp cornstarch
- 3/4 tsp salt
- 1/2 cup brown sugar
- 1/2 cup granulated sugar
- 1 large egg
- 1 tsp vanilla extract
Instructions
- Place the butter in a medium saucepan over medium heat. Allow it to melt and come to a gentle boil. Continue to cook it, stirring occasionally and scraping the bottom of the pan, as it grows darker in color. After about 8-10 minutes it should be golden brown and fragrant, with brown bits on the bottom. Remove the pan from the heat and pour the butter into a large mixing bowl. Let it cool to room temperature.
- While you wait for the butter to cool, mix together the flour, corn starch, and salt in a small bowl. Set aside.
- Once the butter is cool, add the sugars to the mixing bowl and mix everything together on medium speed until fluffy and well-mixed. Add the egg and vanilla, and mix again. Finally, stop the mixer and add the dry ingredients. Mix together on low just until the drys are nearly incorporated and just a few streaks of flour remain. Finish mixing everything with a spatula, scraping the bottom and sides of the bowl.
- Divide the dough in half and press each into a thin disc, wrapping well with plastic wrap. Refrigerate until firmer but not hard, about 30 minutes.
- When you’re ready to bake the cookies, preheat the oven to 350 degrees F. Place a disc of dough between two sheets of parchment or waxed paper, and roll out until it is less than 1/4-inch thick. (I did not need to add any extra flour during the rolling process, but you may find a light dusting helps.) Cut the dough into circles or squares about 2 1/2 inches across and place them on a parchment-lined baking sheet. Put the sheet in the freezer for 10 minutes before baking to help the cookies hold their shape.
- Bake the trays of cookies for about 10 minutes, until the edges take a little color and they have lost the raw shine in the middle. You want them to be somewhat soft after baking, so don’t over bake until they’re hard and crispy–that will make it too difficult to eat your ice cream sandwiches! Let the cool on the baking sheet for 5 minutes, then remove to wire racks to cool completely. Re-roll scraps of dough together to cut out more cookies. If at any point it becomes too warm to work with, chill it briefly in the refrigerator until you can once again roll and cut cookies easily.
- Assemble the sandwiches once the cookies are fully cool. Place a scoop of salted caramel ice cream on top of one cookie, and add a second cookie on top. Press down gently until the ice cream comes to the edges of the cookie, and serve immediately. The cookies get quite hard when frozen, so this is one ice cream sandwich best served with room temperature cookies.
Measuring Tips
Our recipes are developed using weight measurements, and we highly recommend using a kitchen scale for baking whenever possible. However, if you prefer to use cups, volume measurements are provided as well. PLEASE NOTE: the adage “8 oz = 1 cup” is NOT true when speaking about weight, so don’t be concerned if the measurements don’t fit this formula.
Want to learn more about baking measurements and conversion?
Nutrition


I made these for my hubby’s birthday “cake” on the weekend, and I just, well, uhhhh….speechless, really. I have nothing but Homer Simpson noises, because really, the ice cream, the cookies, the combination = sublime.
How long do these keep/how far ahead of time can I make the components?
Hi, you can make the cookies several weeks in advance and keep them in the freezer until you’re ready to make the sandwiches.
I made the cookies only because I was short on time for Valentines Day. The smell as the brown butter mixed with the sugar? Beyond words!!! Even the ones that were slightly over baked and crispy were delicious. My family and I devoured them. I also took half the dough and added coconut extract and shredded coconut (which I processed to really fine) and that was really tasty too. Thanks for the recipe:)
I’m so glad to hear that you liked the cookies–and your coconut version sounds AMAZING. Thanks Myra!