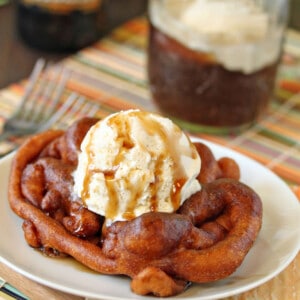
These Deep Fried Root Beer Floats are a fun twist on traditional funnel cakes! They’re swirls of fried dough, brushed with root beer flavor and topped with vanilla ice cream. This is county fair food at its best!

So it’s Fry Day, which means we pull out the deep fryer and pull on our comfy sweatpants. This week’s fried gluttony is Deep Fried Root Beer Floats.
The most common response I get when I tell people I’m deep frying root beer goes like this:
1) Turn head slightly to side.
2) Narrow eyes quizzically.
3) Continue quizzical look until it becomes a quizzical stare.
4) “Huh?”
And then the questions start coming in. First, “How do you fry a liquid?“
Well, of course, you don’t actually fry a liquid. The root beer is a flavoring in a fried funnel cake. I took a cue from Deep Fried Coke, which I’ve seen sold at the fair grounds, and made a funnel cake batter with root beer instead of milk or water. So if we’re being really, technically precise about this, it’s a root beer flavored funnel cake.

The finished cake is the brushed with lots of root beer syrup, to give it a good strong root beer flavor and a moist (but still crunchy on the outside!) texture.

“Is the cake baked inside a funnel?“
No! The funnel is just used to control the flow of the batter into the oil. Except I actually found that method kind of complicated. I just use a piping bag with the tip cut. But “piping bag cake” doesn’t quite have the same ring, does it?

“Okay, so I’ve fried up this really delicious funnel cake and prepared my root beer sauce, but I still feel like it needs a little something more. Do you recommend any additional toppings?“
I’m so glad you asked. I made homemade vanilla bean ice cream to top these crispy, root beery marvels. It adds the perfect richness and flavor and really drives home the root beer float comparison.

So, to conclude: I fried up some funnel cake batter made with root beer, soaked it with root beer syrup, topped it with homemade vanilla bean ice cream, and drizzled it with more root beer syrup, and it was good. No, scratch that, it was gooooooood. It was lets-deep-fry-every-day-because-this-is-freaking-awesome good. I haven’t tried it with other sodas, but I strongly suspect it would work with just about anything. What about black cherry soda? Or Coke with lime? See where I’m going with this?
🤎More Deep Fried Dessert Recipes
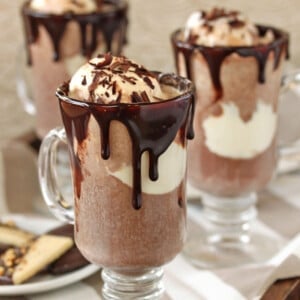
Hot Chocolate Floats

Homemade Root Beer Float Pieces Recipe
Deep Fried Root Beer Floats (Root Beer Funnel Cake with Vanilla Bean Ice Cream)
Ingredients
Funnel Cakes:
- 1 large egg
- 3/4 cup root beer, not diet–I used the type with sugar, not corn syrup
- 1 tsp vegetable oil
- 4.75 oz all-purpose flour, (1 ⅛ cups)
- 2 tbsp granulated sugar
- 3/4 tsp baking powder
- 1/4 tsp salt
- 1 quart oil, for frying
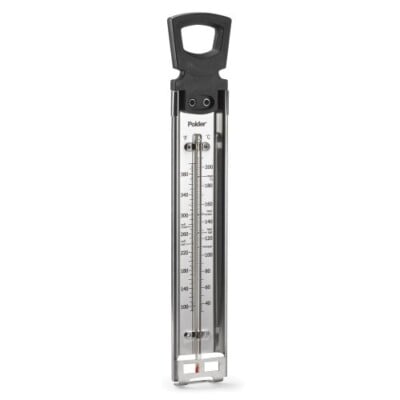
- Candy Thermometer
Root Beer Syrup:
- 12 oz root beer, not diet–I used the type with sugar, not corn syrup
Vanilla Bean Ice Cream:
- 1 vanilla bean, large
- 2 cups heavy cream
- 1 cup milk
- 1 cup granulated sugar
- Pinch of salt
- 5 large egg yolks
- 1 tbsp vanilla extract
Instructions
For Root Beer Funnel Cakes with Root Beer Syrup:
- Whisk together the egg, root beer, and oil. In a separate bowl, whisk together the flour, sugar, baking powder, and salt. Add the liquid to the dry ingredients and whisk until everything is incorporated and all of the lumps are gone. Transfer the batter to a piping bag with a round tip, or a zip-top plastic bag. If using a plastic bag, cut a hole in the corner no larger than 1/2-inch. To prevent the batter from spilling out, clamp the hole closed with a clothespin or binder clip when you’re not piping the cakes.
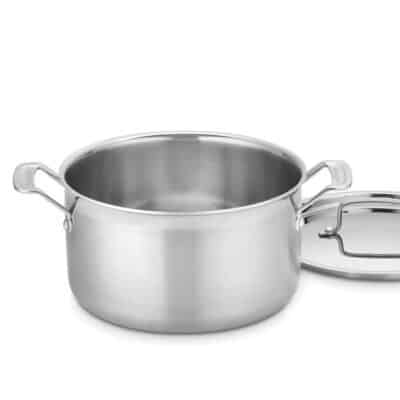
- Pour the frying oil into a medium saucepan so that it’s 2 inches deep, and insert the candy thermometer. Heat the oil over medium heat until it reaches 370 F (188 C). Hold the bag of batter directly above the oil, and remove the clamp. Pipe the batter into the oil, holding it close to the surface, and quickly move it in a wiggly, circular pattern to create an irregularly shaped blob of dough about 6″ across. To ensure that your funnel cakes hold together, make sure that the tip of your bag is close to the surface of the oil, and that you criss-cross over the dough several times when piping the cake.
- The cake will cook quickly–a minute or less for the first side, and closer to 30 seconds for the second side. Once the cake is puffed, crispy, and golden brown, remove it from the oil using a frying skimmer or slotted spoon and place it on a paper towel-lined baking sheet to drain. Repeat with the rest of the batter, making about 6 cakes total. Watch the temperature of the oil and keep it between 370 -380 F. Remove it from the heat if it gets too hot, or let it warm up in between batches if the temperature drops too much. Before serving, brush with the cake's root beer syrup. Serve with a scoop of vanilla ice cream and more root beer syrup drizzled on top.
For the Root Beer Syrup:
- Pour root beer into a small saucepan over medium heat. Cook until the syrup reduces down to about 1/3-1/2 cup (the measurement doesn’t have to be precise). This might take up to 30 minutes. Cool the syrup completely before using. It will thicken a bit as it cools, but will still be more of a liquid than a viscous syrup.
For Vanilla Bean Ice Cream:
- Use a sharp paring knife to cut a slit lengthwise down the front of the vanilla bean. Press the sides open so that the bean lays flat. Run the back of the knife blade (the not-sharp side) down the bean, scraping out all of the seeds.
- Combine the vanilla seeds, cream, milk, sugars, and salt in a medium saucepan over medium heat. Put the egg yolks in a medium bowl nearby and whisk them gently. Bring the milk/cream mixture to a simmer, then when it just starts to come to a boil, remove the pan from the heat. Whisk the egg yolks while you slowly pour in about a third of the hot cream mixture, whisking constantly so the eggs heat up but don’t cook during the process.
- Now return the saucepan to the heat and start whisking the cream while you pour in the hot egg mixture. Continue to whisk as the custard cooks, and cook it until it thickens slightly and coats the back of a spoon. If you want to use a candy thermometer, you’re shooting for 175 F (80C).
- Take the pan from the heat and strain the ice cream custard through a fine mesh strainer into a bowl. Whisk in the vanilla extract, then continue to whisk occasionally as it cools. Once at room temperature, press a layer of cling wrap on top of the custard and refrigerate it until it’s completely chilled. (To speed up the process, you can place the bowl over an ice bath and whisk it as it cools down.)
- Once the custard is fully chilled, churn the ice cream according to your ice cream maker’s instructions.
Measuring Tips
Our recipes are developed using weight measurements, and we highly recommend using a kitchen scale for baking whenever possible. However, if you prefer to use cups, volume measurements are provided as well. PLEASE NOTE: the adage “8 oz = 1 cup” is NOT true when speaking about weight, so don’t be concerned if the measurements don’t fit this formula.
Want to learn more about baking measurements and conversion?


Ummmm… why was this not at the county fair! You should be a fair food advisor (do they have those?) for them asap!
Right?! Obviously I am squandering my talents. I need a meeting with the head of state fairs immediately.
This is the best idea ever. Wow. So pinned and so buying some comfy pants:)
Excellent, join me in the comfy pants club!