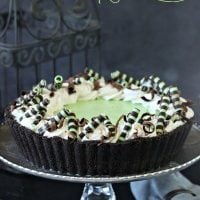
Nothing is more refreshing than a Fresh Mint Grasshopper Pie. This frozen, minty pie has a light, herbal mint filling and a thick chocolate Oreo crust!

I’ve got your perfect Friday night right here. Check the ingredients:
- You, relaxing in comfy loungewear after a long day of [insert your noble profession here]
- A piping hot pizza with plenty of crushed red peppers on top
- Your entertainment of choice—might I suggest Unbreakable Kimmy Schmidt?
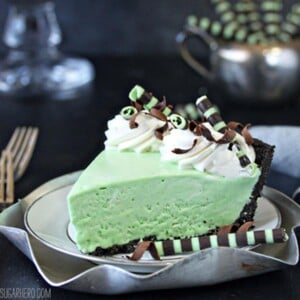
- A big slice of this grasshopper pie for dessert, cold and refreshing and packed with fresh mint flavor
- Your celebrity crush, giving you a foot massage
I can’t help with that last item, but I can most definitely bring the grasshopper pie love! I mean, it’s Friday. It’s Pi Day (3/14) tomorrow. It’s St. Patrick’s Day next week. You NEED a minty chocolatey pie in your face this weekend. I am here for you, friend.

I’m a huge chocolate-mint fan, but I’ve never actually had a grasshopper pie. I know. I KNOW! Looking online, there seems to be a big variation in recipes, and the only thing people seem to agree on is that there’s a chocolate cookie crust, and some sort of creamy mint filling. Some recipes use Cool Whip, some use cream cheese, and some use mint ice cream.
Apparently, it’s a sort of choose-your-own-adventure dessert, so I chose to fill my grasshopper pie with a fresh mint semifreddo.
“A semi-whatto?” you say. “Stop talking nonsense, girl.”

The name “semifreddo” means “half-frozen” in Italian, and it refers to a dessert made with whipped cream, whipped yolks, and whipped whites. It’s kept in the freezer and is often considered a cousin to ice cream, but unlike ice cream, it has a marvelously creamy texture that stays fairly soft even when frozen. This means it’s great for making terrines and frozen pies that need to be sliced—no awkward defrosting periods where the edges are melted but the center is still rock-hard. Just pop that bad boy out and get to slicing!
I chose a semifreddo because I wanted the coolness of a frozen mint dessert with the hassle of wrangling hard ice cream. It’s also an ideal vessel for infusing with fresh mint—since it already calls for cream in the ingredients, it’s no trouble at all to soak a bunch of mint leaves in the cream, then strain them out before whipping the cream. The result is a dessert that’s super refreshing, with a light, herbal, fresh taste that’s miles away from the typical bottled mint flavor. (However, if bottled mint is your jam, I won’t be angry if you skip the fresh mint step and add a teaspoon of mint extract instead.)

To make this pie extra-special, I made some elegant green-and-brown striped chocolate cigarettes for garnishing. Their fancy pinstriped appearance notwithstanding, they’re actually pretty easy to make! You’ll need a few special tools, all of which are $5 or less, and the patience to practice a few times before you nail it. I’ve made a little photo tutorial for you, and down below you can find the full recipe for easy printing. If you want to give them a try, you’ll want to pick up a decorating comb, bench scraper, and an offset spatula.

I know I’m utterly biased, but I can’t think of a better way to celebrate Pi Day than with a fat slice of this grasshopper pie. And you all know that this year we’re celebrating the Pi Day of the Century, right? Instead of the usual 3 digits of Pi, this Saturday we can celebrate TEN digits, on 3/14/15 at 9:26:53 – when will you be able to say you’ve lived through 3.141592653 again?
And yes, I had to google that, and yes, I haven’t taken a math class since high school, and yes, I don’t actually care that much about pi the number. But I do care a great deal about pie the food, and that’s what’s really important around here.

So tell me where you stand on these important issues. Semifreddo or ice cream? Fresh mint or mint extract? Pi the number or pie the food? Commence internet judging…now.
🥧More Pie Recipes You’ll Love
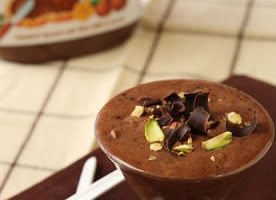
Chocolate Nutella Semifreddo
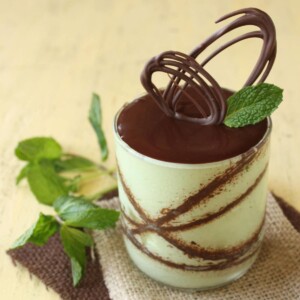
Fresh Mint Semifreddo
Fresh Mint Grasshopper Pie
Ingredients
For the Crust:
- 34 Oreo cookies, about 16 oz, regular or mint-flavored
- 2 1/2 oz unsalted butter, (5 TBSP)
For the Filling:
- 1 cup fresh mint leaves, (about 1 oz or 30 grams), packed
- 1 1/4 cups heavy cream
- 5 large egg yolks
- 3 large egg whites
- 3/4 cup granulated sugar
- Green gel food coloring, I like Americolor brand, (optional)
- whipped cream, for decorating (optional)
- striped chocolate cigarettes , for decorating (optional)
- chocolate curls, for decorating (optional)
Instructions
To Make the Crust:
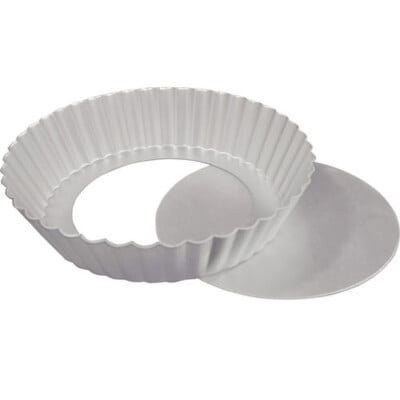
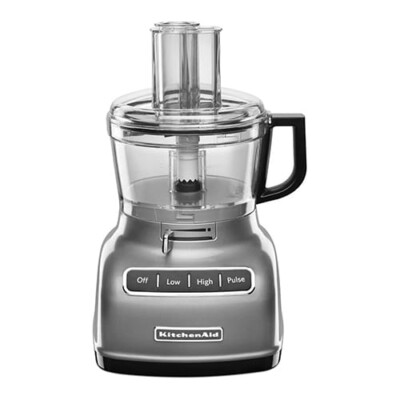
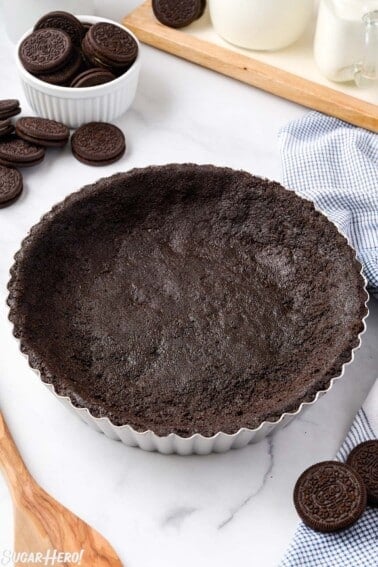
- Preheat the oven to 350 degrees Fahrenheit and spray a 9- or 10-inch tart pan with 2″ sides with nonstick cooking spray. (You can also use a springform pan or a cake pan with a removable bottom.) Place the cookies in a food processor and pulse in long bursts until they are in fine crumbs. Melt the butter and add it to the cookie crumbs, stirring until they’re evenly moistened and have the texture of wet sand.
- Press the cookie crumbs in the bottom of the pan and up the sides, pressing firmly. If you are using a springform or cake pan, only press crumbs about 2 inches up the sides. Bake the crust for 10 minutes, until it starts to puff and looks set but is not burned. Let it cool completely before filling it.
To Make the Filling:
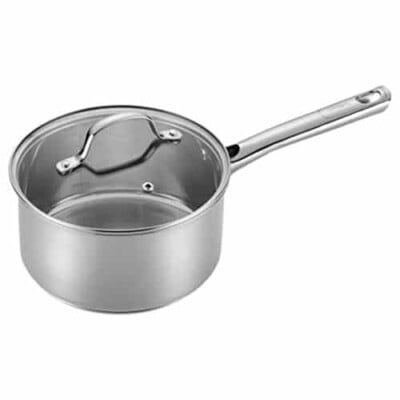
- Coarsely chop the mint leaves, and combine them with the heavy cream in a small saucepan. Bring the cream to a simmer over medium-high heat, and just before it boils, remove the pan from the heat. Cover it with a tight-fitting lid and let it sit at room temperature for an hour to infuse the cream with mint flavor. After an hour, pour the cream through a strainer into a bowl and squeeze the mint leaves tightly to remove any excess cream. Refrigerate the cream until cold. Refrigerate a mixing bowl and whisk attachment at well.
- Once the cream is cold, whip it in the chilled bowl until it forms medium peaks. It should have the texture of shaving cream—full-bodied and able to hold peaks, but not overly stiff or crumbly. Refrigerate the whipped cream while you prepare the rest of the recipe.
- Place a saucepan of water on the stove and bring it to a simmer. In a mixing bowl, combine the egg yolks and 1/4 cup of sugar. Whisk them together, then place the bowl over the saucepan of simmering water. Continue to whisk as the egg yolks heat up, until the yolks have lightened and taken on a custardy texture, about 3-4 minutes. Transfer the bowl to a stand mixer (or use a hand mixer) and beat them for about 5 minutes, until they’re very light and thick and form a ribbon that drips down from the whisk when you lift it from the yolks.
- Place the egg whites and the remaining 1/2 cup of sugar in another mixing bowl. (If you don’t have extra bowls for your mixer, you can transfer the egg yolks to a different bowl and then wash and clean the yolk bowl very well before using it to whip the whites.) Fit the bowl over the saucepan of simmering water and whisk constantly while the egg whites heat up. Whisk until the sugar dissolves and the whites are hot to the touch, 3-4 minutes. Put the bowl on the mixer and whip on high speed until the whites are voluminous, glossy, and have stiff peaks. They should also be room temperature, so use your hand as a guide and feel the outside of the mixing bowl to see when they’ve cooled down enough to use.
- Fold the egg whites into the yolks in 3 batches, then gently fold in the whipped cream in several batches. If you want to give your grasshopper more of a green mint color, add a drop or two of green food coloring and gently stir it in.
- Scrape the filling into the cooled pie shell and smooth it into an even layer. Freeze it for 6 hours, or overnight, before decorating and serving. Keep any extra pie in the freezer, well-wrapped to prevent odors or freezer burn, for up to a week.
- This pie is wonderful because it can be sliced straight from the freezer—no defrosting required! The slices will need just a minute or two at room temperature to become the perfect texture to enjoy.
Recipe Notes
Measuring Tips
Our recipes are developed using weight measurements, and we highly recommend using a kitchen scale for baking whenever possible. However, if you prefer to use cups, volume measurements are provided as well. PLEASE NOTE: the adage “8 oz = 1 cup” is NOT true when speaking about weight, so don’t be concerned if the measurements don’t fit this formula.
Want to learn more about baking measurements and conversion?
Nutrition

Striped Chocolate Cigarettes
Ingredients
- 8 oz chocolate candy coating melts
- 4 oz Mint green candy coating melts, (see Note below!)
Instructions
- Place the candy coatings in separate bowls and melt them individually in the microwave, stirring after every 20 seconds to prevent overheating. Let the coatings cool until they're warm but not hot.
- Pour a thin line of chocolate coating down the center of your work surface. I like to use a small marble slab because it cools the coating quickly and evenly, but you can use the back of a flat baking sheet if you don’t have marble.
- Use an offset spatula to spread the chocolate into a very thin layer. Try to spread it lengthwise instead of widthwise. Keep in mind that the width of the chocolate will be the length of the finished chocolate cigarettes.
- Drag the decorating comb through the chocolate to create stripes. Use firm pressure to make sure that the comb goes all the way through the chocolate and scrapes against the work surface.
- Let the chocolate coating set for a moment or two. As it sets, it will change from shiny to matte. It shouldn't be fully hard, but you should be able to touch it gently without the chocolate transferring to your fingertip.
- Drizzle some of the melted green coating over the chocolate, and spread it into an even layer so that the green color fills in the gaps between the chocolate stripes. Try not to overwork it and smear the chocolate and green colors together.
- Let the coating set for another minute or two. When you can touch it gently without leaving a finger print, it’s ready to roll. It shouldn’t be fully set, otherwise it will crumble.
- Stand behind the line of chocolate. Grasp the bench scraper in both hands. Position the blade an inch or so from the far end of the chocolate. Hold the blade at about a 45 degree angle from the surface.
- Working quickly and firmly, push the bench scraper away from you, causing the chocolate to roll over itself. If it doesn’t roll into a perfect tube, finish rolling and shaping it with your hands.
- Keep forming cigarettes, working quickly so that it doesn't get too hard and shatter when you try to roll it. Repeat this process until you have as many cigarettes as you need. If, during this process, you find that your coating has set too much to make curls from all of it, scrape it off the surface and melt it again with the chocolate-colored coating. The good news is that this project is fast, so even if it takes you a few tries to get right, you’re not out more than a few minutes. And this is definitely a skill where you get better with practice!
Recipe Notes
Measuring Tips
Our recipes are developed using weight measurements, and we highly recommend using a kitchen scale for baking whenever possible. However, if you prefer to use cups, volume measurements are provided as well. PLEASE NOTE: the adage “8 oz = 1 cup” is NOT true when speaking about weight, so don’t be concerned if the measurements don’t fit this formula.
Want to learn more about baking measurements and conversion?
Nutrition
ST. PATRICK’S DAY DESSERTS 🍀
We’ve rounded up 23 of our FAVORITE rainbow dessert recipes & ideas that are sure to make you smile — click here to get all the recipes!


I made this! It was delicious! I didn’t realize that the whipped yolks/whites mixture would be like marshmallow cream. That was fun! Will make again as grasshopper pie is a favorite around here 🙂
Oh, awesome! I’m so glad you enjoyed it, Tori! And I agree, the fluffy egg part is pretty cool. 🙂
Looks amazing. My dad has a pie contest next week for work and wants mint chocolate….this looks perfect. Question for you….what is total time for making this? I love cooking/baking but I’m not very experienced. Is this something a beginner should try?
Hi Shannon! I would say total active time is in the 30-45 minute range, but there’s both an extensive chilling time (6+ hours) and probably 2 other hours of inactive time (infusing the cream with fresh mint, chilling the cream after infusion). So it’s not going to keep you on your feet in the kitchen all day, but it’s not going to be whipped up in 20 minutes, either. 🙂 I would rank it either intermediate or confident beginner level. I don’t think it’s all that tricky, but if you’ve never whipped egg yolks and egg whites before, it might be a little intimidating for the first time? The whipping is really the only tricky part, and I say you should go for it! (PS I’m assuming your dad’s work has a freezer available to store the pie in before the contest??)
I just started making my pie and I forgot to buy the fresh mint!!!! I have mint extract though. Can I use that instead? If so, what would my process be and how much extract do you think I should use.
Okay. I just read where would use a tsp. of the mint extract.
Hmmm I’ve not ever had Grasshopper pie w/o cream de mint in it? Does it taste the same with just using mint leaves? It sure would be easier just to go to the garden vs. all over town looking for cream de mint . My great grandma said the pie is much like the Grasshopper drink but you can’t get intoxicated from the pie because you use very little of the cream de mint.
Hi Jaden, it isn’t quite the same. It has some similar qualities as far as flavor goes, but you couldn’t swap the cream de mint for mint leaves. You could just use a little less cream de mint and add the leaves as well, but you would miss out on some of the flavor. Hope this helps!
Does this freeze well?
Niki,
Yep! It works great, just make sure it’s wrapped up well so that it doesn’t get any weird freezer smells!
Well, newbie baker here and somehow once the mint infused cream went into my mixer and I began to whip it, it appeared curdled. I’ve never whipped egg yolks and egg whites before and I’m not sure where I went wrong.
I made this on the weekend for my dad’s birthday and he LOVED IT! The recipe is really easy to follow. My only tip for other bakers would be to make sure that the egg whites are really super stiff before you mix them with the yolks and whipped cream – mine were only about 80% stiff and as a result my pie didn’t keep its shape! But it still tasted fantastic and I’m definitely going to be making it again.
Hey Jayne, I am so happy to hear you guys loved it! Thank you so much for your feedback, I appreciate it! I would love to hear how it goes again and see pictures!
I am always ready to try new recipes. I loved this recipe and thought the chocolate/mint combo was so refreshing!
Thank you Keira! So thrilled to hear that you enjoyed it 😀