


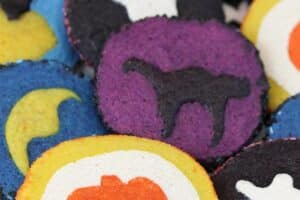


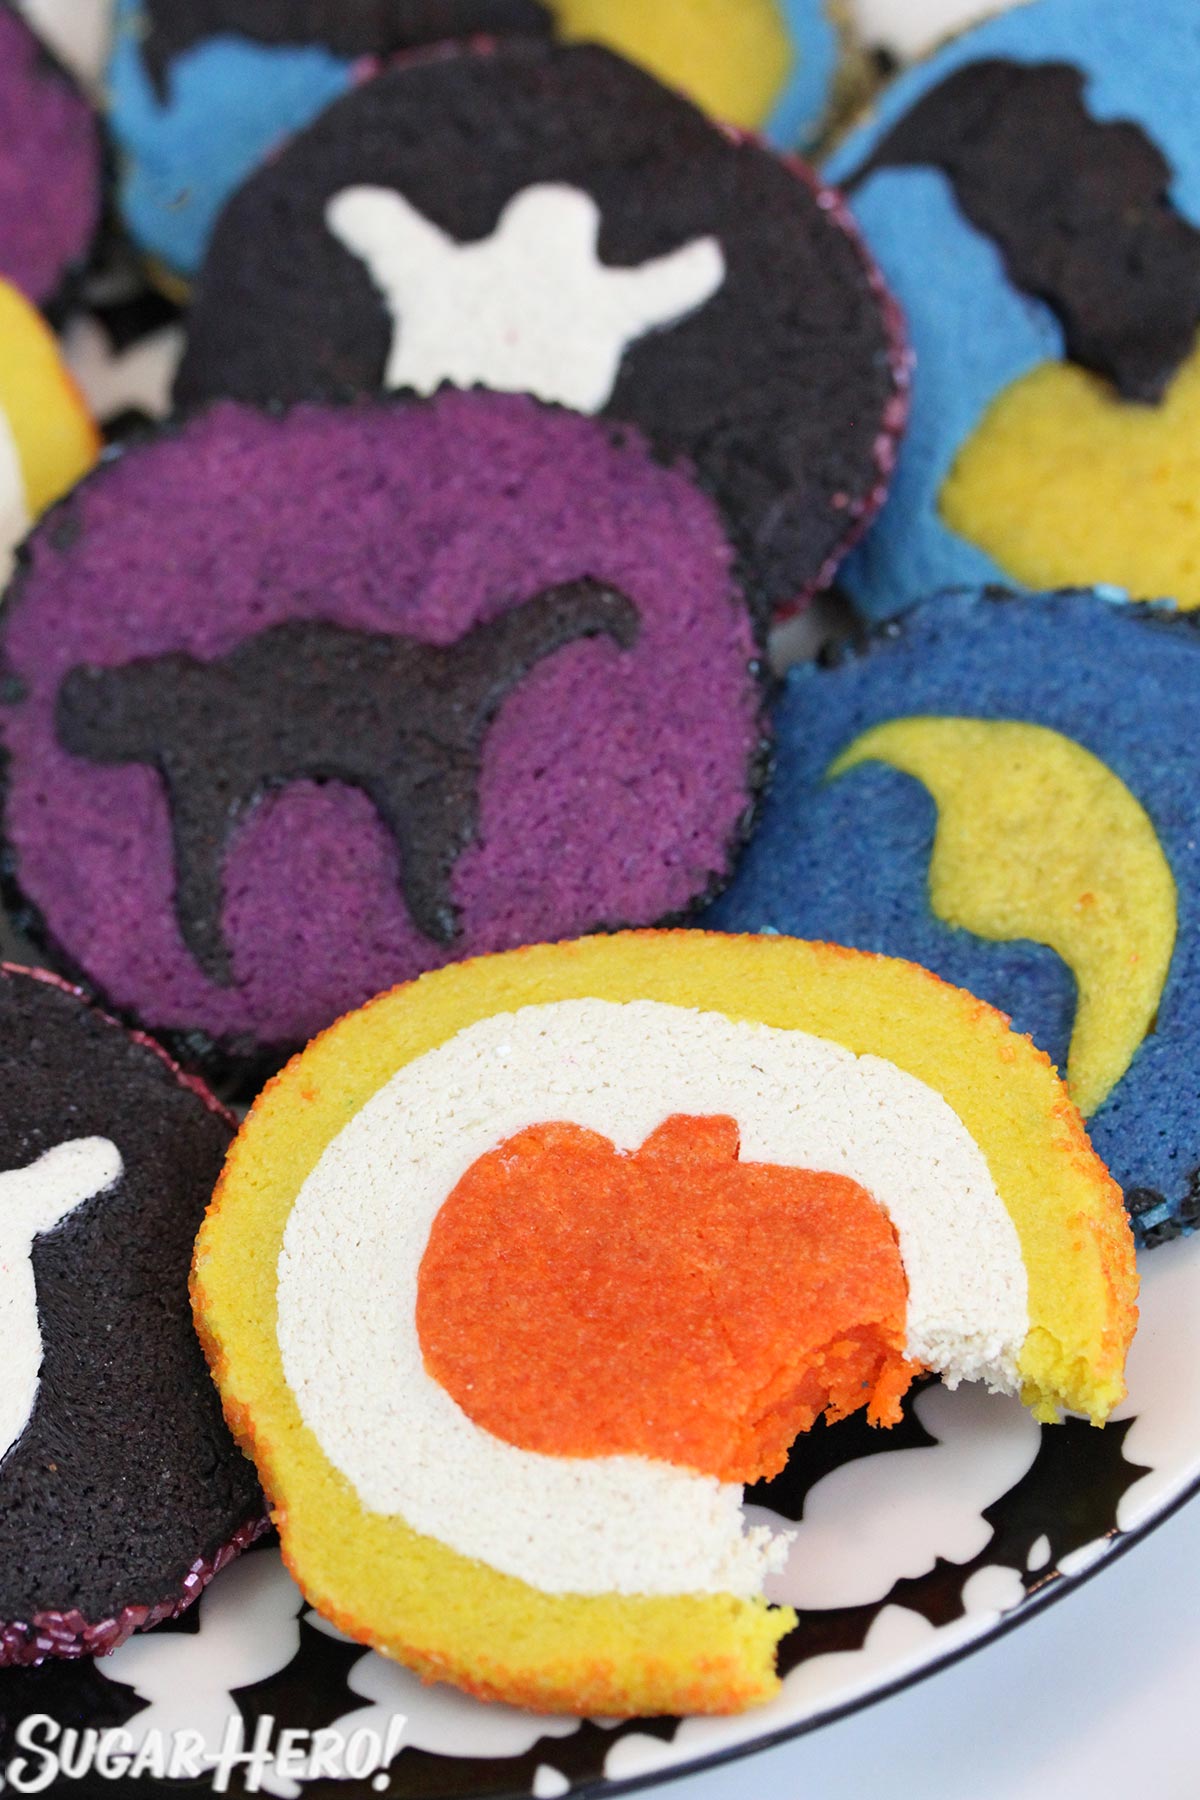
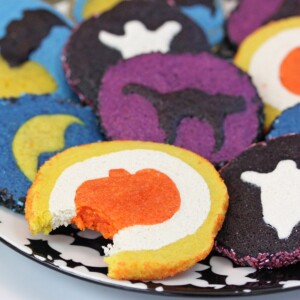
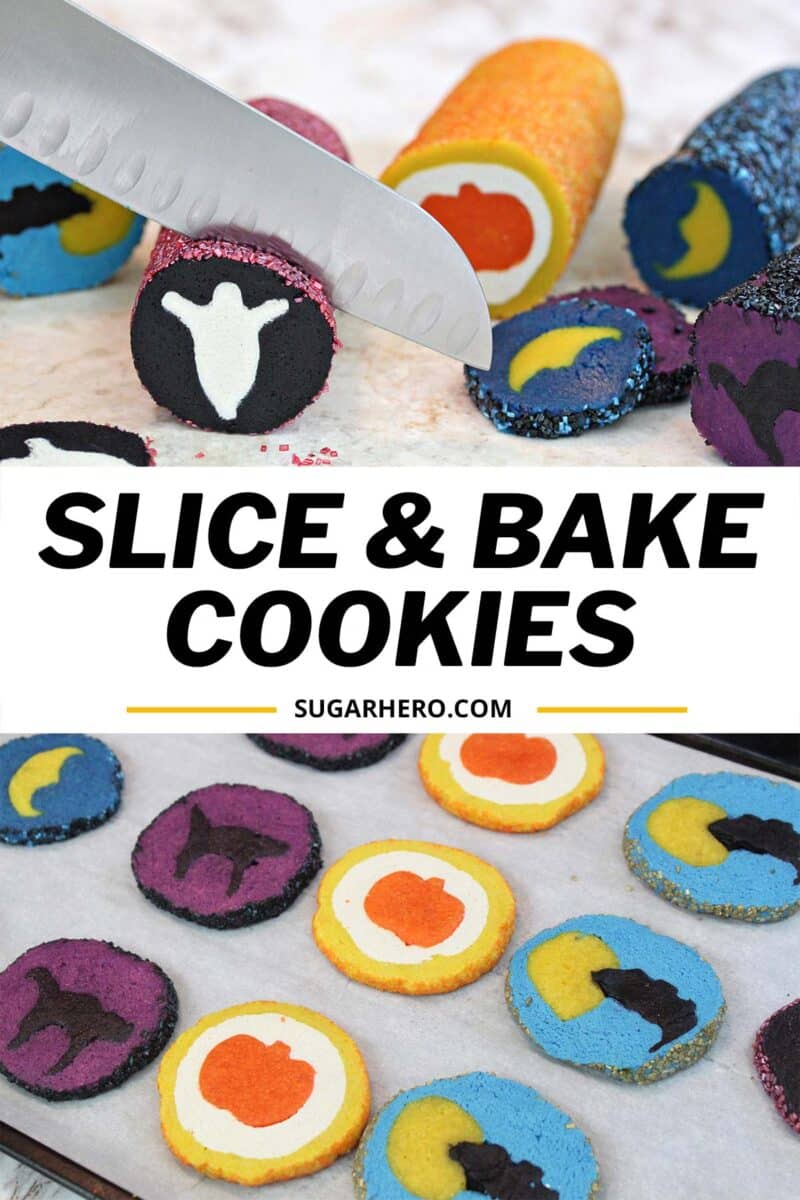
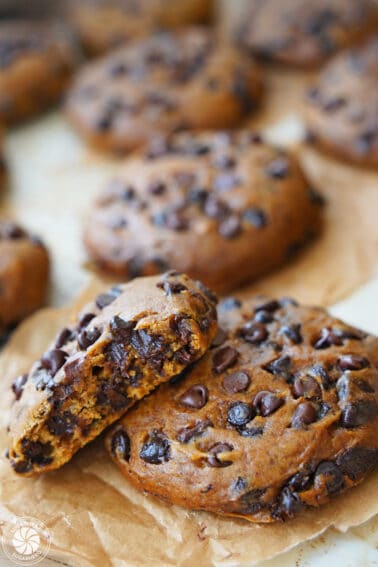
Take your cookie baking up a notch with this Slice and Bake Cookie recipe! Transform regular sugar cookie dough into fun Halloween cookies with surprise designs inside.
🍪 How to Make Slice & Bake Cookies
I have a love-hate relationship with the slice-and-bake cookies you can buy at the grocery store. I LOVE the idea of them—the fact that you can slice into a tube of ordinary sugar cookie dough and discover a pumpkin, or a Christmas tree, or a heart on the inside absolutely delights my inner child. It’s magical!
Unfortunately, I like the IDEA of these cookies more than the final product. What can I say? I’m a sucker for homemade dessert recipes, and there’s no way that cookies from a tube can compare to sugar cookies that have been made with real butter, the best vanilla extract, and of course, love.

That’s why I’m thrilled to share this recipe with you today! I’ve cracked the code on making SUPER FUN slice and bake sugar cookies, with hidden designs inside! These are Halloween themed desserts, obviously, but you can use this technique for any theme, any holiday, any shape, any color scheme…you get the idea.
Fair warning: these are time consuming because there are a few chilling periods involved, but the technique is not hard, and if you like to play with your food, it’s ridiculously fun. Plus, I made a video showing you exactly how it’s done!
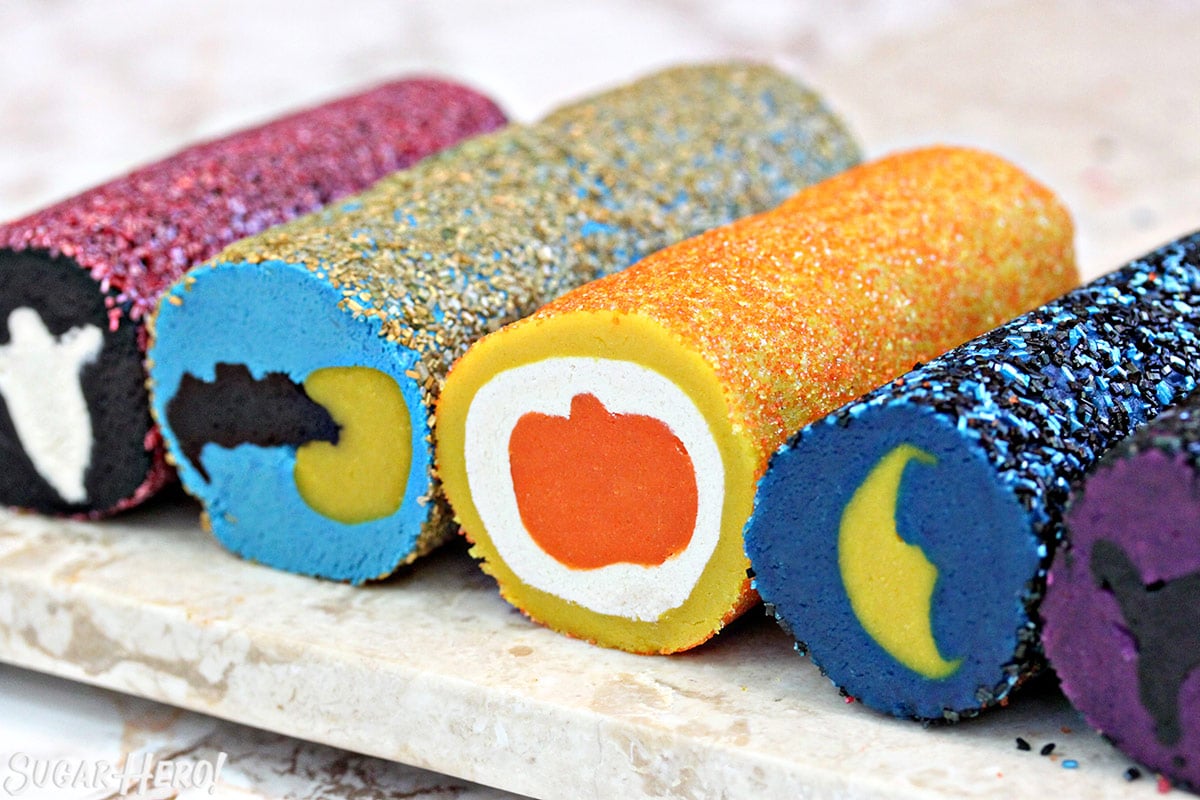
If you want more Halloween baking inspiration, don’t miss our Witch’s Brew Halloween punch, Candy Corn Cupcakes, Monster Cake, and super-spooky Melting Chocolate Skulls.
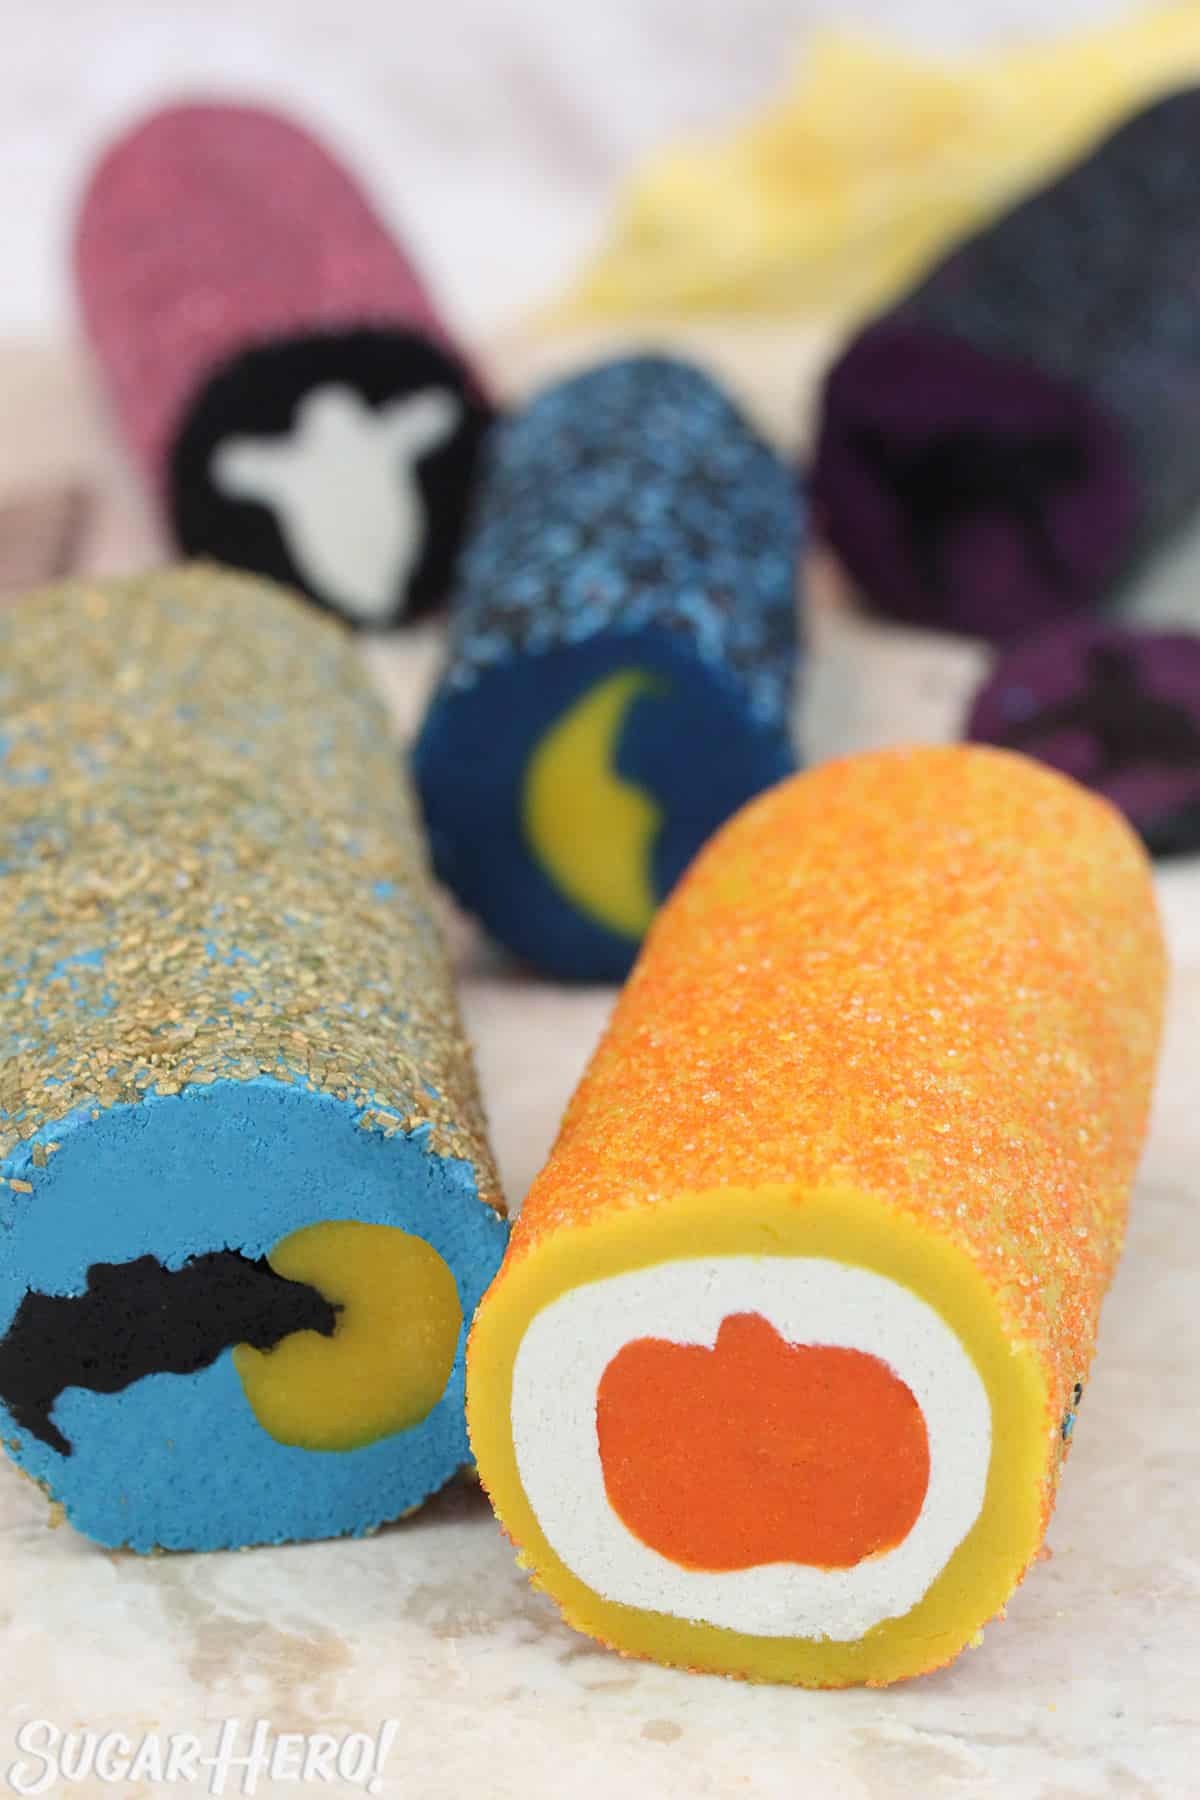
Table of Contents
🧾 What You’ll Need
Must-Have Equipment
The cookies themselves call for standard baking ingredients you probably have one hand — butter, eggs, flour, etc. But to create the vibrant colors and intricate shapes, you’ll want to pick up a few specific items: (Links are affiliate links and I earn a small commission from qualifying purchases.)
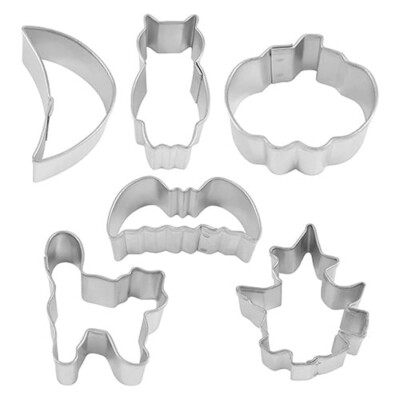
- Mini Halloween Cookie Cutters: To make the shapes in the middle, you’ll want to use miniature cookie cutters, preferably around 1-1.5″. This set of mini cutters has a fun variety of Halloween shapes.
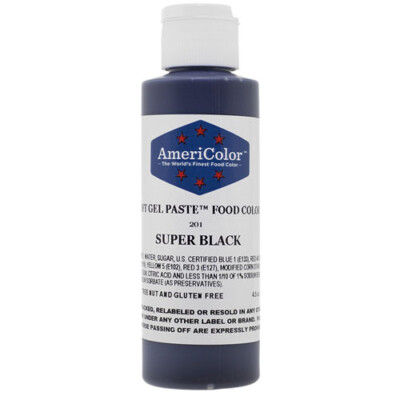
- Black Gel Food Coloring: Black is a HARD color to achieve, and it typically takes a lot of food coloring to get to true black. I like to use Americolor Super Black Gel Food Coloring because it’s a strong, vibrant color, and doesn’t have an aftertaste. It will dye your tongue a blue-black, however, so be warned in advance.
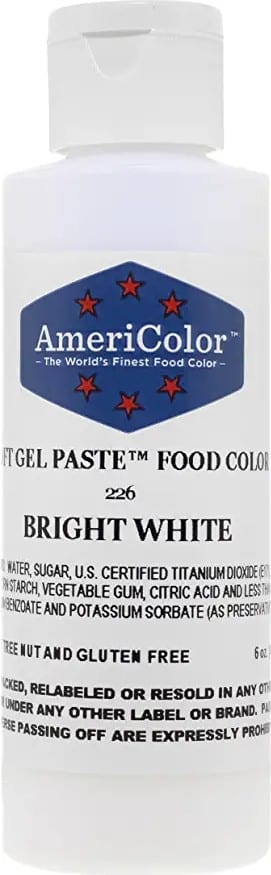
- White Gel Food Coloring: If you want bright white ghost cookies, you’ll want to add some Americolor Bright White Gel Food Coloring to your dough.
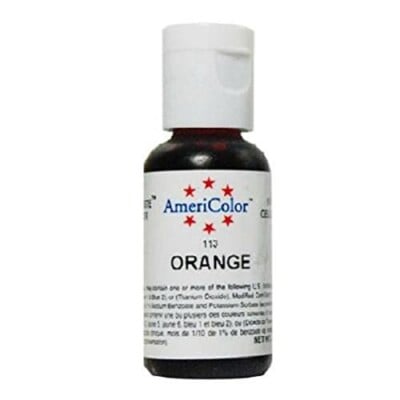
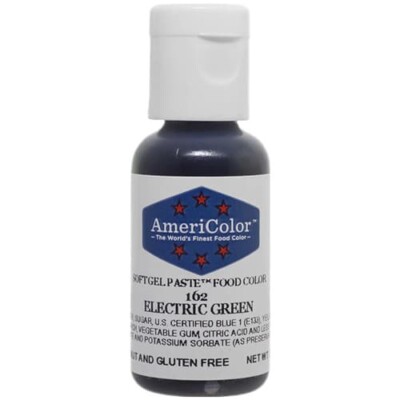
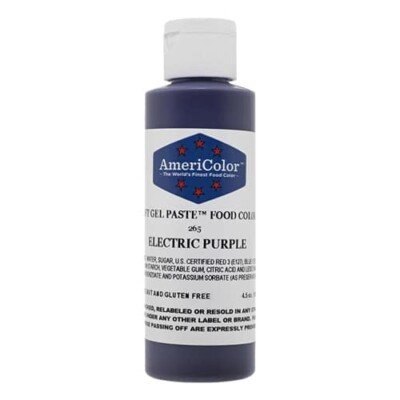
- Additional Food Coloring: In addition to black and white, I used the following colors in these cookies: Electric Purple, Regal Purple, Lemon Yellow, Orange, and Super Red.
📸 Photo Tutorial: How to Make Slice and Bake Halloween Cookies
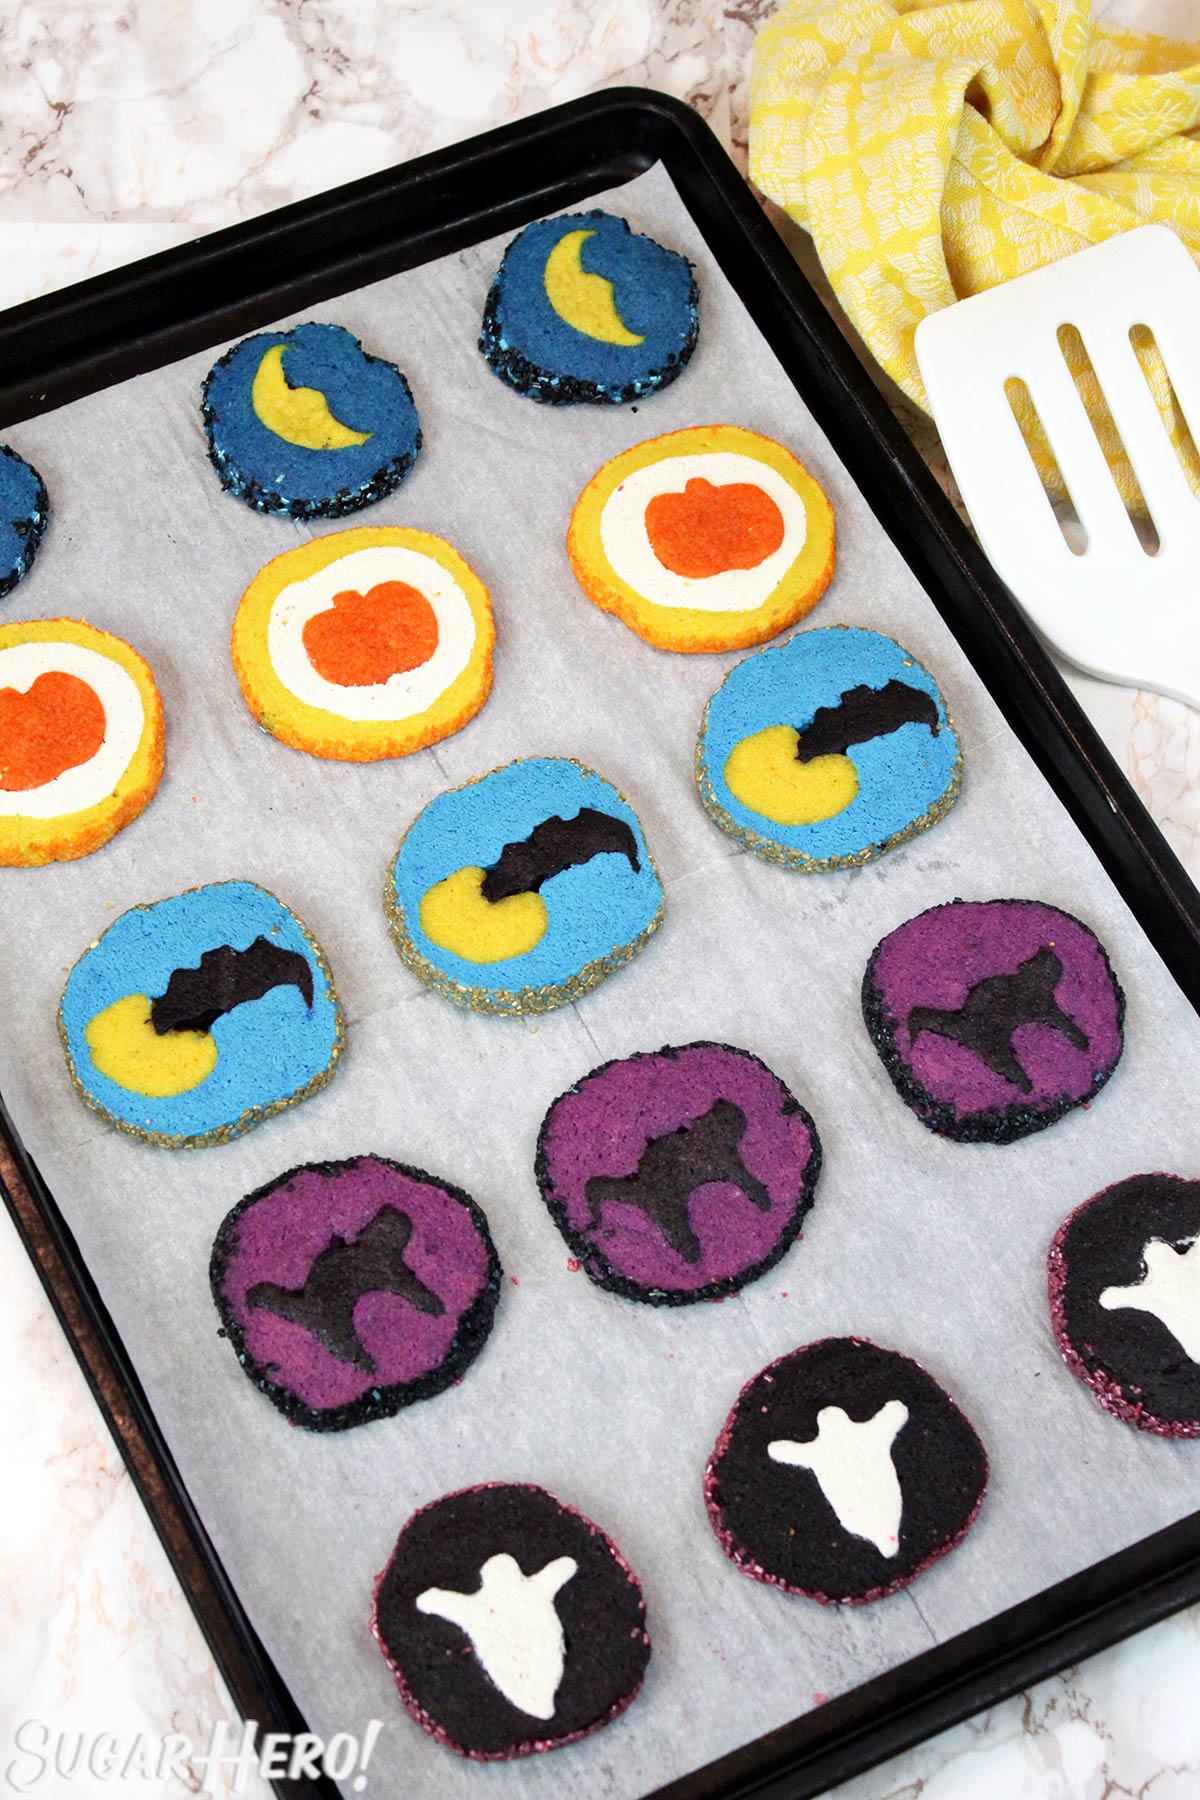
Here’s an overview of how to make Slice and Bake Halloween Cookies, using the black cat cookies as an example. The same technique is used for all of the cookies, so once you get the basics down, you can make any design you’d like. Full instructions and a tutorial video are included in the recipe card down below.
Divide and color the cookie dough
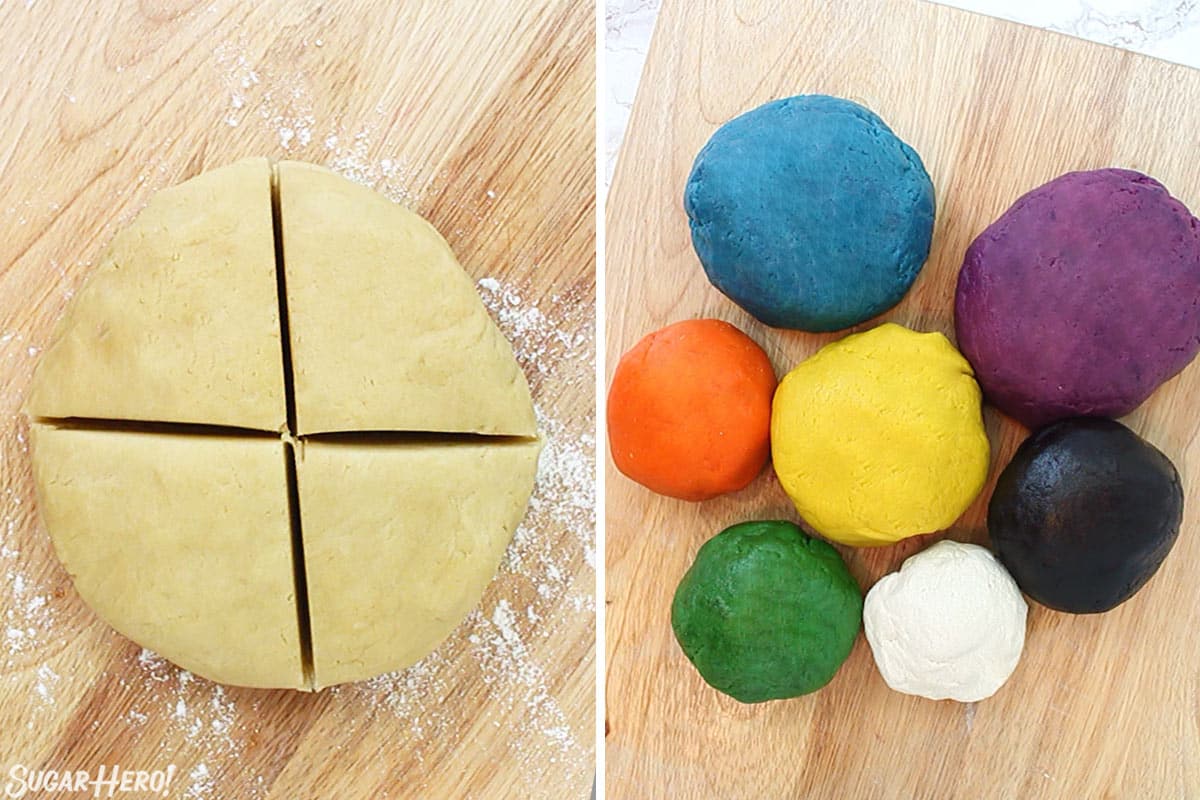
- After making the sugar cookie dough, decide how many colors you want to make, and portion out the dough.
- Knead gel food coloring into the cookie dough until the colors are evenly distributed. Wrap the colors you aren’t using in plastic wrap so they don’t start to dry out.
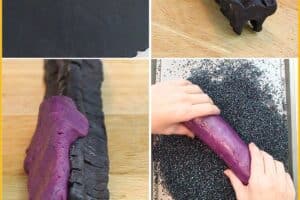
Make the interior shapes
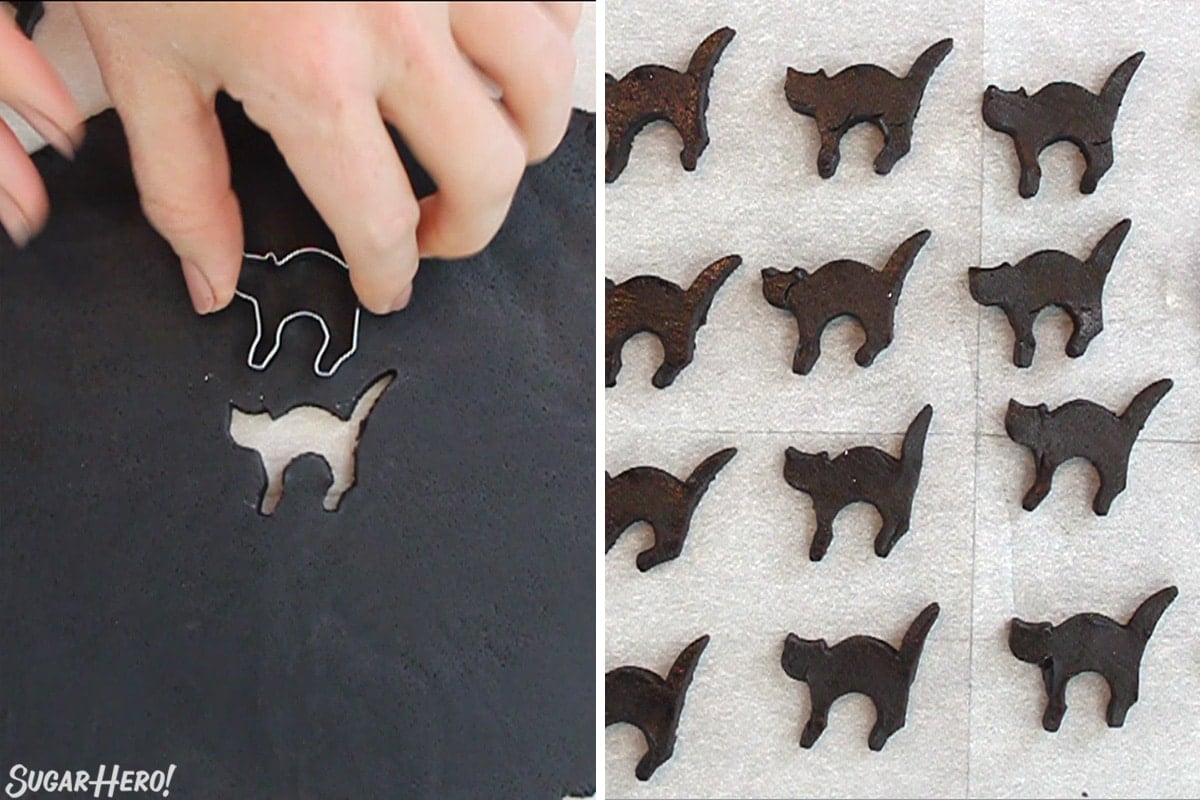
- Roll out black cookie dough between two sheets of parchment paper until it is around 1/4-inch thick, and refrigerate until firm.
- Use a small cookie cutter to cut out black cat shapes from the black dough. Place the cats on a baking sheet lined with parchment and freeze until firm, 10-15 minutes.
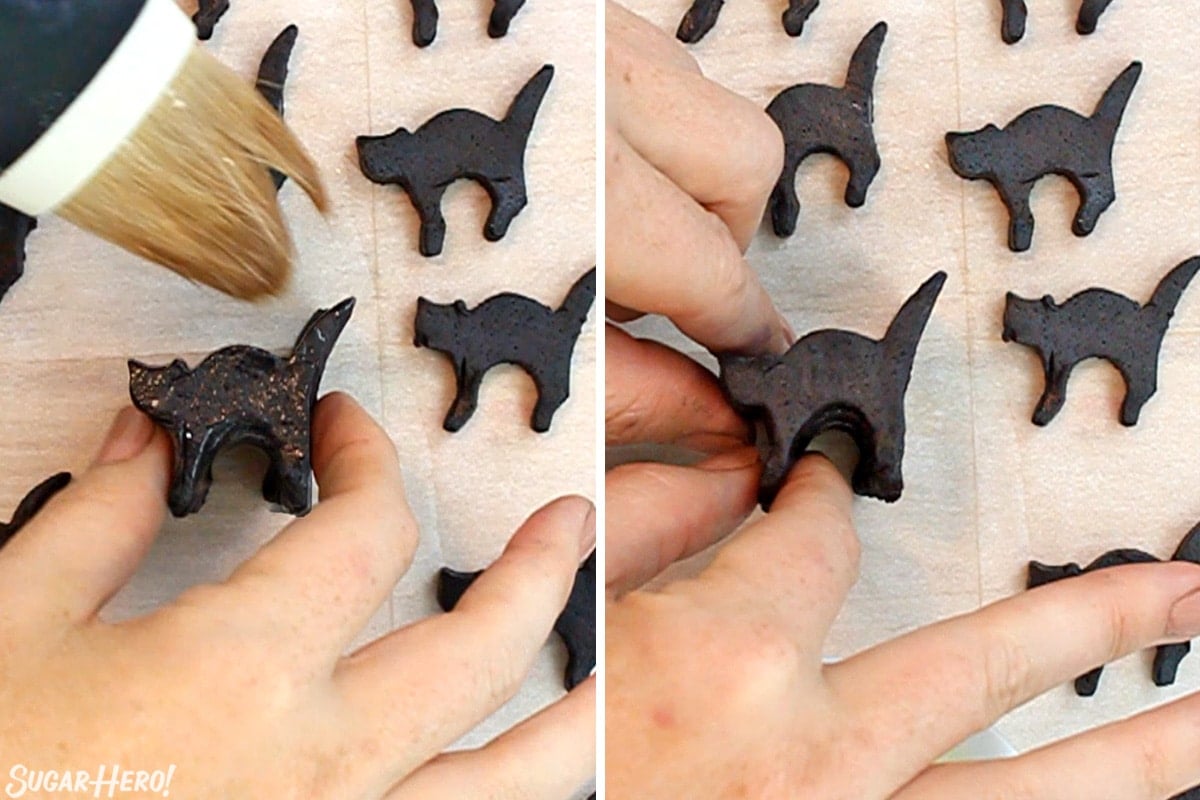
- Once the cats are firm, lightly brush one with egg white and press another cat on top. Continue to press the cats together until you have a long column of black cats.
- As you’re stacking them, make sure you press them together well, and pinch any extremities, like their legs and tails, together as well. Once all the cats are in one column, freeze again until very firm, 20-30 minutes.
Wrap soft dough around the inner shape
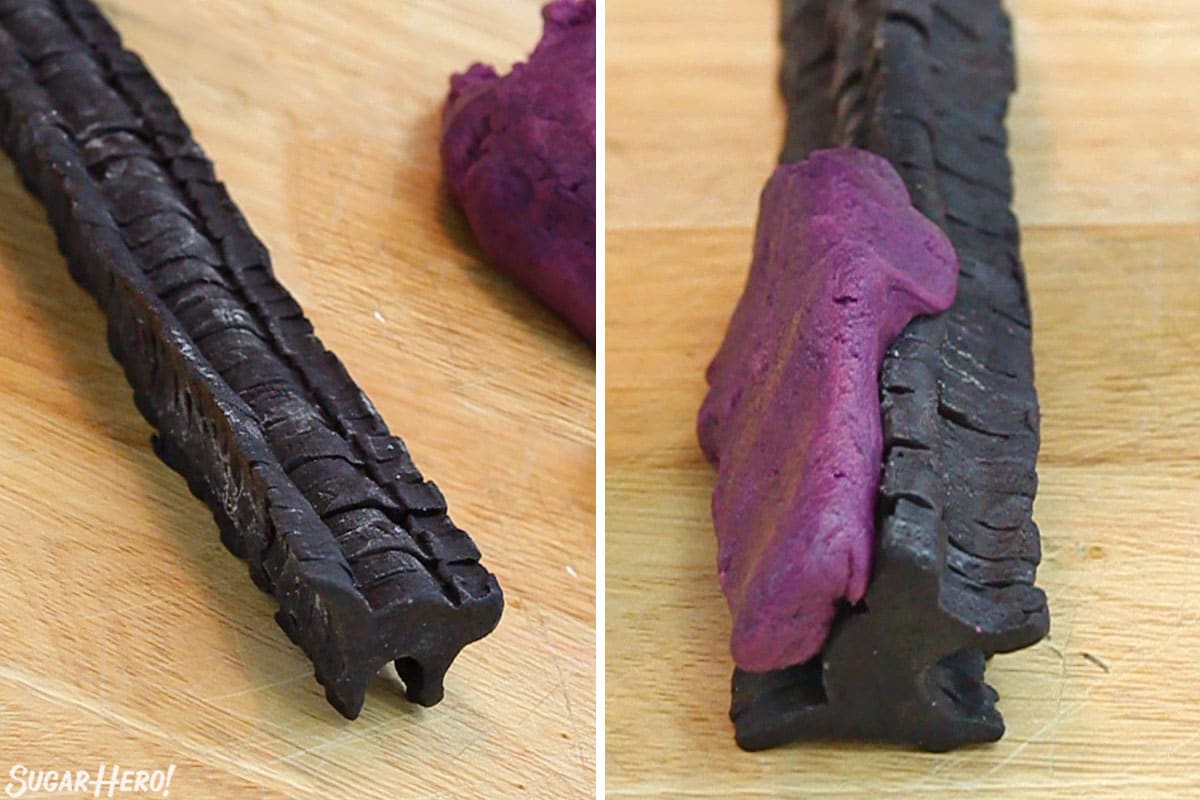
- When the column of cats is well-chilled, pinch off a section of the room temperature purple dough and roll it into a long skinny rope.
- Press the rope onto the cats, pushing it into any crevices and making sure that there are no air pockets between the black dough and the purple dough.
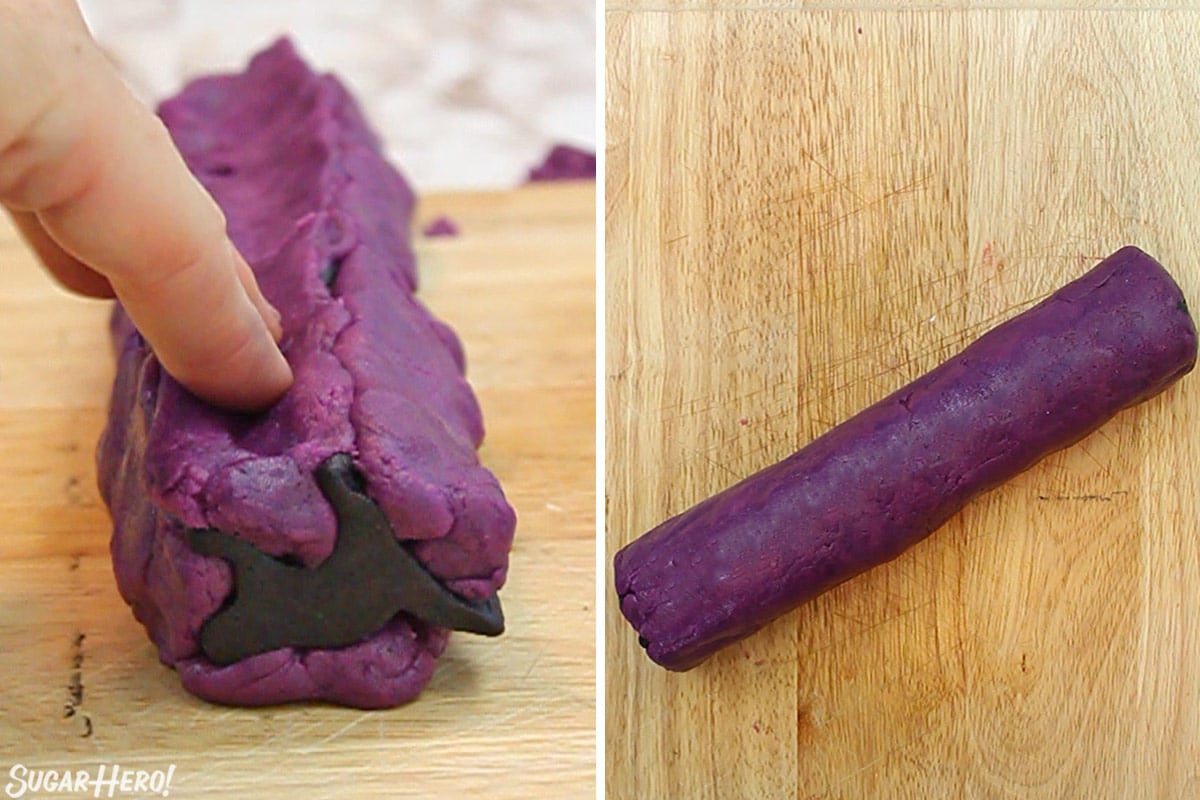
- Pinch, roll, and press the purple dough all around the cats until the cat column is completely surrounded. Work quickly so the cats don’t start to get too soft and misshapen.
- If the dough becomes soft and hard to work with, return it to the refrigerator or freezer briefly to chill.
- Roll the cookie dough log on your work surface until it becomes round.
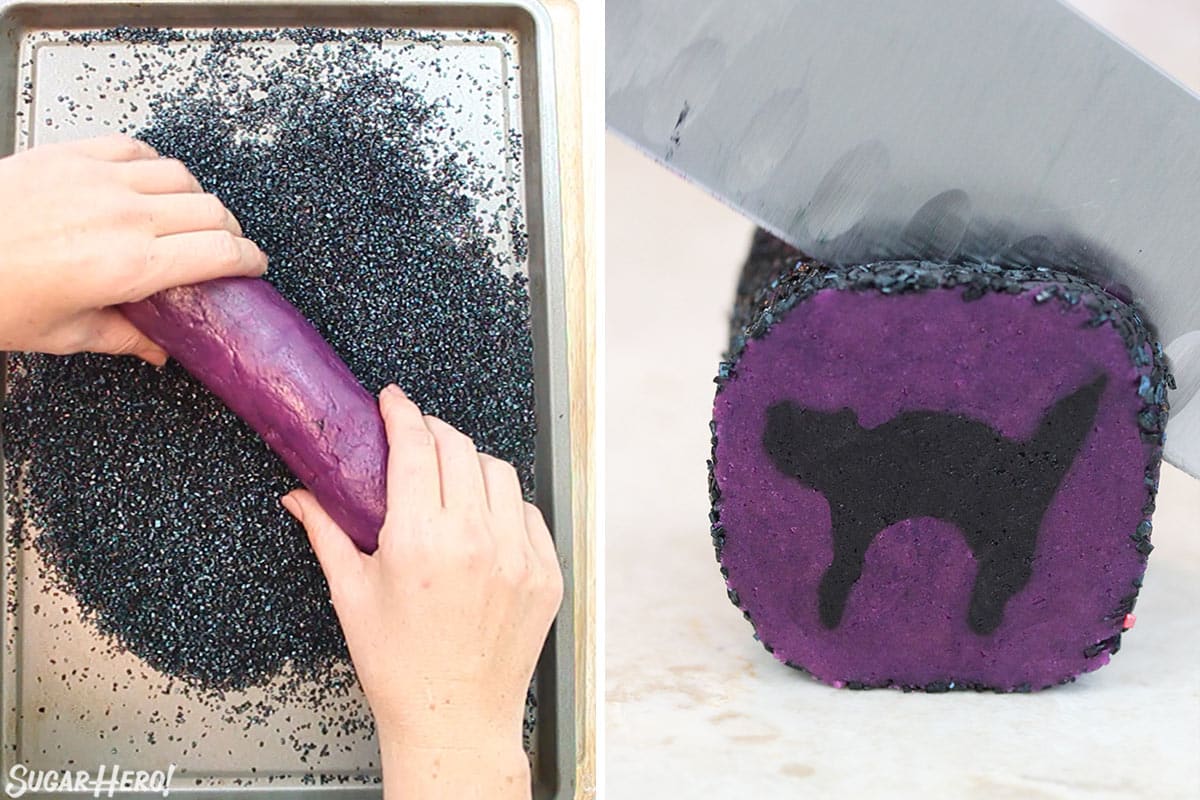
Chill, Slice, and Bake
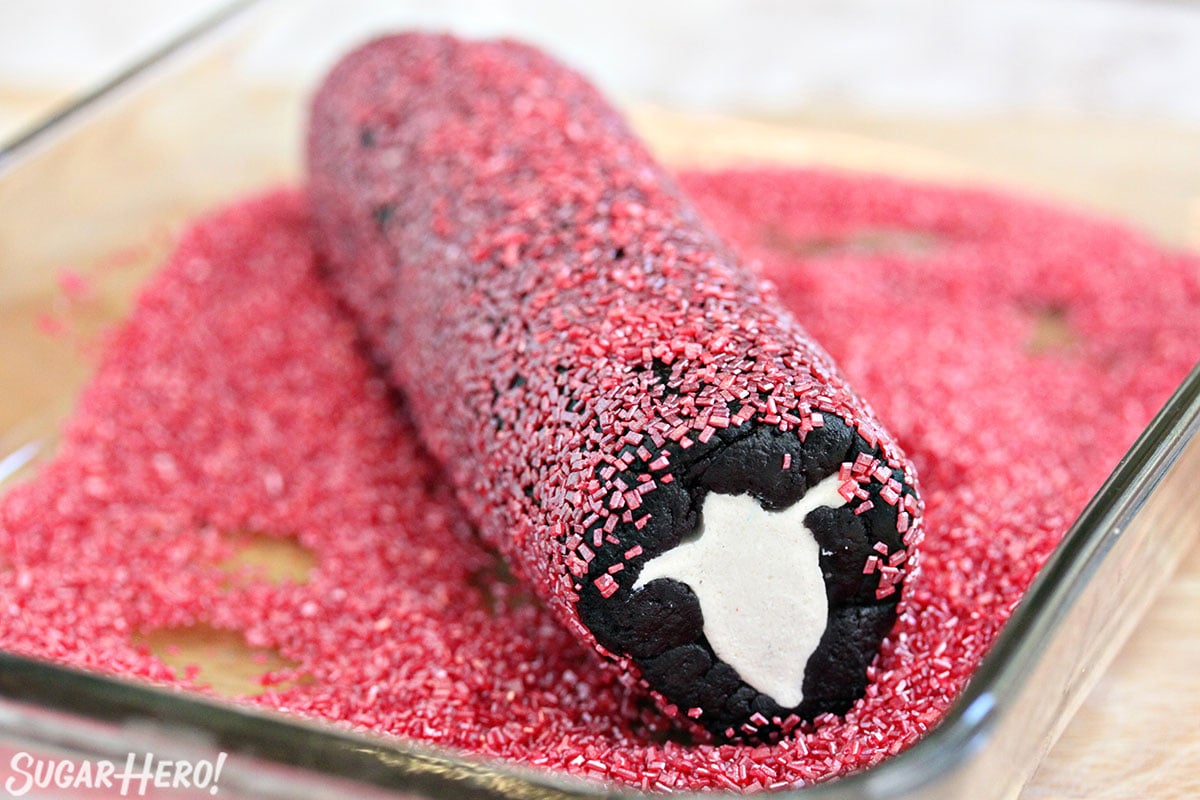
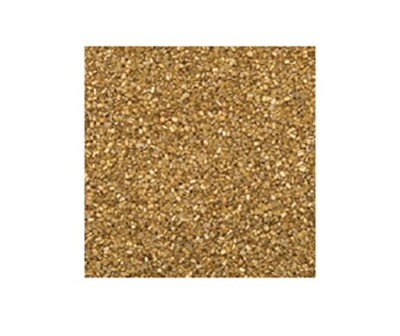
- Pour sugar sprinkles in a shallow pan, and roll the cookie dough log around in the sprinkles until the outside is covered. Refrigerate the dough until it is completely firm.
- Slice the log into rounds about 1/2-inch thick, and place on a parchment-lined baking sheet.
- Bake until slightly puffy and set around the edges.
💡 Tips and FAQs
Getting intense colors like black, red, and navy blue can be difficult. One thing that really helps is using a high-quality gel food coloring like Americolor or the Wilton Color Right system (not regular Wilton colors). The powdered coloring from The Sugar Art is also very good. However, at the end of the day, you’re not going to get bright colors without using a lot of coloring, which not everyone wants to do. In that case, please know that your cookies will be lighter in color, but no less delicious or cute!
These designs look best when the cookies don’t spread much, so here are a few tips to keep your sugar cookies from spreading:
1. Use cold butter – this particular recipe calls for cold butter, not room temperature, so make sure you’re following that instructions.
2. Don’t overbeat – the more you beat the dough, the more air gets beaten into it, which will result in cookies that spread during the baking process.
3. Chill early, chill often – cold temps are your best friend. Working with cold dough, and baking cold cookies, will help them keep their shape. When in doubt, stick that dough back in the fridge for a quick chill!
If you want to make the cookie dough in advance, you can wrap it well in plastic wrap and freeze it in a freezer bag for up to 6 months, or keep it in the refrigerator for up to 2 weeks. Let the dough defrost in the refrigerator overnight before using.
You can also freeze the cookie logs for up to 6 months. To use, let them defrost on the counter until soft enough to cut into rounds, then slice and bake. You may need to add an additional minute or two to the cooking time if they are very cold when baking. Once baked, the cookies are best enjoyed within 5 days.
👻 More Halloween Desserts
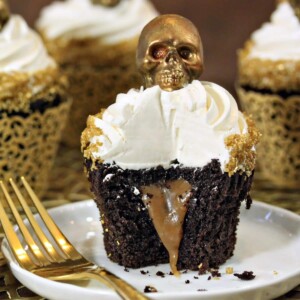
Caramel-Stuffed Chocolate Cupcakes
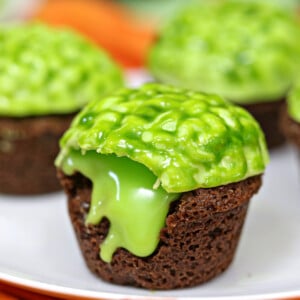
Zombie Brain Brownie Bites
Don’t miss the step-by-step tutorial showing how to make Slice & Bake Cookies – check out the web story here!
Leave a Review!
If you make this recipe, let us know! Leave a ⭐️⭐️⭐️⭐️⭐️ rating on the recipe below, and leave a comment, take a photo and tag me on Instagram @elabau, or use #sugarhero on IG!
Slice and Bake Halloween Cookies
Ingredients
- 18 oz all-purpose flour, (4 1/4 cups)
- ½ tsp salt
- 8 oz cold unsalted butter, cubed
- 12.25 oz granulated sugar, (1 ¾ cups)
- 2 tsp vanilla extract
- 2 large eggs
- Black gel food coloring, (I used Americolor Super Black)
- Purple gel food coloring, (I used Americolor Electric Purple and Regal Purple)
- 1 large egg white
- Small Halloween cookie cutters
- Black sugar sprinkles
Instructions
- In a bowl, whisk together the flour and salt and set aside for now.
- Combine the cold cubed butter and the sugar in the bowl of a large stand mixer fitted with a paddle attachment. Beat them on medium speed just until they're mixed together and there are no longer any chunks of butter. The key is to get a homogenous texture, but not beat until it's light and fluffy—we don't want to beat too much air into the dough, because that will cause the cookies to spread!
- Add the vanilla extract and one egg, and beat to combine. Add the second egg and beat until it's incorporated.
- Stop the mixer and add the flour, and mix on low speed until most of the flour is incorporated and just a few streaks remain. Finish mixing the dough with a spatula, scraping the bottom and sides of the bowl.
- Separate out about a fifth of the dough. Mix purple gel food coloring into the larger portion of the dough—you can either use your mixer, or knead it in by hand. If you’re using your hands, I HIGHLY recommend wearing plastic gloves to keep your hands clean! Note that the dough will be a lighter color once it bakes. Wrap the purple dough in cling wrap and leave it at room temperature.
- Mix the black gel food coloring into the smaller portion of dough. Roll it out between two sheets of parchment paper until it is around 1/4-inch thick, and refrigerate until firm.
- Use a small cookie cutter to cut out black cat shapes from the black dough. Space them together as close as possible, and once you’ve cut out as many black cats as you can, re-roll the dough and cut out more. Place the cats on a baking sheet lined with parchment and freeze until firm, 10-15 minutes.
- Whisk the egg white with a teaspoon of water. Once the cats are firm, lightly brush one with egg white and press another cat on top. Continue to press the cats together until you have a long column of black cats. If it gets unwieldy, you can make several smaller columns, or return the cats to the freezer for a few minutes to firm up again. As you’re stacking them, make sure you press them together well, and pinch any extremities, like their legs and tails, together as well. Once all the cats are in one column, freeze again until very firm, 20-30 minutes.
- When the cats are firm, pinch off a section of the purple dough and roll it into a long skinny rope. Press the rope onto the cats, pushing it into any crevices and making sure that there are no air pockets between the black dough and the purple dough.
- Pinch, roll, and press the purple dough all around the cats until the cat column is completely surrounded. Now roll the cookie dough log on your work surface until it becomes round.
- Put the black sugar sprinkles in a shallow pan, and roll the cookie dough log around in the sprinkles until the outside is covered. Wrap the log tightly in cling wrap, and refrigerate until completely firm, about 2 hours.
- Preheat the oven to 350 F. Slice the end off of the cookie dough log (the end will always be misshapen—more for you to snack on!) then slice cookie rounds a little more than ½-inch thick. Place the cookies on the baking sheets and bake for 9-10 minutes, until slightly puffy and set around the edges. Don’t wait for them to take on any color, and don’t overbake! These are best when still soft in the middle. Let cool for 5 minutes on the baking sheet, then move to a wire rack to cool completely.
Video

Recipe Notes
Measuring Tips
Our recipes are developed using weight measurements, and we highly recommend using a kitchen scale for baking whenever possible. However, if you prefer to use cups, volume measurements are provided as well. PLEASE NOTE: the adage “8 oz = 1 cup” is NOT true when speaking about weight, so don’t be concerned if the measurements don’t fit this formula.
Want to learn more about baking measurements and conversion?
Nutrition


These are so cute! I bet they would go down really well with kids at a Halloween party too!
These are amazing! I love that the designs don’t spread at all–that’s what always bugged me about the store-bought ones. Going to try them!
Ahhhh so cute! I think I like the bats the best, but it’s hard to choose!
Thank you for the great idea. I really don’t care for the cookies from a tube. I’m excited to take your idea and run with it.
The black & white ghosts are my favorite but all of theme are so cute! I’ve always thought that slice and bake cookies looked intimidating but now I want to give it a try!
So cute! I love your use of creativity here.
You make this look so easy — but I’m afraid my cookies would come out looking like a Rohrschak test!
These look super. I don’t celebrate Halloween, but intend to make Christmas cookies using this idea. By the way, if you crush your parchment paper into a wad, then flatten it out again, it will lay flat in the pan without curling and it doesn’t affect the way things bake.
these look amazing and such a great fun idea. whilst I totally understand the use of parchment paper, as someone who hates waste and is always concerned about our impact on the environment, I did wonder if you have ever used the re-usable liners you can buy? They are so easy to use and clean and I find that none of my bakes ever stick to them, and it just saves on buying and throwing away so much parchment paper.
I LOVE these, they’re so fun! What a brilliant recipe!