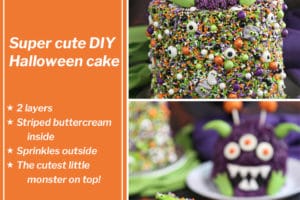

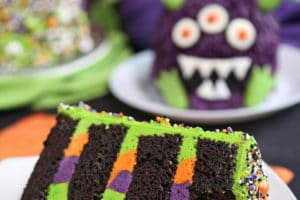
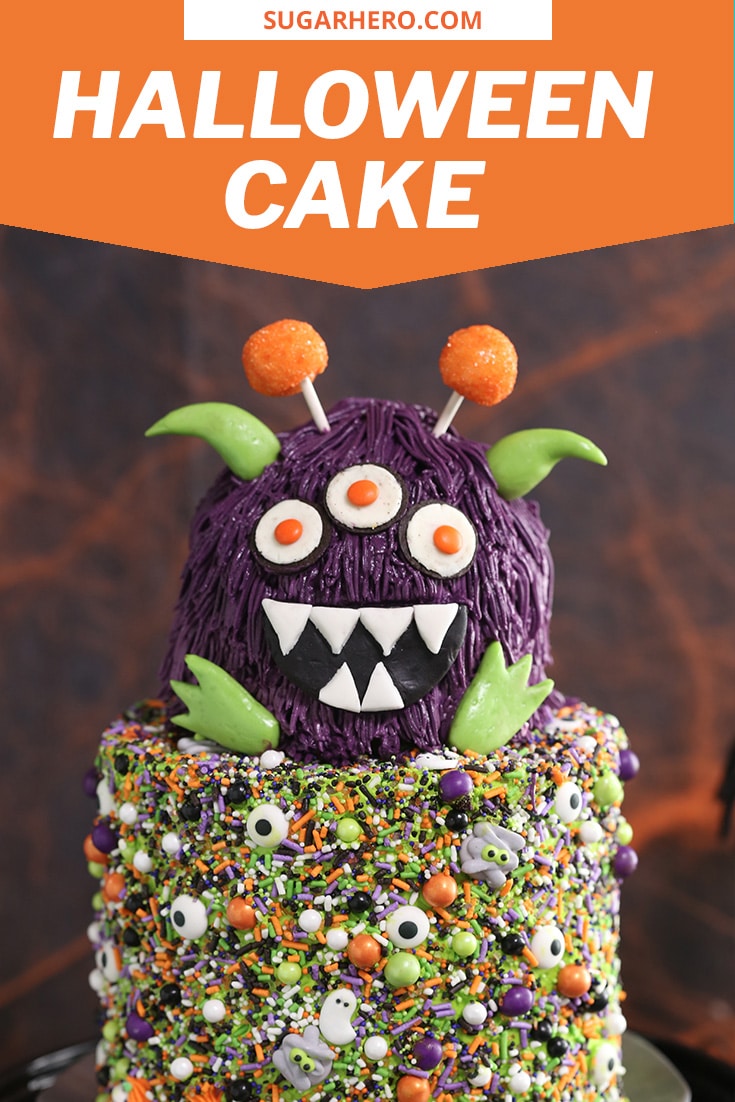
This Monster Cake is so good, it’s scary! This cute Halloween layer cake has a base covered in sprinkles, and a top layer decorated to look like a mini monster. Perfect for parties and spooky occasions! You can use whatever cookies and candies you have to customize the monster and really go wild.

DIY Buttercream Monster Cake
One of the best things about Halloween is that it’s so over-the-top. It thrives on excess–excessive candy, excessively planned costumes, excessive decorations, and of course, excessive desserts.
Sure, you can make simple little Pumpkin Shortbread Cookies, but isn’t it way more fun to make Melting Chocolate Skulls, Zombie Brain Brownie Bites, customized Slice and Bake Halloween Cookies, or Red Velvet Spiderweb Cakes with a giant spider on top?

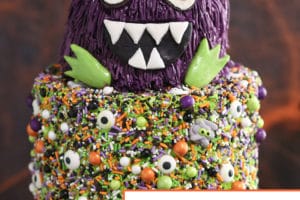
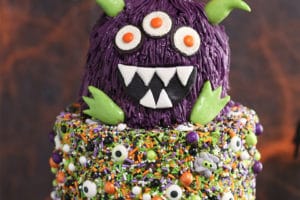
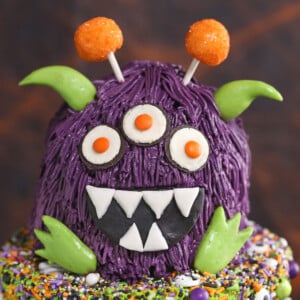
With that in mind, today we’re making a two-layer monster cake. The bottom layer is covered in creepy monster-themed sprinkles, while the top layer is decorated to look like a mini monster, complete with candy horns and antennae! (Speaking of mini monsters, don’t miss these Halloween Monster Cupcakes!)

Table of Contents
🧾 Ingredients
- Chocolate Cake: The cake might look large in pictures, but the cake rounds are actually smaller than usual. The base round is 6″ and the monster on top is a 4″ cake, so it feeds as many people as a standard 9″ or 10″ cake would. It’s perfect for a Halloween party or any spooky gathering! This is the same base recipe I use for my chocolate cupcakes, and it ALWAYS gets huge compliments when people taste it.
- Sprinkles: The sprinkles are the stars of the bottom layer! I used this Monster Mashup mix from SprinklePop, which has adorable royal icing mummies, ghosts, eyeballs, and pumpkins scattered throughout. If you can’t find this one, there are a lot of Halloween sprinkle mixes online, or make your own by buying a few different colors of Halloween-ish jimmies and candy pearls and tossing them together.
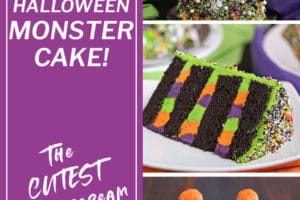
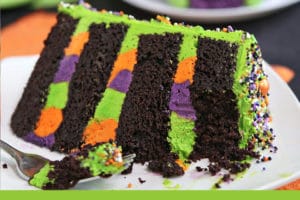
- Frosting: Of course, I used my favorite Easiest Swiss Meringue frosting for this cute monster cake! I took my color cues from the sprinkle mix and filled the cake with purple, orange, and green frosting. The outside of the bottom tier was frosted green, then while the frosting was still soft, the sprinkle mix was pressed into the top and sides until it was completely covered.

🥄 Equipment
- A mixer — to make the cake batter and frosting. (I love my trusty KitchenAid stand mixer.) A stand mixer or a hand mixer will both work, and whatever you use, you’ll want to use a paddle blade for the cake batter, and the whisk attachment for the frosting.
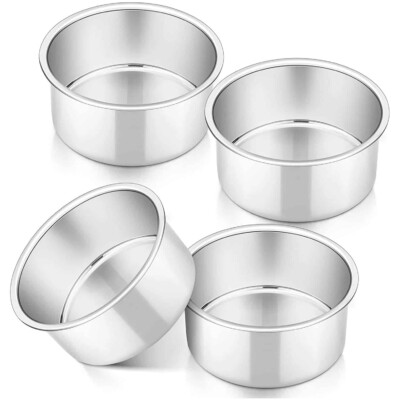
- Cake pans — a 4″ pan and two 6″ pans are ideal. If you don’t have a 4″, you can bake a third 6″ and cut it down to 4″ layers.
- Basic cake tools — assembling and decorating will be MUCH easier if you have a cake turntable and offset spatula.
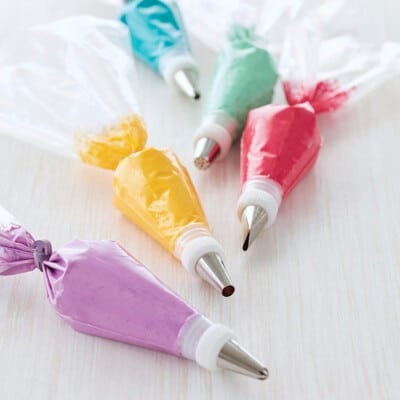
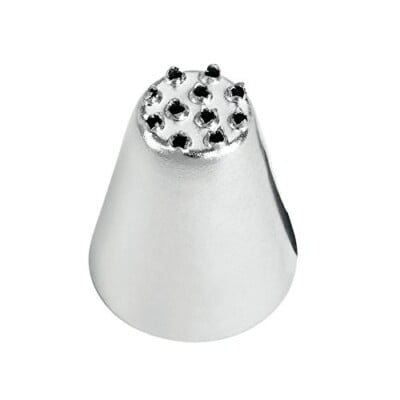
- Piping tools — to get the cool monster fur effect, you’ll need a piping bag and a grass piping tip.
Tip: If you don’t have a grass tip, you can also make the fur using a small star tip, and just cover the cake with frosting stars for a different kind of furry texture.

🍰 Decorating A Monster Cake
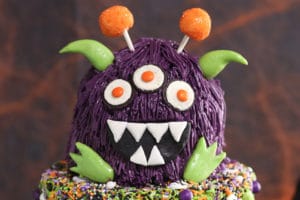
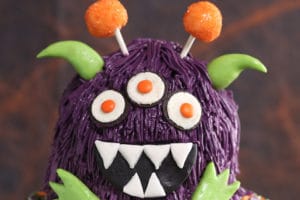
This furry monster friend was decorated with random candies and cookies to give him his own goofy personality. I used things I had already available or could conveniently buy, and recommend you do the same. Don’t feel like you have to recreate this one–use your own favorite candies to put a unique twist on your monster!
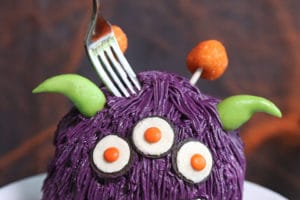
I used colorful fruit chews to make the feet, horns, and antennae. I like using the Tootsie brand chews because they hold their shape well, but Starburst or similar candies also work. (And of course, fondant works too!) Mold them just like you would Play-Doh, and let them dry a bit until they’re firm.
The eyes are made from mini Oreo Thins with mini M&Ms in the center, and the mouth is black fondant with white fondant teeth. (I think half of an Oreo cookie could also make a good monster smile if you’re fondant-averse.) Really, just go through your cupboards (or your kid’s candy stash??) and see what colorful goodies you can come up with to make your monster.

💡 Tips and FAQs
- Working with sprinkles: When working with a sprinkle mix that has large sprinkles, like this one, I like to individually press the biggest sprinkles on the cake, and then fill in with handfuls of the medium and small ones. This guarantees the largest sprinkles are evenly distributed around the cake, and with character sprinkles like these, it ensures they’re not applied backwards. It’s a little more time-consuming to do this way, but definitely worth it in the end.
- Piping fur tip: The key to successfully piping this fur is to have frosting that’s the right consistency and temperature. Too cold/firm and the fur strands won’t lengthen and hang down properly. Too warm/soft and they’ll mush together in a big frosting blob. I always try to frost in a room that’s not too warm–if this means I have to leave my hot kitchen and work in the living room temporarily, so be it!
- Frosting troubleshooting: I also recommend that people who have “hot hands” work with smaller piping bags. Only put a cup or two of frosting in your bag at a time. This way, if your hands do cause the frosting to get too warm and soft, you can easily swap the bag out with another small one. Bags of warm frosting can be briefly refrigerated to return them to a better piping texture.
This was such a fun cake to make AND eat. The bright colors, loads of sprinkles, and cheery monster on top really caught everyone’s attention. I would love to see how your monster cakes look if you give it a try!

🧡More Halloween Cakes You’ll Love:
- Red Velvet Marshmallow Spiderweb Cake
- Stuffed Halloween Cupcakes
- Caramel Chocolate Cupcakes with Caramel Skulls
- Pumpkin Chocolate Chip Cake
- Skull Cake
- Devil’s Food Cake
- Stenciled Halloween Cake

Leave a Review!
If you make this recipe, let us know! Leave a ⭐️⭐️⭐️⭐️⭐️ rating on the recipe below, and leave a comment, take a photo and tag me on Instagram @elabau, or use #sugarhero on IG!
Don’t miss the step-by-step tutorial showing how to make a Monster Cake – check out the web story here!
Monster Cake
Ingredients
For the Chocolate Cake:
- 6 oz unsalted butter, at room temperature
- 4.75 oz granulated sugar, (2/3 cup)
- 5 oz brown sugar, (2/3 cup), packed
- 2 large eggs, at room temperature
- 2 tsp vanilla extract
- 8 fl oz buttermilk, (1 cup), at room temperature
- 4 fl oz sour cream, (1/2 cup), at room temperature
- 2 tbsp water , or coffee
- 7.8 oz all-purpose flour, (1¾ cups)
- 3 oz unsweetened cocoa powder, (1 cup)
- 1½ tsp baking soda
- ½ tsp salt
For the Frosting:
- 6 fl oz pasteurized liquid egg whites, (3/4 cup), see Note below
- 24 oz powdered sugar, (6 cups)
- 1/2 tsp salt
- 24 oz unsalted butter, (6 sticks), at room temperature
- 2 TBSP vanilla extract
- Assorted gel food coloring, Green, purple, and orange food coloring, I used Americolor Electric Green, Electric Purple, and Electric Orange gel coloring
To Decorate:
- 2 cups mixed Halloween sprinkles, (12-16 oz depending on sprinkles)
- 3 Oreo Thins
- 3 M&Ms Minis
- 4 green fruit chews
- 2 orange fruit chews
- Black fondant
- White fondant
- 2 lollipop sticks
Instructions
To Make the Chocolate Cake:
- Line a 4-inch cake pan and two 6-inch cake pans with parchment, and spray them with nonstick cooking spray. (If you don’t have a 4-inch cake pan, you can use a small cheesecake pan, a jumbo muffin tin, or a third 6-inch cake and just trim it later.) Preheat the oven to 350 F.
- Add the butter and both sugars to the bowl of a large stand mixer fitted with a paddle attachment. Beat them together on medium-high speed, until light and fluffy, about 5 minutes. Add the eggs one at a time, beating well after each addition. Add the vanilla extract and mix it in.
- In a separate bowl, whisk together the buttermilk, sour cream, and water (or coffee, if using). In a different bowl, sift together the flour, cocoa powder, baking soda, and salt. With the mixer running on low, add a quarter of the sifted flour mixture. When the flour streaks have almost all disappeared, add a third of the liquid to the mixing bowl. When that’s incorporated, continue to add the drys and wets in an alternating pattern, ending with the dry ingredients.
- When the dry ingredients are nearly incorporated, stop the mixer. Scrape down the bottom and sides of the bowl with a rubber spatula, and finish mixing the cake by hand. Divide the batter between the three pans, filling each about 2/3 full, and smooth it into an even layer. Bake the cakes for 40-50 minutes, until a toothpick inserted into the center comes out with just a few moist crumbs attached. Cool the cakes completely before using.
- The cakes can be made several days in advance and kept, well-wrapped and refrigerated or frozen, until ready to use. If you freeze them, make sure they are partially defrosted before use.
To Make the Frosting:
- Combine the whites, powdered sugar, and salt in the bowl of a large stand mixer fitted with a paddle attachment. Mix everything together on low speed, until the sugar is moistened and no dry patches remain. Turn off the mixer, scrape down the sides and bottom of the bowl with a spatula, then turn the mixer to medium speed. Beat on medium for 5 minutes.
- After 5 minutes, turn the mixer to medium-low and start adding the softened room temperature butter, 1-2 tablespoons at a time. Once all of the butter is incorporated, add the vanilla extract and mix it in. Stop the mixer and scrape down the bottom and sides once more. Turn the speed to medium and beat the buttercream for 10 minutes.
- At the end, you’ll have a frosting with a wonderfully light and creamy texture. It can be used right away, or stored in the refrigerator for up to two weeks, or the freezer for up to two months. If you have chilled the frosting, let it come to room temperature COMPLETELY and then beat it for several minutes to smooth it out and restore its texture before using it.
To Assemble and Decorate:
- Separate out about a cup and a half of frosting, and color it bright orange. Place it in a piping bag fitted with a large round tip or coupler.
- Divide the remaining frosting in half, and color one half bright green and one half bright purple. Place each of these colors in piping bags as well.
- Place the 6-inch cakes on 6-inch cake cardboards. Trim the tops of the cakes so that they’re level, and cut each cake in half so you end up with four cake layers total. Place one cake on a turntable, and pipe a thick circle of green frosting along the outside edge. Pipe a thick orange circle inside of the green one, then add a purple ring inside that. Continue to pipe circles of buttercream in the same pattern until you reach the center of the cake.
- Add a second cake round on top, and repeat the frosting circles. Add a third cake round and repeat once more. Place the last cake round on top, press down gently, and make sure the sides of the cake are straight. Spread a very thin layer of green frosting along the top and sides of the cake to lock in any crumbs. Refrigerate for 45-60 minutes, until the cake is firm.
- While you wait for the 6-inch cake to set, prepare the 4-inch cake. Place it on a 4-inch cake cardboard and cut the cake in half. Do not cut off the top to make it level—we want that cake dome!
- Repeat the frosting circles inside the cake, but this time start with purple along the outside edge. Add the top of the cake, and cover it with a thin layer of purple frosting to lock in crumbs. Refrigerate until firm.
- To decorate the 6-inch cake, remove it from the refrigerator once it is firm. Spread more green frosting on the top and sides of the cake. Use a metal spatula to make it as smooth and even as possible, but don’t worry about getting a perfect finish because it will all be covered by sprinkles. Take a 4-inch round cookie cutter, and center it on top of your cake, embedding it slightly in the top.
- Place the sprinkles in a bowl, and hold the cake in one hand, over a rimmed baking sheet. Take a handful of sprinkles in the other hand, and press them gently but firmly against the side of the cake. Let the excess sprinkles fall into the pan, so you can scoop them up and re-use them. Cover the sides of the cake entirely. Cover the top of the but leave the center of the cookie cutter empty. (Leaving the blank space in the middle will make it easier to layer the cakes.)
- Once the cake is covered with sprinkles, take a dowel and insert it into the center of the cake. Trim the dowel so it’s flush with the top of the cake, then spread a thin layer of frosting over it to adhere the top layer. Carefully set the purple monster cake on top, centering it over the dowel and making sure it’s secure.
- Fit a grass (multi-opening) tip onto the bag of purple frosting. Pipe long strands of fur all over the monster cake. I like to begin about an inch from the bottom and pull the strands down so it’s like shaggy fur. After you’ve done the bottom layer, go up another inch and add a second layer that overlaps the first. Continue until you’ve covered the entire cake with frosting fur.
- You can decorate the monster with whatever candies and treats you have available! To make yours look like mine, twist open 3 Oreo thins, and press a mini M&M into the center of each cream-topped cookie.
- Roll out black fondant, and cut it into a smiling mouth shape. Roll out a thin tube of white fondant, and cut it into small triangles to make teeth. Stick the teeth onto the black mouth with a little dab of water on each tooth.
- Take 2 green fruit chews, and roll them between your hands to make horn shapes. Press a toothpick into the base of each horn, so they’re easier to secure into the cake. Take 2 more green fruit chews, and flatten them out. Cut them into a foot shape. Take 2 orange fruit chews, and roll them into balls. Skewer them on lollipop sticks, and roll them in orange sparkling sugar.
- Now assemble! Press the eyes, mouth, and feet onto the front of the monster. Stick the horns securely into the sides of the monster, and insert the lollipop sticks halfway into the top of the head, so the antennae stick out.
- For the best taste and texture, serve this cake at room temperature. Leftovers can be stored, well-wrapped, in the refrigerator for up to 5-7 days. The candy elements might start to get sticky and unappetizing, so keep an eye on them and remove them if necessary.
Video

Recipe Notes
Measuring Tips
Our recipes are developed using weight measurements, and we highly recommend using a kitchen scale for baking whenever possible. However, if you prefer to use cups, volume measurements are provided as well. PLEASE NOTE: the adage “8 oz = 1 cup” is NOT true when speaking about weight, so don’t be concerned if the measurements don’t fit this formula.
Want to learn more about baking measurements and conversion?
Nutrition


Elizabeth –
You da bomb! What a sweet monster cake! And bonus – you get to feast on it! Love it as Halloween is one of my very fave holidays… why? Because no one cares if you celebrate it, it involves spooky stuff and you get to eat candy! Yay! Winner!
Mary Osborne
San Pedro, CA
Haha, I love all your reasons for loving Halloween! It’s one of my favorites too–just all fun, and no drama! Thanks Mary!
Love your monster cake. like all the sprinkles that you used. can never have to much sprinkles.
AGREED! All the sprinkles, all the time! 😀 Thanks Teresa!
So cute! I like to get really extra with my holiday desserts — so with you that Halloween is the time to live it up. When else will we get to use eyeball sprinkles? Great tip on how to work with the sprinkles — they look perfect and that’s such a great way to get them well spaced. Thanks, Elizabeth!
Thanks, Carissa. Cheers to an over-the-top Halloween for you too!
Wow, what an incredible cake! Both spooky and cute – my kids would definitely love to see this at any Halloween gathering!
This monster cake is a lot of work but totally worth it. The best Halloween party treat!
This is the ultimate Halloween cake! Pinned it as well
This is such a fun and quirky cake I absolutely love it. I am definitely going to be trying this for Halloween!
This cake is so adorable!! My kids would absolutely love it. I’m going to make it for Halloween.
I am not a skilled cake decorator by any means but my Halloween obsessed toddler had to have this cake for her third birthday. Very easy to follow and turned out AMAZING! Thank you for saying exactly what you used. I have an infant and lacked anytime for my own creativity. Was definitely a hit.
Amber I am so thrilled to hear this!!! Happy birthday to your sweet girl and I hope she had the best Halloween-themed party ever. 😀