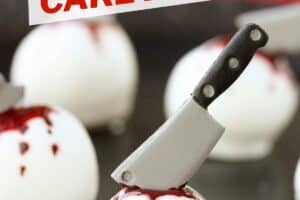
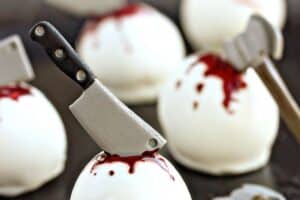
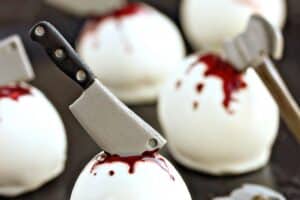

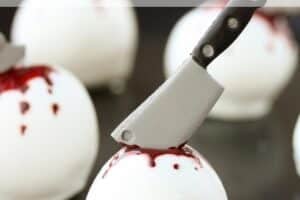
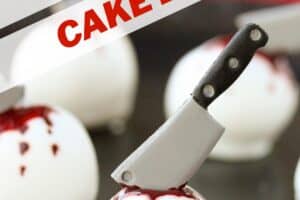
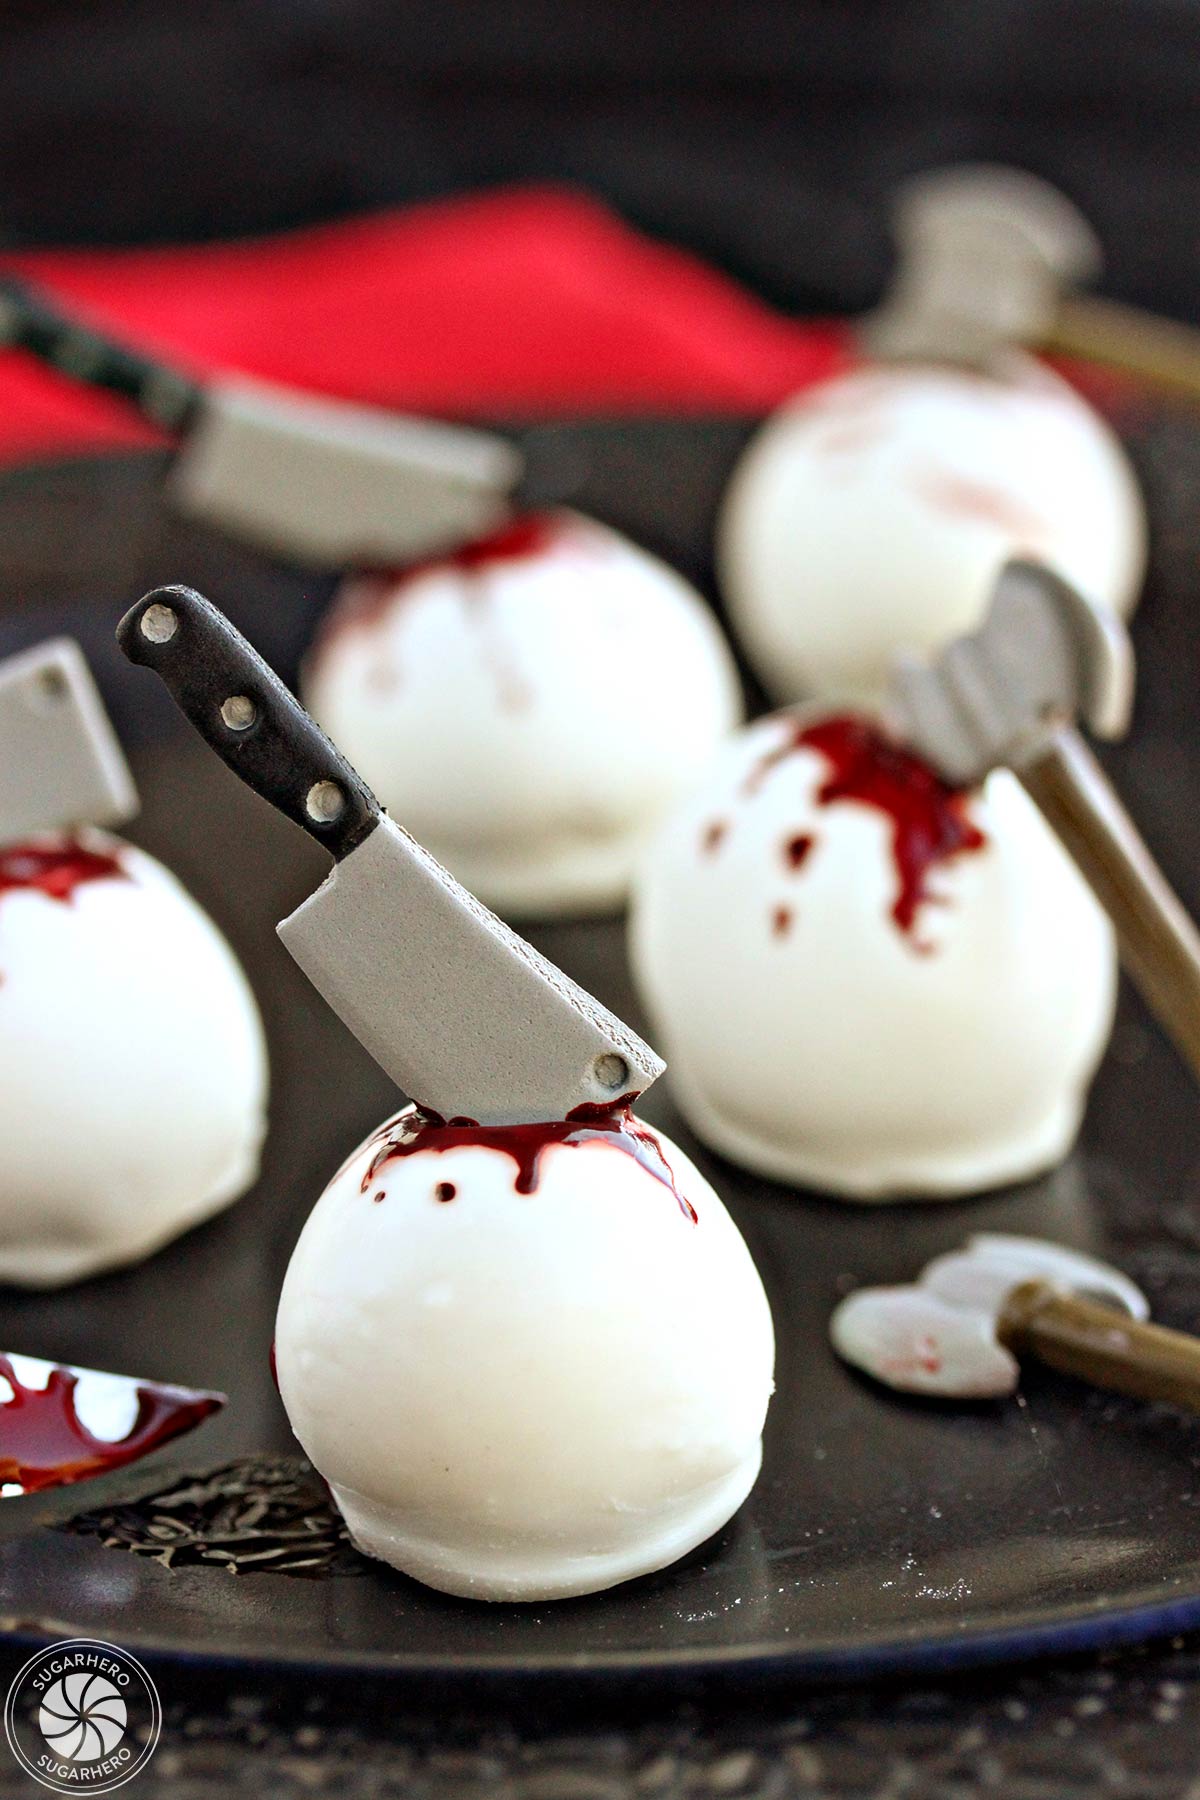
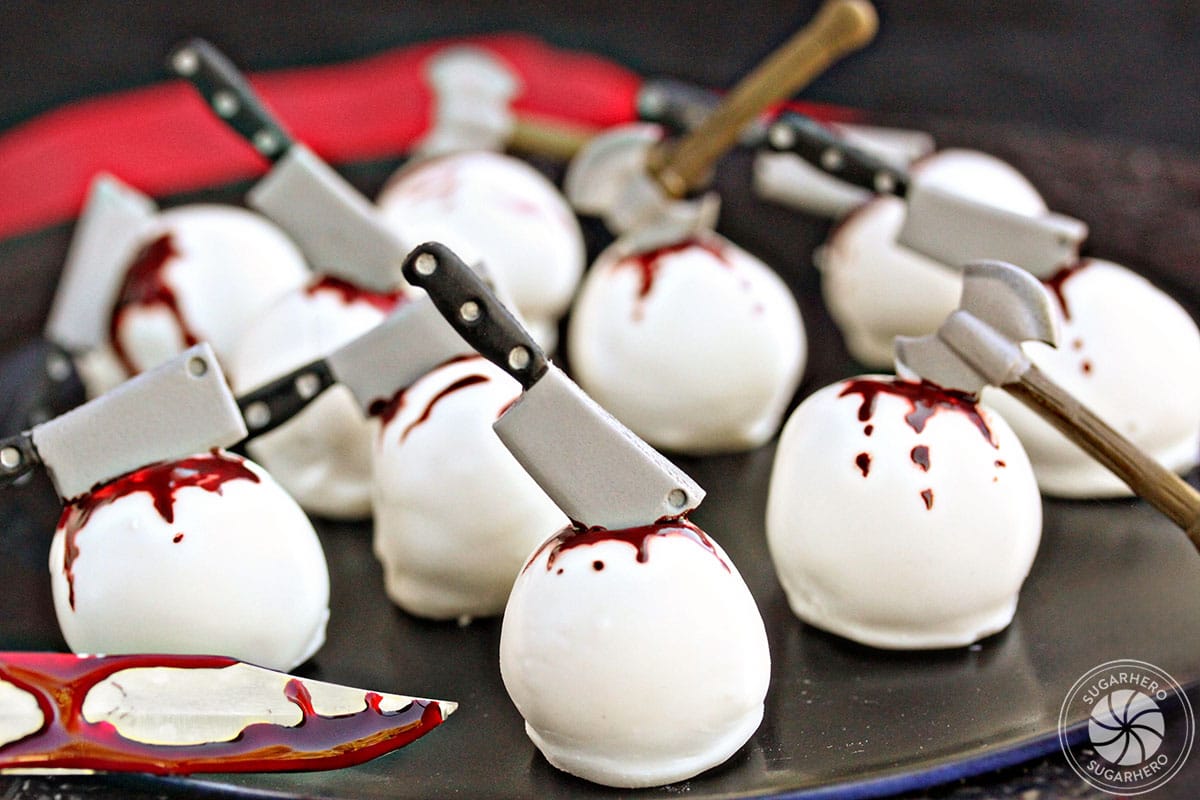
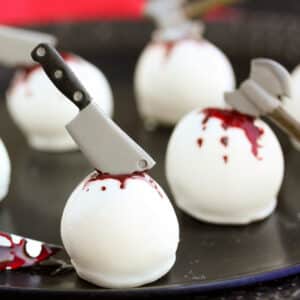
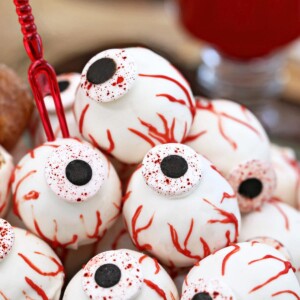
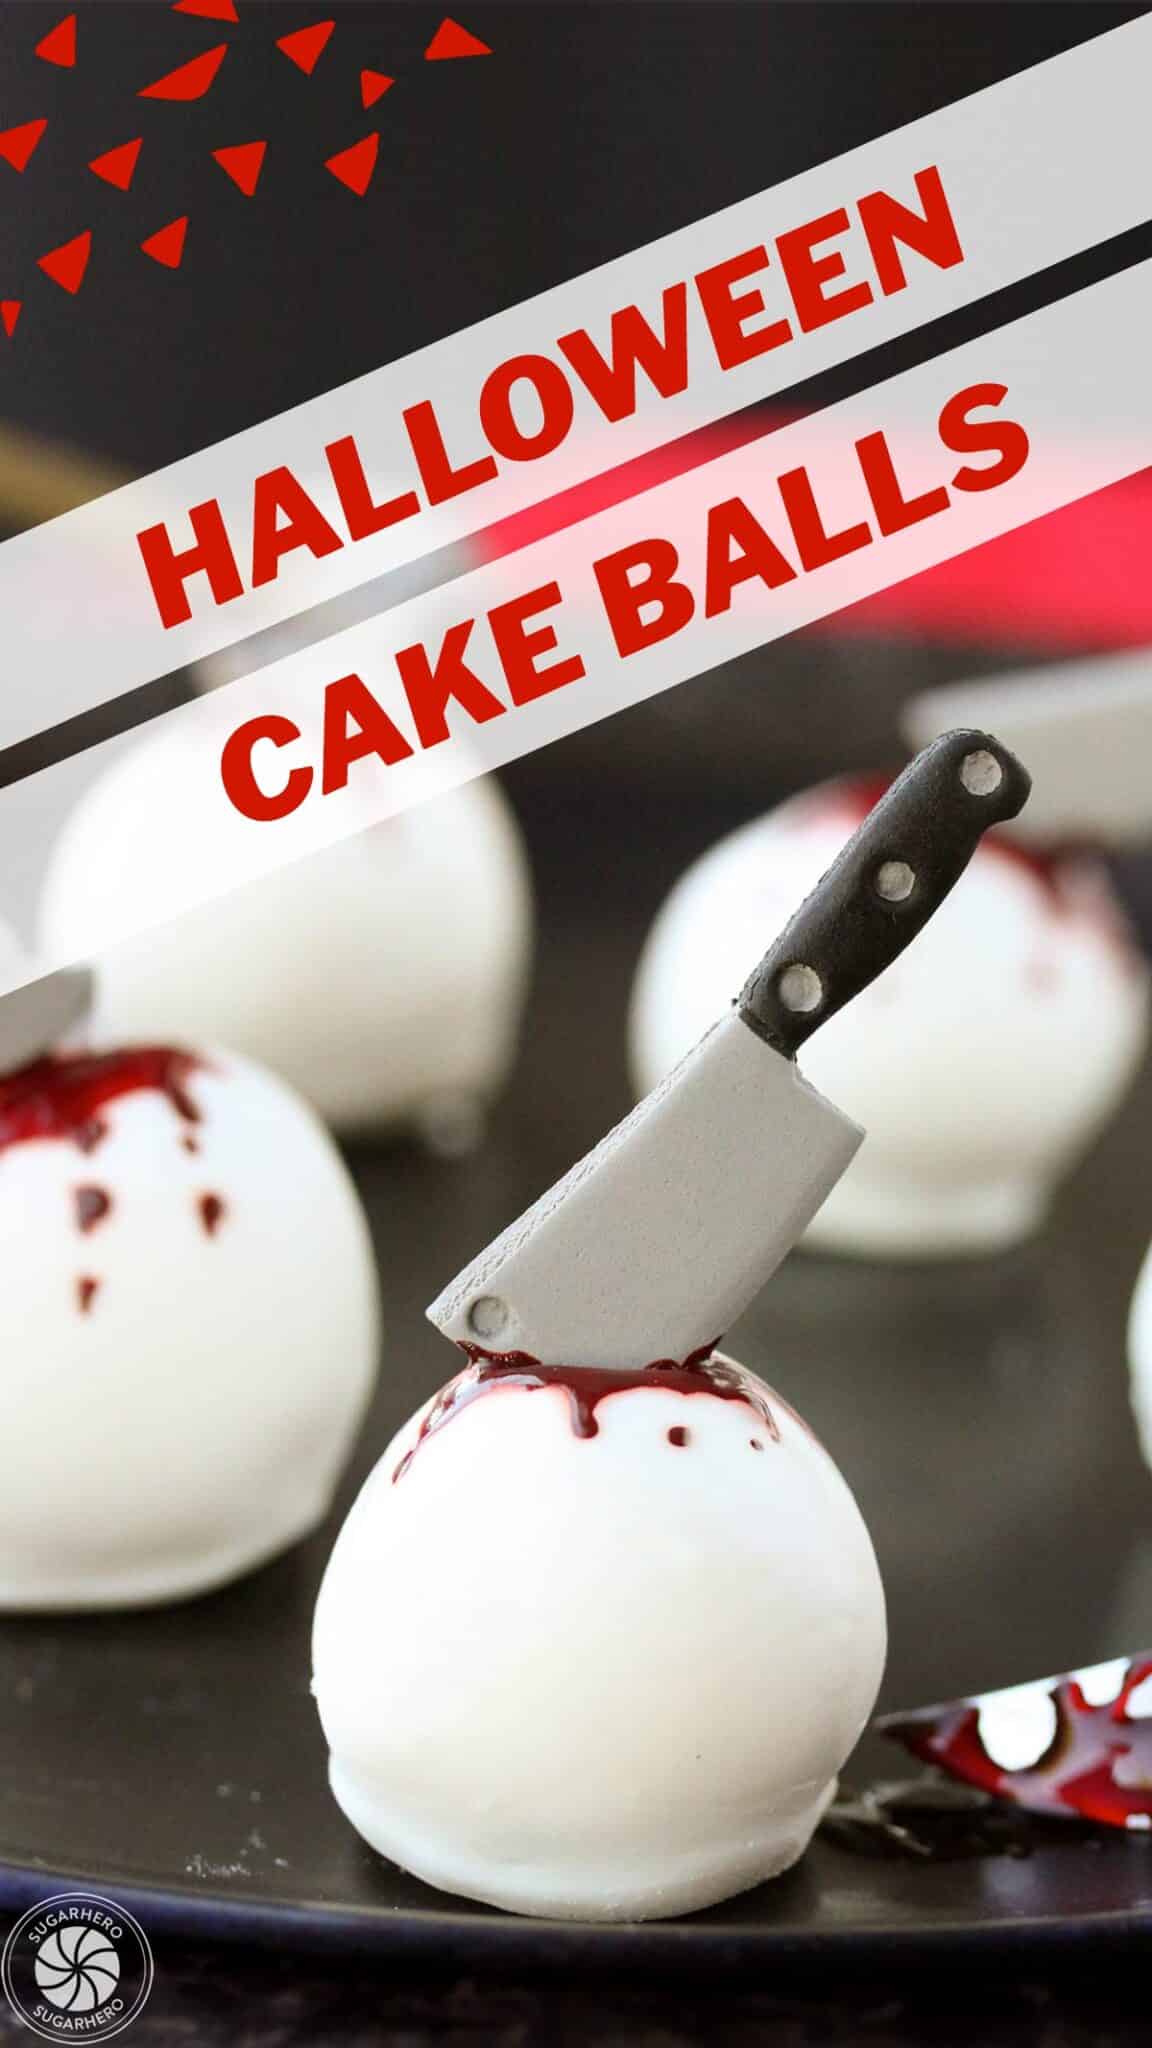
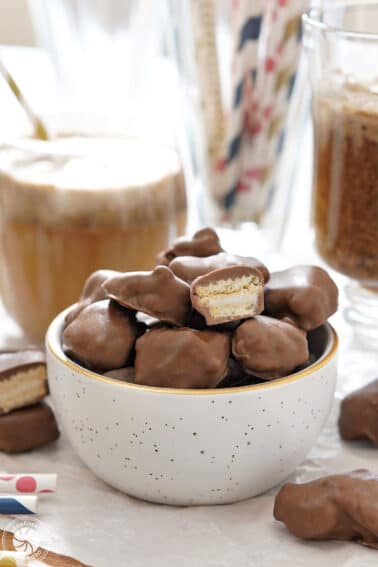
Our Bloody Halloween Cake Balls are so good, it’s scary! These soft vanilla cake truffles have an optional cherry filling, and are decorated with candy weapons and a bit of edible “blood.” Perfect for Halloween parties!
🔪 Halloween Truffles To Die For
We’ve been sharing a lot of wholesome pumpkin desserts lately, and don’t get me wrong–I love a good pumpkin cookie as much as the next person. But there’s so much more to Halloween baking than just pumpkin recipes.
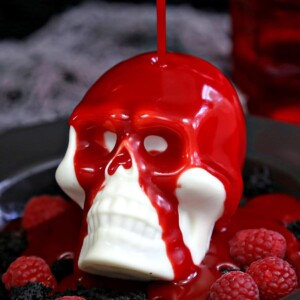
I’m talking, of course, about spooky sweets! Gory goodies! Creepy candies! Whatever you want to call them, Halloween is prime time for gross-out, blood-and-guts desserts like Donut Hole Eyeballs, Zombie Brain Brownie Bites and Bloody Melting Chocolate Skulls! The gorier the better!
I first made these bloody truffles years ago, and they’ve proven to be surprisingly popular–I guess everyone secretly loves tiny edible weapons in their food!
I’ve updated the recipe and added an optional cherry component, and took step-by-step pictures to walk you through the whole thing. Let’s get started!
Table of Contents
🧾 What You’ll Need
Ingredients
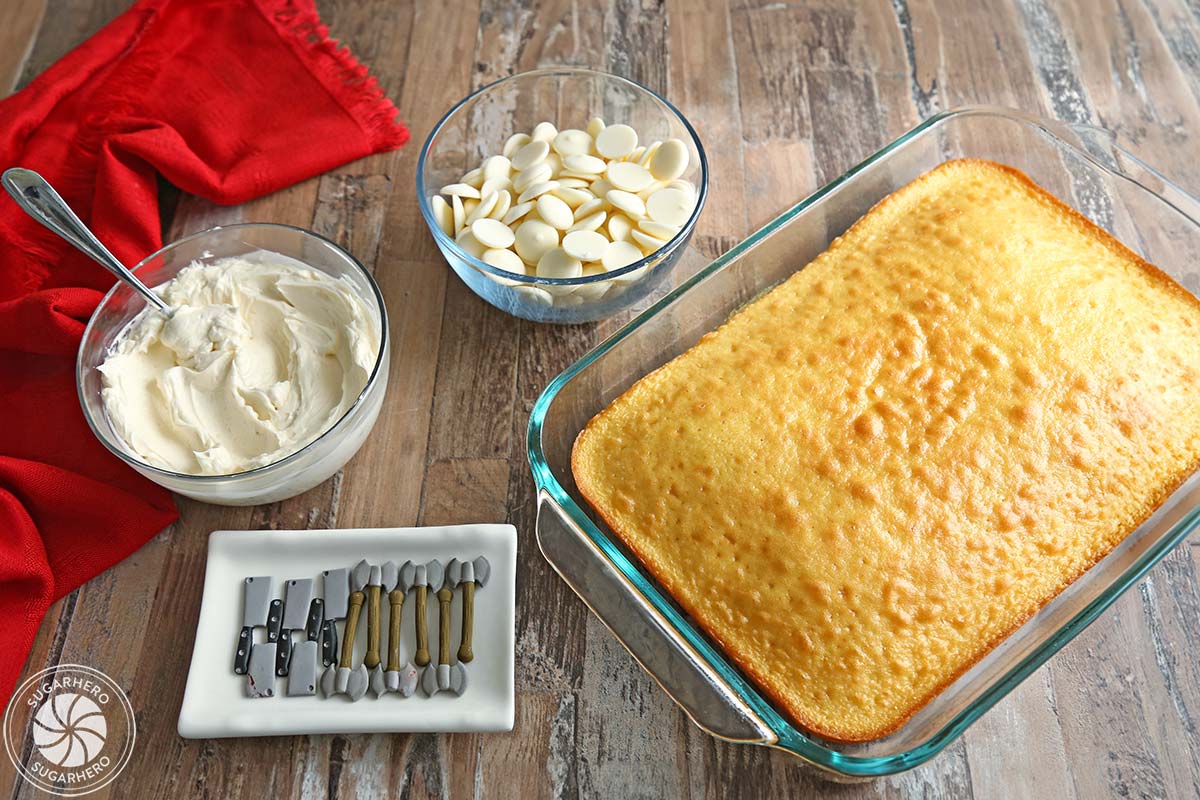
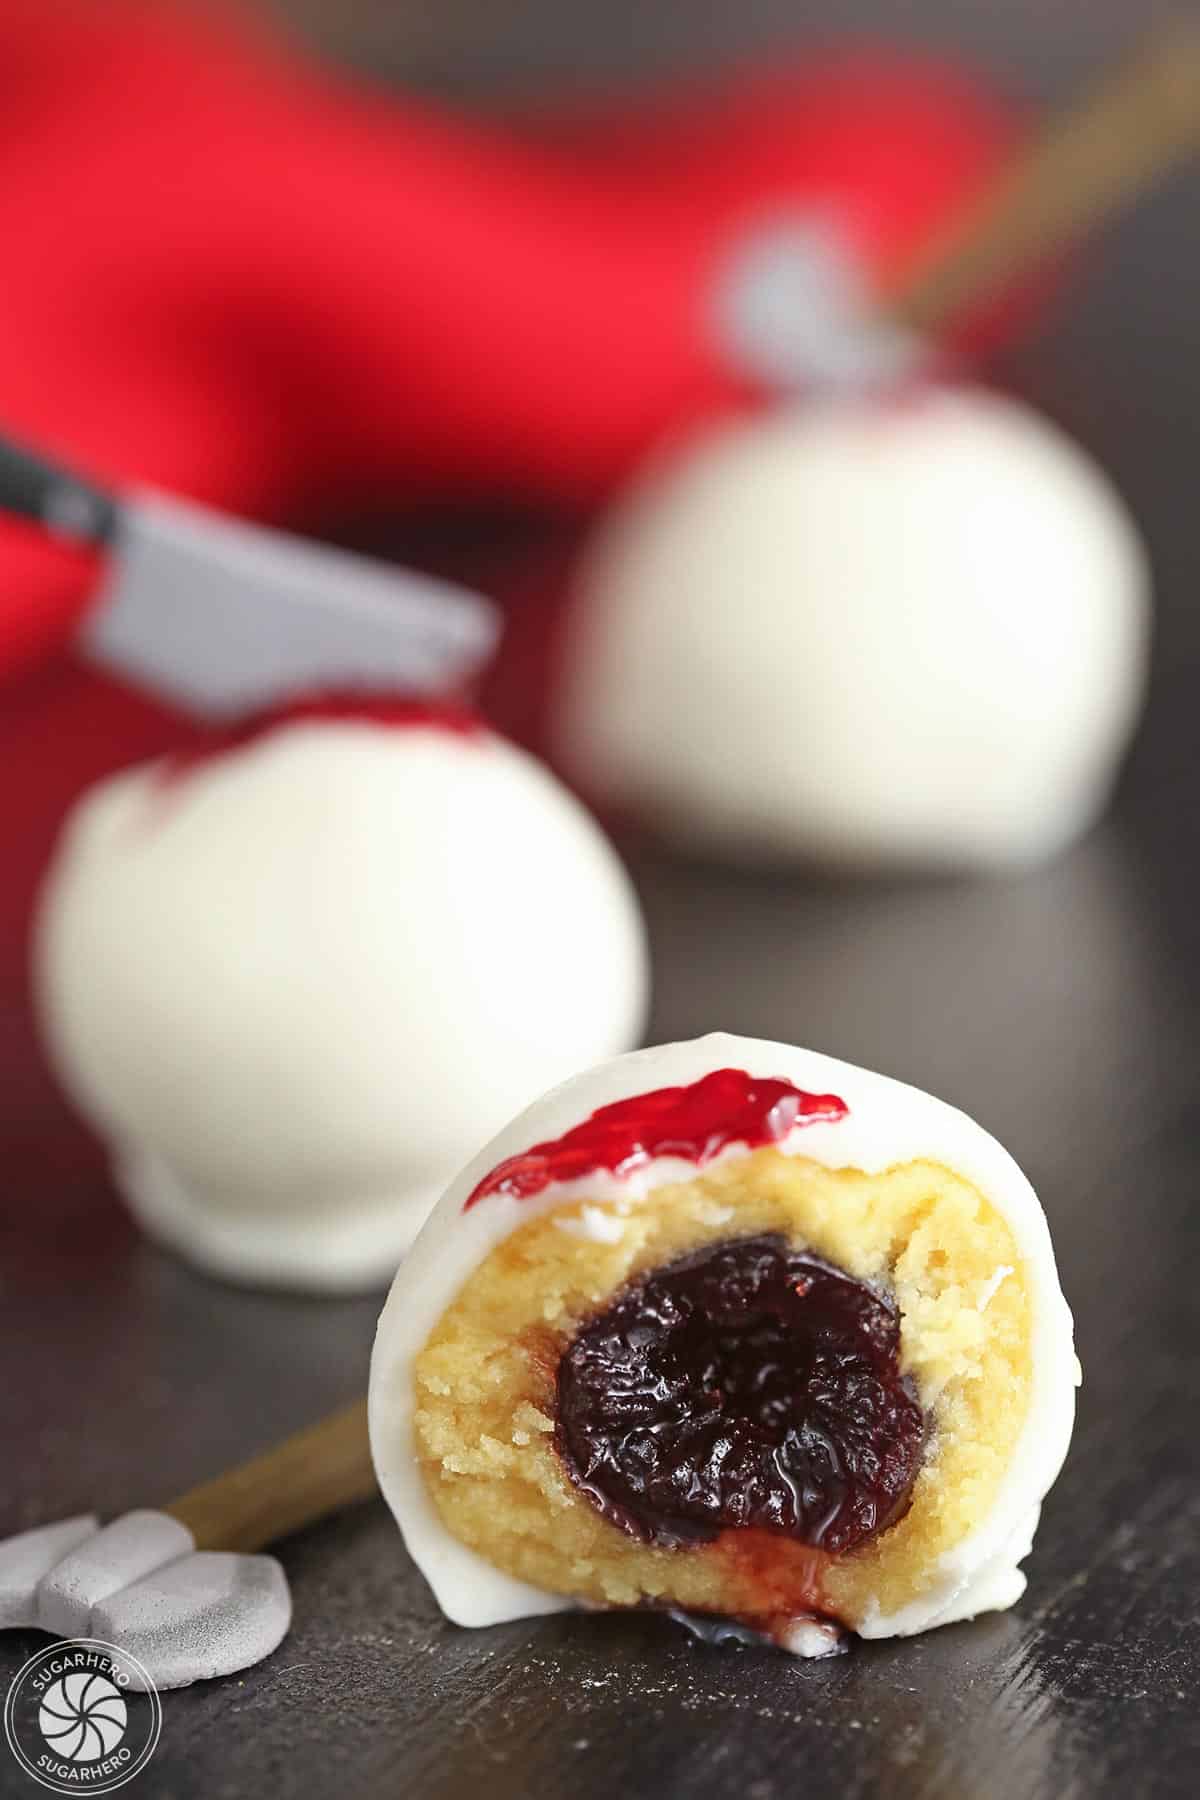
- Baked and cooled cake: I often recommend using a cake mix cake for cake truffles–it’s faster, easier, and honestly once it’s made into truffles, it tastes about the same as homemade! Any flavor of cake will work.
- Frosting: You can use store-bought frosting. I prefer homemade Easiest Swiss Meringue, just for the flavor, but this recipe calls for such a small amount of frosting, it’s not worth it to make a whole batch if you know you won’t use it for anything else.
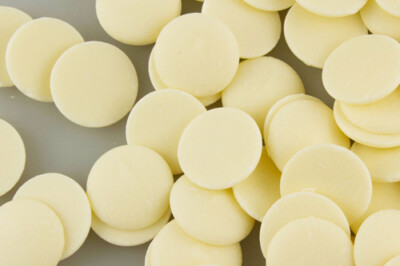
- White candy coating: I like Mercken’s brand candy coating because it is more fluid when melted, but Wilton is also good.
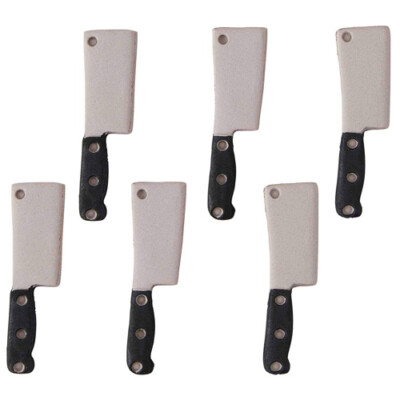
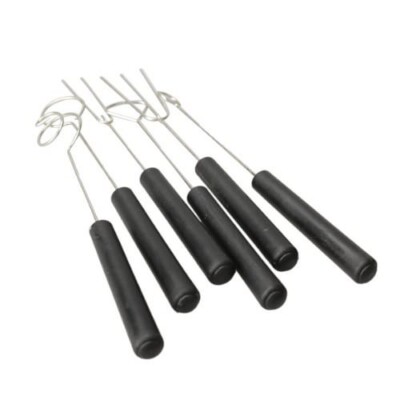
- Royal icing weapons: Mine are Wilton brand, purchased at craft stores like Michael’s or online on Amazon. Their selection/availability seems to change from year to year, so the ones you find may not look like mine.
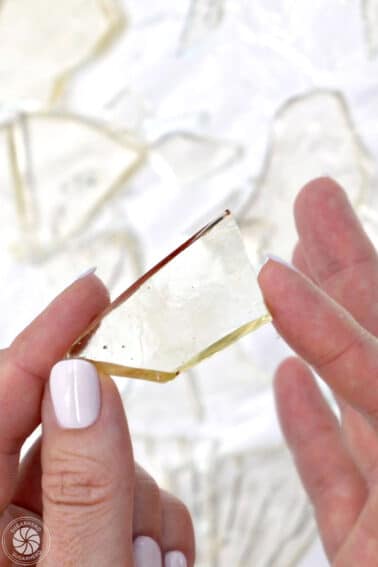
- Amarena cherries: (Not pictured–optional but so good!) More on this below!
Equipment
- Candy scoop: This is optional, but a small candy scoop makes the truffle process go much faster, and it ensures all of your candies are the same size and shape. I use and love this Norpro candy scoop.
- Dipping tools: Another optional-but-helpful tool! Dipping tools come in an assortment of shapes and are helpful when dipping truffles in melted chocolate. You can use a regular fork instead, but if you’re going to be making candies regularly, it’s worth it to pick up an inexpensive set of dipping tools.
📋 Instructions
Here’s a quick overview of how to make these spooky cake balls. Grab the full, easily printable recipe from the recipe card below.
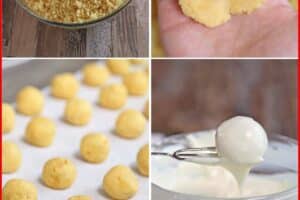
1. Make the cake balls
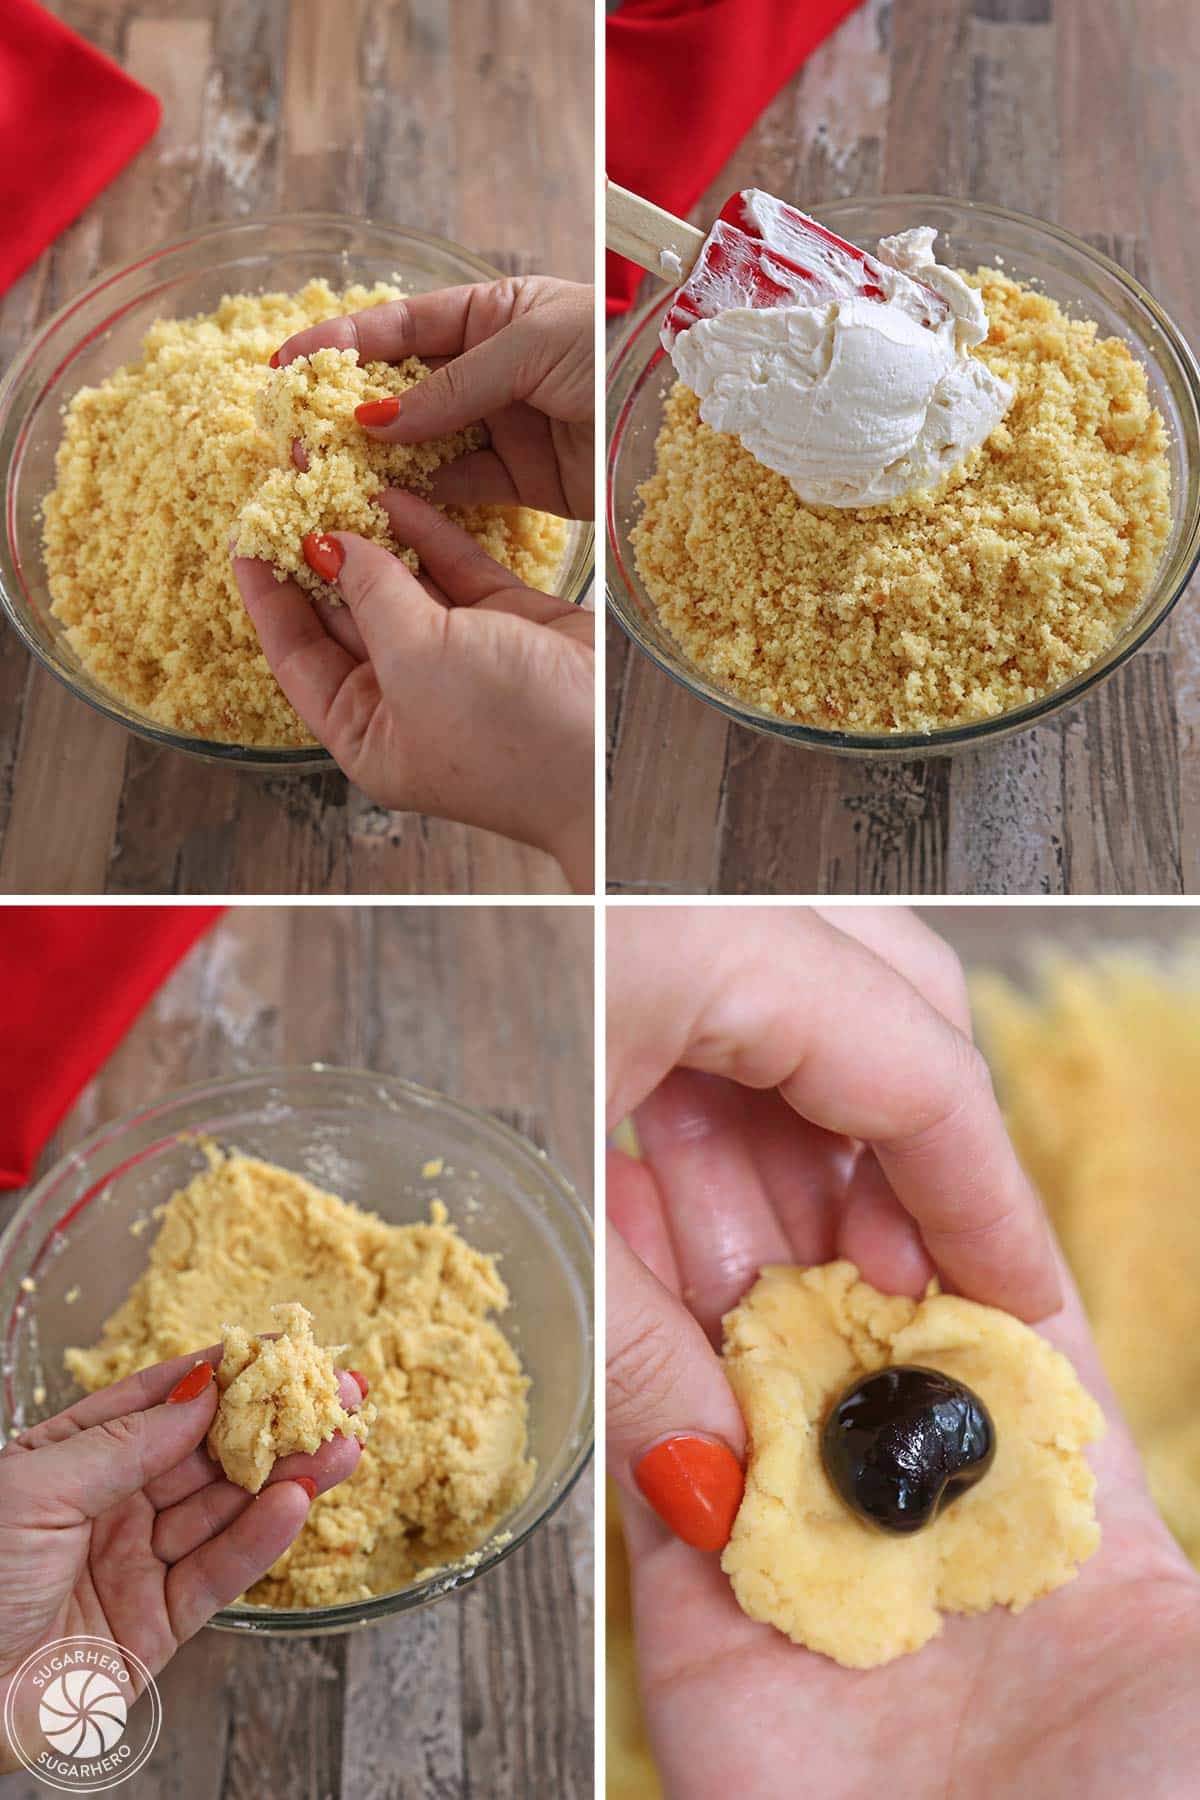
- Crumble a baked and cooled cake into a large bowl. Work the cake between your fingers (or use a spoon) until it’s in small crumbs.
- Add the frosting: start with a small amount of frosting and stir it into the cake crumbs. You want the cake mixture to hold together when you press it into a ball, so if it seems very crumbly after stirring in the frosting, add more a bit at a time until you get a texture you like. Avoid adding so much that the cake mixture gets very soft or greasy. The exact amount you’ll need depends on the cake and frosting you’re using.
- Now you have some choices! You can roll them into plain balls–just use a candy scoop or spoon to get a ball of cake truffle mixture, and roll it gently between your palms until it’s round.
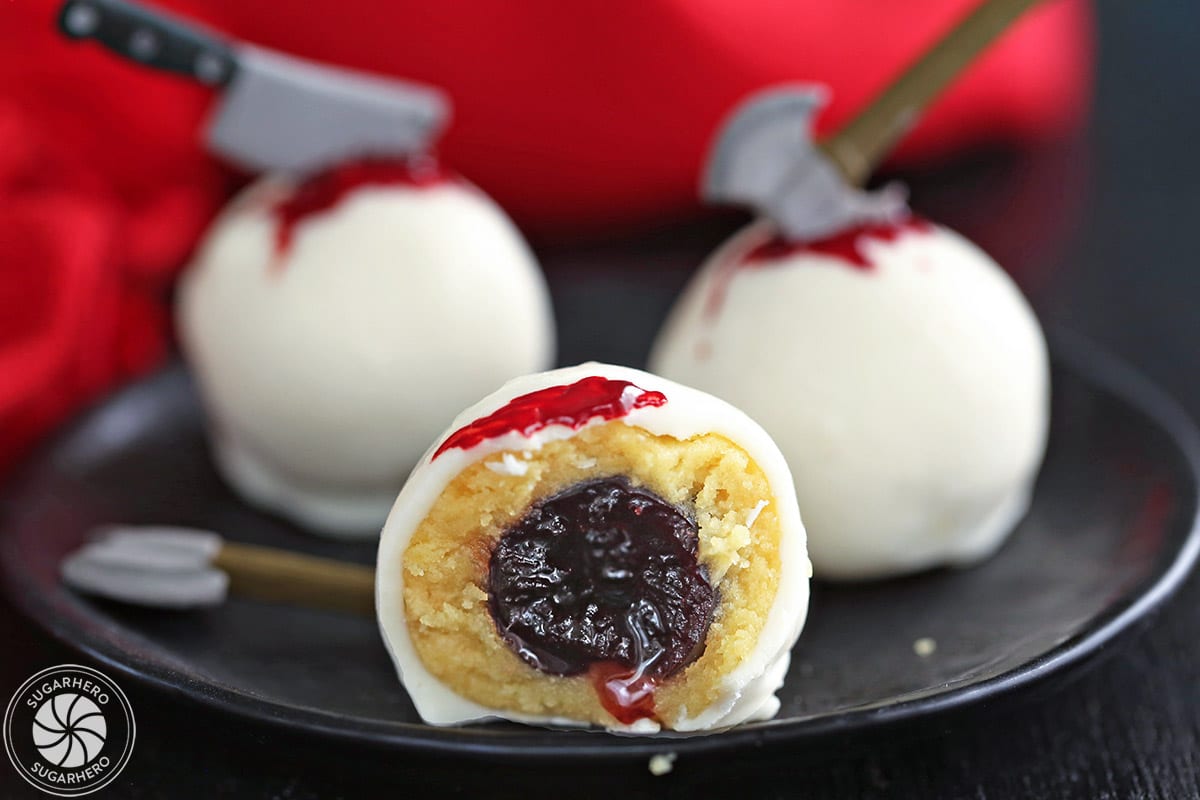
2. Add a cherry inside (optional)
- If you want to add a bit more flavor, add a red cherry center! Drain a jar of cherries (I love using Amarena cherries) and pat them dry.
- Flatten out a ball of cake truffle mixture, and press it into a thin disc. Place a cherry in the center of the cake mixture, then press the cake up and around the cherry, rolling it between your palms until it’s completely covered.
3. Chill the cake balls
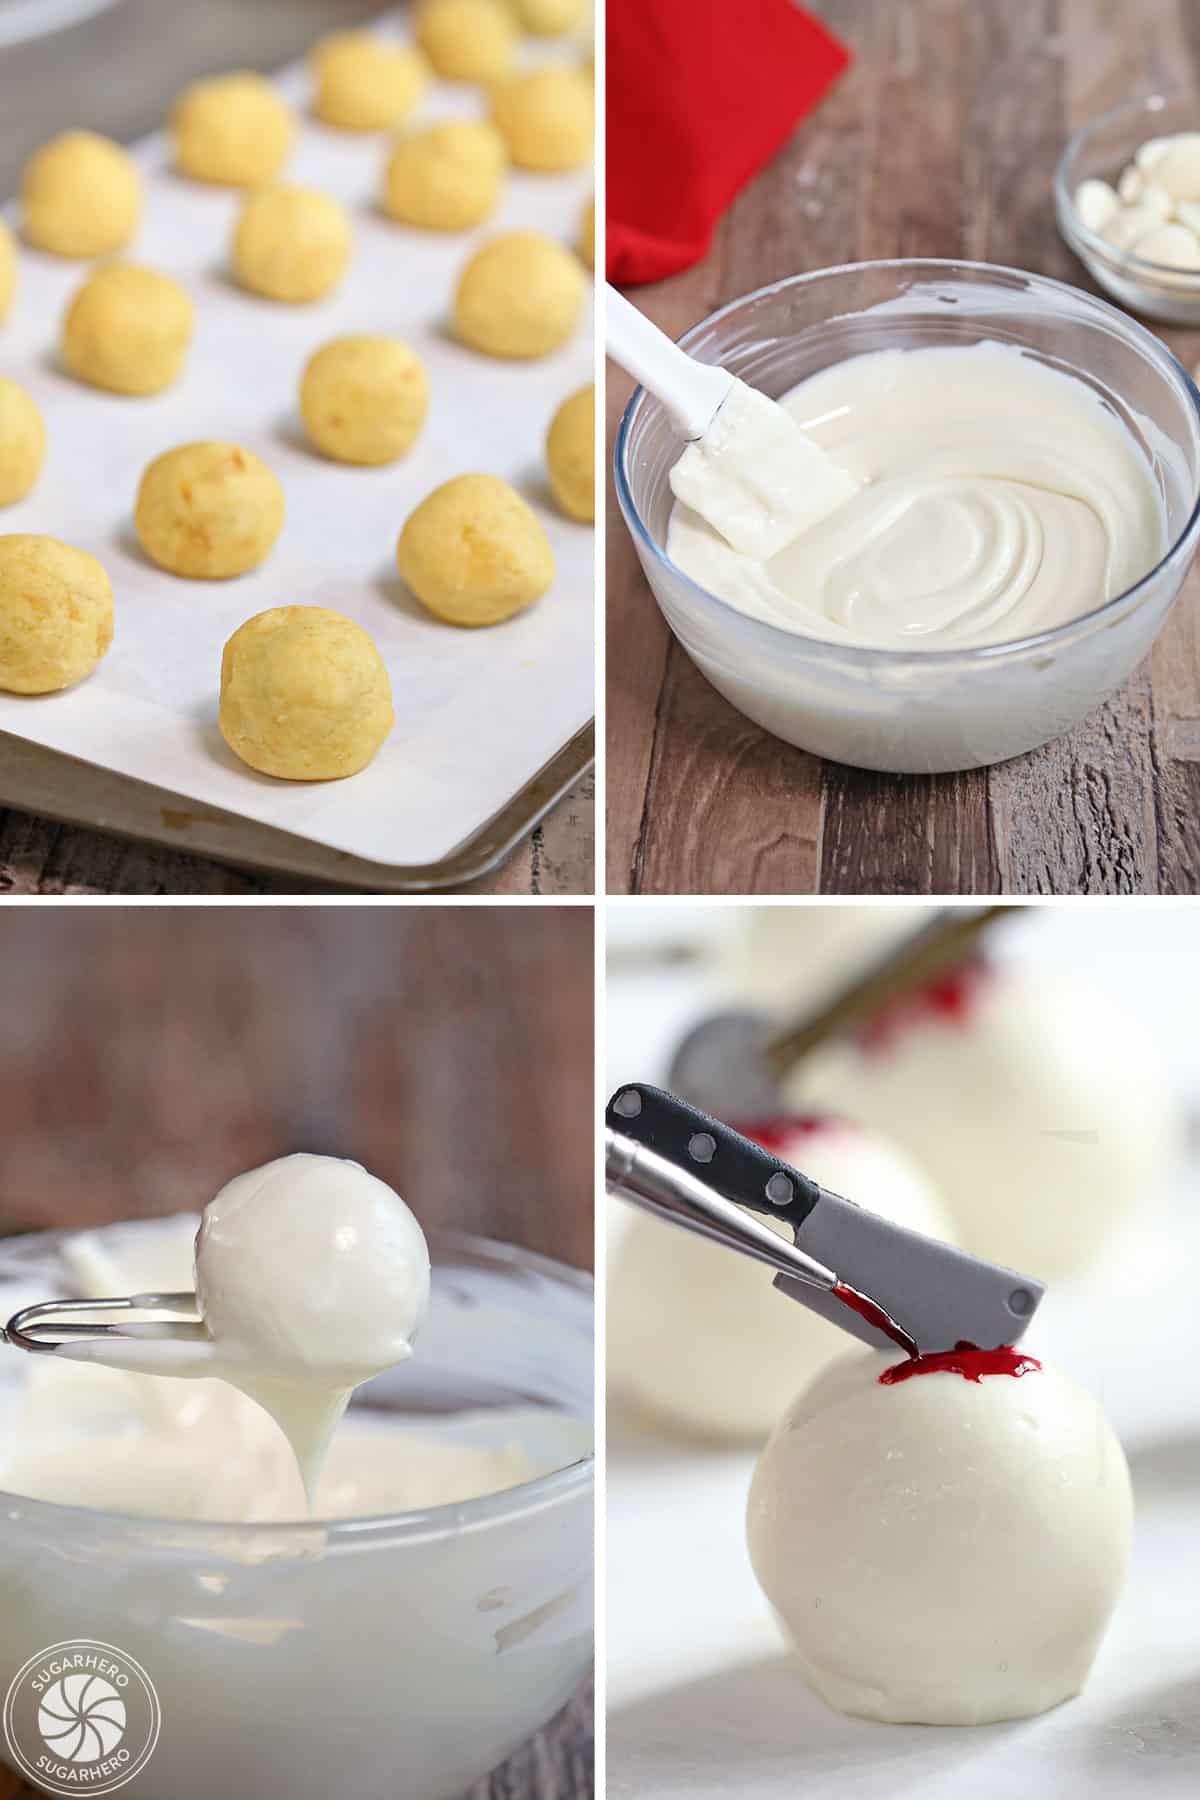
- As you roll the truffles, place them on a baking sheet covered with parchment paper or waxed paper.
- Once they’re all shaped, refrigerate the tray until the truffles are very firm, for at least an hour. (Longer is fine too–I usually chill mine overnight.)
4. Dip them
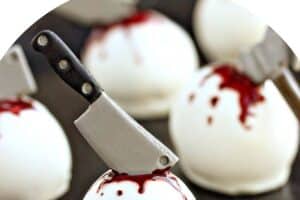
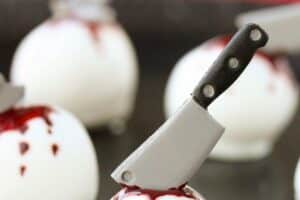
- Using dipping tools or a fork, submerge a cake ball in melted candy coating. Remove it from the coating let the excess drip back into the bowl. Replace the dipped truffle on the baking sheet. While the coating is still wet, firmly press a royal icing knife or axe into the truffle. Repeat until all of the truffles are dipped and decorated.
- Refrigerate the candies to set the coating completely, about 20 minutes.
5. Decorate your bloody cake truffles
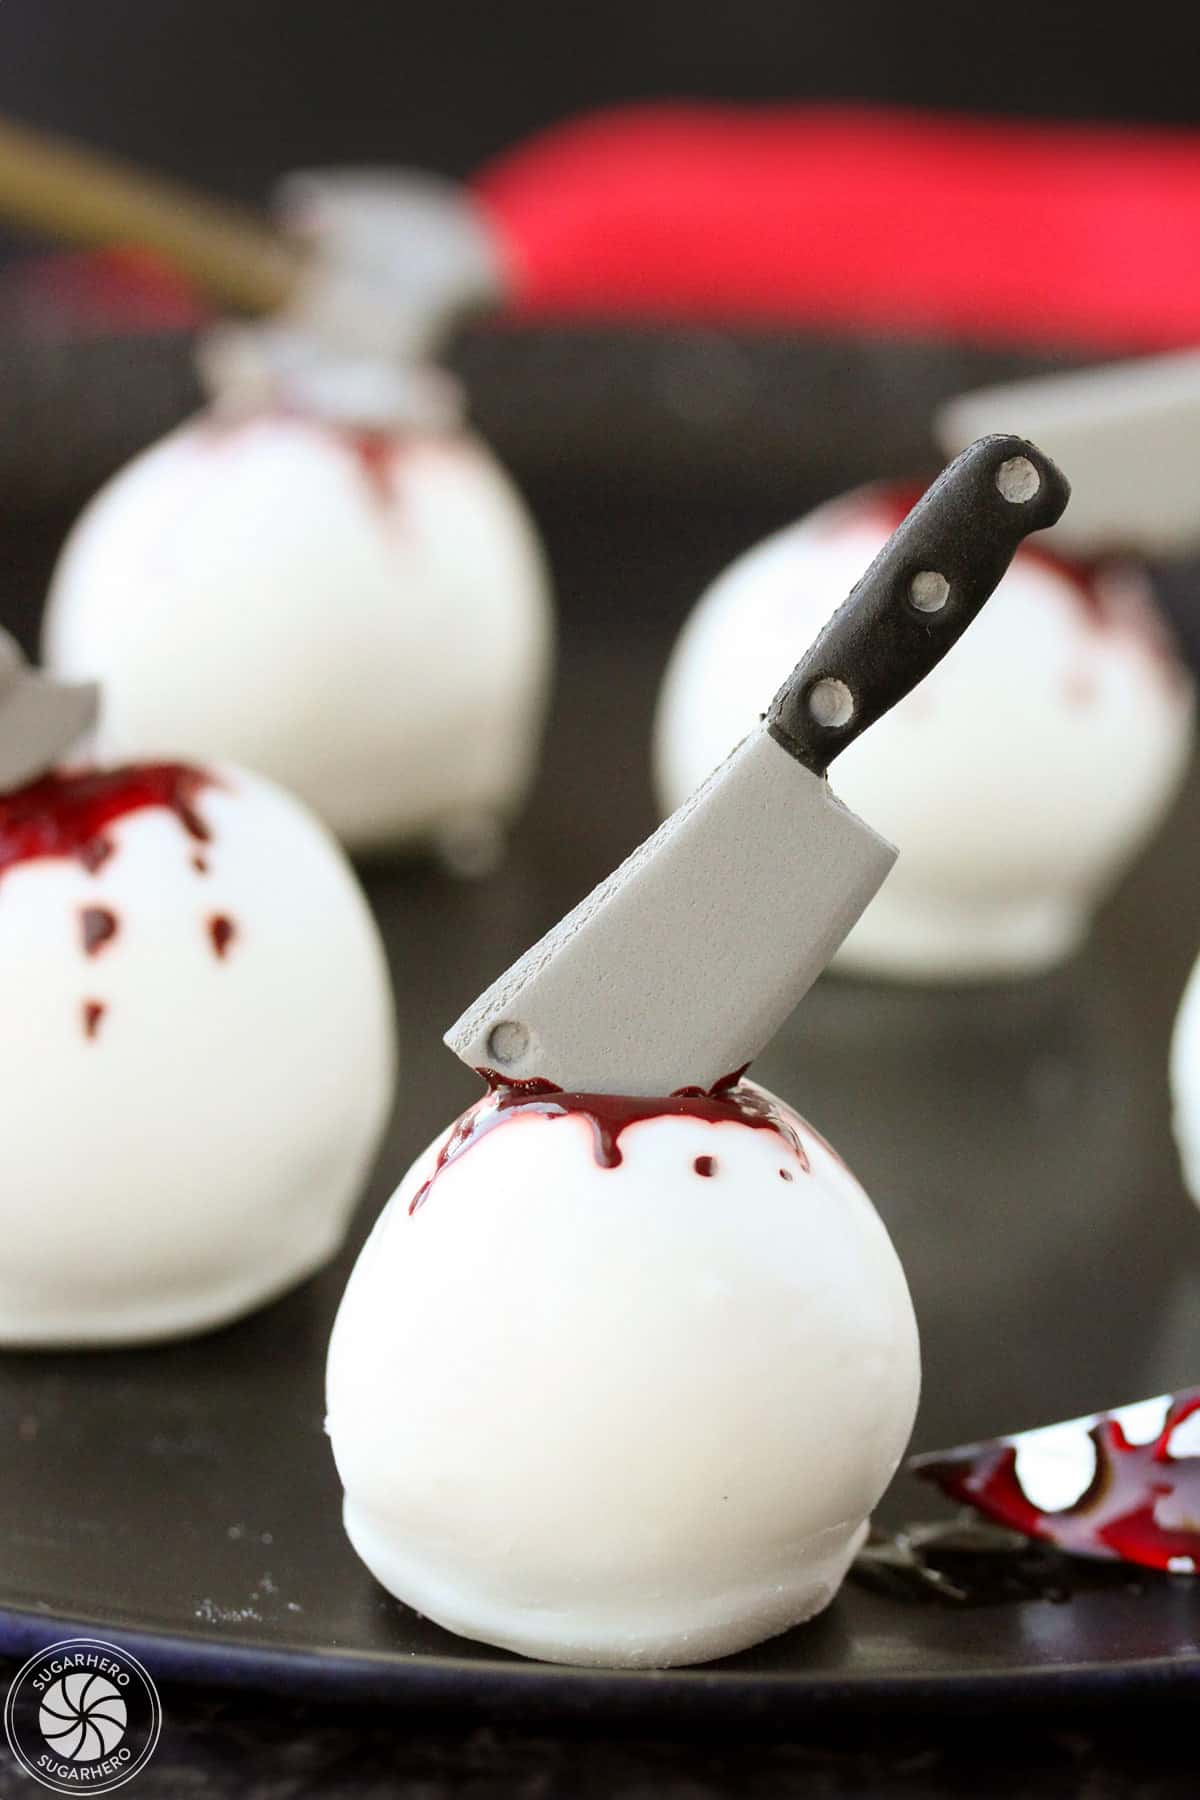
- Add a bit of blood around the weapon. You can use those gel decorating tubes found in the grocery store, but I usually just use a bit of gel food coloring, applied with a small paint brush. Let it dry, and your terrifying treats are ready to enjoy!
💡 Tips & Variations
- Getting the right cake ball texture is very important. Start with a small amount of frosting and add more if you need it. Too much frosting makes the cake balls greasy and harder to dip. Because different cake mixes have different amounts of fat/moisture, the frosting amount is always just a starting suggestion.
- Cake balls should be cold but not frozen when dipping them. If they are frozen, the candy coating will crack as the cake defrosts.
- Amarena cherries are my favorite to use. (I find them at Trader Joe’s). They have a great depth of flavor and complexity, and aren’t cloyingly sweet. You can also use other jarred cherries, like Morello or even maraschino, but they are much sweeter.
- Try using other colors of candy coating (think bright green, orange, or purple) and decorate the tops with spooky Halloween sprinkles, candy eyeballs, or gummy fangs.
- Make cake pops: Insert a lollipop stick before chilling for cake pops. Hold them by the stick to dip them in coating.
Candy Coating Tips
If you’re new to working with candy coating, or haven’t used it for dipping truffles before, there are a few things to know to make sure your candy turns out well.
The most important part of dipping candy is the texture of your melted chocolate or candy coating! Too thin, and it will run off of the candies and pool at the bottom. Too thick, and it will be difficult to work with and make lumpy, bumpy truffles.
Mercken’s brand is my preferred candy coating. It’s thinner when melted and provides a nice smooth coating.
When melting the coating, always melt it in short intervals (like 30 seconds), stirring frequently, to prevent overheating. Overheated coating will always be clumpy! I suggest using 50% power on your microwave, if you have that function.
The other thing to watch out for is old product. Older candy coating will invariably be thicker when melted. So if you try to use an old dusty bag of coating you found in the back of the pantry (or if you unknowingly purchase an old batch), don’t be surprised if you have trouble with it. You can always try adding a bit of vegetable oil, coconut oil, or paramount crystals to your coating to thin it out. But be warned that if it’s really old, or overheated, all the oil in the world won’t make it workable.
For the best dipping, you’ll want your coating warm and fluid, but not hot, and your truffles cold and firm, but not frozen. Use a fork or dipping tools to dunk a truffle in the melted coating, then let the excess drip back into the bowl.
🦇 Spooky Halloween Desserts
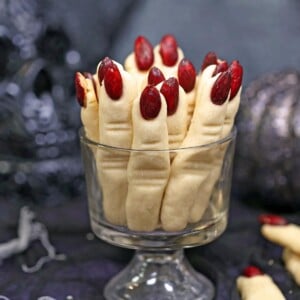
Witch Finger Cookies
Leave a Review!
If you make this recipe, let us know! Leave a ⭐️⭐️⭐️⭐️⭐️ rating on the recipe below, and leave a comment, take a photo and tag me on Instagram @elabau, or use #sugarhero on IG!
Bloody Halloween Cake Balls
Ingredients
- 1 yellow cake mix, (can use any flavor), prepared according to package directions
- 1 cup prepared frosting
- 48 Amarena cherries, optional
- 24 oz white candy coating melts
- Royal icing weapons, or similar decorations
- red gel food coloring
Instructions
To make the cake balls:
- Prepare the cake mix according to the directions on the package, and bake it in a 9×13-inch cake pan. Once baked, allow the cake to cool completely.
- Crumble the cake into a large bowl and work it with your hands until it is in small pieces.
- Spoon three-quarters of the frosting into the bowl and stir with a rubber spatula until the mixture is well-combined. It should be moist and hold together if you squeeze a ball of cake between your fingers, but not too wet or greasy. If the cake mixture is still a bit dry and crumbly, add more frosting to get it to the desired consistency—the exact amount you need will depend on the texture of the cake you started with.
- Using a small cookie or candy scoop, scoop out 1-inch balls of cake and roll between your palms until they are round. You should get about 36 balls from this recipe.
Cherry variation:
- If you want a cherry filling, drain 48 Amarena cherries and gently pat them dry. Flatten out a ball of cake truffle mix on your palm, and place a cherry in the center. Gently press the cake mixture around the cherry, and roll it between your palms so it’s completely covered.
- Place the cakes balls on a baking sheet covered with parchment or waxed paper, and refrigerate them until firm, at least 1 hour. Longer is fine, and even overnight works well.
To dip and decorate:
- Place the candy coating in a medium microwave-safe bowl and microwave it until melted, stirring after every 30 seconds to prevent overheating.
- Using dipping tools or a fork, submerge a cake ball in the melted candy coating. Remove it from the coating let the excess drip back into the bowl. Replace the dipped truffle on the baking sheet. While the coating is still wet, firmly press a royal icing knife or axe into the truffle. Repeat until all of the truffles are dipped and decorated.
- Once all of the cake balls are dipped, refrigerate the candies to set the coating completely, about 20 minutes. Take a clean paintbrush and brush some red gel food coloring around the tops of the truffles where the royal icing decorations are.
- These cake balls are best served at room temperature, and can be stored in an airtight container in the refrigerator for up to a week.
Recipe Notes
Measuring Tips
Our recipes are developed using weight measurements, and we highly recommend using a kitchen scale for baking whenever possible. However, if you prefer to use cups, volume measurements are provided as well. PLEASE NOTE: the adage “8 oz = 1 cup” is NOT true when speaking about weight, so don’t be concerned if the measurements don’t fit this formula.
Want to learn more about baking measurements and conversion?
Nutrition
Browse More:


These are awesome! That blood looks eerily real, and those tiny weapons are too cute
Hey Indya, Thank you so much! It’s fun for the holidays that is for sure. I appreciate your comment, thanks for following along!
Those truffles are real crime masterpiece 😉
Hey Saunier, I love that! Couldn’t agree more!
OMG These bloody truffles are bloody delicious! Thanks for this super amazing recipe.
Hey Marie, I am so glad to hear it! Thanks for the feedback!
that is so so good i tried it is asom