These Vintage Christmas Card Cakes are a delightfully fun way to welcome the holiday season and return to your inner child! They are decorated with No Spread Sugar Cookies for an added touch of magic.

Phew! Now that Halloween and Thanksgiving are history, we can finally get to the fun stuff: holiday baking! Hello, December. Hello, candy canes and gingerbread and twinkling lights and that fresh evergreen smell and buying all the butter and sugar at the store. Hello, Christmas cards from long-lost friends, and hello, edible vintage Christmas card cakes topped with sugar cookies. It’s going to be a good month indeed!

We’ve been very well-behaved and waited this long to start our Christmas baking, despite the ubiquitous presence of holiday decorations for the last two months, so let’s not wait a moment longer. Let’s go big and make cakes topped with cookies. Because if one holiday treat is good, two is even better, right?!

These sweet vintage-inspired Christmas card cakes are pure nostalgia. I decorated the cakes using cookies made from high definition cookie molds. For these cookies, I used Aunt Chick’s Merry Christmas Cutter Set but feel free to use any brand you love.
The process for making these cookies is almost the same as with any other cut-out cookie. You’ll need a reliable cookie dough recipe that won’t spread when baked (I’m sharing my favorite below!) and your trusty cookie molds. After rolling, press the cutters into the dough to make an imprint. The secret to getting all the beautiful details, though, is to press, press, press the dough into the cutter with your hands. Then push the dough away from the sides of the cutter to help is release, and voila! Your Santa has never had a fuller beard or jollier cheeks. It’s magic.

The baked cookies look just as good as the unbaked ones, and I was so tempted to leave them plain to let the details shine through. I’m used to covering my regular cookies in plenty of frosting or royal icing, but these were so beautiful right off the baking sheet, it seemed like a crime to obscure the star’s rays or the stocking’s contents.

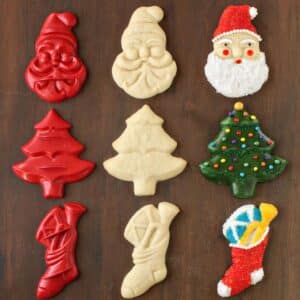
I like to call this next shot The Evolution of the Cookie. I experimented a lot with different decorating techniques, and finally settled on some methods that I thought enhanced the beautiful cookies, instead of taking away from their originality. (Details on how each cookie is decorated are a little further down.) It’s difficult to see all the details and the 3-D effect in the pictures, but you’ll have to believe me when I say they look amazing in real life.

One of the things I liked most about the cookies was that they had a bit of a retro feeling, in the best way possible. They seemed like they’d be at home in a grandma’s kitchen, fresh from the oven, to be enjoyed with a cozy mug of hot cocoa. The Santa especially was giving me old-school Santa vibes in a major way. You just don’t see rosy cheeks like that any more!

So, inspired by their timeless looks, I decided to go a step further and use my cookies as edible decorations on these four mini cakes inspired by vintage Christmas cards. Read on for detailed descriptions!

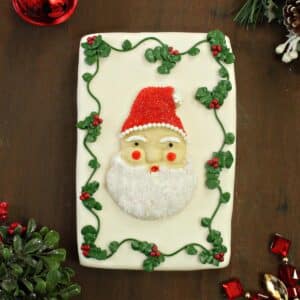
I probably shouldn’t play favorites, but just between you and me, this Santa is totally my fave. To decorate him, I mixed egg white with gel coloring and painted him before baking: red coloring for his cheeks, mouth, and hat, and white coloring for his beard, eyebrows, and the very tip of his hat.
The egg white coloring method produces a shiny, strong color upon baking, but I found he developed a few cracks, even though the dough didn’t spread much. So after they cooled, I mixed equal parts corn syrup and water and brushed it onto the cookies, then sprinkled red and white sparkling sugar on the hat and beard. (One color at a time, obviously.) I affixed the final details with royal icing: small black sprinkles for eyes, sugar pearls for his hat border, and a snowflake sprinkle for his hat pom-pom.
(While you can skip the egg white step, I found it gave the cookies a much stronger color—just adding the sprinkles on top of regular cookies didn’t produce the vibrant red or white you see here, since a bit of the beige cookie still showed through.)

The stockings were made just like the Santas: they got an egg white color bath before they were baked, with red, yellow, blue, and white colors being painted on. After baking, I used the same corn syrup technique for affixing the different colors of sprinkles, and gave them a sugar pearl border too.
Pro tip for working with sprinkles: place the cookies on a parchment-covered baking sheet before you pour on the sprinkles. The rimmed sides of the baking sheet will keep the sprinkles from going everywhere, and after you’re done you can pick the parchment up and bend it in half to funnel the extra sprinkles back into the container!
The border is fondant, made with Wilton’s fondant and gum paste lace mold. (First time using it, and I’m a fan!) I sprayed the pieces with red Color Mist and then brushed them with a bit of gold luster dust.

The Christmas trees were a bit different. For them, I used a powdered sugar glaze, made from powdered sugar, green gel food coloring (I used a mix of Leaf Green and Juniper Green) and a bit of milk. I start with several cups of sugar and just a tablespoon of milk, and add more milk little by little until I get a consistency that is thick enough to cover the cookies, but thin enough to let their texture show through. I love the shiny, vibrant color the glaze gives the trees!
They’re decorated with rainbow chips for lights (obsessed with these!) and gold Sixlets on top. The border is made with the same Wilton lace mold mentioned above, and I sprayed it with gold Color Mist to get that beautiful gold color.

The stars were a little vexing at first. Sprinkles didn’t seem quite right, and a powdered sugar glaze covered too many of the subtle details. Finally, I settled on keeping things fairly simple: a yellow egg white wash before baking, then a quick brush with gold glaze afterward to enhance the shine.
The pattern on the cake is made by mixing gold luster dust and vodka together to make a liquid paint, and brushing it over an adhesive stencil. (I couldn’t find the exact one I used online, but this is similar.) I always dust the back of the stencil very lightly with powdered sugar before use, so it’s still adhesive but not strong enough to damage the smooth fondant.

After all that talk about decorating, let’s not forget that there’s cake under there! I used a vanilla-flavored pound cake and vanilla buttercream for these cakes, but of course you can flavor them however you want. These would make lovely holiday gifts, or serve them all together for one showstopping dessert!
🎄More Christmas Cookie Recipes
- Oreo Cookie Christmas Ornaments
- Gingerbread Cookie Mug Toppers
- Christmas Pinwheel Cookies
- Big Soft Sugar Cookies (with Frosting!)
- Pecan Snowball Cookies
- Gingerbread Chocolate Chip Cookies
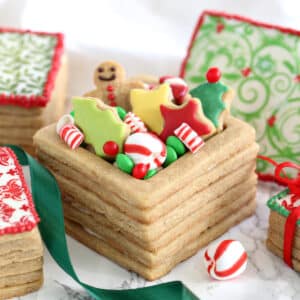
Edible Christmas Cookie Boxes Recipe
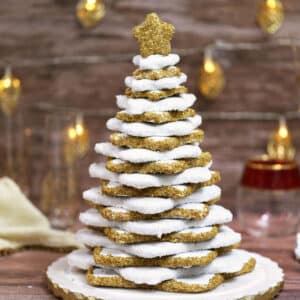
Gingerbread Christmas Cookie Tree
No Spread Sugar Cookies
Equipment
- Vintage Christmas Cookie Cutters I used this 4-piece set by Aunt Chick's
Ingredients
- 18 oz all-purpose flour, (4 1/4 cups)
- 1/2 tsp salt
- 8 oz unsalted butter, cold, cubed
- 12.25 oz granulated sugar, (1 3/4 cups)
- 1 tsp vanilla extract, or other flavoring extracts
- 2 large eggs
Instructions
- In a bowl, whisk together the flour and salt and set aside for now.
- Combine the cold cubed butter and the sugar in the bowl of a large stand mixer fitted with a paddle attachment. Beat them on medium speed just until they’re mixed together and there are no longer any chunks of butter. The key is to get a homogenous texture, but not beat until it’s light and fluffy—we don’t want to beat too much air into the dough, because that will cause the cookies to spread!
- Add the vanilla extract and one egg, and beat to combine. Add the second egg and beat until it’s incorporated.
- Stop the mixer and add the flour, and mix on low speed until most of the flour is incorporated and just a few streaks remain. Finish mixing the dough with a spatula, scraping the bottom and sides of the bowl. Wrap the dough in plastic wrap and chill for an hour in the refrigerator.
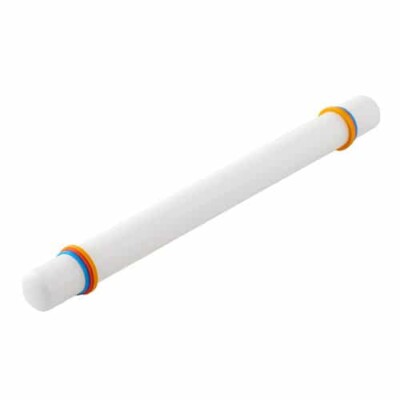
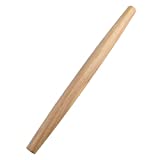
- Dust your work surface, rolling pin, and cookie cutters with flour. Roll the dough out until it’s about 1/4-inch thick. Press a cookie cutter into the dough, hard enough to cut around the edges. Make sure the inside of the cutter has a nice dusting of flour, then pick up the cutter with dough inside. Use your hands to really press the dough into the cutter, so it gets a clear imprint of the shape. Use your thumb to push the dough away from the edges of the cutter, to make removal easier. Tap the cutter firmly against your other palm so the cookie releases.
- Place the cookies on a parchment-covered baking sheet. Chill the sheet while you preheat the oven to 350 F. Bake at 350 for about 10 minutes, rotating halfway through, until the cookies lose the raw shine in the middle and just start to take on color along the very edges—they shouldn’t have much color at all! Cool, then decorate as desired.
Recipe Notes
- You can mix some egg white and gel food coloring, and paint the cookies before they are baked, which will give them a shiny color and a vintage look. (The coloring might crack a bit if your cookies spread.)
- You can also brush them with a mix of equal parts water and corn syrup, then pour sanding sugar or sprinkles on them.
- You can dip them in a glaze made from powdered sugar, food coloring, and a touch of milk—just make sure the glaze is thin enough so that the shape of the cookies can show through!
- You can decorate these with royal icing or regular frosting, too.
- Finally, they’re so cute, consider leaving them plain and letting the shapes take center stage!
Measuring Tips
Our recipes are developed using weight measurements, and we highly recommend using a kitchen scale for baking whenever possible. However, if you prefer to use cups, volume measurements are provided as well. PLEASE NOTE: the adage “8 oz = 1 cup” is NOT true when speaking about weight, so don’t be concerned if the measurements don’t fit this formula.
Want to learn more about baking measurements and conversion?
Nutrition
Vintage Christmas Card Cakes
Ingredients
For the Pound Cake
- 8 oz unsalted butter, at room temperature
- 8 oz cream cheese , at room temperature
- 1 3/4 cups granulated sugar
- 5 large eggs, at room temperature
- 1 tbsp vanilla extract
- 2 1/4 cups all purpose flour
- 1 1/2 tsp baking powder
- 1/2 tsp salt
To Decorate:
- 4 cups buttercream, Swiss Meringue or your favorite
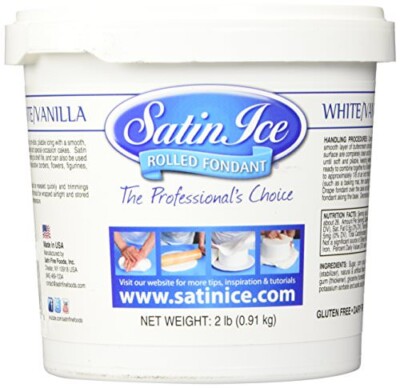
- 2 lbs fondant, Marshmallow fondant or store-bought
- Decorated sugar cookies
- Assorted sprinkles, or fondant decorations, etc.
Instructions
- Preheat the oven to 350 degrees Fahrenheit. Line a rimmed 11×17-inch baking sheet with parchment paper, and spray the paper with nonstick cooking spray.
- In the bowl of a large stand mixer combine the softened butter, cream cheese, and sugar. Mix on medium speed until light and fluffy, about 3-4 minutes. Add the eggs one at a time, mixing well after each addition. Add the vanilla and mix it in. The batter might appear a little broken at this point—that’s okay.
- In a small bowl, whisk together the flour, baking powder, and salt. Add the dry ingredients to the wet ingredient and mix just until they’re combined. Finish stirring everything together with a spatula, scraping down the bottom and sides of the bowl.
- Pour the batter into the prepared pan and smooth it into an even layer. Bake the cake for about 20 minutes, until golden and a toothpick inserted into the center comes out with just a few moist crumbs attached. Let cool on a wire rack.
- Once cool, cut the cake into four equal rectangles. After cake shrinkage, they'll be about 5¼ x 8-inches. Cut pieces of cardboard the size of the cakes, and transfer each cake to its own cardboard rectangle.
- Frost the sides and tops of each cake with a very thin layer of buttercream, to trap the crumbs in the frosting and create a smooth surface for later. Refrigerate the cakes for an hour to firm up the frosting. Frost the cakes with a second, thicker layer of buttercream, trying to get smooth edges and sharp corners. Refrigerate the cakes again to chill the frosting before covering them with fondant.
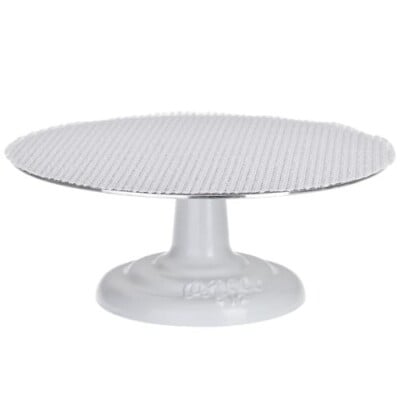
- When the cakes are firm, divide the fondant into four pieces, and dust your work surface and rolling pin with powdered sugar. Place the cake on a turntable. I find it easiest to elevate the cake off the table a bit, so I place a piece of nonskid drawer lining on the turntable, top it with a small rectangular container, and put the cake on top of that—I think it's easiest to get smooth fondant sides and corners if there is empty space underneath the cake, especially with such a small cake.
- Roll the fondant out into a long rectangle, and drape it over the cake. Gently smooth it over the top and sides, pressing your hands into each other at the corners to make a sharp edge. Use kitchen shears to cut the excess fondant, then smooth it against the sides again and press it against and underneath the bottom of the cake to form a smooth edge. Repeat until all of the cakes are covered with fondant.
- Top the cakes with your decorated cookies, and any other decorations you'd like! Affix them with frosting or royal icing. Try piping on frosting boarders, making fondant decorations, or brushing them with luster dust.
Measuring Tips
Our recipes are developed using weight measurements, and we highly recommend using a kitchen scale for baking whenever possible. However, if you prefer to use cups, volume measurements are provided as well. PLEASE NOTE: the adage “8 oz = 1 cup” is NOT true when speaking about weight, so don’t be concerned if the measurements don’t fit this formula.
Want to learn more about baking measurements and conversion?
Nutrition


I love how strong the imprint is!
Those cookies look beautiful. Thanks for the giveaway!
I couldn’t do these justice but I want to try!
WOW!!!
The cookies I could make with these…
I could REALLY be THAT MOM…
BWAHAHAHHHAHA!!!!
All my friends tease me about being the PTA mom and such and w/ this I could really bring home the WINTER bake sale…
Some serious fund raising going on here…
Wow, I’m going to make sugar cookies this year with whatever cutters I have. But I think I NEED these ones!
These are great! I’m going to make them next year for sure. Took me a bit of looking but I found the cutters here for anyone looking https://www.grammascutters.com/product/aunt-chicks-merry-christmas-cookie-cutters/
Hi Aleiah! So glad you were able to find the cutters and thanks for sharing the link again! It’s also linked in the post. I just added an extra link to the cutters on the recipe card as well to make it easier to find. We hope you will enjoy the recipe when you make it. Happy New Year’s!