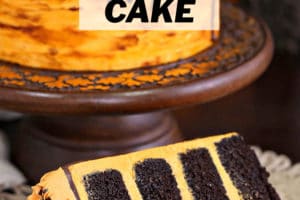


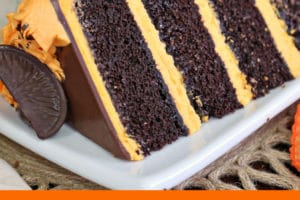


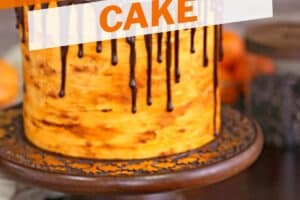

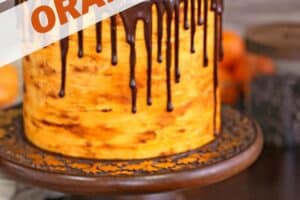

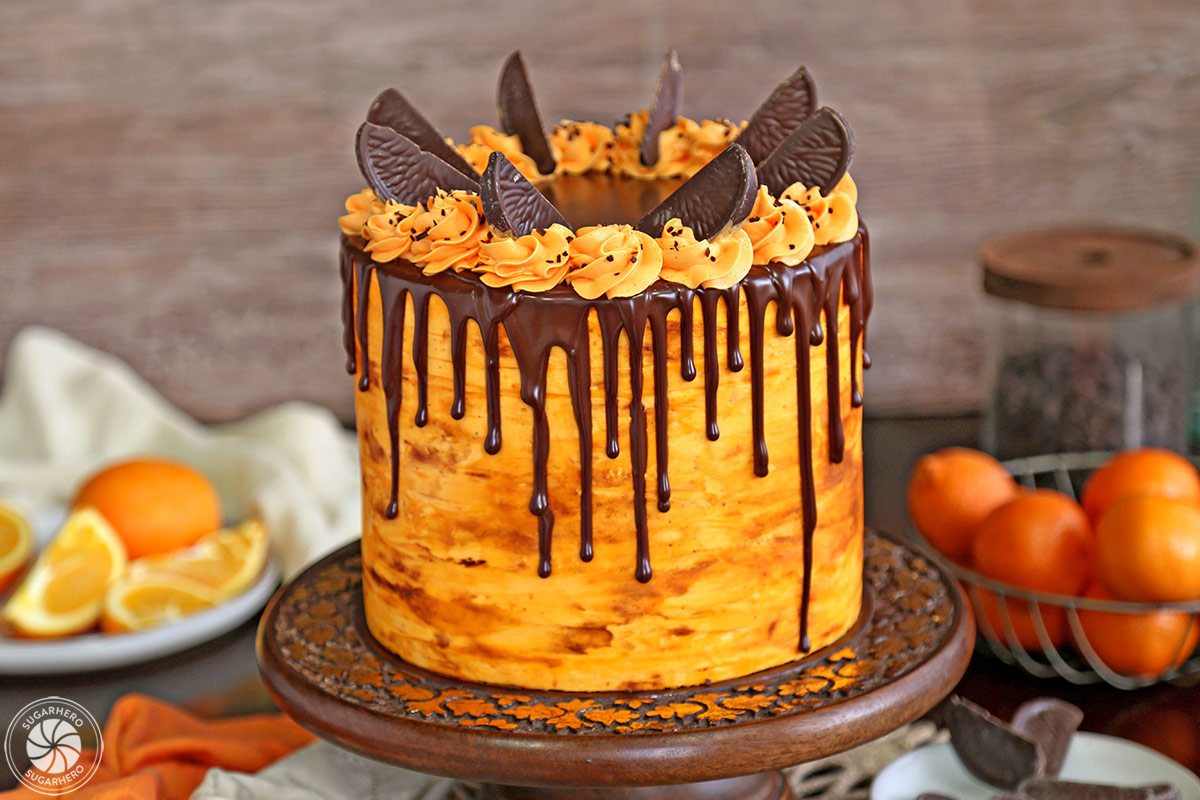
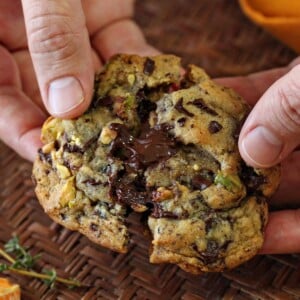
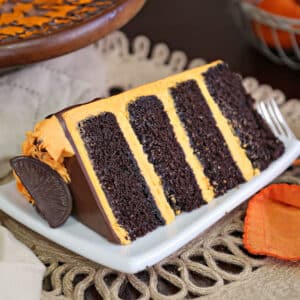
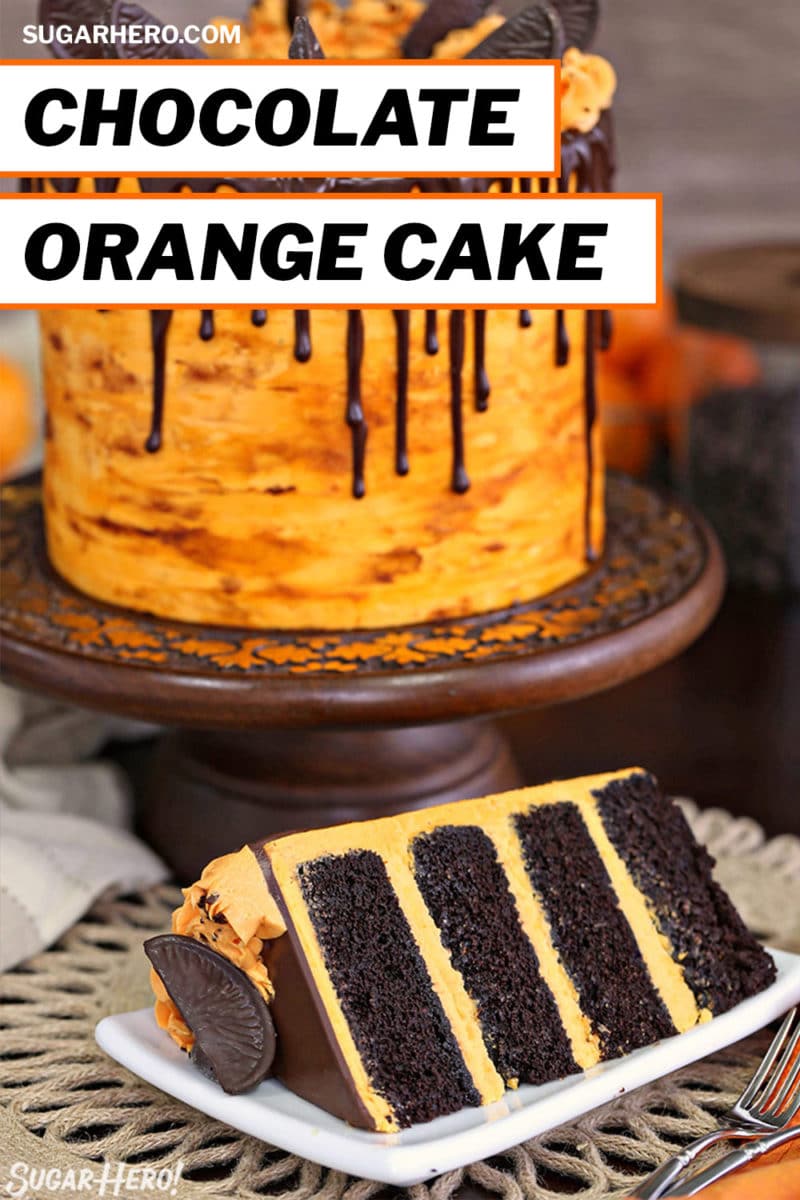
This Chocolate Orange Cake is the perfect blend of citrus flavors and dark chocolate. It features four layers of chocolate cake filled with tangy orange buttercream, topped with a shiny chocolate glaze and chocolate orange slices.

🍊Chocolate Orange Layer Cake
I’ve loved the combination of chocolate and orange ever since I first discovered a chocolate orange in my Christmas stocking as a child. Something about the contrast between rich, dark chocolate and bright, zesty orange flavor just hits all the right notes for my taste buds.
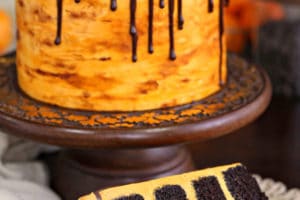
This towering Chocolate Orange Cake features 4 thick layers of chocolate cake, brushed with orange simple syrup for extra flavor and moisture. It’s stacked with zesty orange buttercream, and decorated with glossy chocolate ganache and–as tribute to those Christmas stocking treasures from long ago–finished with chocolate orange slices.
I hope you love this recipe as much as my family does! It’s an ultra-decadent cake that’s just bursting with chocolate and orange flavor. It’s a wonderful cure to the drab winter blues, but I can honestly eat it year-round!

Table of Contents
🧾 What You’ll Need
Ingredients
Because there are several different components to this tall layer cake, the ingredient list is a bit long. Fortunately, most of the ingredients are baking staples you probably already have. Below I’ve listed out specialty ingredients and a few tips to help you gather what you need. You can find the full list of ingredients in the recipe card below.
(Links are affiliate links and I earn a small commission from qualifying purchases.)
Chocolate Cake
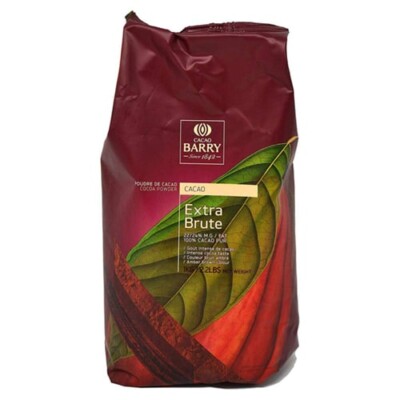
- Unsweetened cocoa powder: Since this cake gets all of its chocolate flavor from cocoa powder, I recommend using a high-quality, dutch-processed cocoa powder (also known as alkalized cocoa powder). Cheap cocoa powders can be nearly flavorless, or worse, impart a bitter, dusty, or stale flavor. My personal favorite is Cacao Barry Extra Brute – it hits that sweet spot between very high-quality and affordability since it is sold in bulk.
- Butter: Use unsalted butter, and leave it at room temperature for about 30 minutes before you start baking so it can soften. See ‘Cake Tips’ in the tips section for more information about using butter.
- Eggs: You’ll need large eggs for the cake batter (not extra large or medium). Allow them to come to room temperature before using them but letting them rest on the counter for about 30 minutes.
Buttercream Frosting
- Unsweetened chocolate: To give the chocolate frosting a deep, rich flavor, use unsweetened chocolate. You’ll only need 1 oz, so if you’d prefer to economize, use any high-quality chocolate you have on hand that has a high percentage of cacao in it.
- Pasteurized egg whites: This frosting recipe is a little different, in that it uses pasteurized egg whites from a carton. They are usually sold right next to the eggs in the refrigerated section. YES, it is safe to consume uncooked egg whites as long as they have been pasteurized! If you can’t find pasteurized egg whites in a carton, buy some pasteurized eggs from the store and separate them yourself – you’ll need about 6 egg whites for this recipe.
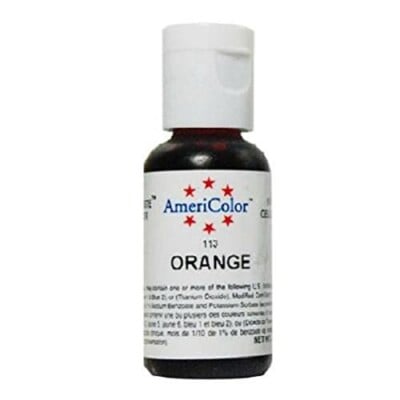
- Orange gel food coloring: To get a bright orange colored buttercream, I like to use orange gel food coloring. Unlike liquid food coloring, you only need to use a little gel coloring to achieve a vibrant shade. My preferred brand is Americolor.
- Orange oil: Note this is NOT orange essential oil–it’s a flavoring oil specifically meant for food. I love it because it provides a big POP of orange flavor with just a few drops! Lor-Ann is my favorite brand of orange oil. You can substitute orange extract if you don’t have the oil, but you might need to add a little extra since the extract is less potent.
- Orange zest: Adding delicate orange zest to the buttercream gives it a fresh orange flavor.
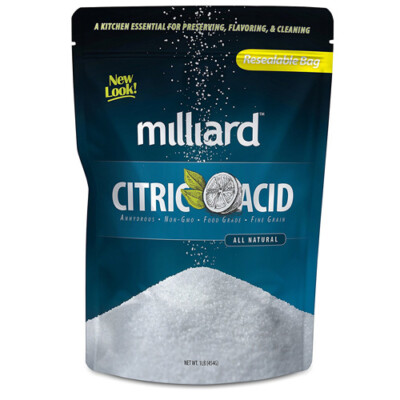
- Citric acid: This is optional, since it will probably need to be purchased online, but if you can track it down, I HIGHLY recommend it! Citric acid is my secret ingredient for making extremely realistic fruit desserts. It’s a granular white powder (similar in texture to salt) and is SUPER sour. Just a pinch will add a realistic tangy flavor to any fruit dessert. You can get a whole pound of it for about $12, and that amount will last forever!
Assembly and Decoration
- Orange juice: The secret to amazing orange flavor throughout the cake is making a simple syrup from orange juice and brushing it over each cake layer before frosting it.
- Semi-sweet chocolate: Chopping up a chocolate bar will give you the best flavor–I’m a big proponent of Trader Joe’s pound plus bars–otherwise, go for high-quality chocolate chips like Guittard.
- Heavy whipping cream: I like heavy whipping cream best for the rich texture it gives to ganache, but you can use whipping cream if that’s what’s available to you.
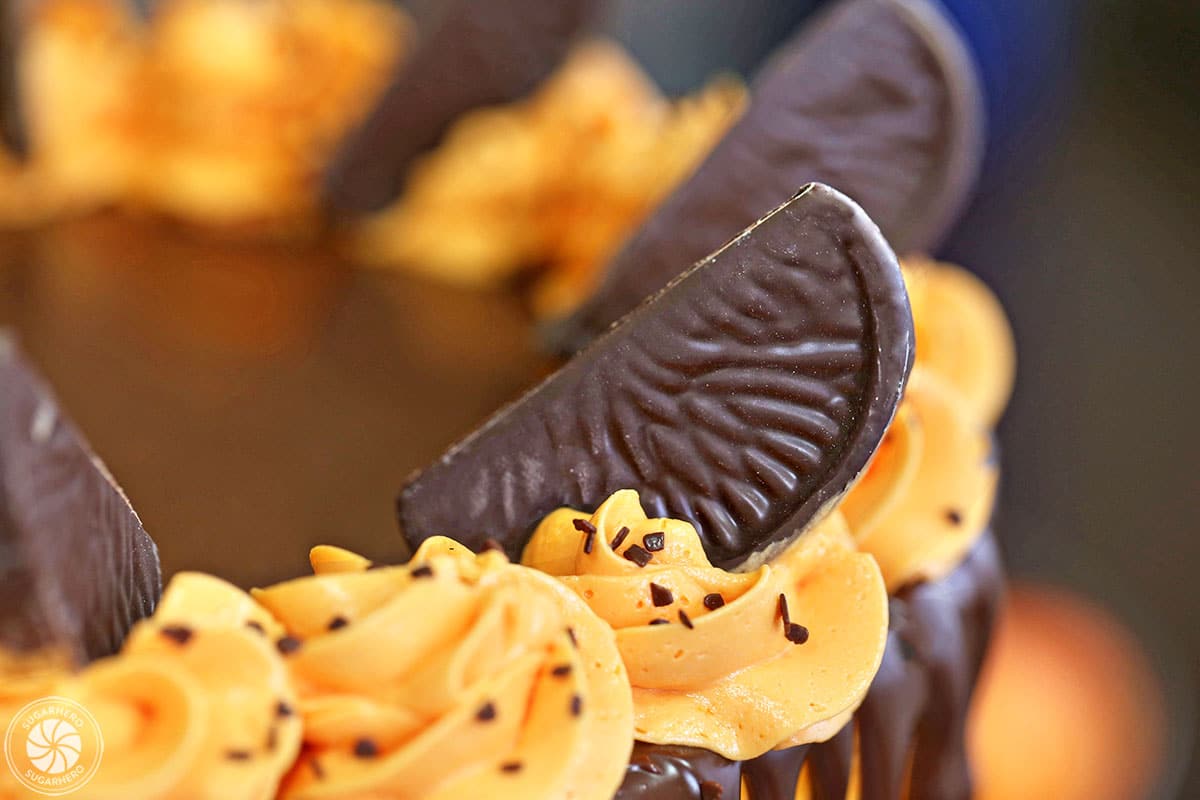
- Chocolate oranges: Optional but fun! They can be hard to track down in non-winter months, but you can always get chocolate oranges online if you’re committed to the theme. Otherwise, just use anything that is chocolate or orange-themed: chocolate sprinkles, orange Sixlets, mini chocolate chips, or slices of candied orange rind would all be great decorations too!
- Chocolate flakes: Whenever I use these particular chocolate flakes, people ask about them! They are real chocolate and are made by Cacao Barry. If you can’t find them, just use regular chocolate sprinkles.
Equipment
- A mixer: A MUST for making the cake batter and frosting. A stand mixer (like my trusty KitchenAid stand mixer) or a hand mixer will both work. Make sure to use a paddle blade for the cake batter, and a whisk attachment for the frosting.
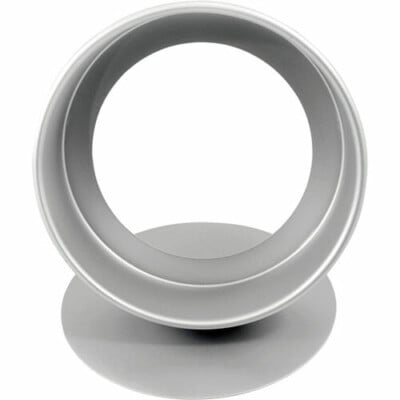
- Cake pans and cardboard cake rounds: This recipe is written to use four 8″ cake pans, but you can also use four 9″ cake pans and adjust the baking time. You’ll also need four cardboard cake rounds to place under each of the layers when assembling the cake.
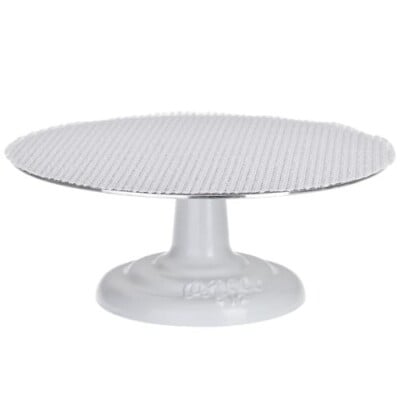
- Basic cake tools: Assembling and decorating will be MUCH easier if you have parchment circles, a cake turntable, an offset spatula and a silicone pastry brush.
- Piping tools: To create the rosettes around the edge of the cake, a piping bag and large closed star tip is a must. I used Ateco tip #849.
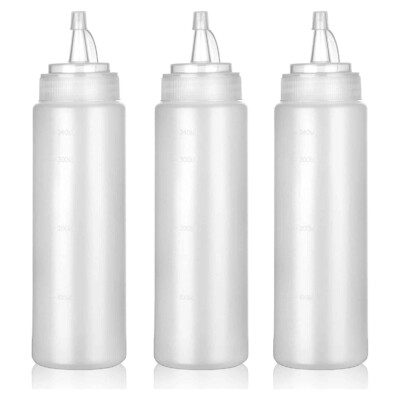
- Squeeze bottle: A squeeze bottle is a big help for getting those perfect ganache drips!
- Microplane: Use a microplane to make orange zest. A very fine grater can be substituted if you don’t have a microplane.
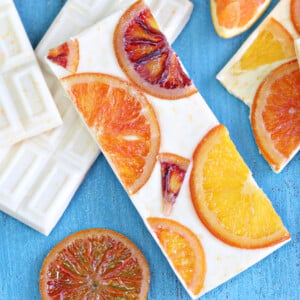
❤️ More Orange Desserts


Leave a Review!
If you make this recipe, let us know! Leave a ⭐️⭐️⭐️⭐️⭐️ rating on the recipe below, and leave a comment, take a photo and tag me on Instagram @elabau, or use #sugarhero on IG!
Chocolate Orange Cake with Orange Buttercream
Ingredients
For the Chocolate Cake:
- 3 cups water
- 4.5 oz unsweetened cocoa powder, (1 ½ cups)
- 18 oz all-purpose flour, (4 cups)
- 1 TBSP baking soda
- ¾ tsp baking powder
- 1 ½ tsp salt
- 12 oz unsalted butter, at room temperature
- 26 oz granulated sugar, (3 ¾ cups)
- 6 large eggs, at room temperature
- 2 TBSP vanilla extract
For the Buttercream:
- 1 oz unsweetened chocolate, finely chopped
- 6 fl oz pasteurized liquid egg whites, (3/4 cup, see Note below)
- 24 oz powdered sugar, (6 cups)
- 1/2 tsp salt
- 24 oz unsalted butter, (6 sticks), at room temperature
- 2 TBSP vanilla extract
- Orange gel food coloring
- 1 tsp orange oil, or 2 tsp orange extract
- Zest of 2 oranges, (about 4 TBSP)
- ¼ tsp citric acid, optional
To Assemble:
- 5 fl oz orange juice, (2/3 cup)
- 4.6 oz granulated sugar, (2/3 cup)
- 4 oz semi-sweet chocolate, finely chopped
- 6 fl oz heavy cream
- Chocolate flakes, or chocolate sprinkles, optional
- Chocolate orange slices, or other decorations, optional
Instructions
To Make the Chocolate Cake:
- Preheat the oven to 350 F. Line four 8-inch cake pans with sides at least 2” high with parchment rounds, and spray the insides with nonstick cooking spray.
- Pour the water into a medium bowl and microwave until it starts to boil, 3-4 minutes. Add the cocoa powder and whisk well, until all of the dry cocoa dissolves. Cover the bowl with plastic wrap to prevent water from evaporating, and let it sit until the paste is warm but not burning hot.
- In a large bowl, sift together the flour, baking soda, baking powder, and salt, and set aside.
- Combine the butter and sugar in the bowl of a mixer fitted with a paddle attachment, and beat on medium speed for 8-10 minutes, until very light and fluffy. Add the eggs two at a time, beating for about a minute between each addition, then mix in the vanilla.
- Alternate adding the dry ingredients and the cocoa paste in batches, beginning and ending with the dry ingredients. Finish by scraping the bottom and sides of the bowl with a rubber spatula to mix the cake batter well.
- Divide the batter between the prepared pans—if you have a kitchen scale, each pan should get about 22-23 oz of batter. Bake at 350 F for about 30 minutes, until the cakes spring back when lightly pressed with a fingertip and a toothpick inserted into the center comes out with just a few moist crumbs attached.
- Cool the cakes completely before using them. They can be made in advance and kept, well-wrapped, in the refrigerator for a week or in the freezer for several weeks. Allow them to partially defrost before assembling.
To Make the Buttercream:
- Place the unsweetened chocolate in a small bowl and microwave for 30 seconds. Stir, and microwave in smaller increments if necessary until melted and smooth. Set aside until the melted chocolate is no longer hot.
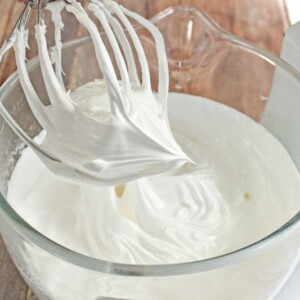
- Meanwhile, combine the whites, powdered sugar, and salt in the bowl of a large stand mixer fitted with a paddle attachment. Mix everything together on low speed, until the sugar is moistened and no dry patches remain. Turn off the mixer, scrape down the sides and bottom of the bowl with a spatula, then turn the mixer to medium speed. Beat on medium for 5 minutes.
- After 5 minutes, turn the mixer to medium-low and start adding the softened room temperature butter, 1-2 tablespoons at a time. Once all of the butter is incorporated, add the vanilla extract and mix it in. Stop the mixer and scrape down the bottom and sides once more. Turn the speed to medium and beat the buttercream for 10 minutes. At the end, you’ll have a frosting with a wonderfully light and creamy texture.
- Separate out approximately 1/2 cup of frosting, and mix the melted chocolate into the frosting to make a deep, rich chocolate color.
- To the rest of the frosting, add several drops of orange gel food coloring, the orange zest, the orange oil or extract, and the citric acid (if using). Mix well, and adjust the color and flavoring until you’re satisfied.
- At this point, the frostings can be used right away, or transferred to an airtight container. If you’ll be using them within a day they can be left out on the counter. Otherwise, store in the refrigerator for up to 2 weeks. Refrigerated buttercream needs to COMPLETELY come to room temperature and then be beaten for several minutes to smooth it out and restore its texture before being used to frost the cake.
To Assemble and Decorate:
- Make the orange syrup by combining the orange juice and granulated sugar in a small saucepan over medium heat. Stir frequently while the mixture heats up and comes to a simmer. Once simmering, remove it from the heat and allow it to cool to room temperature.
- Place the cake rounds on 8-inch cardboard cake circles. Place one layer on a cake turntable. Take a pastry brush, and generously brush the top of the chocolate cake with the orange syrup.
- Place a big dollop of orange frosting on the cake layer—about 1 generous cup—and use a metal spatula to spread the frosting into an even layer going all the way out to the edges of the cake.
- Top the cake round with a second cake layer, and repeat the syrup and frosting process again. Repeat the layering process with the third layer, and finally, add the last cake layer. Brush the top of the cake with the orange syrup.
- Then cover the top and sides of the cake with a very thin layer of frosting—this is the crumb coat, which locks crumbs into the frosting and also provides some stability to the cake. Refrigerate the cake for 45-60 minutes, until the crumb coat is set and the cake feels firm and stable.
- If the orange buttercream has started to get spongy, re-whip it briefly until it is smooth and silky. Cover the top and sides of the chilled cake with a thicker layer of frosting. Use a bench scraper or metal spatula to smooth out the sides and top of the cake as much as possible. Chill for 30-45 minutes, until firm.
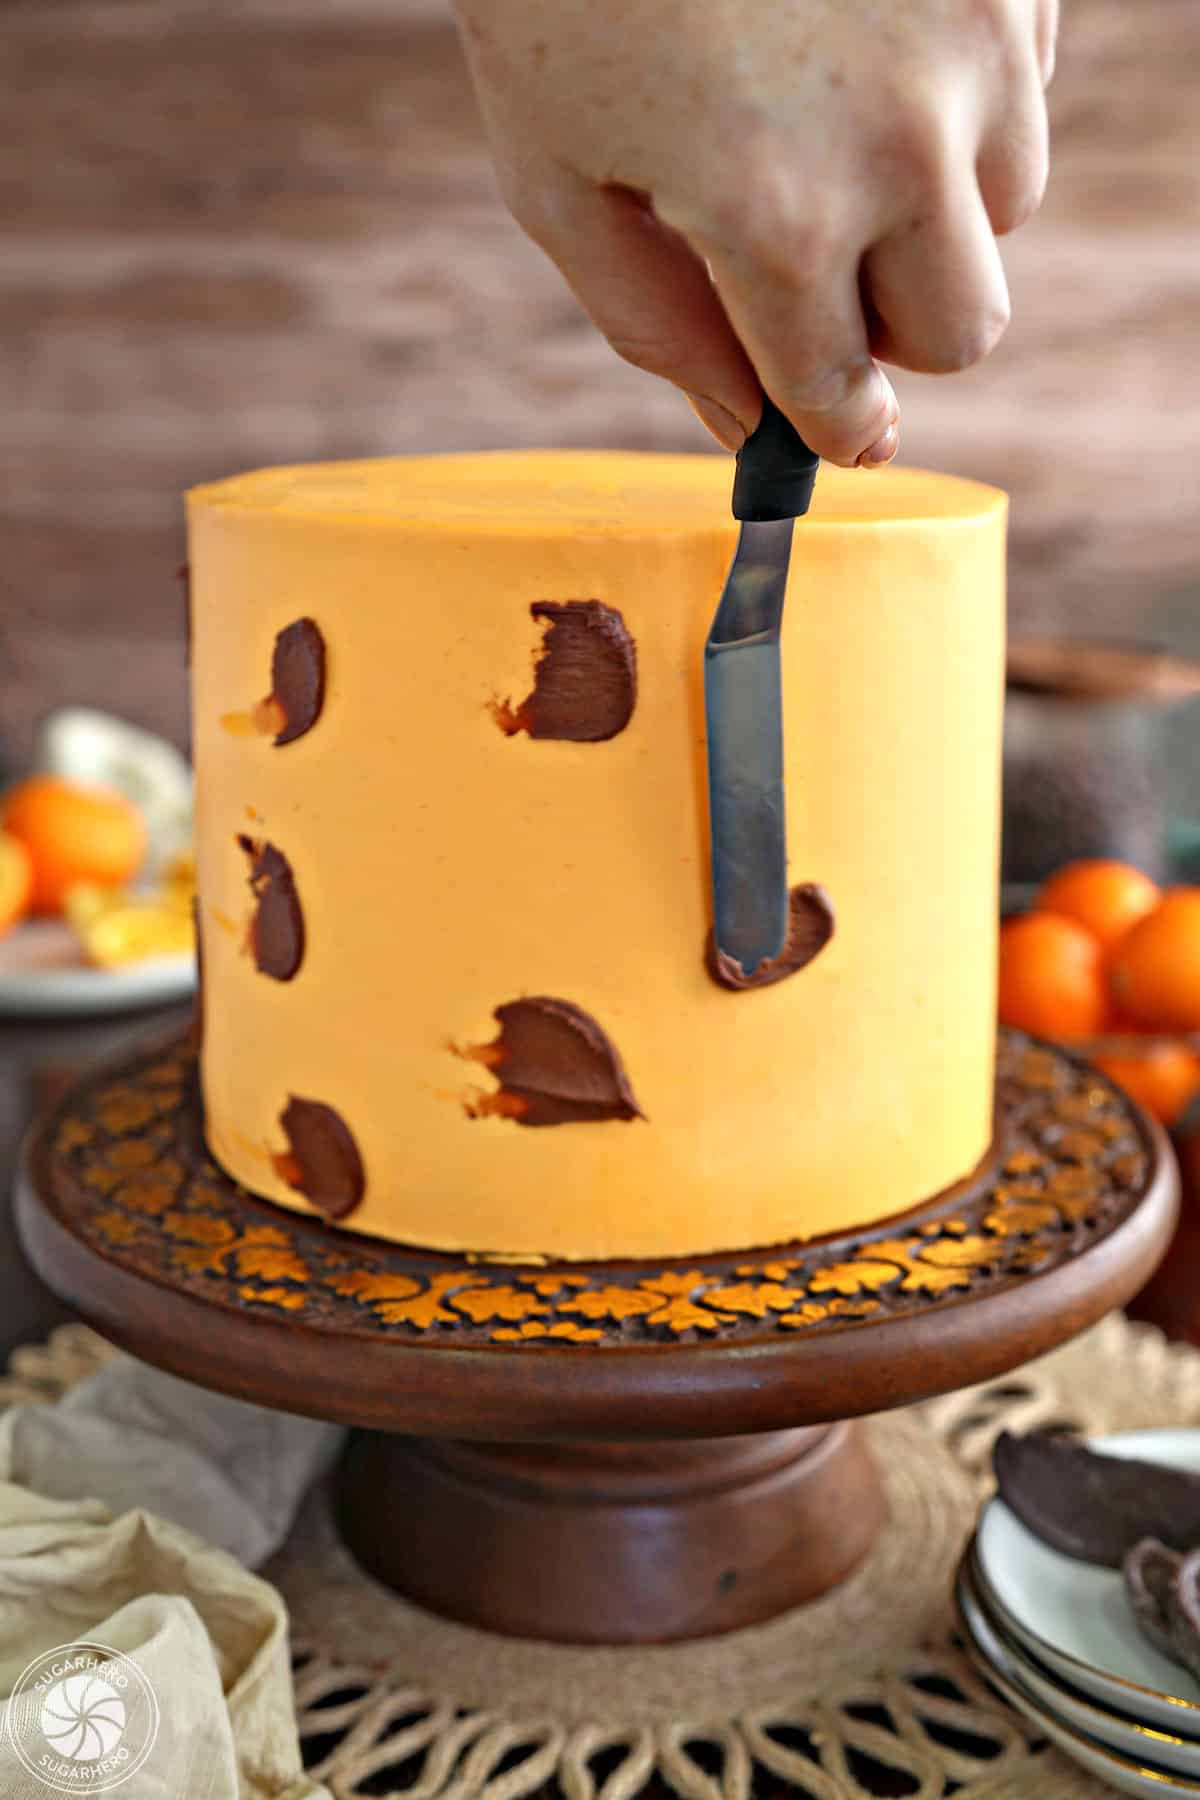
- Take a small metal spatula and dab the chocolate buttercream in small spots all around the sides of the cake. Use a bench scraper or large metal spatula to smooth out the buttercream and create a smooth surface with subtle chocolate streaks. (You can add more orange frosting or chocolate frosting until you get an effect you love.)
- Make the chocolate ganache by combining the chopped semi-sweet chocolate and the cream in a medium bowl, and microwave for 1 minute. Whisk well, and if any chunks of chocolate remain, whisk again briefly until it is completely melted and smooth. The chocolate glaze should have a fairly thin texture. Test the consistency by dipping a spoon into the ganache and letting the excess drip off back into the bowl; it should almost immediately blend back into the rest of the glaze.
- Transfer the chocolate glaze to a squeeze bottle with a narrow tip. Squeeze about a dime-sized amount of glaze on the top edge of the cake, and nudge it gently so it starts to slide down the side. Squeeze another small circular amount of glaze right next to the first drip, and continue this process all the way around the top edge of the cake until the edge is covered by a ring of drips. To get drips of different lengths, vary the amount of ganache squeezed in each circle and vary how much of it you nudge over the side with the bottle tip.
- Squeeze the remaining glaze into the center of the cake, and use a small spatula to smooth it into an even layer that joins with the outer ring. Let the glaze set for 10 minutes in the refrigerator, or about 30 minutes at room temperature, so that it’s not completely soft and liquid when adding the decorations on top.
- Transfer the remaining orange buttercream to a piping bag fitted with a large closed star tip (I used Ateco #849), and pipe frosting rosettes all along the edges of the cake. Top the rosettes with chocolate flakes or sprinkles, chocolate orange slices, or any other decorations you’d like.
- For the best taste and texture, serve this cake at room temperature. Leftovers keep well, and can be stored in an airtight container in the refrigerator for up to a week, but will taste best when eaten within 3-4 days.
Recipe Notes
Measuring Tips
Our recipes are developed using weight measurements, and we highly recommend using a kitchen scale for baking whenever possible. However, if you prefer to use cups, volume measurements are provided as well. PLEASE NOTE: the adage “8 oz = 1 cup” is NOT true when speaking about weight, so don’t be concerned if the measurements don’t fit this formula.
Want to learn more about baking measurements and conversion?
Nutrition
📸 Photo Tutorial: Chocolate Orange Cake With Orange Buttercream
Once you’ve layered and frosted the cake, use this photo tutorial to help you decorate your cake. You can find the full instructions in the recipe card above as well.
Create a Chocolate Buttercream Streak Effect
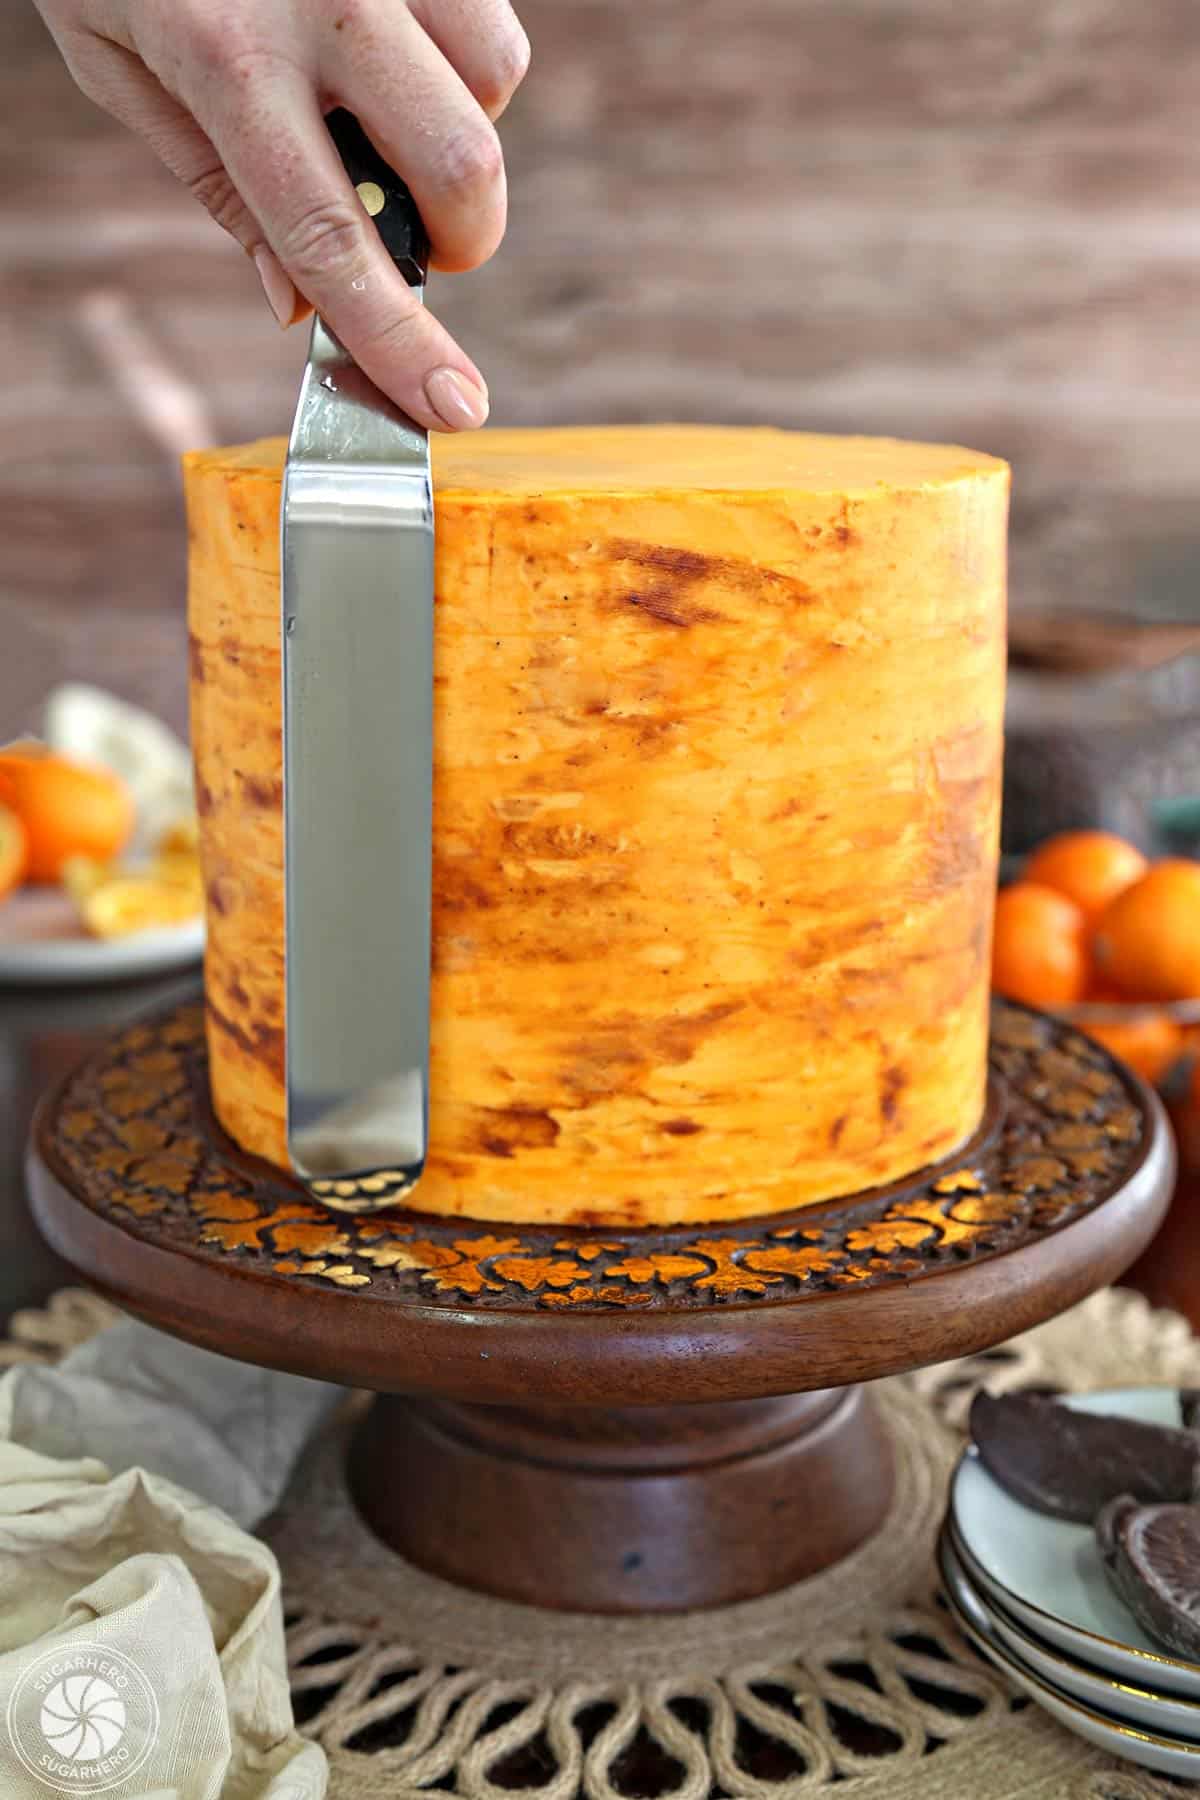
- Remove chilled cake. Remove chilled, frosted cake from the refrigerator. It should be nice and firm on the outside.
- Dab outside with chocolate frosting. Take a small metal spatula and dab the chocolate buttercream in small spots all around the sides of the cake.
- Smooth outside of cake. Use a bench scraper or large metal spatula to smooth out the buttercream and create a smooth surface with subtle chocolate streaks. (You can add more orange frosting or chocolate frosting until you get an effect you love.)

Add Chocolate Drip and Buttercream Rosettes
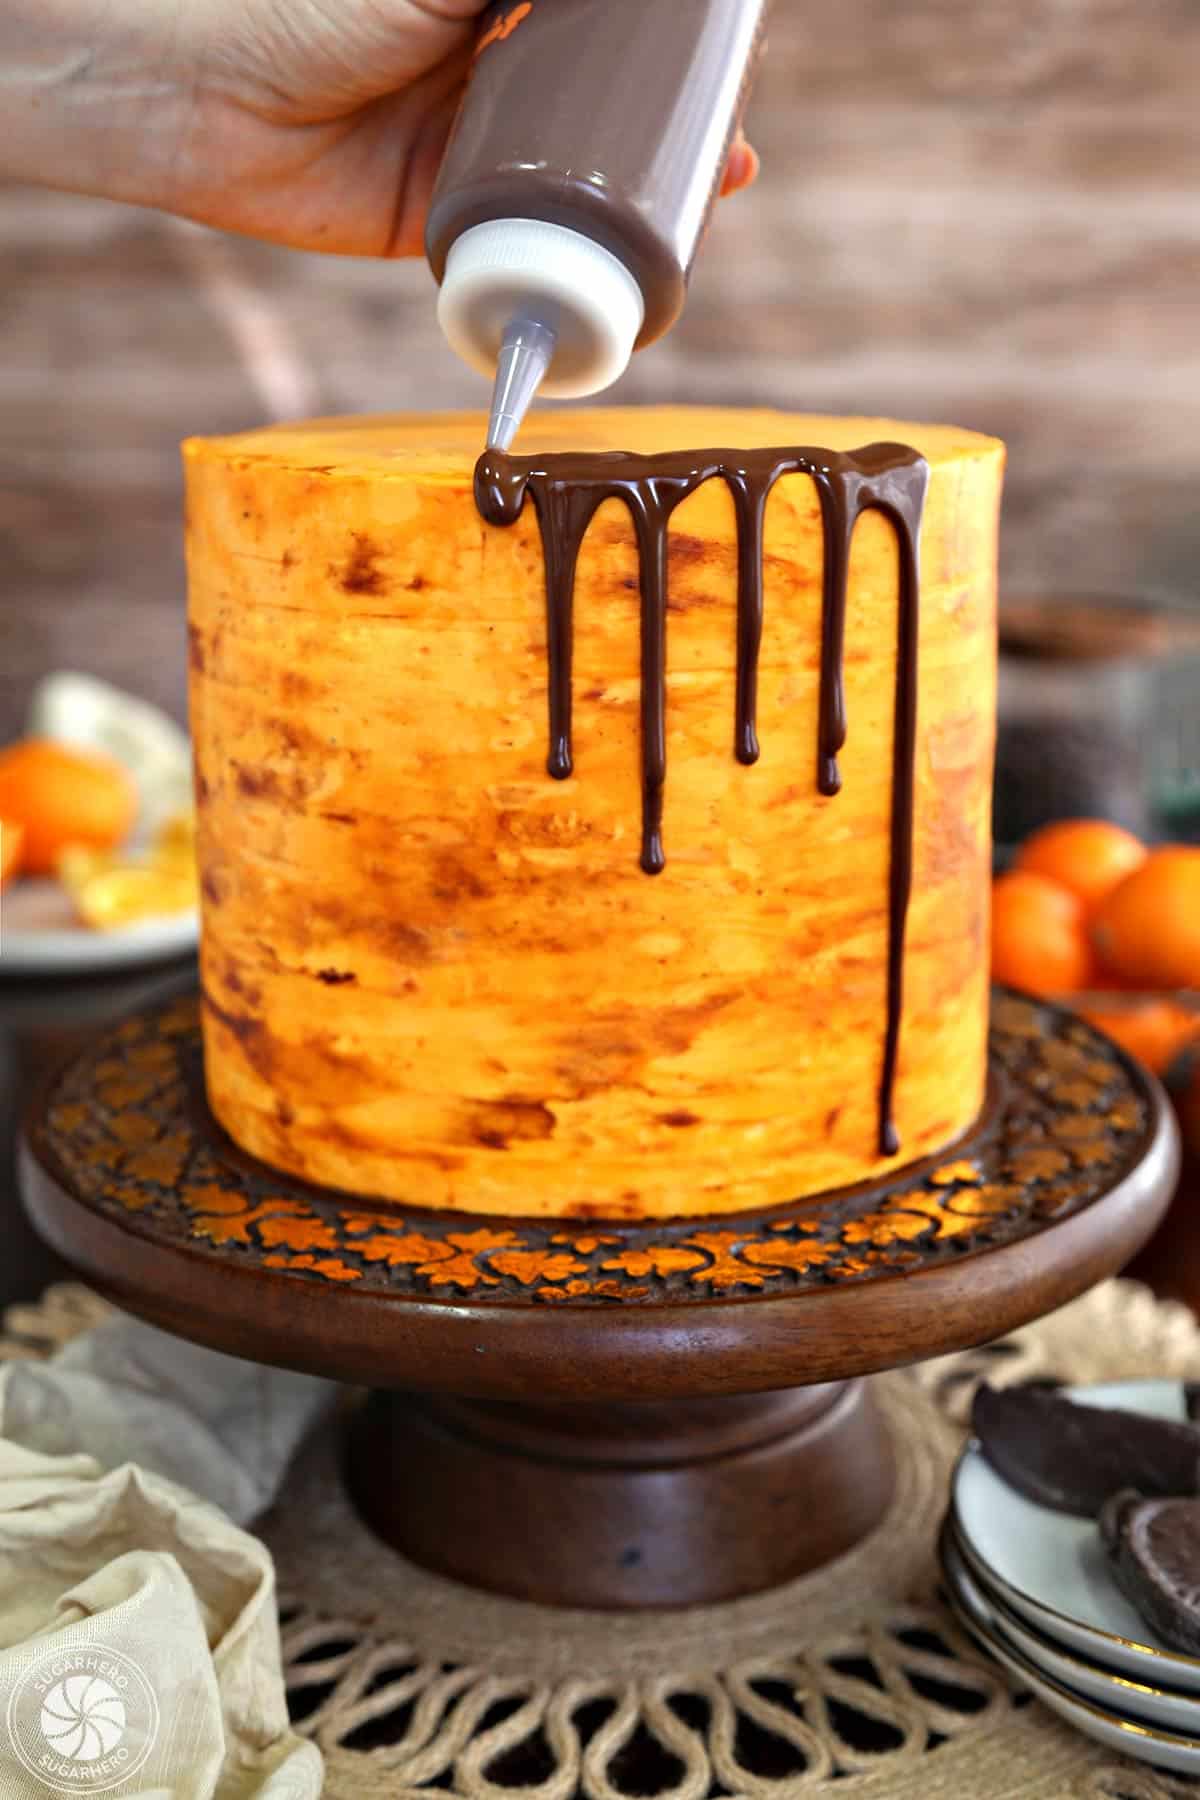
- Fill squeeze bottle with ganache. Use a squeeze bottle filled with chocolate glaze to make the chocolate drip around the top of the cake.
- Squeeze and nudge ganache. Squeeze about a dime-sized amount of glaze on the top edge of the cake, and nudge it gently so it starts to slide down the side.
- Make a dripped ring of ganache on top edge of cake. Squeeze another small circular amount of glaze right next to the first one and nudge the drip over the side. Continue this process all the way around the top edge of the cake until the edge is covered by a ring of drips. To get drips of different lengths, vary the amount of ganache squeezed in each circle and vary how much of it you nudge over the side with the bottle tip.
- Fill in top of cake with ganache. Squeeze the remaining glaze into the center of the cake, and use a small spatula to smooth it into an even layer that joins with the outer ring.
- Set glaze. Let the glaze set for 10 minutes in the refrigerator, or about 30 minutes at room temperature, so that it’s not completely soft and liquid when adding the decorations on top.
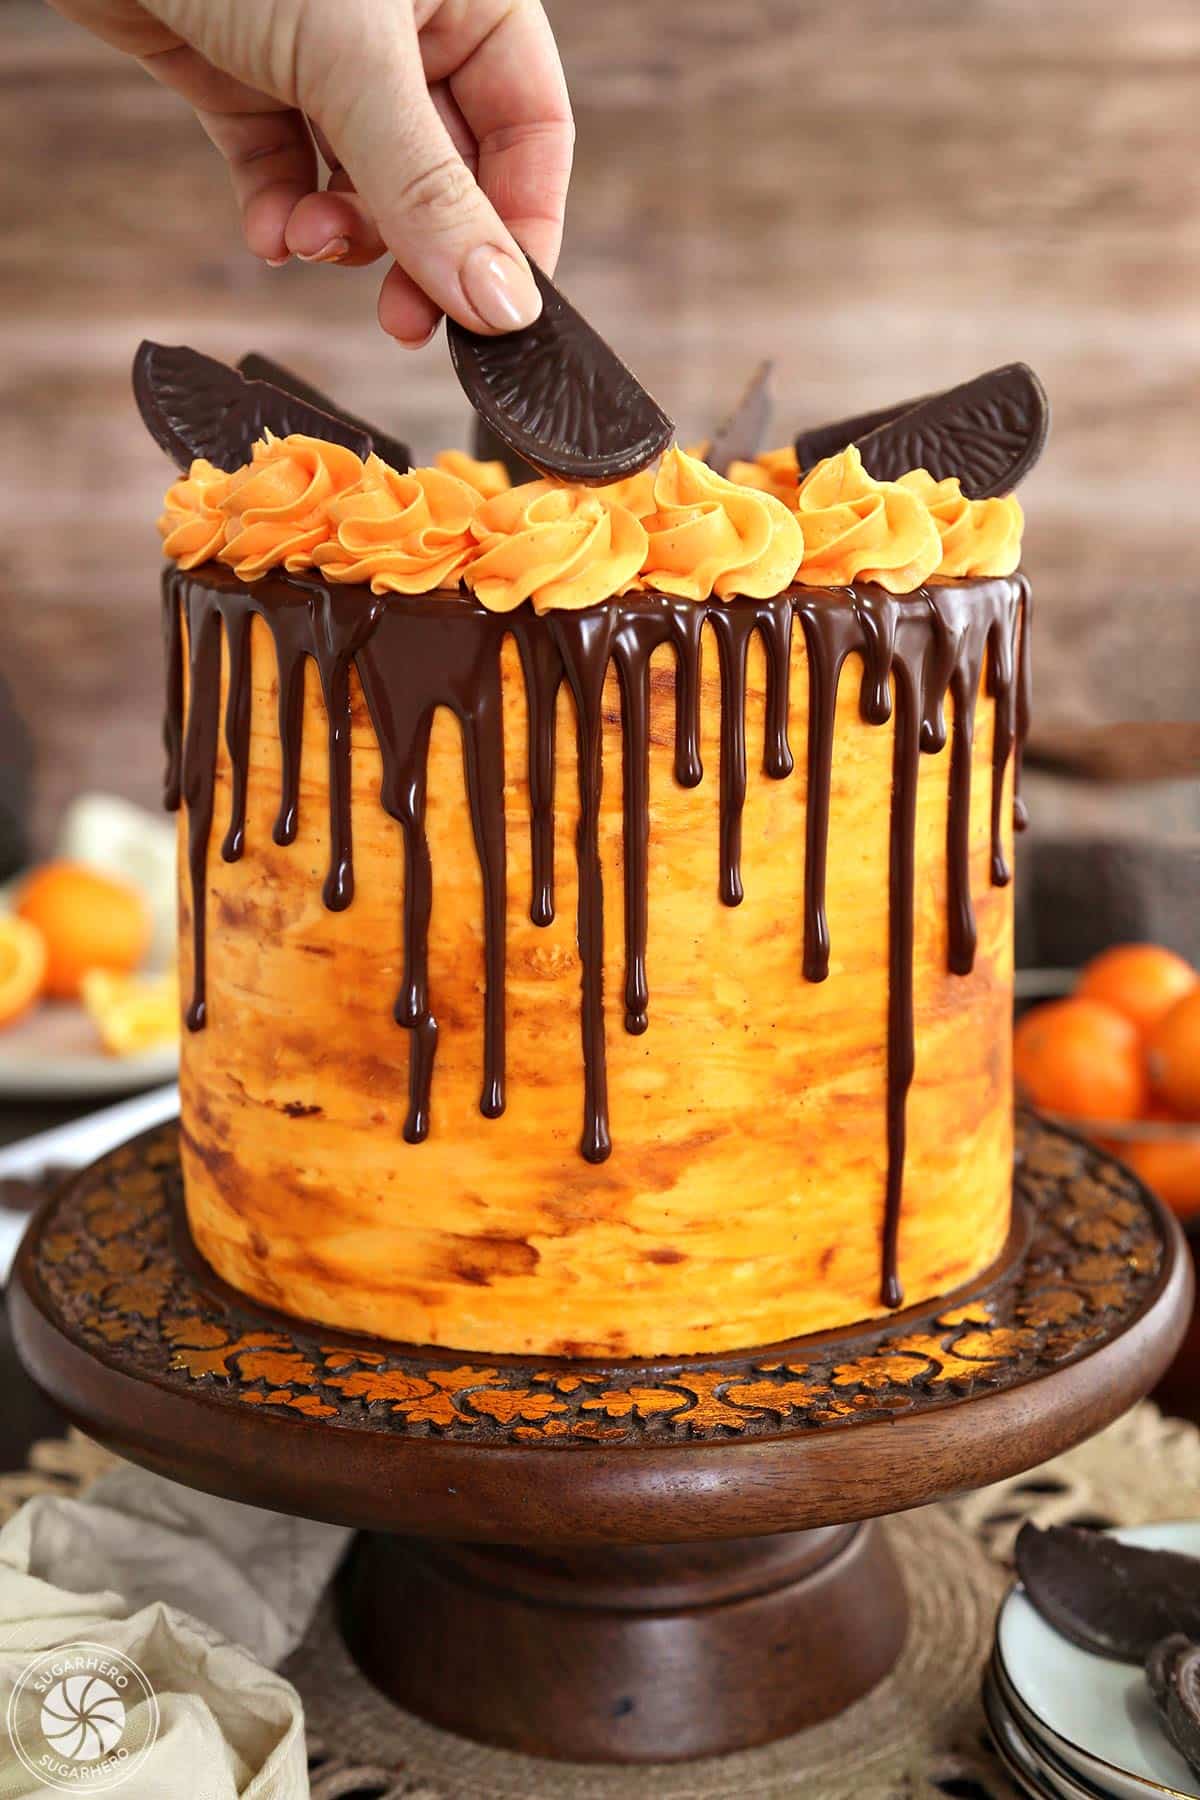
- Pipe rosettes. Transfer the remaining orange buttercream to a piping bag fitted with a large closed star tip (I used Ateco #849), and pipe frosting rosettes all along the edges of the cake.
Decorate with Finishing Touches
- Add finishing touches. Top the rosettes with chocolate flakes or sprinkles, chocolate orange slices, or any other decorations you’d like.
- Enjoy!

💡 Tips For Success
Cake Tips
This chocolate cake recipe is pretty straight-forward and forgiving. Even if it’s slightly overbaked, it still turns out moist and delicious! Don’t forget to prep your pan with parchment circles, and a generous layer of pan release or nonstick spray.
This is an all-butter cake, which is my favorite type of chocolate cake to make. Using butter instead of oil gives the cake more flavor, makes it less prone to a greasy texture, and also makes the cake sturdy enough for layering. Chocolate butter cakes can also be turned into great cupcakes, and if you’re looking for a no-fail cupcake, check out my Chocolate Cupcake recipe.
Even though the cake is moist, I still like to add a little extra insurance–and flavor!–by brushing it with an orange simple syrup. This easy recipe is just orange juice and sugar, heated until the sugar dissolves. Once cool, use a pastry brush to spread the syrup on each layer. Bam! Your cakes are now extra-moist and tinged with orange flavor!
Buttercream Tips
The frosting is a variation of my Easiest Swiss Meringue Buttercream. There are full instructions in the recipe card above, but if you want to learn more in-depth about the recipe, please check out my stand-alone buttercream recipe post–it has lots of step-by-step pictures, tips, and tricks for frosting perfection!

FAQs
It is extremely common for the frosting to go through an “ugly” period before it’s done. Your frosting may look soupy, curdled, chunky, or downright gross. This is normal!
This frosting needs to be beaten for an extended amount of time so that the fat in the butter emulsifies with the egg whites and creates that gorgeous frosting texture. If it looks soupy or curdled, there is a 95% chance that it has not been beaten long enough, and you just need to keep whipping in order for it to come together. I promise.
The other common cause of frosting failure is butter that is too warm. “Room temperature” does not mean greasy, slightly melted around the edges, or warm. It is better to have the butter be slightly too cool than too warm. If your butter is too warm, the frosting might remain liquidy. Refrigerate the frosting for 5-10 minutes and try beating again until it comes together.
It’s always a good idea to give yourself plenty of time to make the components and assemble a layer cake. Whenever possible, I like to do it over the course of several days so I’m not rushed or stressed. Fortunately, all the parts of this cake can be made in advance!
The cake can be baked and then wrapped well in plastic wrap. Store it in the freezer until you’re ready to assemble–the freezer does a better job of keeping cakes moist than the refrigerator. Cake can be stored for up to 3 months in the freezer.
The frosting can be made and stored in an airtight container in the refrigerator for up to 2 weeks. Let it come completely to room temperature, then whip well to restore the smooth texture.
The ganache can be made and stored in an airtight container in the refrigerator for up to a week. Warm it up very gently in the microwave in short bursts, stirring frequently, just until it’s fluid.
You can store any cake leftovers (if you have any) in a covered cake stand for 3-4 days. It can be refrigerated for up to a week, but it will become more dry due to refrigeration after about 3-4 days. For the best taste and texture, bring it to room temperature before serving.


16/10/24 never been a baker but I started baking in may this year just before my 60th birthday and I’m absolutely loving it so when I saw this recipe I really wanted to try it but I was like no way can I do that. So took the bull by the horns and gave it a go. The instructions and pictures are so easy to follow that I actually made it and for my first attempt on a cake like this I’m so proud of myself thank for sharing your recipe and for putting the easy to follow instructions and pictures I’ll be making this again. I’ve posted a comment with a picture at front of this post
Hi Bev. Thank you so much for your recipe review and rating! It really means a lot. So proud of you for trying something new. Sounds like it was amazing. Way to go!
I made this cake , I used the 8 inch cake pans as directed, I think the directions for the cooking times are very incorrect, it lists to bake for 55-60 mins at 350F ? I put mine in , checked them again at 44 min and they were way overbaked and no longer moist. The layers were wayyy overcooked. I think they should have been taken out around 28 min, max.
Hi Steph, many apologies, this was an error on our part. The recipe originally called for baking the cakes in two 8×3″ pans, then cutting those tall layers in half. We got feedback that 3″ high pans were tough to find, so revised the recipe to make four shorter layers, but did not revise the baking time. I hope you were still able to enjoy the cake, and I’m very sorry for the mistake and appreciate you letting me know.
Made this but haven’t tried it yet. Looking forward to it though. Topping mixture did not come out like what is shown in the pic. I am also a bit confused as to exactly when and where you incorporate the 6oz of heavy cream into the syrup as it is listed as an ingredient. I don’t read minds and after looking through the entire recipe many times, decided to not include it. Cook time was off by 20 mins. 30 mins was not even close. A more detailed recipe would be very helpful.
Hi Randy, the cream is used in step 6 under the “To Assemble” headline – it is part of the chocolate ganache used to make the chocolate drips, not the syrup. For the best drips the ganache needs to be used while it is warm which is why it is typically made right before use, after the rest of the cake is decorated and chilled. I do agree that such a long recipe could probably use additional subheadings to divide the steps up further. Re the baking time, just to clarify, did you divide the batter into 4 cake pans and still found that they needed 50 minutes?
Don’t rely on the printed instructions as I did. Apparently you need to stare at your phone or tablet while trying to deal with all these meticulous steps. The printed instructions are woefully absent of crucial details!
I haven’t tried making this cake yet but after reading the entire writeup, which is something you should ALWAYS do, I just wanted to share this bit of info for those reading the comments. If you live in the US and have a Target or Walmart nearby you can find citric acid there. It comes in a plastic container. The last time I purchased it, which was a few yrs ago, the price at Target was just under $6. If I can find items in store I’d rather go that route then ordering online. It’s just a personal preference though it seems I’m going to have to purchase the black cocoa powder online because I have yet to find it being sold in store anywhere. Just my luck, right? LOL I love to seeing the use of LorAnn’s oils. It’s the only brand I like to use. Again, if you’re in the US and have a Michael’s craft store nearby you can find it there. She has quite a bit of flavors which I was happy to see. I used to buy her oils at Walmart but the amount of flavors to choose from were very few. Hope this is helpful
Thanks for leaving this helpful comment Tammie! It’s very thoughtful of you.