


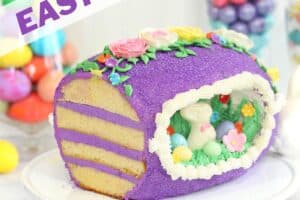

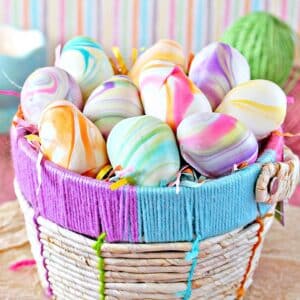
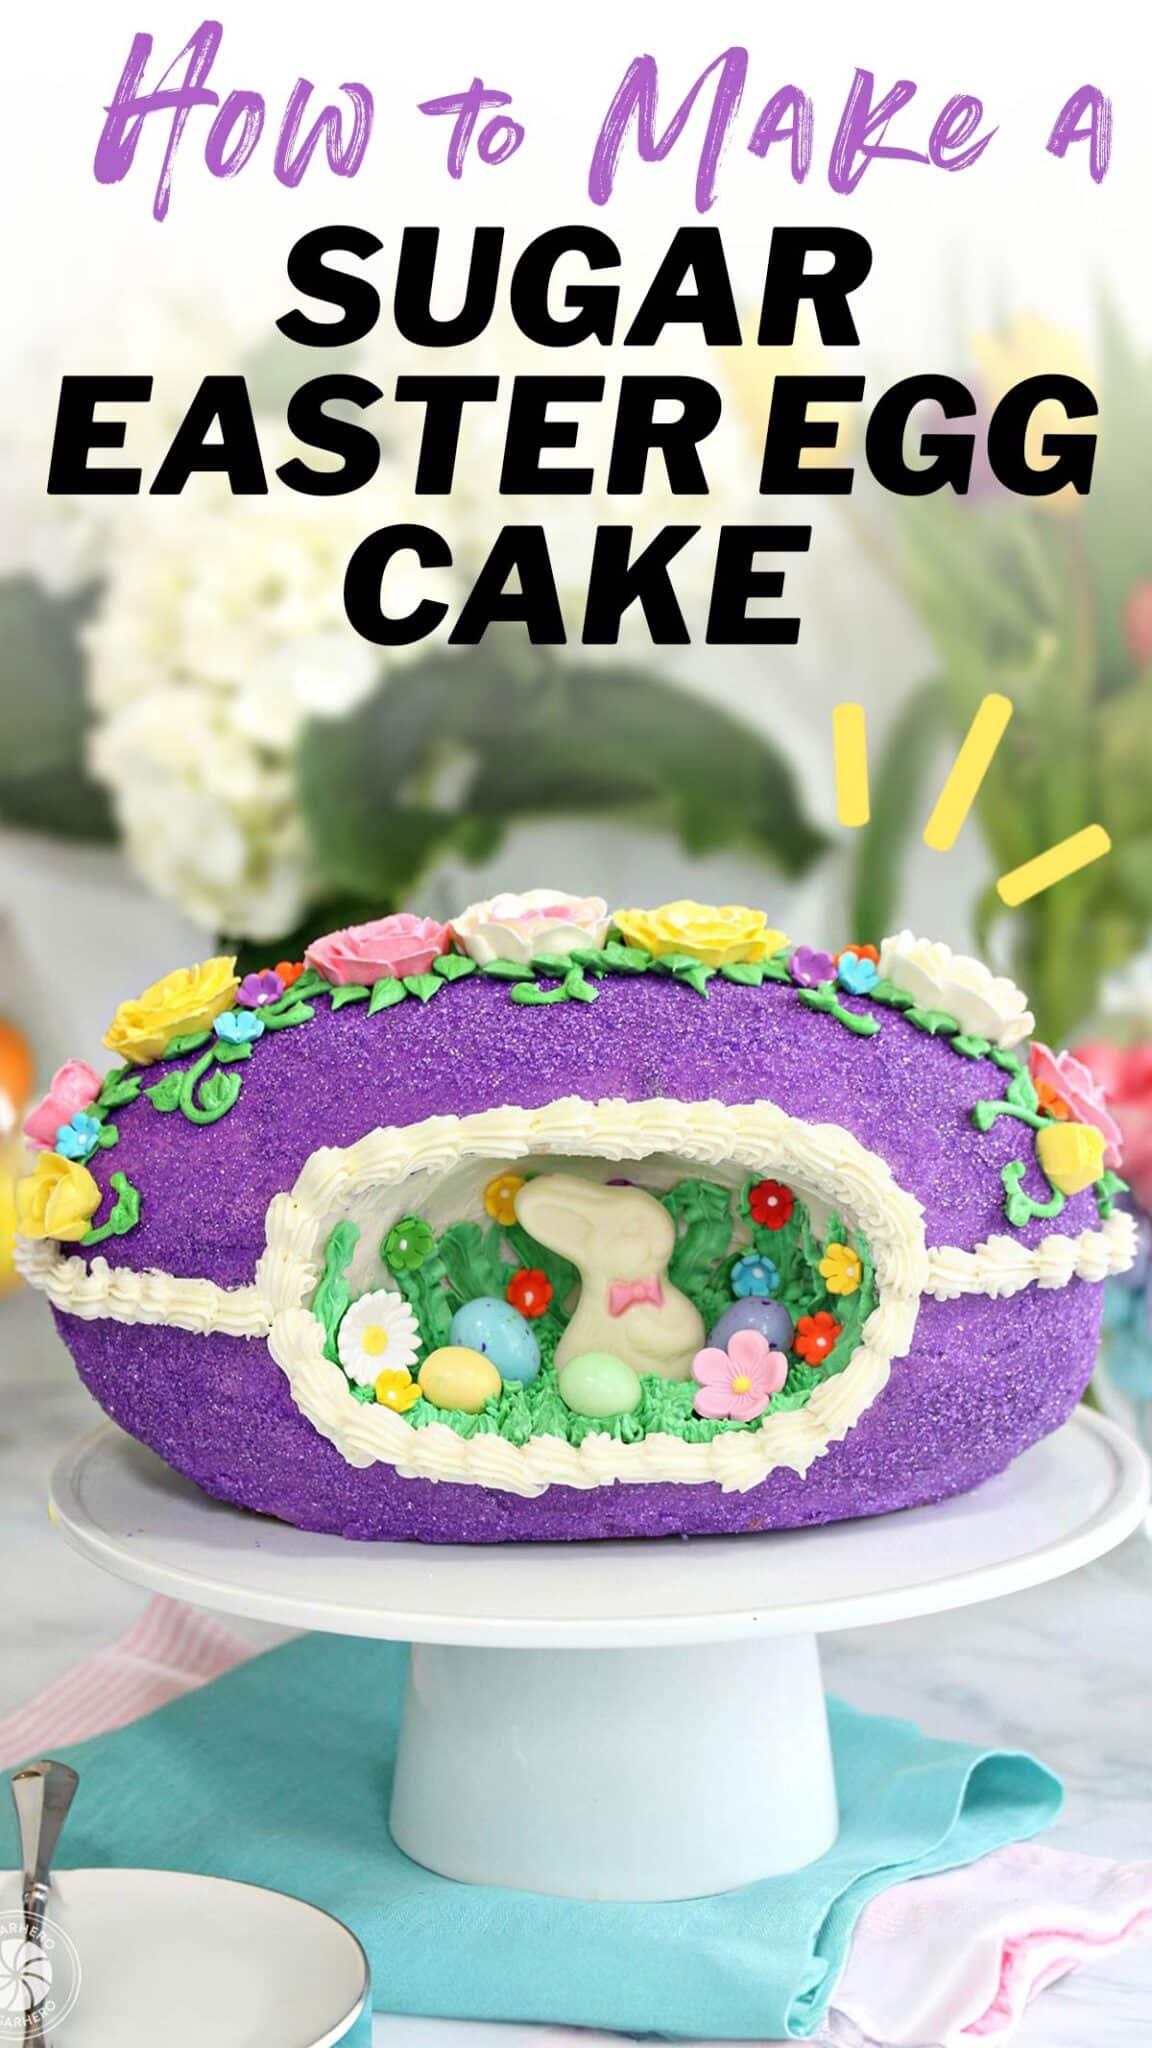
Looking for a knockout Easter cake? Try this Sugar Easter Egg Cake! The look is based on old-fashioned panoramic sugar eggs, but it’s made out of CAKE! And unlike those classic sugar eggs, this dessert is entirely edible!

🐇It’s a Panoramic Sugar Easter Egg…Cake!
Growing up, my parents had a set of panoramic sugar Easter eggs they would pull out every Easter. You might be familiar with the type of eggs I’m talking about. They’re large eggs made of hard-packed sugar, usually in pastel colors, decorated with royal icing flourishes and candy accents. They’re delicate, beautiful…and to childhood me, they were complete torture.
Think about it. These gorgeous, colorful eggs were made out of SUGAR! Nectar of the gods! And yet, they were completely inedible, never intended to be eaten at all. They were brought out as decorations year after year, then painstakingly wrapped up after Easter with the rest of the decor. It was a cruel trick.
I obviously still harbor a little bit of a grudge against those delicious-but-forbidden sugar eggs. Now that I’m an adult, I’m here to recreate those panoramic sugar Easter eggs…in cake form. It’s whimsical, beautiful, and definitely a show-stopper on the Easter table!

Table of Contents
🧾What You’ll Need
Ingredients
Although this cake has several steps, the ingredients themselves are pretty simple. Take a look at these ingredient tips to help you get everything you’ll need. (Links are affiliate links and I earn a small commission from qualifying purchases.)
For the Pound Cake
- Unsalted butter and salt: I prefer to use unsalted butter so that I can add just the right amount of salt to the batter. If you don’t have unsalted butter, omit the extra salt. You’ll also want to use room temperature butter because it blends much more easily and helps to prevent overmixing the batter.
- Cream cheese: It’s best to use full-fat, brick-style cream cheese (avoid whipped or low fat varieties). Bring it to room temperature before mixing it into the batter.
- Granulated sugar
- Eggs: Use large, room temperature eggs (not medium or extra large).
- Vanilla extract: My absolute favorite brand of vanilla extract is Nielsen Massey. Using a high-quality extract will give your cake the best flavor.
- All-purpose flour: It’s important to measure the flour properly so that the cake doesn’t become dense or dry. If possible, use a kitchen scale for accurate weight measurements.
- Baking powder
For the Frosting
- Egg whites: For the best results, use the whites from large eggs (not medium or extra large).
- Granulated sugar
- Unsalted butter and salt: I also recommend using unsalted butter for the buttercream frosting. Salted butter will likely make it taste too salty. The butter needs to be soft but still cool to the touch.
- Vanilla extract
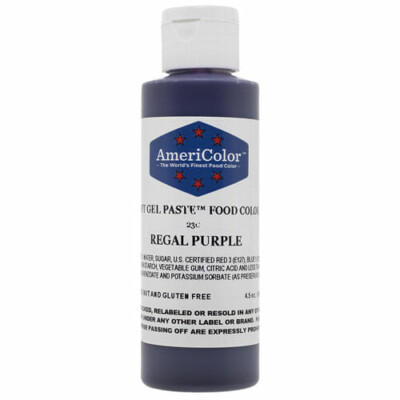
- Gel food coloring: I highly recommend using gel food coloring for this project because the coloring is highly concentrated and won’t water down the buttercream. I like to use Americolor brand: I used Regal Purple and Electric Purple for the purple buttercream and Leaf Green for the flower leaves.
For the Decorations
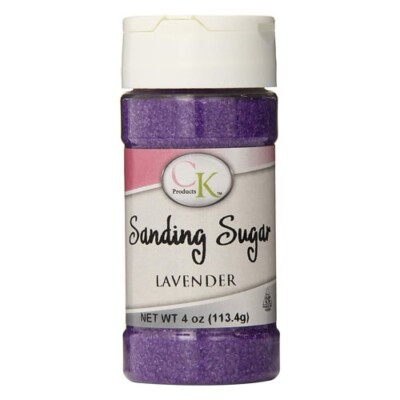
- Purple sparkling sugar: To make the textured outside coating of the sugar egg, I used purple sparkling sugar.
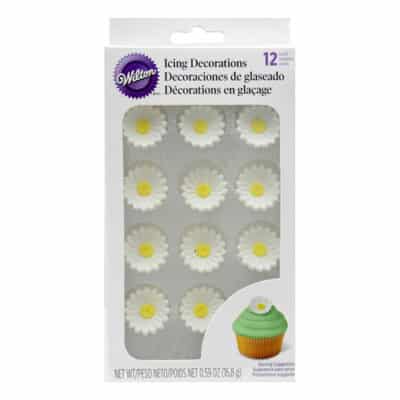
- Royal icing daisy flowers: Since this cake is a little labor intensive, I decided to use some premade decorations. These royal icing daisy flowers are optional, but very cute and easy to use.
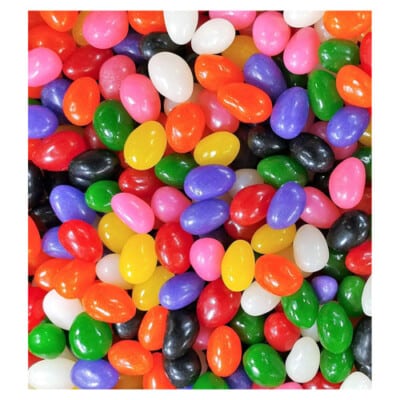
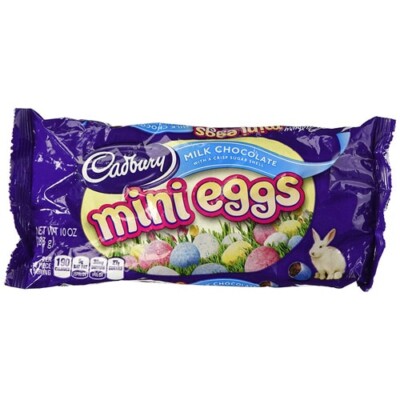
- Easter candy: Use your creativity to design the cut-out Easter scene. You can use chocolate figurines, jelly beans, chocolate eggs, or any other seasonal candy you’d like.

Equipment
To get the right look, you’ll need some specialty equipment and tools. Take a look and make sure you’ve got everything you need to get started. (Links are affiliate links and I earn a small commission from qualifying purchases.)
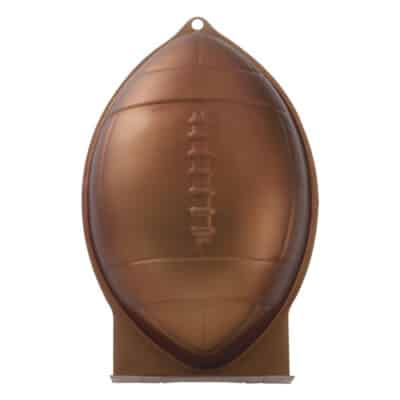
- Football cake pan: I used a 12x8x3-inch football cake pan to make the egg shape. You’ll need to make the cake twice — once for the top of the egg and once for the bottom of the egg. To save time, you could purchase two football pans and bake the top and bottom at the same time. I recommend spraying the pan(s) well with nonstick cooking spray.
- Stand mixer: It’s best to use a stand mixer for this recipe, especially when making the buttercream. It needs to mix for an extended amount of time and your arms will be exhausted if you try making it with a hand mixer.
- Wire rack: Place the cakes on a wire rack to cool.
- Small saucepan: Choose a small saucepan that lets you fit the base of the stand mixer snugly into the top of the saucepan—this will be your makeshift hot water bath.
- Whisk: You’ll need a whisk to whip the egg whites and sugar over the water bath.
- Cake boards: Use a cake board, trimmed to the size of the cake, to build the cake on. Having a cake board on the bottom will also be helpful when it is time to cover the cake with the sparkling sugar because it gives you something to hold on to while decorating.
- Rimmed baking sheet: For easy clean up, decorate the cake with sparkling sugar over a rimmed baking sheet to catch excess sugar.
- Piping tools: To make the panoramic scene you’ll need the following piping tools: piping bags, piping couplers, a small leaf tip, a grass tip, a small or medium open star tip to make the shell borders, and a small round tip to make the vines or pipe a message.
- Offset spatula: Use an offset spatula to frost the cake.
- Serrated knife: To shape the cakes into an egg shape and create layers, you’ll need a serrated knife. You’ll also use the knife and a spoon to scoop out an space for the panoramic scene.


Leave a Review!
If you make this recipe, let us know! Leave a ⭐️⭐️⭐️⭐️⭐️ rating on the recipe below, and leave a comment, take a photo and tag me on Instagram @elabau, or use #sugarhero on IG!
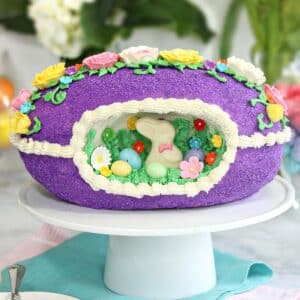
Sugar Easter Egg Cake
Ingredients
For the Cake- Make this recipe TWICE:
- 8 oz unsalted butter, at room temperature
- 8 oz cream cheese, at room temperature
- 12.25 oz granulated sugar, (1 ¾ cups)
- 4 large eggs, at room temperature
- 1 tbsp vanilla extract
- 9.5 oz all-purpose flour, (2 ¼ cups)
- 1 1/2 tsp baking powder
- 1/2 tsp salt
For the Frosting:
- 12 large egg whites
- 18.66 oz granulated sugar, (2 2/3 cups)
- 1.33 lbs unsalted butter, soft but still cool
- 1 tbsp vanilla extract
- 1/4 tsp salt
- Assorted gel food coloring, I used Americolor brand: I used Royal Purple and Electric Purple, Leaf Green for the primary frosting colors
For the Decorations:
- 16 oz purple sanding sugar, not all will be used on the cake
- Royal icing daisy flowers
- Chocolate Easter figurines
- Jelly beans, or chocolate eggs
- Other Easter candies as desired
Instructions
To Make the Cake:
- Prepare to bake: Preheat the oven to 350 degrees Fahrenheit. Spray a 12x8x3-inch football cake pan with nonstick cooking spray, and place it on a baking sheet.
- Cream wet ingredients: In the bowl of a large stand mixer, combine the softened butter, cream cheese, and sugar. Mix on medium speed until light and fluffy, about 3-4 minutes. Add the eggs one at a time, mixing well after each addition. Add the vanilla and mix it in. The batter might appear a little broken at this point—that’s okay.
- Mix dry ingredients, add to wet: In a small bowl, whisk together the flour, baking powder, and salt. Add the dry ingredients to the wet ingredients and mix just until they’re combined. Finish stirring everything together with a spatula, scraping down the bottom and sides of the bowl.
- Fill pan: Pour the batter into the prepared pan and smooth it into an even layer.
- Bake: Bake the cake for about 65-70 minutes, until a toothpick inserted into the center comes out with just a few moist crumbs attached. If the top starts to get too dark while baking, loosely tent the top with foil to prevent overbrowning.
- Cool completely: Once the cake is baked, let it cool at room temperature for 15-20 minutes, then turn it out onto a wire rack to finish cooling completely.
- Make and cool second cake: Repeat this process to make a second football cake. The cakes need to be completely cool before assembly. They can be made in advance, wrapped in plastic, and stored in the freezer until ready to use. Partially defrost them before assembly.
To Make the Frosting:
- Simmer water: Start your makeshift hot water bath by adding 1-2 inches of water to the bottom of a small saucepan that will let you fit the base of the stand mixer snugly on top. Bring the water to a simmer.
- Heat egg whites and sugar: Combine the egg whites and the granulated sugar in the bowl of a large stand mixer, and whisk them together. Place the mixing bowl on top of the saucepan, making sure that the bottom isn’t in contact with the water, and heat the egg white mixture. Whisk frequently so that the egg whites don’t cook. Continue to heat the whites until they are hot to the touch, and when you rub a bit between your fingers, you don’t feel any grittiness from the sugar. Once the whites are hot, transfer the mixing bowl to your mixer and fit it with a whisk attachment.
- Whip meringue: Beat the whites on medium-high speed until they are a shiny, stiff, voluminous meringue, and are no longer warm to the touch—feel the outside of the bowl, and make sure that it is around room temperature. Depending on your mixer and the temperature of your environment, this may take 15-20 minutes, or more.
- Add butter chunks: Reduce the speed to medium-low and add the softened but cool butter in small chunks, a tablespoon at a time, making sure to wait in between additions. It may separate or look a little gloopy at this point—this is normal!
- Whip till fluffy, add vanilla and salt: Once all of the butter is added, increase the speed again and whip until it comes together and is light and fluffy. If, after 5 minutes, it hasn’t come together, refrigerate the mixing bowl for 5-7 minutes, to cool the mixture down, and whip it again until it has thickened and is smooth and silky. Add the vanilla extract and salt.
- Use or chill: The buttercream can be made in advance and kept at room temperature if you’re going to use it the same day, or refrigerated. If it has been chilled, let it sit at room temperature until completely soft, then re-whip it to get the smooth texture back before you use it.
To Assemble And Decorate:
- Divide and color frosting: Remove 2-1/2 cups of frosting from the bowl. Color 1 cup of this frosting green, and place it in a piping bag. Leave the other 1 ½ cups white, and place it in a separate piping bag. Color all of the remaining frosting purple.
- Prep bottom cake: Trim off the rounded bottom of one of the football cakes so that it will sit flat. Cut out a stiff piece of cake board to be the approximate shape of the bottom of your football cake. Flip the cake over so the flat bottom rests on the cake board.
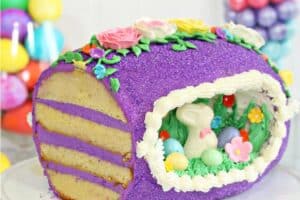
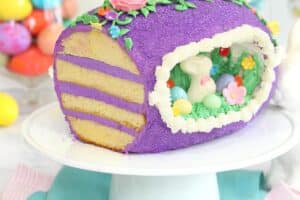
- Cut cake layers: Trim the long flat tops of both cakes until they are even. Then slice both cakes into two layers, giving you a total of four cake layers total—the trimmed rounded bottom, two long wide layers for the center of the cake and one rounded piece for the top of the cake.
- Stack and frost first layer: Spread an even layer of purple buttercream onto the bottom cake layer, about 1/4-inch thick. Note: Before adding the next piece, take note that the long wide layers that are being used for the center of the cake are not perfectly rectangular. Due to the round shape of the cake pan, you'll notice that one side is slightly wider and the other is slightly narrower. The second layer should have the narrow side pointing down and the third layer should have the narrow side pointing up. That means that the widest parts of the 2nd and 3rd layers will be in the center of the cake, becoming more narrow as they connect with the rounded bottom and top pieces.
- Stack and frost second and third layers: Place a long wide cake layer with the narrowest part pointing downward on top of the first layer and spread more frosting on top. Place the remaining long wide cake layer with the narrowest part pointing upward on top to form the third layer. Then add buttercream to the third cake layer.
- Place final layer and chill: Place the final rounded cake layer on top. You should have a vaguely egg shaped cake now! Chill the cake well, until the buttercream is firm.
- Trim and shave cake edges into egg shape: Use a serrated knife to trim around the edges of the chilled cake to make it egg shaped. Shave off any protruding edges, and shave down the pointy sides.
- Carve spot for panoramic scene: Once you're happy with the shape, use a knife and a spoon to carve out a hollow in the center of the cake for the panoramic scene. Carve an outline with the knife, and scoop out the insides with a spoon. The exact size is up to you, but be sure to leave a margin around the top and sides so the cake is stable (and leave enough cake to eat!) Look at the size of the candies you want to use in the scene and use those to help you determine the size of the hollow.
- Add crumb coat and chill: Spread a thin layer of purple frosting all along the outside of the cake to lock in crumbs, and spread a thin layer of white frosting on the inside of the hollow. Refrigerate the cake again until the frosting is firm.
- Frost outside and cover with sugar: Spread a thicker layer of purple frosting along the outside of the cake and smooth it out. Pour the purple sparkling sugar into a bowl set on a rimmed baking sheet. Hold the cake on a cake board in one hand, and use your other hand to grab handfuls of sparkling sugar. Pour the sugar over the frosted cake and press gently to adhere it to the frosting. Let the excess sparkling sugar fall onto the baking sheet for easy clean-up later. Cover the whole outside of the cake with sparkling sugar.
- Decorate panoramic scene: To decorate the inside, fit the green frosting bag with a leaf tip, and pipe leaves trailing up the walls of the hollow. Switch to a grass tip, and pipe grass on the bottom. Now add your candy decorations! Flowers, candy eggs, and chocolate animals are all great choices, but use whatever you have available.
- Add border: Finish by fitting a small or medium open star tip on the piping bag filled with white buttercream. Pipe a shell border around the outside of the panoramic scene to make it look more polished. You can also pipe more shells around the entire cake, if you’d like.
- Add finishing touches: Finally, place a small round tip on the green piping bag and pipe swirly vines on top of the egg. Add flowers, either purchased royal icing flowers or homemade buttercream roses, and finish it off with small leaves here and there. You can also write a customized Easter message on your egg if you’d like.
- Serve or store: For the best taste and texture, serve this cake at room temperature. It can be kept, well-wrapped, at room temperature for several days, or in the refrigerator for 4-5 days.
Video

Recipe Notes
Measuring Tips
Our recipes are developed using weight measurements, and we highly recommend using a kitchen scale for baking whenever possible. However, if you prefer to use cups, volume measurements are provided as well. PLEASE NOTE: the adage “8 oz = 1 cup” is NOT true when speaking about weight, so don’t be concerned if the measurements don’t fit this formula.
Want to learn more about baking measurements and conversion?
Nutrition
🥣How to Make A Sugar Easter Egg Cake
This cake takes a bit of planning, mostly because you’ll need to make the pound cake recipe twice, and it requires some extensive chilling times throughout the entire project. Be sure to read through the recipe before getting started, and leave yourself plenty of time to work on the cake! Full instructions are included in the recipe card above.
Here’s how it all come together:
- Make 2 rounded pound cakes: The two batches of pound cake batter are baked in a football cake mold–this will help us achieve that signature egg shape!
- Cut, stack, and frost cake layers: Both cakes will be cut in half and layered one on top of the other with buttercream in between. Once stacked the cake will need to be chilled well.
- Shape the chilled cake: You’ll use a serrated knife to shape the chilled cake into an egg shape. Then you’ll hollow out a cavity in the center of the cake for the Easter scene.
- Apply crumb coat and chill: Now the outside of the cake gets a thin crumb coat of frosting, and another chill in the fridge.
- Frost outside of the cake: The cake is frosted again, with a thicker layer of buttercream this time.
- Apply sparkling sugar: To get the full sugar egg look, sparkling sugar is pressed all over the outside of the cake.
- Finish the cake: Time for decorating! Create your panoramic scene with frosting leaves, candy accents, flowers, and any other flourishes. Add a shell border and embellish the top. Yesssss! Keep reading for more decorating ideas.

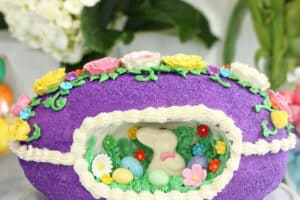
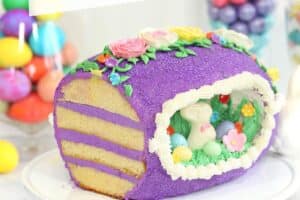
💭Decorating A Sugar Easter Egg Cake
Decorating this cake is the most fun part! To come up with my design, I browsed the Internet, looking at lots of different panoramic sugar egg designs to get inspiration. They ranged from simple to quite ornate, and I think my final design ended up somewhere in the middle of the spectrum. You can go as big or as restrained as you want.
One thing all sugar eggs have in common is the central panoramic scene. They almost always include Easter figures like chicks, bunnies, ducks, or geese, along with Easter eggs and flowers. For my cake, I first filled in the cake’s center with some buttercream grass and leaves, then added a white chocolate rabbit with chocolate eggs and royal icing flowers.
Then along the outside and top of the cake, I added a shell border, green vines and leaves, and some buttercream roses. Over the top, or just the right amount of extra? You decide!
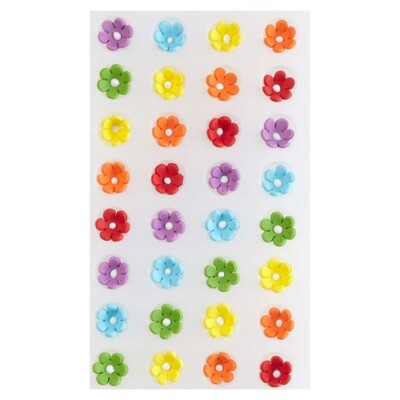
Other things you can add to your sugar egg cake:
- Coconut grass
- Jelly beans
- Candy carrots
- Marshmallow flowers
- Fondant ribbon
- Sprinkles and other small decor
- Custom frosting messages

💡Tips and FAQs for Success
When attempting a labor intensive cake, avoid common mistakes by reading through these tips and common questions before getting started. You’re guaranteed to make the most beautiful cake!
- Measure with precision. Either use a kitchen scale (the best!), or be attentive when using measuring cups and spoons, especially when it comes to flour. Measure your flour by spooning it into your measuring cup, then use the back of a knife to level off the top of the cup. This method is better and more precise than just dipping your measuring cup in the flour bin to fill it. When you dip your cup in to fill it, the flour gets compacted and you end up with more flour per cup than the recipe calls for. More flour = dry cake.
- Don’t overmix the cake batter. A common mistake when making cake is overmixing the batter. If you continue mixing after the ingredients are combined, the gluten in the flour will become over-actived, and you’ll end up with tough, dense cake.
- Use room temperature ingredients. One of the best ways to make sure you don’t overmix the batter is to use room temperature butter, cream cheese, and eggs for the cake. Once these ingredients have a warmed a bit, they’ll blend more easily with the other ingredients and be less prone to forming lumps.
No. This cake design requires a sturdy, stable cake recipe, and cake mixes produce a cake that is quite soft. If you have a favorite homemade cake recipe that you know is sturdy, you can swap that in, but I do not recommend using a boxed mix for this one. (Sorry!)
Again, no. Canned frosting won’t give you enough stability or support. You need either a good Swiss meringue buttercream or American buttercream for this recipe. I’ve provided a Swiss meringue that I love, but you can use American if you prefer. Just don’t bring out the jars of frosting!
No, but I do recommend it. I chose the football cake mold because it will produce the least amount of waste. You’ll have to do very little trimming of the cake to achieve an egg shape. But if you have a different cake pan that you think will also work to create an egg shape, of course you can use that instead. The football pan is 12 x 8 x 3 inches, if you use a different pan that’s a different size, you may need to adjust baking time and the amount of batter you use.
Make-ahead: The cakes can be made in advance, wrapped in plastic, and stored in the freezer until ready to use. Partially defrost them before assembly. The buttercream can also be made in advance and refrigerated. If it has been chilled, let it sit at room temperature until completely soft, then re-whip it to get the smooth texture back before you use it.
Storage: You can store the well-wrapped cake at room temperature for 2-3 days, or in the refrigerator for 4-5 days. For the best taste and texture, serve cake at room temperature so that the buttercream softens.

Browse More:
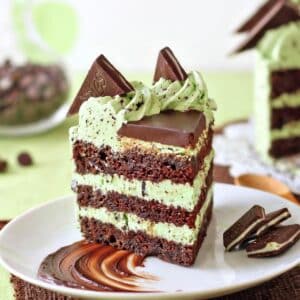
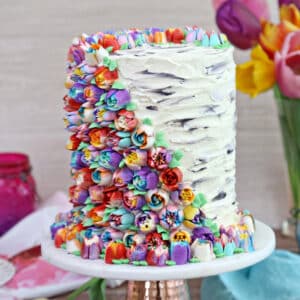
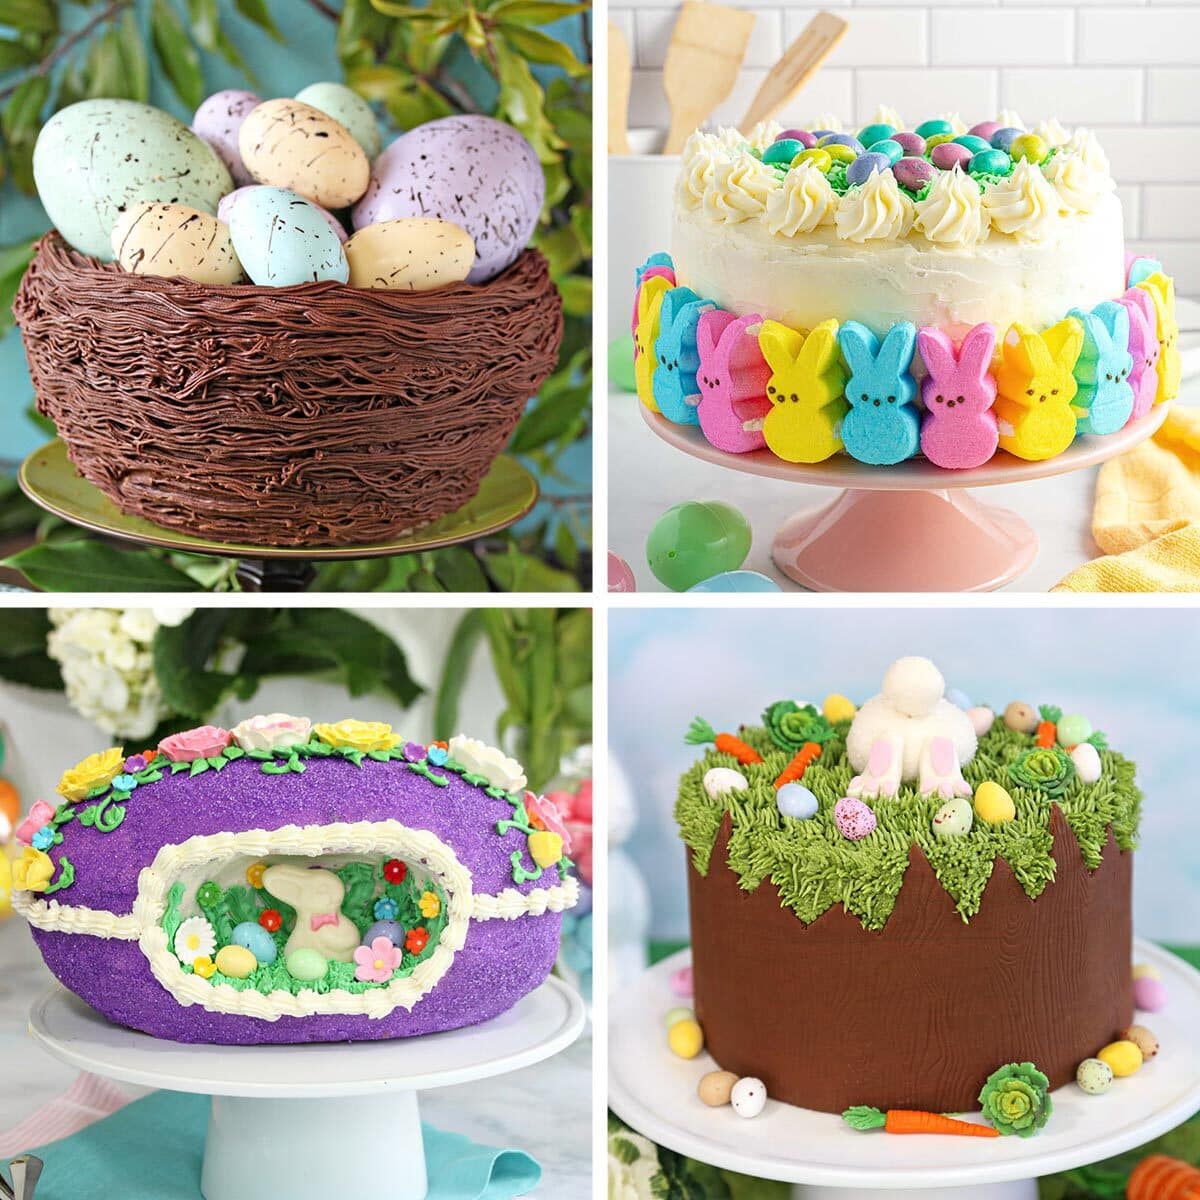
EASTER CAKE RECIPES 🐇
We’ve rounded up 35 adorable Easter cake recipes that will make your holiday extra-special — click here to get all the recipes!


Oh my goodness this is just too cute. You are so creative with your recipes.
Hey Megan, I really appreciate that! Thank you so much, I am thrilled to hear you like it!
This cake is so cute – it would certainly be a hit at any party – can’t wait to give your recipe a try!
Hey Elaine, YAY!! I am so glad to hear it, it is definitely a show stopper! Thank you so much for your response!
Whoah! That’s a cake?! You are amazing! Almost too adorable to eat, but I would. 🙂
Hey Lisa, I am so glad to hear you like it! Thank you so much, I am right there with you. I would think it is too adorable for only so long before I had to dig in myself! Thanks again for your response!
This is just the cutest cake ever! Perfect for Easter and Spring in general actually! Would be cute for a tea party as well.
Hey Emily, thank you so much! I completely agree, it would be perfect!
This cake is just beautiful and sure to be a hit with everyone. I can’t wait to give it a try.
Hey Krissy, I am so glad to hear it! Thank you so much, I would love to hear how it goes!
I made this this week for dinner and both my husband and I LOVED it!! Thank you so much for posting this deliciousness.
This cake was a hit at my family Easter celebration! Delicious, nostalgic, beautiful, and fun. It was my first time making Swiss buttercream and now I’m hooked for life. I didn’t have the football pan so I made 2 9×13’s, cut in half, and carved down the four layers to an egg shape. It worked fine but would have been much easier with the correct pan. Thanks for the great recipe!
Hi Dionne! I’m so glad you enjoyed this beautiful and festive cake 🙂 Thank you for sharing!