


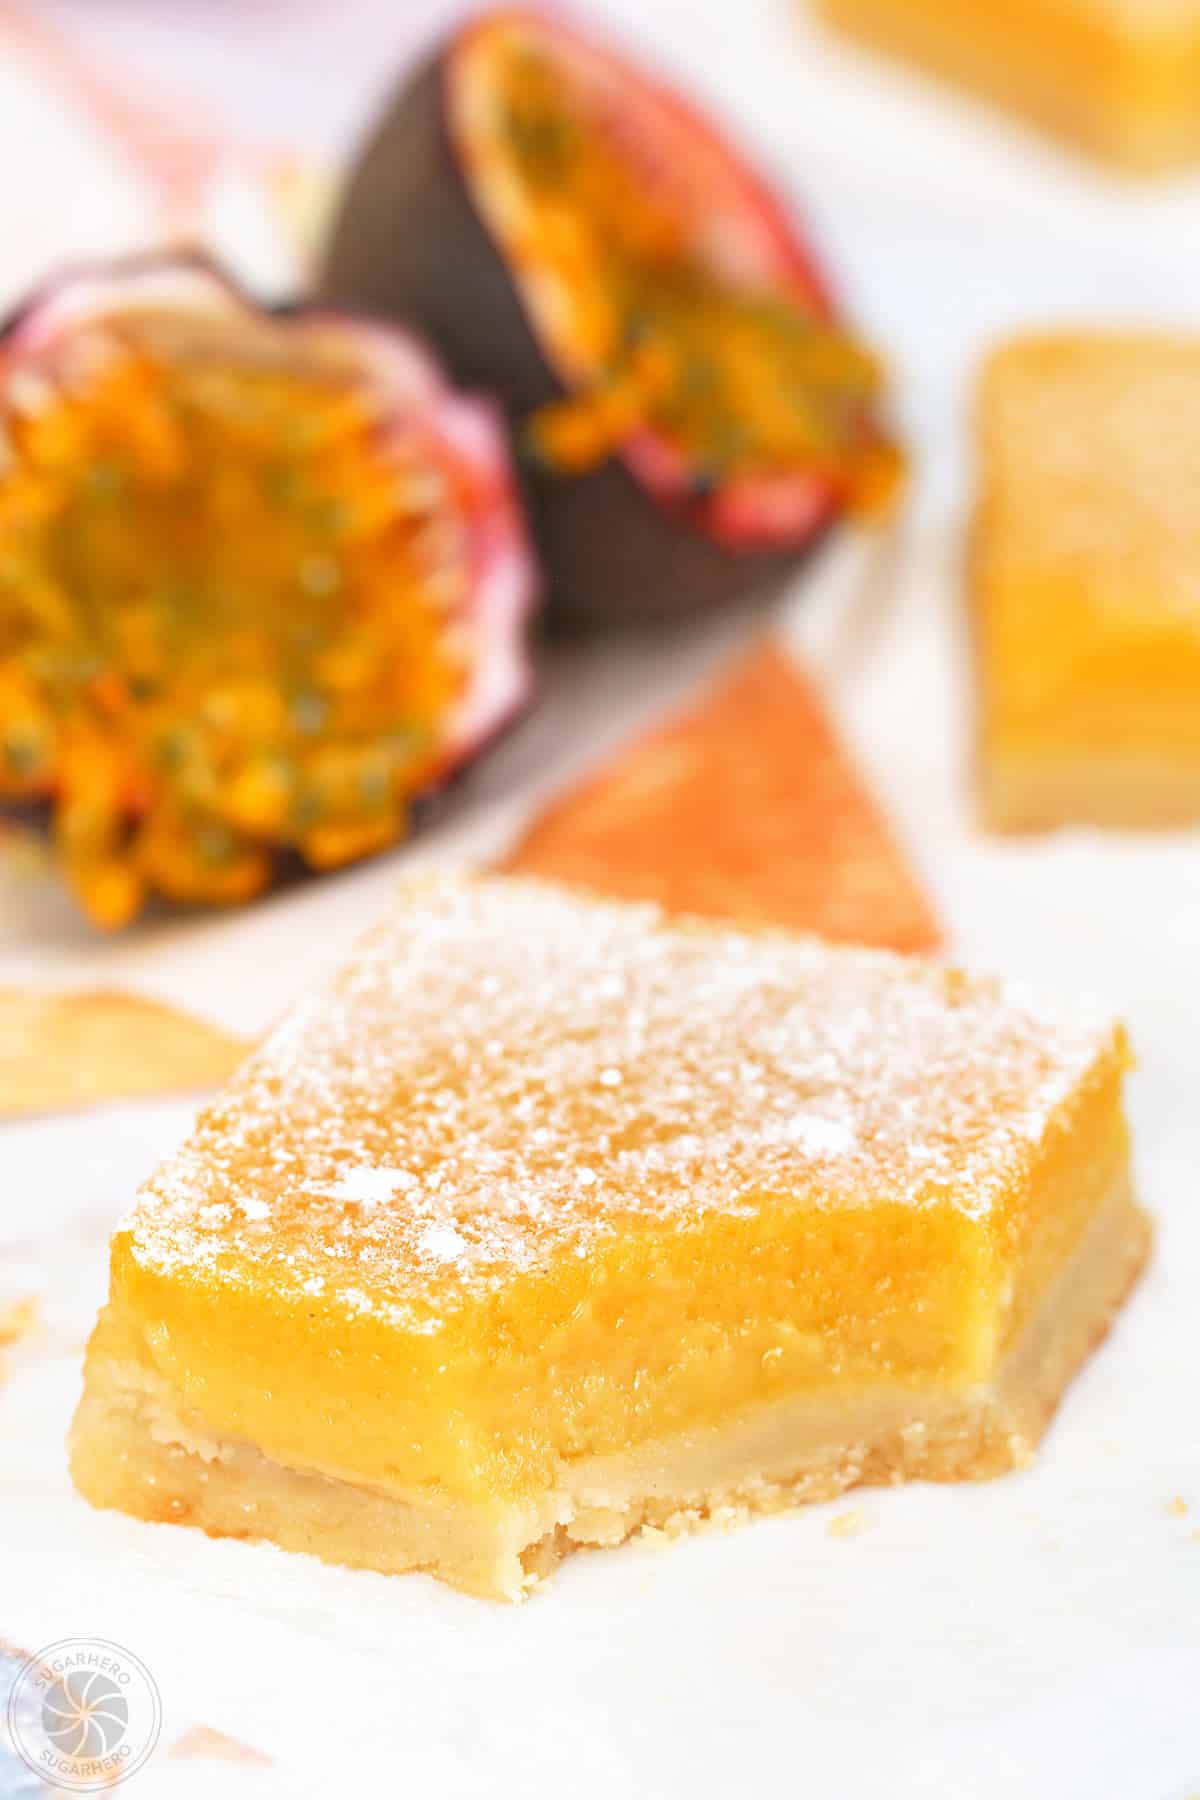
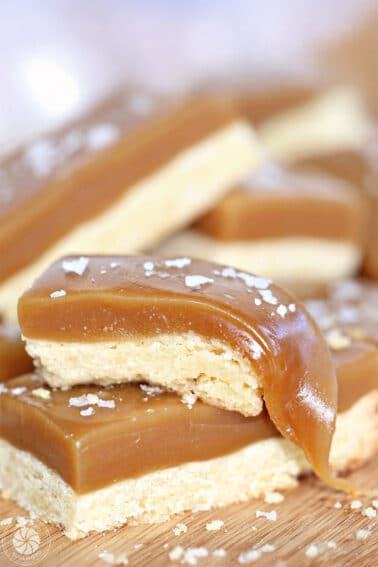
Move over, lemon bars! These Passion Fruit Bars are going to be your new sweet/tart obsession. They have a buttery shortbread crust and a deliciously creamy, tangy and tropical passion fruit filling.

🧡 My Favorite Passion Fruit Dessert
I’m a little obsessed with passion fruit. The flavor, the concept—even the name. (Adding “passion” basically means you’re required to love it, right?)
What is passion fruit?
Passion fruit is a tropical fruit that’s filled with a mixture of delicious, edible pulp and seeds. You strain the seeds from the pulp, and blam – you have passion fruit puree, which tastes like if mango and guava and lemon had a baby together. It’s tart, with a bit of sweetness, and a flavor that makes me want to book a beach vacation, immediately.
If you’re new to the passion fruit, don’t miss my full guide to passion fruit, including tips for picking the best, most ripe fruit, how to store them, and more. I also have a tutorial showing how to make your own passion fruit puree, with photos and videos to walk you through it.
Why You’ll Love These Bars
These bars are a twist on classic lemon bars. Since passion fruit is quite tart, it’s a good substitute for lemon in a lot of baking recipes. I swapped passion fruit puree for lemon juice in my favorite Lemon Bars recipe, and magic was made. ✨
The base is a super-crispy buttery crust that comes together in a minute and doesn’t require any chilling. The filling is tart and tropical, with a soft and creamy texture that melts in your mouth, but sets enough so you can easily and neatly cut and serve the bars.

What if I don’t have fresh passion fruit?
Never fear — you don’t have to have your own passion fruit vine to make these bars. (Yes, they grow on vines – told you they were cool!)
I typically use frozen passion fruit puree in this recipe. It’s easier for me to find, much cheaper than using fresh passion fruit, and I love that I can keep a supply in my freezer for whenever a craving strikes!
I usually buy Goya brand passion fruit puree from my local Mexican market. (I live in CA, availability and brands will vary based on location.) One 14-oz package of puree is the perfect amount for this recipe. All you have to do is defrost and you’re ready to go!
Table of Contents
🧾 What You’ll Need
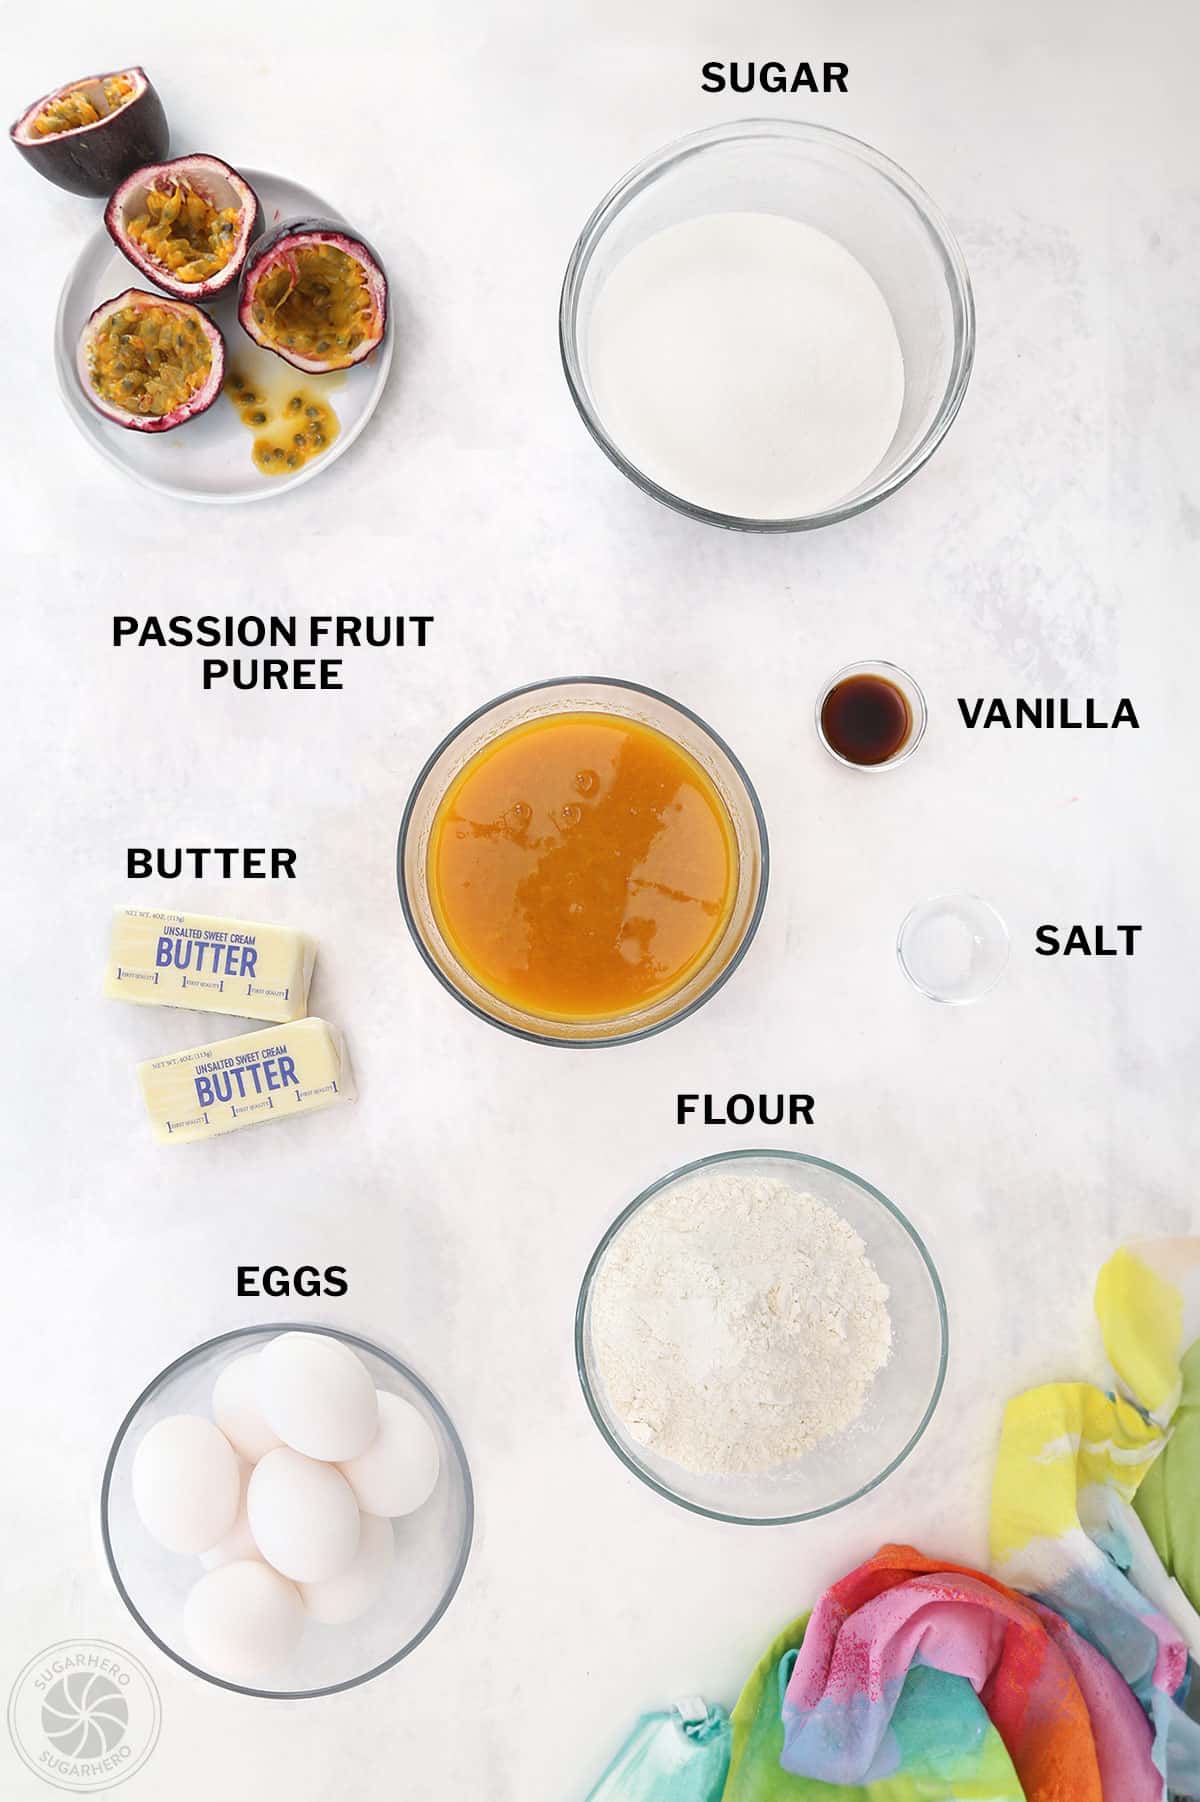
Ingredients
Now here’s the rest of what you’ll need to make these bars! Full ingredient amounts can be found in the recipe card below. (Links are affiliate links and I earn a small commission from qualifying purchases.)
For the Crust
- Unsalted butter and salt: I like to use unsalted butter in baked goods so that I can adjust the salt to my exact tastes. However, if you only have salted butter, you can still use it, but make sure to omit the additional salt in the crust.
- Sugar: You’ll need regular granulated sugar to sweeten the crust.
- Vanilla extract: To give the shortbread crust a little flavor.
- Flour: Use all-purpose flour for the base of the crust. If possible, use a scale to measure the flour so that you add the correct amount.
For the Filling
- Eggs: You’ll need 8 large eggs to make the filling. (Avoid other sizes, like medium or jumbo – using too much or too little egg might result in a gooey or gummy filling.) For the best results, have the eggs at room temperature.
- Sugar: Granulated sugar for the filling, and a bit of powdered sugar on top before serving!
- Passion fruit puree: This is the star of the show! I typically use Goya passion fruit puree, and you can read more about that above.
- Flour: A little all-purpose flour in the filling helps it to firm up and will make the bars easier to cut.

Equipment
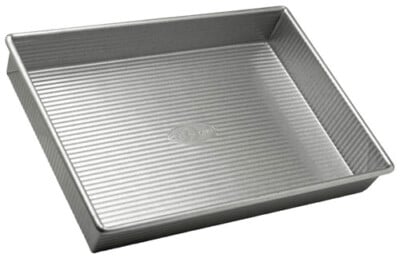
- 9×13 baking pan: I like to use a metal 9×13 pan to bake these bars.
- Foil or parchment paper: To make clean up a breeze and easily remove the bars from the pan, I highly recommend lining the pan with foil or parchment paper and giving it a quick coating of non-stick cooking spray.
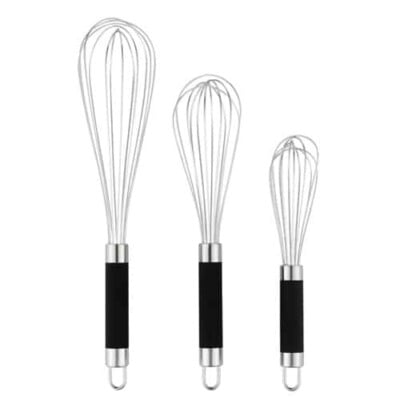
- Utensils: You’ll need a whisk and spatula to blend the crust and filling.
- Sift: Although optional, sifting the flour into the filling really helps to prevent lumps. Using a sift is a tiny extra step that will make a big difference in the texture of your bars.
- Chef’s knife: If you want bars with crisp cut lines, make sure to use a large sharp chef’s knife when cutting them.

💛 More Bar cOOKIES


Leave a Review!
If you make this recipe, let us know! Leave a ⭐️⭐️⭐️⭐️⭐️ rating on the recipe below, and leave a comment, take a photo and tag me on Instagram @elabau, or use #sugarhero on IG!

Passion Fruit Bars
Ingredients
For the Crust:
- 8 oz unsalted butter, (1 cup), melted and slightly cooled
- 3.5 oz granulated sugar, (1/2 cup)
- 2 tsp vanilla extract
- 1/2 tsp salt
- 8.5 oz all-purpose flour, (2 cups)
For the Filling:
- 8 large eggs, at room temperature
- 16.3 oz granulated sugar, (2 1/3 cups)
- 14 oz passion fruit puree, (1 1/2 cups), I used Goya frozen puree
- 2.12 oz all-purpose flour, (1/2 cup)
Instructions
To Make the Crust:
- Preheat the oven to 350°F. Line a 9×13 pan with parchment paper so that it extends up the sides, and spray the foil with nonstick cooking spray.
- In a bowl, whisk together the melted butter, sugar, vanilla, and salt. Once mixed, add the flour and stir with a spatula until combined and no streaks of flour remain.
- Scrape the dough into the pan and press it into an even layer. It might seem a little greasy—this is normal.
- Pre-bake the crust for about 25 minutes at 350° F, until it’s lightly golden on top. While the crust is baking, prepare the filling so it’s ready to go as soon as the crust is finished.
To Make the Filling:
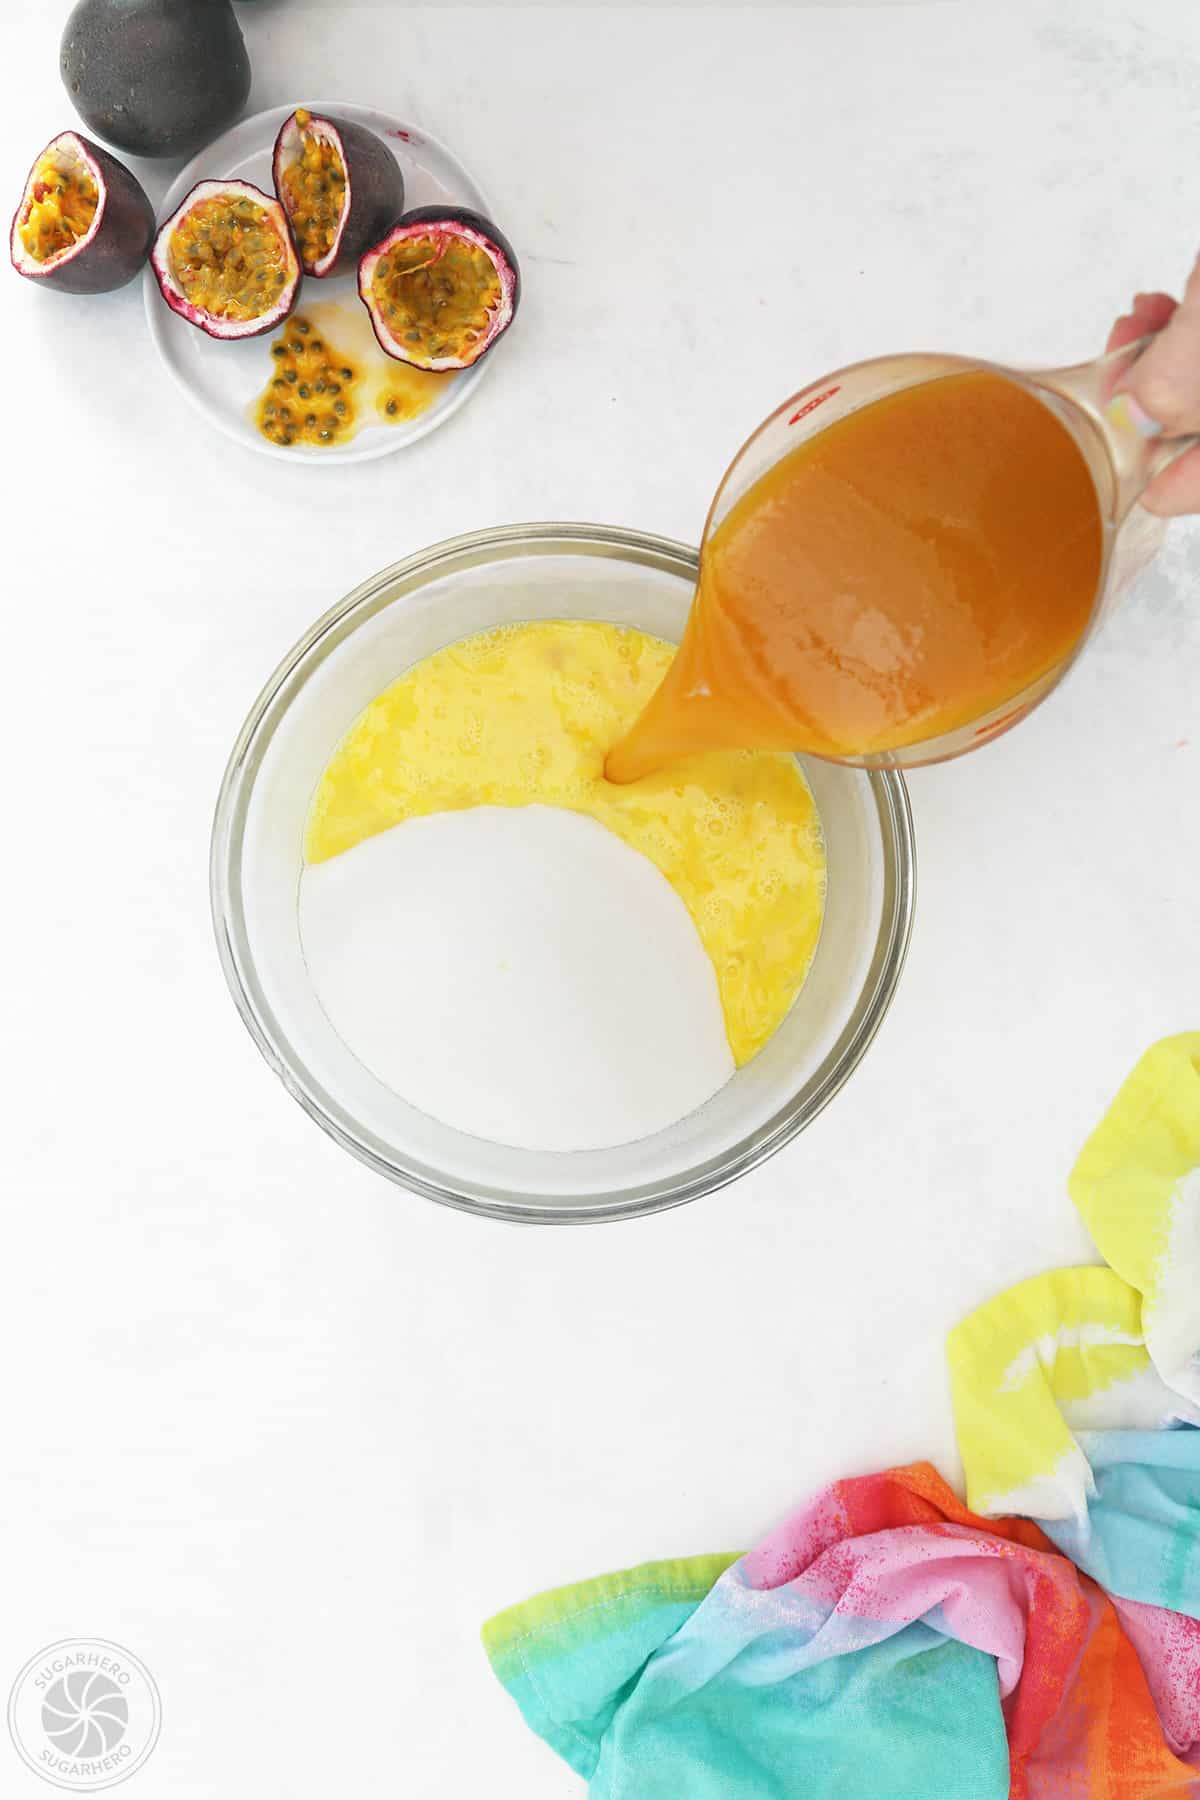
- In a large bowl, whisk together the eggs, granulated sugar, and passion fruit puree. Sift the flour on top of the egg mixture, and whisk it in as well.
- When the crust has finished pre-baking, slide the rack part-way out of the oven. Pour the filling over the hot crust and slide it back into the oven.
- Reduce the temperature to 325°F and bake for an additional 25-30 minutes. The bars are done when the center barely jiggles when you tap the pan.
- Once done, remove the pan from the oven and let it cool until it reaches room temperature. Then refrigerate the pan until the bars are completely chilled. This is optional but helps with making clean, neat cuts.
- Remove the entire thing from the pan using the extra parchment as handles. Place it on a cutting board. Use a large sharp chef’s knife to cut the sheet into bars. Wipe the knife clean between cuts to get nicely cut bars.
- Right before serving, sprinkle the tops of the bars with powdered sugar.
- Storage: Passion Fruit Bars keep well – the filling stays nice and creamy, although the crust will get softer over time. Store extra bars in an airtight container in the refrigerator for up to a week, or in the freezer for 3-4 months. See the Notes section below for more freezing tips.
Video

Recipe Notes
Measuring Tips
Our recipes are developed using weight measurements, and we highly recommend using a kitchen scale for baking whenever possible. However, if you prefer to use cups, volume measurements are provided as well. PLEASE NOTE: the adage “8 oz = 1 cup” is NOT true when speaking about weight, so don’t be concerned if the measurements don’t fit this formula.
Want to learn more about baking measurements and conversion?
Nutrition
📸 Photo Tutorial: How to Make Passion Fruit Bars
Here’s a step-by-step guide for how to make Passion Fruit Bars! Printable instructions are included in the recipe card above.


Make the Crust
- Prepare to bake. Preheat the oven to 350°F. Line a 9×13 pan with parchment paper so that it extends up the sides, and spray the paper with nonstick cooking spray.
- Mix crust ingredients. In a bowl, whisk together 8 oz (1 cup) melted butter, 3.5 oz (1/2 cup) granulated sugar, 2 tsp vanilla, and 1/2 tsp salt. Once mixed, add 8.5 oz (2 cups) purpose flour and stir with a spatula until no streaks of flour remain.


- Press crust into pan. Scrape the dough into the pan and press it into an even layer. It might seem a little greasy—this is normal.
- Bake crust. Bake the crust for about 25 minutes at 350° F, until it’s light golden on top. While the crust is baking, prepare the filling so it’s ready to go as soon as the crust is done.

Make the Filling
- Mix eggs, sugar and puree. In a large bowl, whisk together 8 large eggs, 16.3 oz (2 1/3 cups) granulated sugar, and 14 oz (1 1/2 cups) passion fruit puree.


- Sift flour in. Sift 2.12 oz (1/2 cup) flour on top of the egg mixture, and whisk it in well.


- Pour filling over hot crust. When the crust is done baking, slide the rack part-way out of the oven. Pour the filling over the hot crust and slide it back into the oven.
- Reduce temperature and bake till done. Reduce the temperature to 325°F and bake for 25-30 minutes. It’s done when the center barely jiggles when you tap the pan.
- Cool. Remove the pan from the oven and let it cool until it reaches room temperature. Then refrigerate until completely chilled.
- Cut into squares. Cut bars into squares with a large sharp knife. Before serving, sprinkle the tops with powdered sugar. Enjoy!

💡Tips and FAQs
Here are my top tips for making these bars!
- Purchase frozen passion fruit pulp. The Goya brand passion fruit pulp I used is from a local Mexican grocery store—if your area has a sizable Latino population, chances are the freezer section might have the same (or similar) product! If you use frozen puree, just make sure it’s defrosted before making the recipe.
- Use non-melting powdered sugar. Optional but SUPER handy! This is one of those professional tricks that I think everyone should know about. If you’ve ever made a dessert and sprinkled a gorgeous layer of powdered sugar on top, only to find that it’s absorbed moisture from the dessert and turned into a wet, gloopy mess, this is the product for you! Non-melting powdered sugar is basically powdered sugar that has been coated with a microscopic layer of fat, so that the sugar doesn’t absorb any moisture and stays pristine for days. It is a lifesaver for desserts like these bars, which often start to get damp and gross-looking in a matter of minutes. The texture is a little finer than powdered sugar, and taste-wise, I can’t tell a difference between regular powdered sugar, especially since it’s usually used in very small amounts as a garnish.
- Get clean cuts. Make sure to refrigerate the bars until completely cold before cutting them. Then, remove the entire thing from the pan using the extra parchment as handles. Place it on a cutting board and use a large sharp chef’s knife to cut it into squares. For the cleanest cuts, wipe the knife off between cuts.
- Don’t overcook the filling. It can be difficult to tell when the bars are completely done. You can test for doneness by tapping the side of the pan. The outside of the bars should be firm but the center should still jiggle a little. This is perfect! The bars will continue to set as they cool and the center will firm up on its own.
Store Passion Fruit Bars in an airtight container in the refrigerator for up to a week.
You can also freeze the bars. If you plan to freeze them, hold off on sprinkling them with powdered sugar. Cut the bars with a clean, sharp knife and lay them on a cookie sheet. Give them a quick partial freeze in the freezer (about 15-30 minutes or so) and then place them in a large freezer safe container. If you stack them, make sure to place parchment paper between the layers. They can be frozen for up to 3-4 months.
Allow them to thaw in the fridge the night before you need them and sprinkle with powdered sugar just before serving.


This recipe is awesome. I followed the directions to a t minus the suggestion for non-melting confectioners sugar for topping. They were absolutely perfect. Lovely tangy filling, perfect texture, nice crust. This is going into my holiday rotation! Thank you so much!
Hi Kris! Thank you so much for the recipe review and rating — it means a lot! So glad that you enjoyed the recipe and we hope you get to enjoy all season long!
These bars taste great but the time estimate is all wrong. Cook time alone is 50-60 minutes. Nobody’s finishing the recipe start to finish in 40 minutes. Please get that updated.
Hi Kate! Thank you so much for the heads up about the time estimate. I’m getting that fixed on the blog post right now! And, I’m glad that the bars turned out well for you despite the confusion. All the best to you!
When freezing these bars do you find it better to feeeze them whole or cut them to their serving siz?
Thanks!
Hi Jaci! Elizabeth has done it both ways but typically cuts them into squares first. It’s a little easier to freeze them that way because they can be stacked in a container instead of as a sheet. If you decide to cut them first, make sure they are chilled or partially frozen, then layer them in a freezer-safe containter with parchment or waxed paper between each layer. When you’re ready to defrost, unstack the bars, remove the paper, and defrost them in a single layer–helps to prevent marks from forming on top of the bars. Best of luck to you!