
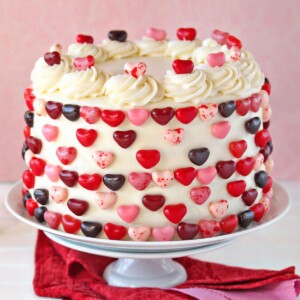
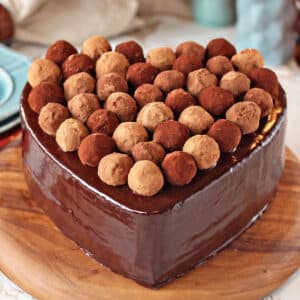
This Truffle-Topped Heart Cake is a chocolate lover’s dream come true! It starts with a moist chocolate cake, layered with chocolate-blackberry filling and covered with a shiny chocolate glaze. Top it off with a mass of homemade chocolate truffles! Make it in a heart shape for a romantic occasion, or make it as a round cake to enjoy any time!

The Ultimate Chocolate Cake for Valentine’s Day
Valentine’s Day is about celebrating love. Some people may think it’s about the love for a significant other, or family, or best friends, or even pets. Those people are dead wrong. To me, Valentine’s Day is about celebrating the most important love of all: chocolate.
What better way to show chocolate that you truly care than to make a giant, truffle-topped cake that uses chocolate in four—FOUR!—different components? Making this cake tells chocolate, “I love you. I respect you. I appreciate you. And when I am done, I am going to devour you.”
This beast of a dessert starts with a moist chocolate cake made with both cocoa powder and melted chocolate, and a touch of blackberry jam. It’s layered with more jam, and has a thick center filling of chocolate-blackberry whipped ganache. Over the top is a shiny chocolate glaze, and the crowning touch is a layer of homemade chocolate truffles.

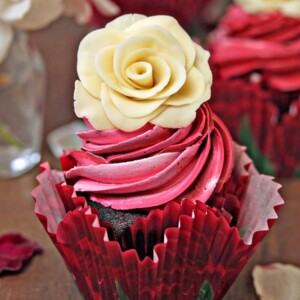
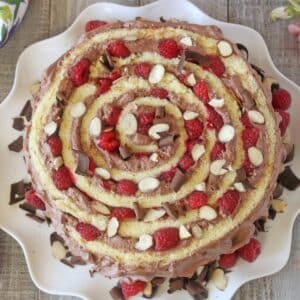
I couldn’t decide whether I liked the cake better with just an outline of truffles along the edge, or with the top of the cake completely filled in—so I did it both ways. The arrangement is up to you, but if possible, I do recommend using two or three different cocoa powders to roll them in. I think the different shades of cocoa add so much dimension and visual interest to the cake. I used a natural cocoa powder (the lightest color), an alkalized cocoa powder (the darkest) and then I sifted the two together to make the medium brown shade.
The blackberry taste itself is very subtle, and I don’t think anyone would eat this and think that it’s a blackberry cake—rather, it just enhances the natural fruitiness of the chocolate to make it even more tangy and fragrant, and of course the jam between the layers keeps the cake very moist. You’re free to use any other seedless berry jam you like—I think raspberry and blueberry would also work very well.
Table of Contents
🧾 What You’ll Need

Ingredients
The ingredients needed to make a Truffle-Topped Heart Cake are fairly simple and require a lot of chocolate! I’ve provided some handy tips about what ingredients will be best for this cake. Full ingredient amounts can be found in the recipe card below. (Links are affiliate links and I earn a small commission from qualifying purchases.)
For the Chocolate Cake, Filling & Glaze
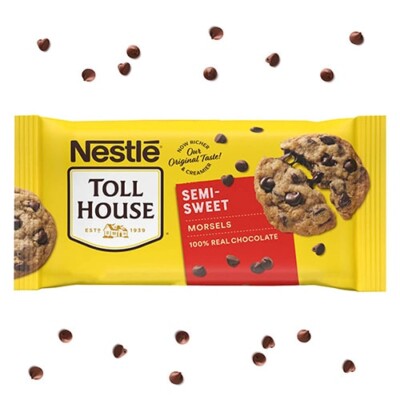
- Semi-sweet chocolate: I recommend using high quality baking chips (or finely chopped chocolate bars) with 60-65% cacao for the best flavor and texture. Use flavorful chocolate that you enjoy the taste of. Using old or waxy chocolate chips will produce disappointing results!
- Unsalted butter and salt: I like to use room temperature butter when baking. It is much easier to mix with the other ingredients. I also prefer to use unsalted butter so that I can control the amount of salt more precisely. If you only have salted butter, just omit the rest of the salt in the recipe.
- Sugar: To give this cake a moist, sweet flavor we’ll be using lightly packed brown sugar and powdered sugar.
- Eggs: Make sure to use large eggs when baking (not medium or extra large). Bring them to room temperature before baking. They will bind the other ingredients together more easily.
- Vanilla extract: Use a high quality vanilla extract for the best flavor.
- Blackberry jam: You’ll want to get a high quality, seedless blackberry jam for the filling.
- Cocoa Powder: I recommend using a high-quality, Dutch-processed (also known as alkalized) cocoa powder. Cheap cocoa powders can be nearly flavorless, or worse, impart a bitter, dusty, or stale flavor. My personal favorite is Cacao Barry Extra Brute – it hits that sweet spot between very high quality but is also fairly affordable.
- All-purpose flour: Make sure to measure the flour properly. I recommend using a food scale to weigh the flour. If too much flour is added, your cake will turn out overly dense. If you don’t have a food scale, you can also gently spoon it into a measuring cup and level it off.
- Baking powder: Helps the cake to rise and creates a soft, tender texture.
- Milk: I like to use higher percentages of milk for the best taste, but you can use what you have on hand. Bring it to room temperature first to make it easier to mix with the other ingredients.
- Heavy cream: Needed to make a rich, creamy filling. When it comes to cream, the more fat, the better! This is why I recommend using “manufacturing cream” or “heavy cream” instead of “whipping cream,” when possible. If whipping cream is what you have, you can still use it with good results.
For the Chocolate Truffles
- Semi-sweet chocolate: I recommend using high quality baking chips (or finely chopped chocolate bars) with 60-65% cacao for the best flavor and texture.
- Heavy cream: Contributes to the soft and creamy texture of the truffles.
- Light corn syrup: Corn syrup adds sweetness and helps to bind the truffle ingredients together.
- Unsalted butter: I prefer to use unsalted butter but you can use salted if that’s what you have on hand.
- Unsweetened cocoa powder: Use the same high-quality, Dutch-processed cocoa you chose for the cake.
- Chocolate candy coating melts: The candy melts are optional but very helpful for creating a thin layer for toppings such as nuts, coconut, sprinkles, and cocoa powder to adhere to.

Equipment
I’ve found that having the right tools can make all the difference in the kitchen. Here are the tools I recommend to make this cake. (Links are affiliate links and I earn a small commission from qualifying purchases.)
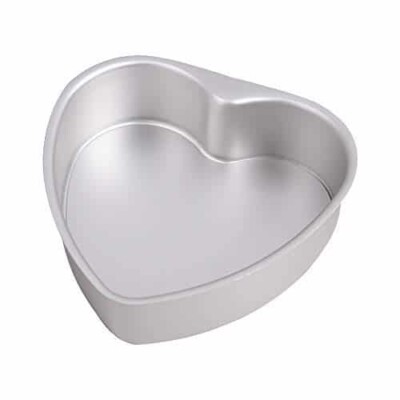
- 8-inch heart-shaped cake pans: You’ll need two 8-inch heart-shaped cake pans to make this layer cake. I used pans made by Bakerdream.
- Parchment paper: To make the cake easier to release, I like to line the pans with parchment paper.
- Mixer: You will need some kind of mixer to properly beat the eggs and sugar to make the right texture for the cake batter. I prefer to use a stand mixer, but a hand mixer will also work.
- Small saucepan: You’ll need a small saucepan to make the filling, glaze, and truffles.
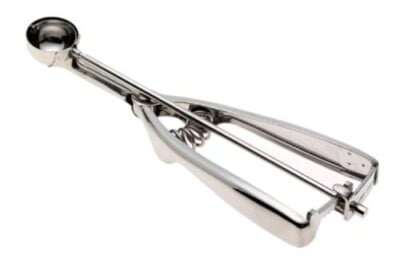
- 1-inch candy scoop: Using a candy scoop makes forming the truffles much easier. Plus, you’ll have the added benefit of uniformly sized candy.
- Wire rack: The chocolate glaze will cover the entire cake. It’s extremely helpful to place the cake on a wire rack while applying the glaze so that the excess drips off.

💡 Tips and FAQs
This cake isn’t difficult, but it does have a lot of components—especially if you decorate it with homemade chocolate truffles! Take a look at my top tips for baking a Truffle-Topped Heart Cake to avoid common mistakes.
If you don’t have heart-shaped pans, round pans can be substituted. I’d recommend using 9-inch pans and paying extra attention to the baking time incase you need to make slight adjustments.
This recipe is heavy on the cake and lighter on the filling. If you prefer more filling to cake, consider doubling the Chocolate-Blackberry Filling and put it between each layer of cake, instead of just in the center.
Allowing the truffles sit out overnight at cool room temperature helps them to form a “skin.” This makes them much easier to dip because they can be dipped at room temperature without cooling down the temperature of the dipping chocolate. The skin prevents them from melting into the chocolate and changing the texture. If you absolutely don’t have the time to make the truffles in advance, simply refrigerate the truffles until firm.
Truffles are often rolled in cocoa powder. Once they are firm, all you need to do is roll them in cocoa and you are good to go.
However, to really help the cocoa powder stick, you can also dip the truffles in a very thin layer of chocolate candy coating before rolling them in the powder. And, if you want to roll them in other toppings like nuts, coconut, or other textured substances, dipping the truffles in a thin layer of candy coating is a must!
To cover the truffles with candy coating, first place the cocoa powder, nuts, coconut, or whatever else you want to coat the truffles with, in a shallow bowl or pie tin. Then you’ll melt the coating wafers in the microwave, stirring after every 30 seconds to prevent overheating. Let the melted coating cool until it is warm but not hot. Then, spoon a generous amount of coating into your palm. Place a truffle in the coating, and use your other hand to roll it around until it’s covered. Tilt your hand down so that the truffle rolls down your fingers and into the cocoa powder (or other topping)—this will help remove excess coating and ensure that the chocolate around the truffle is a very thin layer.
Immediately use a spoon or fork to toss cocoa powder (or other topping) on top of the wet chocolate. Leave the truffle in the topping dish to firm up while you dip more truffles. Once your topping container is full of truffles, carefully fish out the finished truffles with a fork, place them on a baking sheet, and repeat until all of the truffles are dipped and coated.
While this cake can be made in one day, if you have the time I highly recommend you split the work into two days. Bake the cakes, make the filling, and roll the truffles the first day. The second day, dip the truffles, and assemble and decorate the cake. This way you won’t be too tired to enjoy the fruit of your labors by the end!
If needed, the chocolate cakes can also be made well ahead of time and kept, tightly wrapped in plastic wrap, at room temperature for several days, or in the freezer for several weeks.
Lastly, no matter how you plan to assemble the cake, I recommend waiting to cover it with glaze until just before you’re ready to serve it for the best presentation. The glaze might get dull or show condensation if it’s refrigerated for an extended amount of time and then brought to room temperature. It will still taste good, but the visual impact will be lessened.

🤎More Tempting Desserts
Leave a Review!
If you make this recipe, let us know! Leave a ⭐️⭐️⭐️⭐️⭐️ rating on the recipe below, and leave a comment, take a photo and tag me on Instagram @elabau, or use #sugarhero on IG!
Truffle-Topped Heart Cake
Ingredients
For the Chocolate Cake:
- 8 oz semi-sweet chocolate, either baking chips or finely chopped, 60-65% cacao
- 8 oz unsalted butter, at room temperature
- 5 oz brown sugar, (2/3 cup), packed
- 2.66 oz powdered sugar, (2/3 cup )
- 4 large eggs, at room temperature
- 2 tsp vanilla extract
- 1 1/2 cup blackberry jam, seedless, divided use
- 3 oz unsweetened cocoa powder, (1 cup)
- 10.66 oz all-purpose flour, (2 1/2 cups)
- 1 tbsp baking powder
- 1 tsp salt
- 2 cups milk, at room temperature
For the Chocolate-Blackberry Filling:
- 2.75 oz heavy cream, (1/3 cup)
- 2.75 oz blackberry jam, (1/4 cup), seedless
- 6 oz semi-sweet chocolate, either baking chips or finely chopped, 60-65% cacao
- 2 tbsp unsalted butter, at room temperature
For the Chocolate Truffles: Ideally made 1 day in advance
- 10 oz semi-sweet chocolate, either baking chips or finely chopped, 60-65% cacao
- 8 oz heavy cream, (1 cup)
- 1 tbsp light corn syrup
- 2 tbsp unsalted butter
- 1 cup unsweetened cocoa powder
- 12 oz chocolate candy coating melts, optional
For the Chocolate Glaze:
- 8 oz semi-sweet chocolate , (1 cup), either baking chips or finely chopped, 60-65% cacao
- 8 oz heavy cream, (1 cup)
Instructions
To Make the Chocolate Cake:
- Preheat the oven to 350 F. Line two 8-inch heart-shaped cake pans with parchment paper, and spray the pans with nonstick cooking spray. (Round pans can be substituted, and 9-inch pans will also work, with slight adjustments to the baking time.)
- Place the semi-sweet chocolate in a microwave-safe bowl and heat in 30-second increments, stirring after every 30 seconds to prevent overheating. Set the chocolate aside to cool to lukewarm.
- Combine the butter and both sugars in the bowl of a large stand mixer fitted with a paddle attachment. Cream them together on medium-high speed until light and fluffy, 2-3 minutes. Add the eggs one at a time, beating well after each addition. The batter will probably look lumpy or broken by the end—this is okay.
- Add the vanilla extract, 1/2 cup of seedless blackberry jam, and the cooled melted chocolate. Mix on low speed until the batter smooths out and there are no visible bits of unincorporated butter.
- Sift or whisk together the cocoa powder, flour, baking powder, and salt in a small bowl. Add a third of the dry ingredients to the mixing bowl and mix them on low just until the flour streaks disappear. Add half of the milk, then when that’s incorporated add half the remaining drys, then the milk, and finish with the dry ingredients. Finish mixing by hand, scraping the bottom and sides of the bowl well. Divide the batter evenly between the two cake pans.
- Bake the cakes in the 350 F oven for 35-40 minutes, until a toothpick emerges with just a few moist crumbs attached. Don’t overbake, or your cakes will be dry! Allow to cool completely on a wire rack. Cakes can be made ahead of time and kept, well-wrapped in plastic wrap, at room temperature for several days, or in the freezer for several weeks.
To Make the Chocolate-Blackberry Filling:
- Place the chopped chocolate in a medium bowl. Combine the heavy cream and blackberry jam in a small saucepan. Whisk them together and heat them until the cream comes to a simmer and bubbles appear along the edges of the pan.
- Pour the simmering cream over the chocolate and allow it to sit for one minute to soften the chocolate. After a minute, whisk the chocolate and cream together until the mixture is shiny and smooth. Add the room temperature butter and whisk it in. Press a layer of cling wrap on top of the chocolate and let it sit overnight to firm up, or, if you’re pressed for time, refrigerate it for about an hour until it has the texture of peanut butter.
To Make the Chocolate Truffles: Ideally made 1 day in advance
- Place the chopped chocolate in a medium bowl. Combine the heavy cream and light corn syrup in a small saucepan. Whisk them together and heat them until the cream comes to a simmer and bubbles appear along the edges of the pan.
- Pour the simmering cream over the chocolate and allow it to sit for one minute to soften the chocolate. After a minute, whisk the chocolate and cream together until the mixture is shiny and smooth. Add the room temperature butter and whisk it in. Press a layer of cling wrap on top of the chocolate and refrigerate it for about 1 hour, until firm enough to scoop and roll.
- Pour the cocoa powder into a shallow bowl or pie tin. Use a small 1-inch candy scoop or a teaspoon to form small balls of truffles, and roll them quickly in the cocoa powder. Coat your palms with cocoa and roll the truffles between your palms to make them round. Place the round truffles on a baking sheet covered with parchment. Continue until all of the truffles are formed. This recipe makes about 48 truffles.
- If cocoa powder is going to be your only topping, it is not necessary to dip them in chocolate. You can just make sure they’re totally covered in cocoa, and then once they’re firm, you’re good to go.
To Roll the Truffles in Toppings: Optional
- If you want to roll the truffles in extra toppings like nuts, coconut, or other textured substances, I definitely recommend the dipping step. This step can also be done to add an extra layer(s) of cocoa powder, if you’re curious to try it.
- If you have time, let all the truffles sit out overnight at cool room temperature to form a “skin.” This makes them much easier to dip—it means they can be dipped at room temperature, so they don’t cool down the temperature of the dipping chocolate, but the skin prevents them from melting into the chocolate and changing the texture. If you don’t have the time, simply refrigerate the truffles until firm.
- To quickly dip the truffles in a thin layer of chocolate coating, melt the coating wafers in the microwave, stirring after every 30 seconds to prevent overheating. Let the melted coating cool until it is warm but not hot. Place the cocoa powder, nuts, coconut, or whatever else you want to coat the truffles with, in a shallow bowl or pie tin.
- Spoon a generous amount of coating into your palm. Place a truffle in the coating, and use your other hand to roll it around until it’s covered. Tilt your hand down so that the truffle rolls down your fingers and into the topping of choice—this will help remove excess coating and ensure that the chocolate around the truffle is a very thin layer. Immediately use a spoon or fork to toss the topping on top of the wet chocolate. Leave the truffle in the topping to firm up while you dip more truffles. Once your tin of topping is full of covered truffles, carefully fish them out with a fork, place them on a baking sheet, and repeat until all of the truffles are dipped and coated.
To Assemble the Cake and Make the Chocolate Glaze:
- Cut a piece of cardboard the size of the heart-shaped cakes, and slide it under one of the cakes to make the finished cake easy to transfer. Trim the tops of the cakes so that they are flat, and slice each cake in half. Transfer the chocolate-blackberry filling to a mixing bowl, and whip it with a whisk attachment on medium-high speed until it lightens in color and gets thick like frosting, about 1-2 minutes.
- Spread a layer of blackberry jam, about 1/2 cup, on top of the bottom layer of cake. Top it with a cake layer. Spread the chocolate-blackberry filling on the second layer of cake, then top it with a third layer. Top this layer with the remaining 1/2 cup of blackberry jam, then add the final cake layer on top. Scrape off any filling or jam that has squished out the sides. Transfer the cake to a wire rack set over a baking sheet, then make the chocolate glaze.
- Place 8 oz chocolate in a small bowl and set aside. Pour 8 oz heavy cream into a small saucepan and heat it until it comes to a simmer and bubbles appear along the edges of the pan. Pour the simmering cream over the chocolate and allow it to sit for one minute to soften the chocolate. After a minute, whisk the chocolate and cream together until the mixture is shiny and smooth. If it seems a little thin, let it cool and thicken for a minute or two.
- Pour the glaze over the cake, taking care that it goes down the sides evenly and that all of the cake is covered. Let it sit for 5-10 minutes to start setting, then transfer the cake to the refrigerator to firm up the glaze completely, for about 10-15 minutes. Top the cake with the homemade chocolate truffles, and serve immediately.
- The cake can be assembled in advance, but for the best presentation I recommend not covering it with the glaze until shortly before you’re ready to serve it. The glaze might get dull or show condensation if it’s refrigerated for an extended amount of time and then brought to room temperature. It will still taste good, but the visual impact will be lessened.
Recipe Notes
Measuring Tips
Our recipes are developed using weight measurements, and we highly recommend using a kitchen scale for baking whenever possible. However, if you prefer to use cups, volume measurements are provided as well. PLEASE NOTE: the adage “8 oz = 1 cup” is NOT true when speaking about weight, so don’t be concerned if the measurements don’t fit this formula.
Want to learn more about baking measurements and conversion?
Nutrition
📸 Photo Tutorial: How to roll Chocolate Truffles
I put together a photo tutorial showing my favorite method for rolling and coating truffles. This is technically optional for cocoa-covered truffles—to save some time, you can just roll the truffles in cocoa and call it good. However, it’s a valuable method to know in general, so allow me to drop some knowledge.
This method is explained in detail in the recipe above, but the general idea is that the truffles are rolled in chocolate or candy coating in your palm to produce a very thin layer around the truffle.
When you dip them the traditional way into a bowl of melted chocolate, the coating is much thicker. That’s fine if you just want chocolate-dipped truffles, but if you’re looking to coat them with nuts, coconut, sprinkles, or any other textured topping, you might find that you’re left with a very thick, lumpy outer layer that distracts from the smooth filling.
The other advantage this method provides is that gives your coated truffles some structure. They’re less likely to soften, melt, or get misshapen if they have a little chocolate around them keeping them round. The photos show the truffles being coated in cocoa powder, but this works for basically anything you might want to roll truffles in—nuts, coconut, sprinkles, chopped candy, freeze-dried fruit powder, or anything else you can dream up!

💭 Variations
This cake is great on its own, but here are a few ideas to change things up.
- If you are short on time (or attention span!) feel free to omit truffles. Or, instead of making your own truffles, use store-bought. You’ll still have one delicious chocolate cake with undeniably rich flavor.
- Feel free to top the cake with other toppings like nuts, coconut, chocolate curls, etc.
- You can also swap the blackberry jam with other flavors like cherry, raspberry, or strawberry. Just make sure to use a seedless/smooth jam or jelly.
- And, if you stumbled upon this recipe because you wanted to learn to make your own truffles, might I suggest using those truffles in a different recipe? Try pressing them into the center of a cookie or cake for a melty, chocolatey surprise inside of another dessert.
And there you have it! An edible love letter to chocolate, my favorite valentine of all. Enjoy!
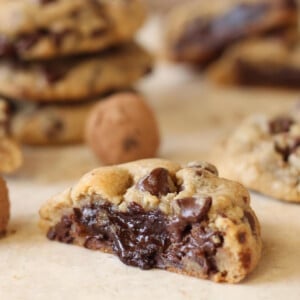
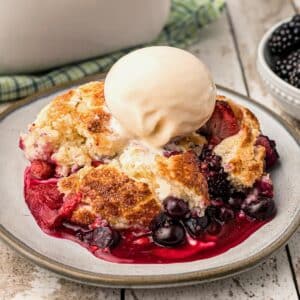
Truffle-Stuffed Chocolate Chip Cookies
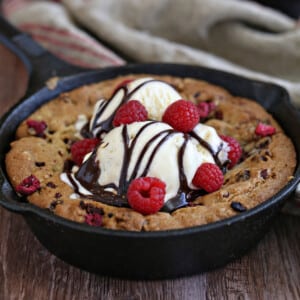
Raspberry Truffle Skillet Cookies

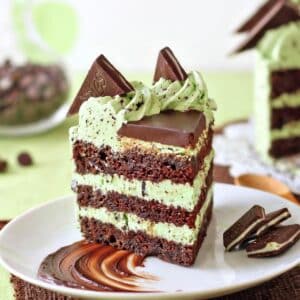

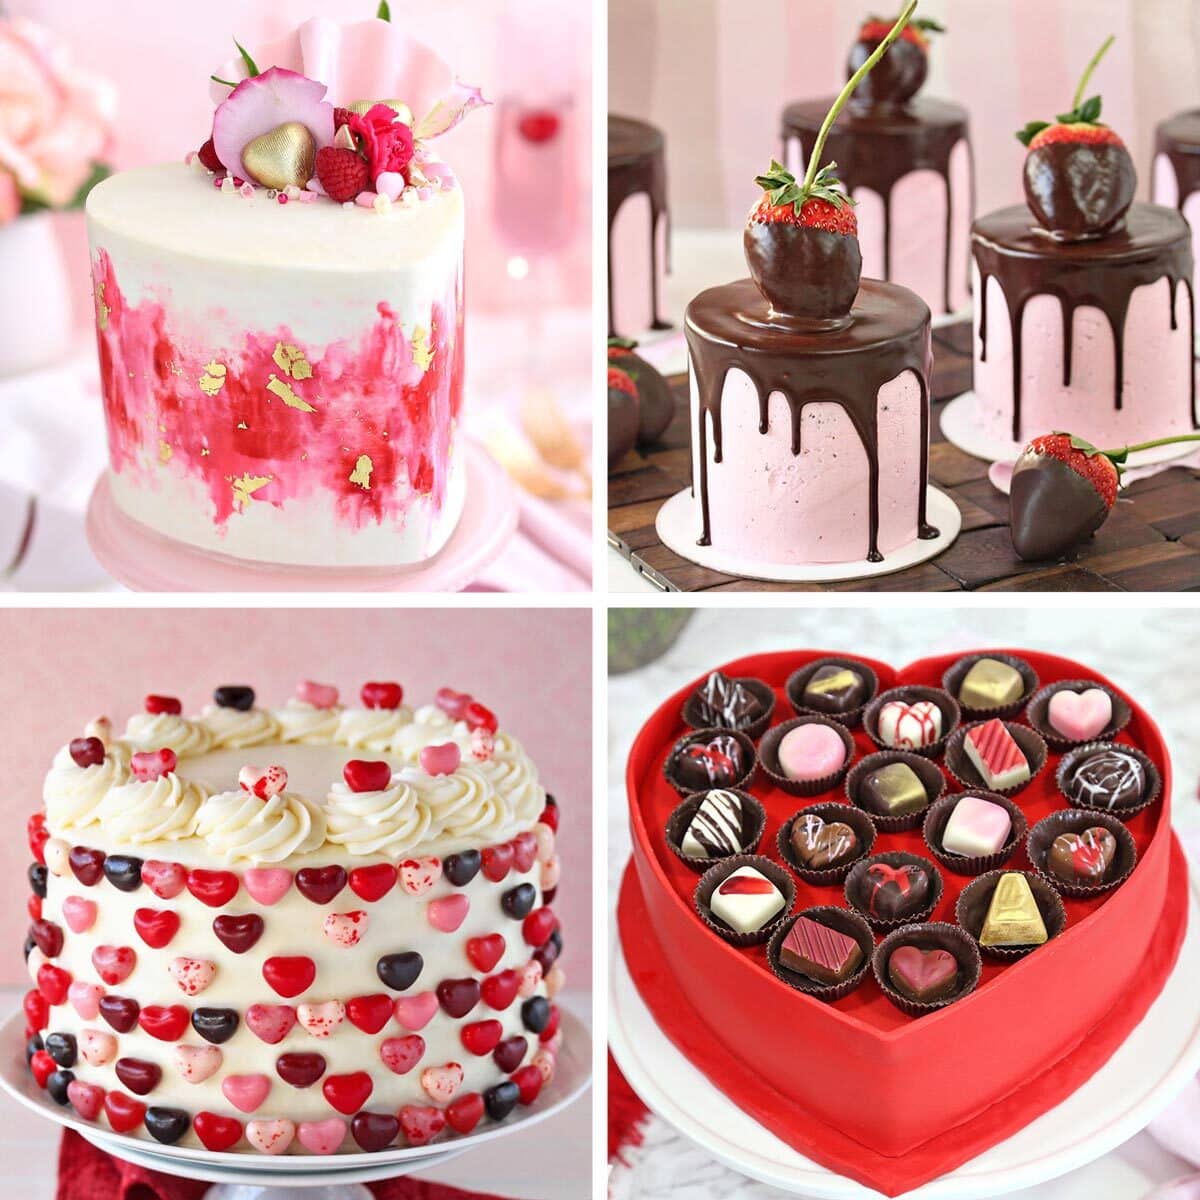
THE BEST VALENTINE’S DAY CAKES
Check out our collection of the 27 best Valentine’s Day cake ideas — click here to get all the recipes!


Wow!!! Absolutely stunning!Just wondering why do truffles look different colors?
Thanks! Love your blog!
wah!!! It is amazing!!! On my friend’s birthday I will recommend this cake to all my friends.
Thank you so much!!
Since blackberries are indeed “fruit”, and chocolate is indeed a “vegetable” according the Wiki, this cake covers two of the FDA recommended food groups that we should eat “daily”. This cake looks wonderful, and I am definitely making it soon, with a generous helping of truffles, on the top, on the side, maybe a couple underneath. I’m a health nut!
Hey Ginny! You sound like a women after my own heart! I love it! Thanks so much, I would love to hear how it goes and see pictures!
I never get a shiny chocolate glaze using ganache. Is there anything else you do? Because following these instructions it’s very matt by the time chocolate dries.
Hi Zlatan, IME the key to shiny glaze is to minimize refrigerator time. That’s why the chilling time in this recipe is so short, just until the glaze sets but no longer. The temperature shifts and condensation from a long stay in the fridge is pretty much a guarantee for a matte finish. Obviously for food safety reasons it’s unavoidable to refrigerate leftovers (and sadly we home cooks don’t have specialty cake fridges to prevent humidity issues etc) but for the initial presentation, the less your cake hits the fridge, the better.