
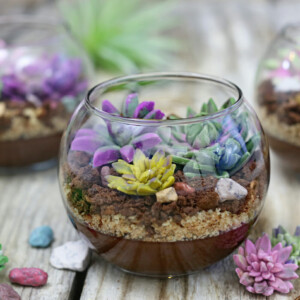
Embrace the succulent trend with these Edible Terrariums! These cute centerpieces are totally edible and totally fun to make and eat. The terrariums are made with chocolate pudding, cookie crumbs, chocolate rocks, and fondant succulents.

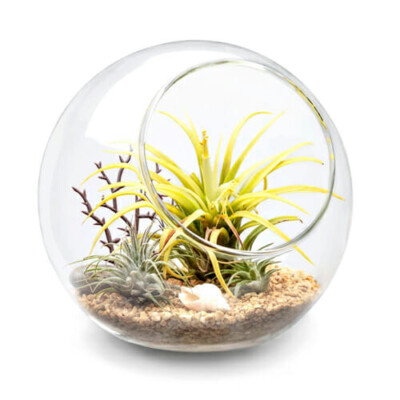
I have been obsessed with the idea of edible terrariums ever since I saw Heather at SprinkleBakes make this cute version last year. They sat on my to-make list for months, but it took finding these cute glass containers (at the dollar store, no less!) to push me into action. As soon as I saw the little globes, I could just picture the fondant succulents inside, and I knew I had to make it happen.

First, a disclaimer: I am NOT a plant expert. The only succulents I have in my house currently are of the plastic variety. I love the way they look, but I just don’t have a green thumb. I can barely keep my lawn alive! So please don’t look to these for a high degree of realism. I’m sure there are a lot of edible terrariums out there that are perfectly factually accurate, from the layers of soil down to the measurements of each cactus spine, but that’s not my jam. These are terrarium-ish, and succulent-ish, and most importantly, delish.

I knew from the start that I wanted a pudding or mousse of some kind in my terrarium. Many of the ones I’ve seen are layers of dry ingredients (see above re: realism!) but I thought, if I’m really going to curl up and eat an actual terrarium, I want a little something’ somethin’ in there to keep it moist, realism be damned.

I made a homemade chocolate pudding to put at the base of my terrariums. It has two kinds of chocolate, a splash of heavy cream for richness and a little vanilla for flavor. If you’ve only ever had pudding from a mix, I urge you to try the homemade version–the flavor and texture is worlds ahead of a box mix or prepackaged pudding cup! (But if a mix is what you have and like, I certainly won’t stop you!) It’s so dreamy, and I could just stop right there with the recipe and be perfectly happy.
However, a cup of pudding does not a terrarium make, so once the puddings were set, I added two layers of dirt: first, crumbled cinnamon crunch doughnuts, then a layer of crushed chocolate-almond biscotti. I love the varied textures and colors of the doughnuts and biscotti–they really mimicked the uneven, random appearance of different types of dirt. You can swap in other sweet treats, too–try crumbled chocolate chip cookies instead of doughnuts, and Oreo cookie crumbs or chocolate cupcake crumbs instead of the biscotti.

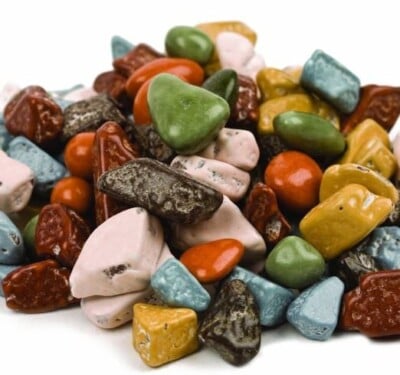
To decorate, I scattered chocolate rocks over the top, and made cute little fondant succulents to put inside. There are a lot of different types of succulents you could make, but I kept it simple and used flower cookie cutters I already had to form these easy plants. I colored some fondant in various shades of green, purple, and yellow, and then once the succulents were dry, brushed them with petal dust to add color variations. If you don’t have petal dust, you can use powdered sugar and/or cocoa powder to give them some dimension. I like the rainbow effect of all the different colors together, but if you’re a purist you can stick to shades of green instead.

So tell me–have you made an edible terrarium or edible succulents yet? I think I’m going to tackle a succulent cake next!
Equipment You’ll Need to Make Edible Terrariums:
• Glass Terrarium Containers
• White Fondant
• Flower Cutters
• Gel Food coloring: Avocado Green / Leaf Green / Electric Purple / Chocolate Brown / Lemon Yellow
• Petal Dust: Leaf Green / Pistachio / Iris / Rose Pink / Lemon / Dark Chocolate
• Chocolate Rocks
🌸More Fun Desserts
- Dirt Pudding Cups (Dirt Dessert)
- Easy Chocolate Flower Cupcakes
- Hamburger Cupcakes Recipe
- Sugar Cookie French Fries
- Galaxy Mousse Cakes with Mirror Glaze
- Mermaid Cupcakes
- Flamingo Cupcakes
Chocolate Feathers
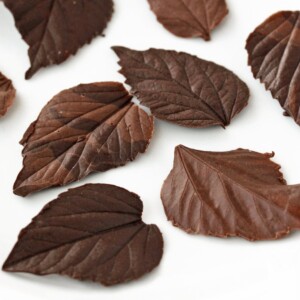
Chocolate Leaves
Edible Terrariums
Ingredients
For the Chocolate Pudding:
- 1 oz cornstarch, (1/4 cup)
- 3 cups milk, divided use
- 1 cup heavy cream, or whipping cream
- 8.75 oz granulated sugar, (1 ¼ cups)
- ½ tsp salt
- 1.5 oz unsweetened cocoa powder, (1/2 cup), sifted
- 2 oz unsweetened chocolate, finely chopped
- 1 oz unsalted butter, (2 TBSP)
- 1 TBSP vanilla extract
For the Fondant Succulents:
- 1 lb white fondant
- Assorted gel food coloring, I used Americolor Avocado Green, Leaf Green, Electric Purple, Chocolate Brown, Lemon Yellow
- Daisy cookie cutters
- Petal dust, I used CK Kitchen Leaf Green, Pistachio, Iris, Rose Pink, Lemon, and Dark Chocolate – optional
To Assemble:
- 6 cinnamon crunch doughnuts, or 12 mini doughnuts
- 12 pieces mini chocolate-almond biscotti
- ½ cup chocolate rocks
Instructions
To Make the Chocolate Pudding:
- Combine the corn starch and ¼ cup cold milk in a small bowl, and whisk until smooth and free of lumps. Set aside for now.
- Place the remaining 2 3/4 cups milk, heavy cream, sugar, and salt in a 4-quart saucepan over medium heat. Bring to a simmer.
- Add the corn starch liquid and sifted cocoa powder, and whisk everything together. Continue to cook, whisking CONSTANTLY, until the mixture thickens, about 4 minutes. If you notice any stray lumps of corn starch, strain the pudding through a wire mesh strainer into a large bowl.
- Add the butter, chopped unsweetened chocolate, and vanilla extract, and whisk until combined. The pudding should be smooth and shiny. Divide between your terrarium containers, and chill for at least 2 hours, until cold and set.
To Make the Fondant Succulents:
- Divide the fondant into as many colors as you’d like to make. I recommend wearing disposable gloves while coloring fondant, to avoid staining your hands. Dust your work surface with powdered sugar, and flatten out one portion of fondant into a disc. Place a few drops of food coloring in the center, and fold the sides over so the coloring is in the middle of a fondant ball. Knead the fondant like bread dough. The color will first show up as marbled streaks, but as you continue to knead it will become a consistent color. Add additional coloring, if you’d like, until you get the shade you want. Wrap the fondant in plastic wrap to prevent it from drying out, and repeat with the remaining fondant.
- Roll one color of fondant out until it is a little less than ¼-inch thick. Use a large daisy cutter to cut out two large daisy flowers, and use a medium cutter to cut out three medium daisies. If you have fondant tools, you can indent the center of each petal to spread it out and make it look more realistic.
- Layer the two large flowers on top of each other so the petals are staggered and offset. Attach them together in the center with a dab of water.
- Affix one of the medium flowers on top of the large flowers with a bit of water, and add a second medium flower on top, with petals staggered. For the third medium flower, curl the petals inward before affixing it to the top. Place the entire thing in a curved flower former, or if you don’t have one of those, in an empty egg carton, so the sides gently curl upward. Repeat until you have as many succulents as you’d like. You can experiment with different sizes of succulents and thicknesses of fondant to make a variety of plants.
- The fondant succulents will need to sit overnight to harden, or can be baked in a 170* F oven (76 C) for 10 minutes to speed the setting process. If you bake them, let them cool completely before handling.
- Brush the finished succulents with petal dust, powdered sugar, or cocoa powder to add color and dimension.
To Assemble:
- Crumble the doughnuts into one bowl. Chop or crush the biscotti into small pieces, and place that in a separate bowl. Spoon doughnuts crumbs on top of the chocolate puddings, and top with a layer of crushed biscotti pieces. Scatter chocolate rocks on top of the biscotti. Finish by placing several fondant succulents into each terrarium, and serve!
- The pudding and succulents can be made several days in advance. If you’re going to make the pudding in advance, cover it with plastic wrap to prevent it from drying out and forming a skin on top. I recommend adding the toppings shortly before serving, so they don’t get too soggy. Enjoy!
Video

Recipe Notes
Measuring Tips
Our recipes are developed using weight measurements, and we highly recommend using a kitchen scale for baking whenever possible. However, if you prefer to use cups, volume measurements are provided as well. PLEASE NOTE: the adage “8 oz = 1 cup” is NOT true when speaking about weight, so don’t be concerned if the measurements don’t fit this formula.
Want to learn more about baking measurements and conversion?
Nutrition


These are the CUTEST! Where did you get the bowls?
Thank you so much! I got them at my local dollar tree in the vases section. Hopefully you can find something similar!
Can I just say, you are a talented pastry chef with clever ideas that are expertly executed. Thank you for sharing with all of us. These in particular are beautiful. I for some crazy reason, love those little succulent terrariums and well, it never even occurred to me to make them out of dessert.
I will be doing the galaxy mousse cakes with the mirror glaze after the holiday for a dinner party. I’ll report back.
Thank you so much, I really appreciate that! Im so glad to hear you love them, and please let me know how the galaxy cakes go!
These are so adorable!!! I’d love to make a bunch of these for a large crowd . . . how far in advance could you make the succulents do you think? Would you store them in an air tight container at room temp? Freeze them? Thanks!
Thanks Alina! The succulents can be made quite far in advance. In my experience fondant doesn’t “go bad” quickly, although it will get more brittle as time goes on. (And like most fondant decorations, people tend to nibble them, perhaps, but not really eat the whole thing.) As far as storage, I would store them in an airtight container at room temperature. I would try to avoid stacking them, to prevent breakage, but if you have to, put a layer of waxed paper in between the layers. The freezer is not a good idea because they might get condensation which will make them sticky. Good luck and let me know how it goes! 🙂