


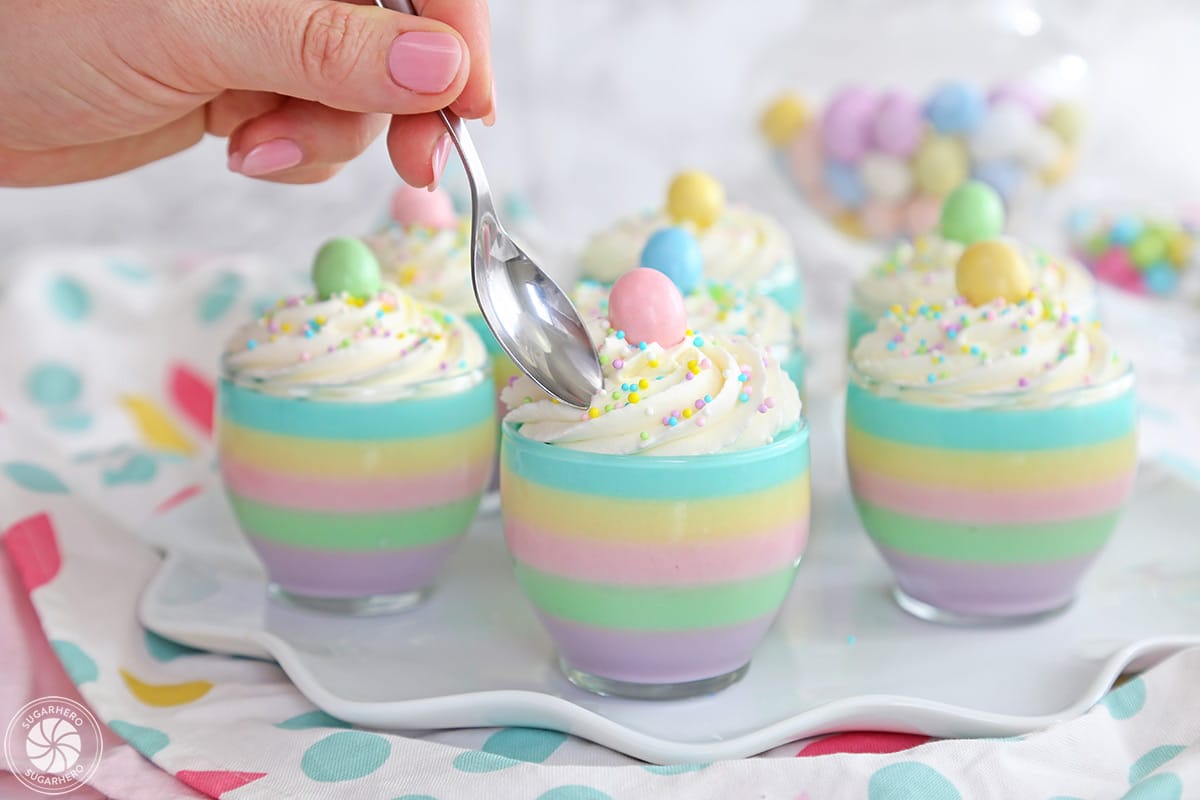
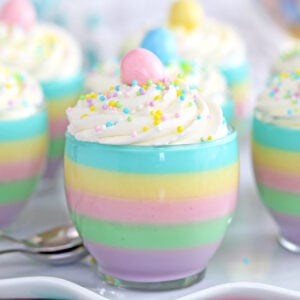
Looking for an easy spring or Easter dessert? These Pastel Rainbow Gelatin Cups are simple, kid-friendly, and so beautiful! Make them with creamy vanilla yogurt and your favorite flavors of gelatin. Serve them plain, or top them with whipped cream and sprinkles!

💗Pastel Rainbow Jello Recipe
Rainbow gelatin is a great way to make a somewhat boring dessert exciting. (Sorry, gelatin, but it’s true!) Plain gelatin cups are a snooze. But rainbow gelatin cups? Rainbow gelatin cups are a party!
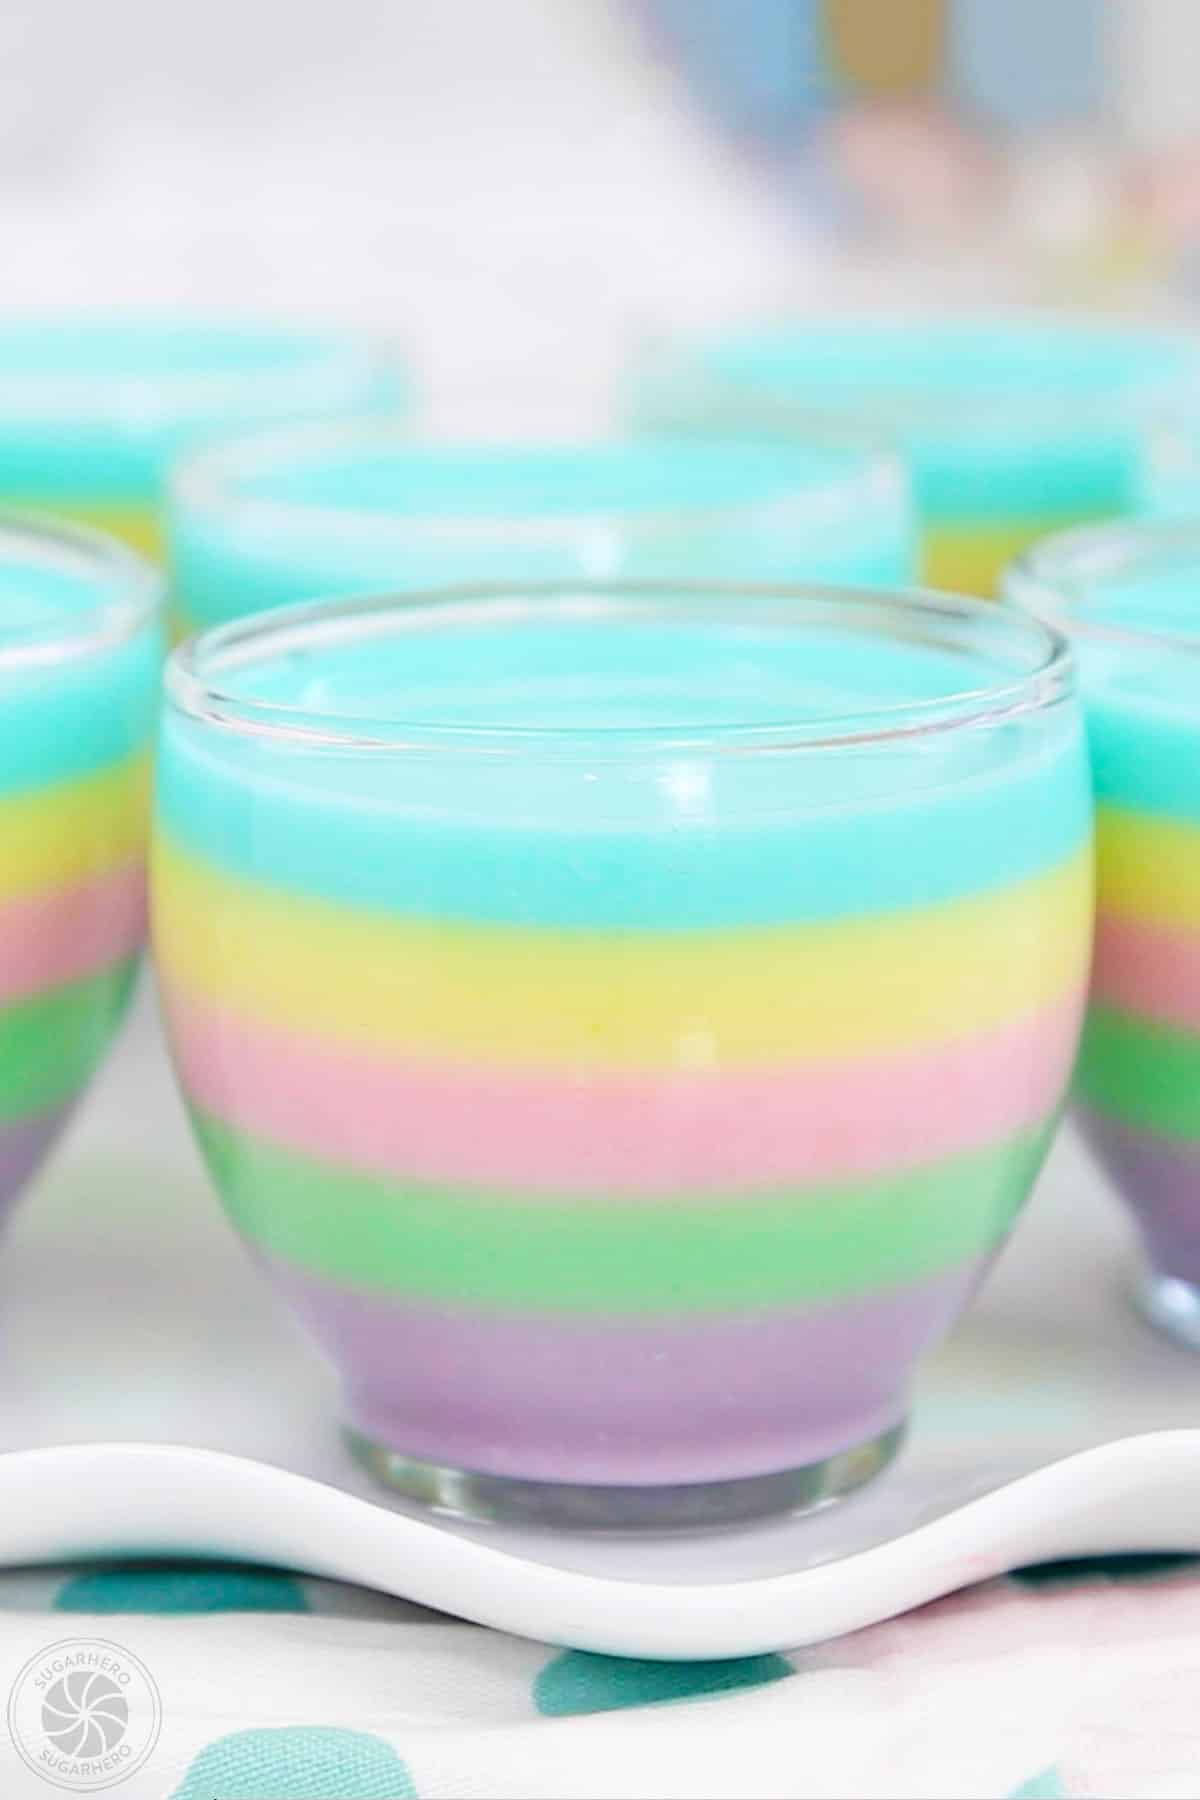
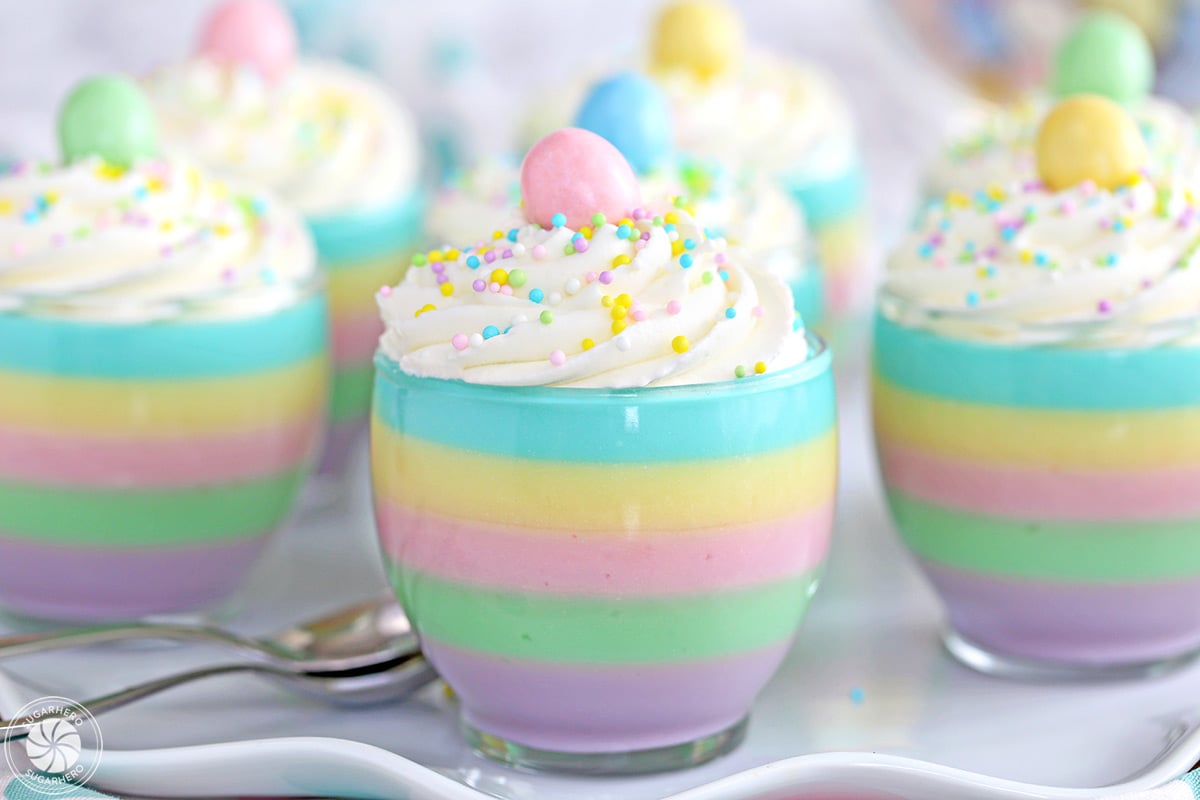
These Pastel Rainbow Gelatin Cups are as delicious as they are beautiful. They feature five—FIVE!!—creamy, fruity layers, all stacked together in single-serving cups and topped with lots of whipped cream and sprinkles.
This recipe is inspired by our immensely popular Easter No-Bake Mini Cheesecakes. They’re always one of SugarHero’s top spring recipes, and many people love them and request similar recipes. We also get requests from people who don’t like cheesecake, but still want to get in on the springtime rainbow fun. So here we go—a pretty striped pastel treat, no cream cheese required!
Table of Contents
🧾 What You’ll Need
Ingredients
Don’t be intimidated by all the colors and layers — these gelatin cups are super simple to make! Here’s a summary of what you’ll need, and you can find more detailed information in recipe card down below. (Links are affiliate links and I earn a small commission from qualifying purchases.)
- Gelatin: The most important ingredient! You will need five (3-ounce) packages of different flavors/colors of fruit-flavored gelatin. I’ve tried this recipe with several different brands, from expensive fancy brands to cheap store brands, and they all work well, so you can use whatever is available to you. Sugar-free gelatin can also be substituted with no issues. (Quick note about sugar-free gelatin: because the weight of the packages is very different, disregard the gelatin weight measurements in the recipe, which will be inaccurate for sugar-free gelatin.)
- Milk: You can use any fat percentage you have available.
- Vanilla yogurt: I love this recipe with a thick, Greek-style vanilla yogurt, but you can use another flavor of yogurt, plain (unsweetened) yogurt, or even swap in sour cream if you want your gelatin cups to be more tangy.
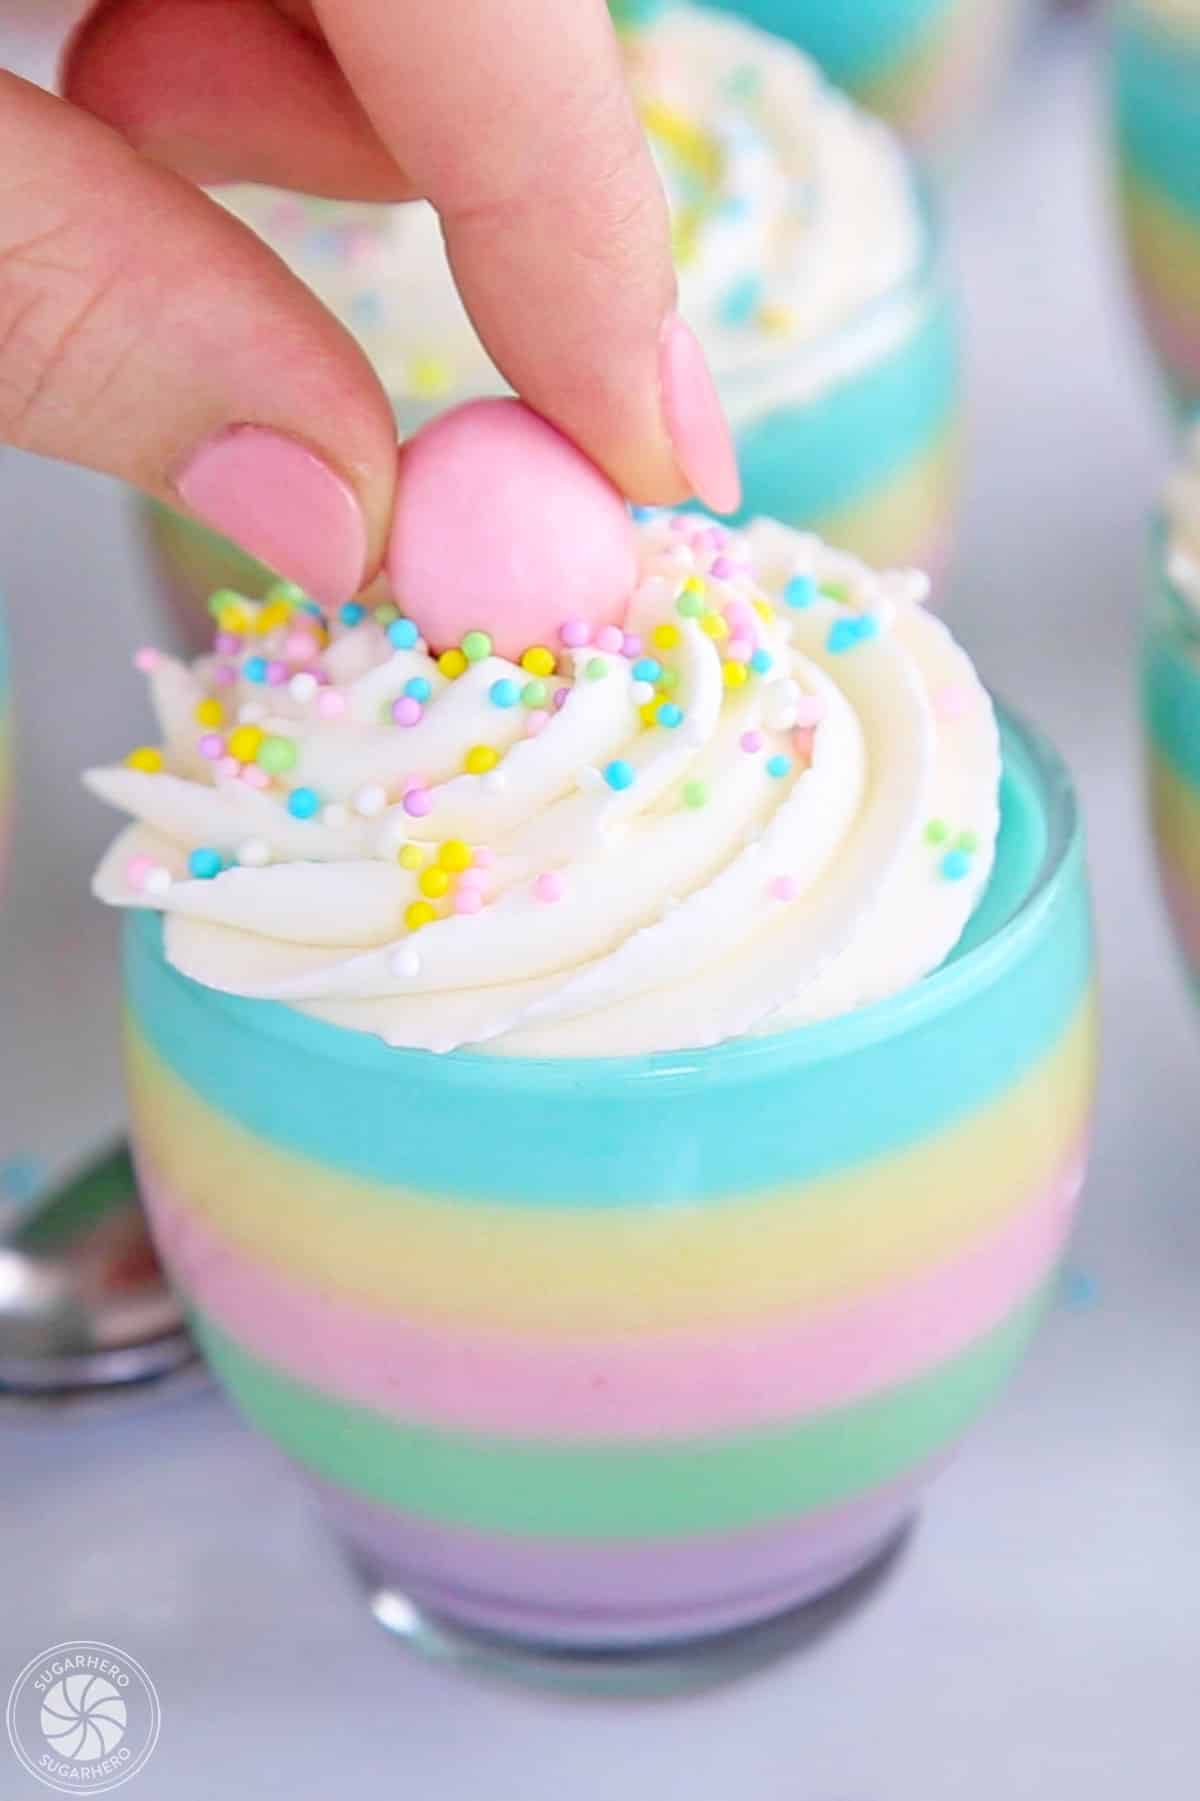
- Whipped cream and sprinkles:These cups are delish on their own, but to really gild the lily, top them with a swirl of whipped cream and your favorite pastel sprinkles!

Equipment
- Whisk: A whisk is truly the only tool you need to make these!
- Bowls: Five colors means a lot of mixing bowls! Have several bowls handy so you’re not constantly washing between each layer.
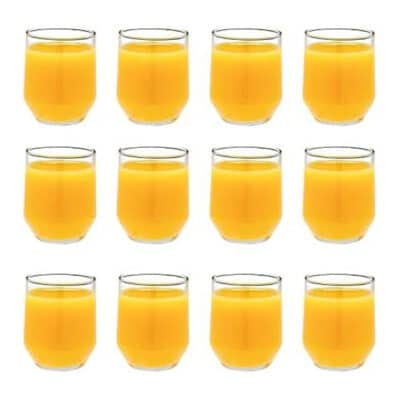
- Small glasses:The glasses pictured are 1/2-cup (4-ounce) glasses, which I think is the perfect serving size for this dessert. You can find 4-ounce dessert cups online and will need 12 cups total. Check the recipe card note section for other ways to prepare the gelatin in larger cups or pans.

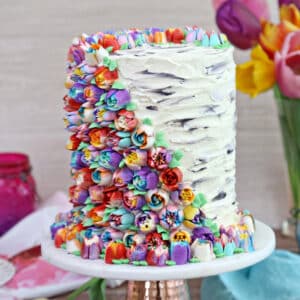
🌷More Pastel Desserts To Try


Leave a Review!
If you make this recipe, let us know! Leave a ⭐️⭐️⭐️⭐️⭐️ rating on the recipe below, and leave a comment, take a photo and tag me on Instagram @elabau, or use #sugarhero on IG!
Pastel Rainbow Gelatin Cups
Ingredients
- 3 ¾ cups water, divided use
- 5 packages flavored gelatin, (3 oz packages), Assorted colors, like purple, blue, pink*, yellow, and green
- 1 ½ cups milk, divided use
- 2 ½ cups vanilla yogurt, divided use
- Whipped cream, for topping
- Sprinkles, or other decorations
Instructions
- Prepare your container(s): If you are using individual glasses, set your twelve 4-oz glasses on a baking sheet. If you are using a baking dish or bundt pan, spray it lightly with nonstick cooking spray.
- Boil water: For each of the 5 layers, you will use one 3-oz gelatin package, ¾ cup boiling water, ¼ cup milk, and ½ cup vanilla yogurt. Boil enough water for the gelatin (about 5 cups to account for evaporation). Keep the dairy ingredients refrigerated for now.
- Mix gelatin with boiling water: Pour each 3-oz package of gelatin into its own medium bowl. Add ¾ cup boiling water to each bowl, and whisk well, for about 30-60 seconds each, to make sure all of the gelatin granules are dissolved.
- Cool gelatin, add dairy: The gelatin will be hot and needs to be room temperature before you can add the dairy components. To speed the cooling time for the first color of gelatin, place it in the refrigerator for 10-15 minutes, until it feels neutral to the touch — not warm. It should not be starting to set, but if you notice setting around the edges, microwave the bowl for 10 seconds and whisk well until completely fluid again. (Note: the other 4 bowls of gelatin will cool to room temperature on the counter, no refrigeration needed.)
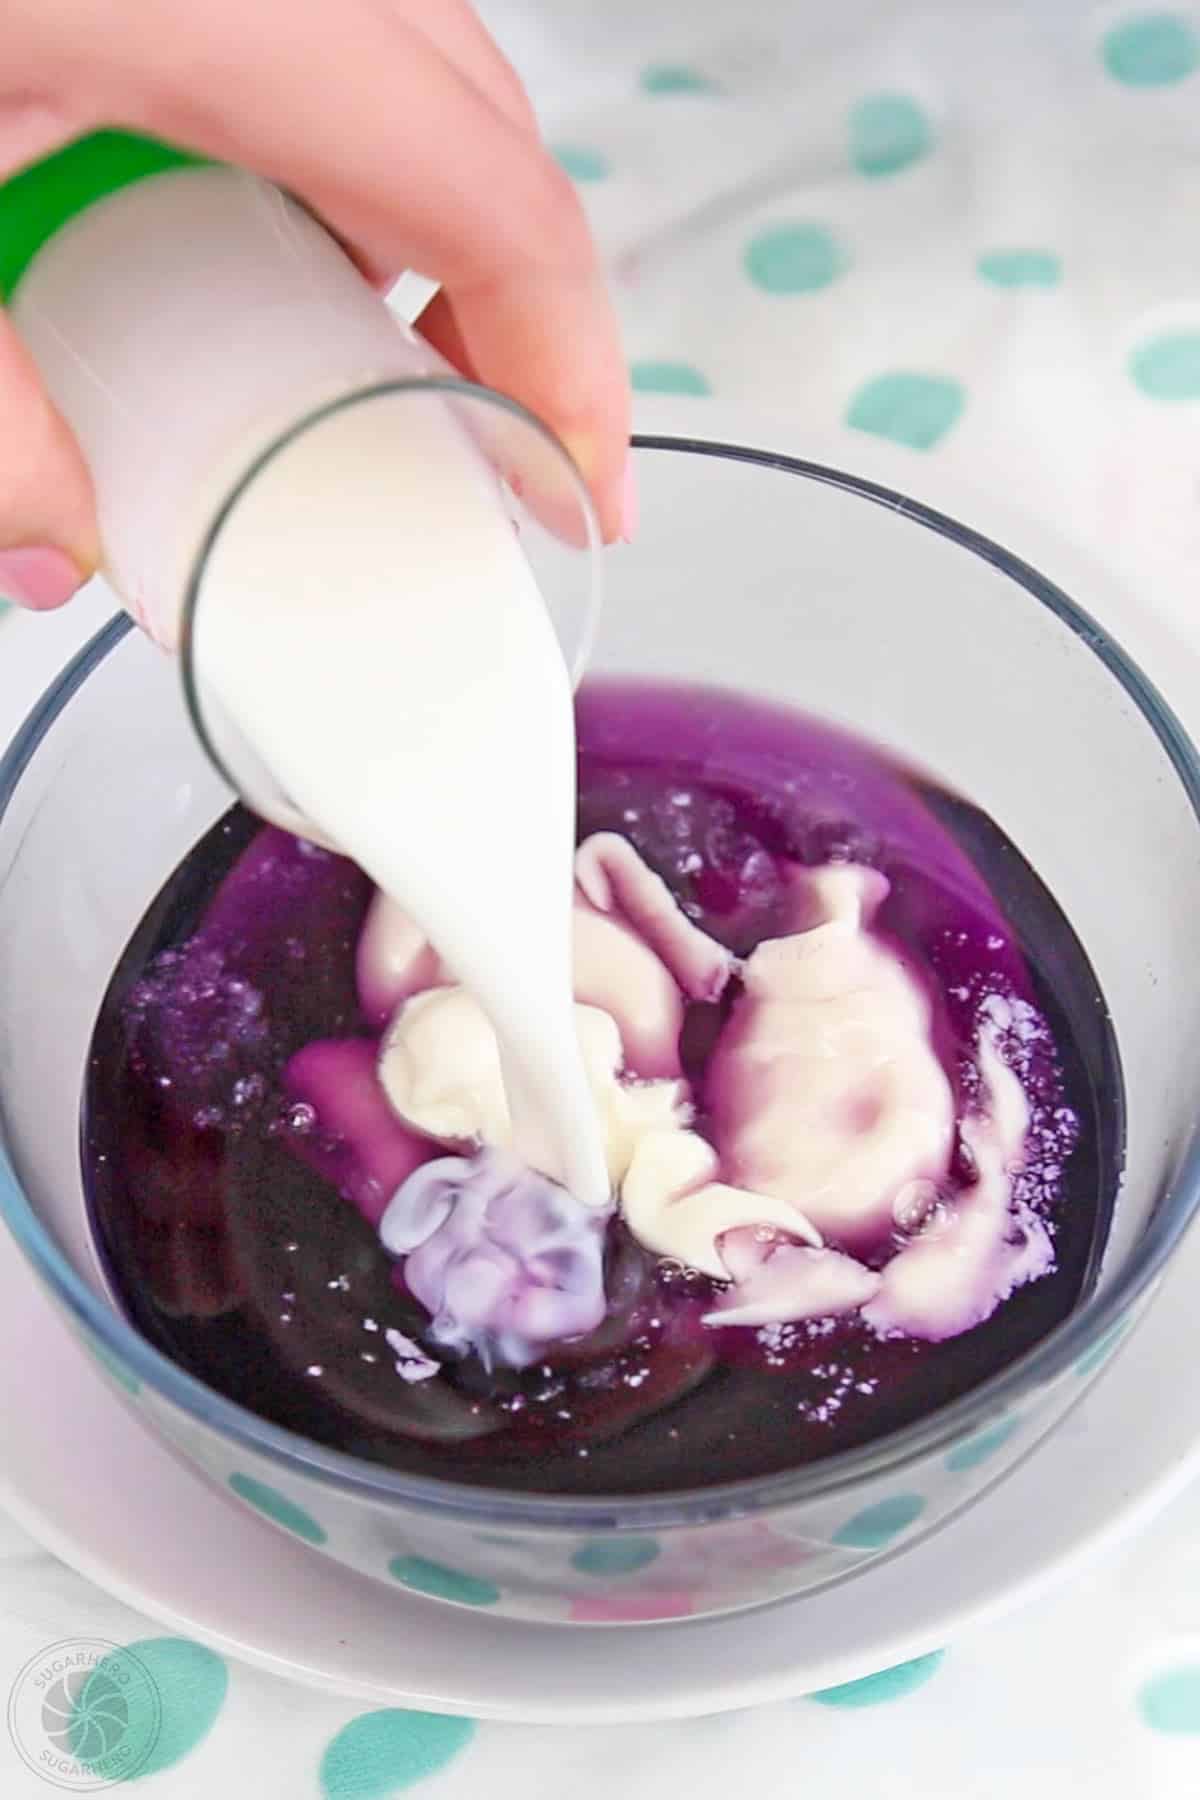
- Add dairy to first bowl of gelatin: Add ¼ cup milk and ½ cup vanilla yogurt to the bowl of gelatin you'd like to use for the first layer. Whisk well, until you have a smooth and creamy pastel mixture. Divide it evenly between your glasses, using about 2 TBSP per glass. If you are using a large pan, pour the entire contents into the bottom of the pan.
- Chill the first gelatin layer: Place the tray of glasses or baking pan into the refrigerator to set, for about 15 minutes. (If you’re in a hurry, you can place it in the freezer for about 8 minutes, but don’t let it freeze completely!) Note that the timing might be slightly different if you are using a baking dish or bundt pan. When you touch the top of the gelatin with your finger, it should feel mostly set, but it’s okay if your finger leaves a slight mark in the top.
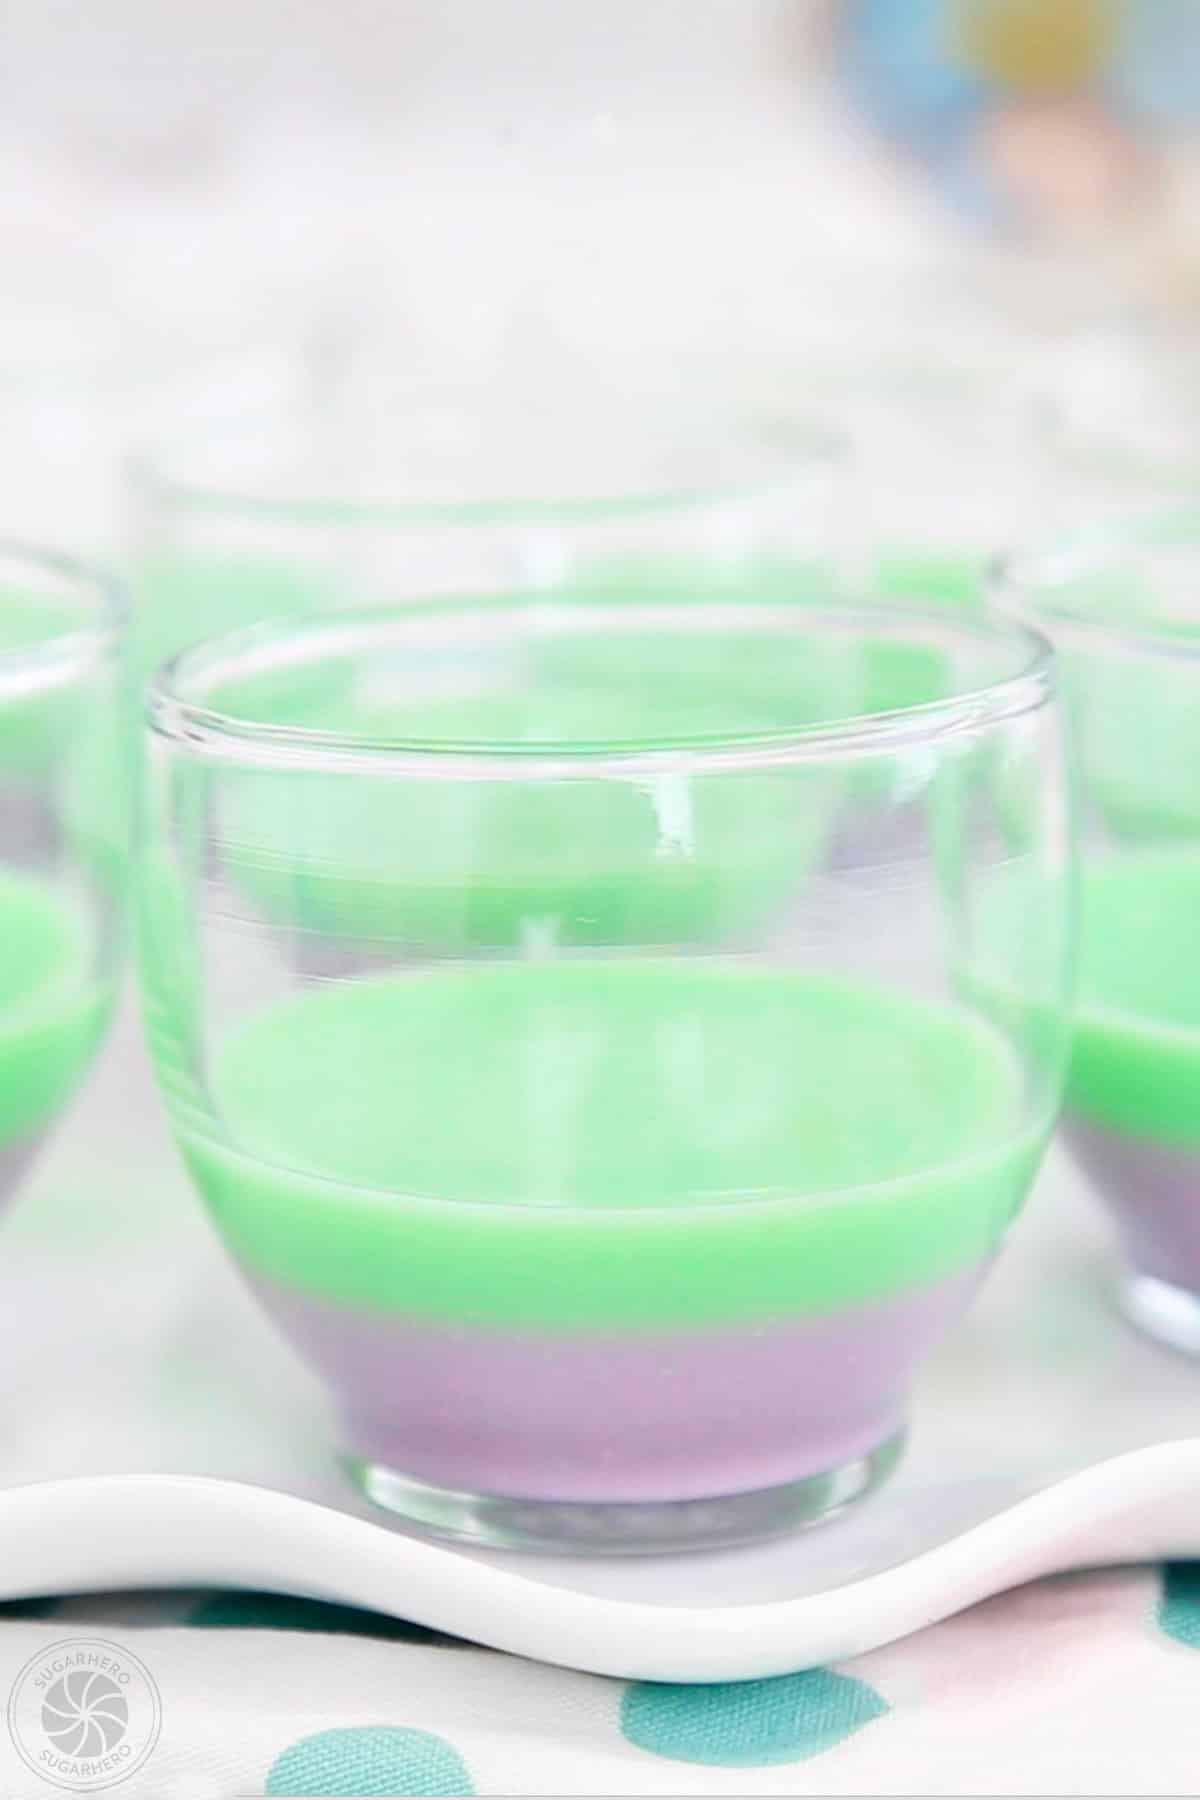
- Add dairy to next bowl of gelatin, layer, and chill: Once the first layer is set, make sure that the gelatin for the second layer is room temperature, then whisk in the milk and yogurt. Pour the second color on top of the first, and chill again for 15 minutes, until mostly set.
- Continue gelatin process with remaining colors: Continue to repeat this process with the remaining 3 colors. The gelatin that you mixed up in the beginning should be fine sitting at room temperature, but if you find that it does start to set around the edges, microwave it briefly and whisk well to make sure it’s fluid before adding the dairy.
- Refrigerate to fully set: After all 5 colors have been layered, refrigerate the cups or pan for at least 4 hours before decorating and serving, to make sure they’re set all the way through.
- Cover until ready to decorate: This dessert keeps very well in the refrigerator, so you can prepare the cups or cake up to a week in advance. It's best to decorate them just before serving — whipped cream and decorations will not hold up to prolonged storage. Wrap each undecorated cup individually or cover the baking dish with plastic wrap so the tops don’t dry out.
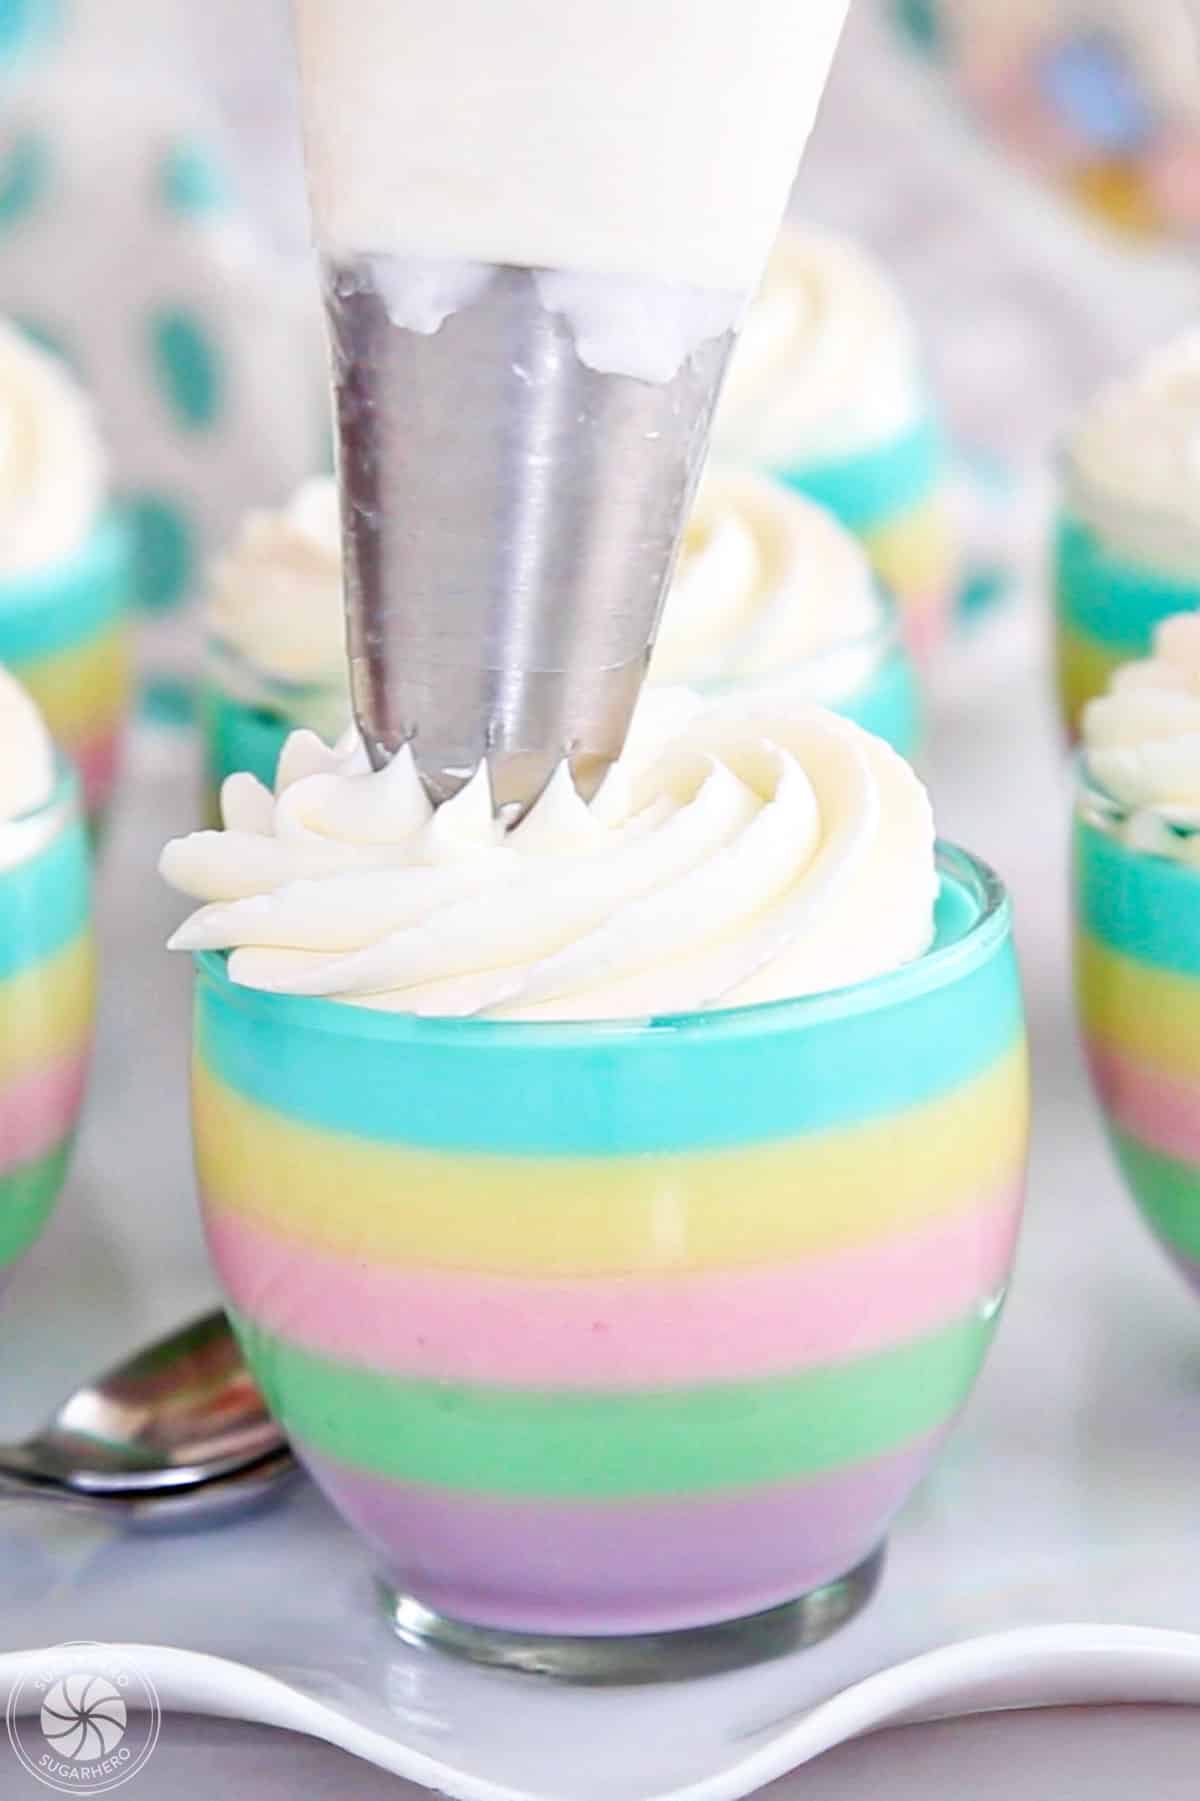
- Decorate and serve: A few hours before you plan to serve the gelatin, top each cup with a swirl of whipped cream, and whatever sprinkles or other decorations you’d like! If you are making a gelatin cake, whipped cream can be spread evenly over the set layers and decorated as desired. Store in the fridge until just before serving.
- Storage: Leftovers should be returned to the refrigerator as soon as possible and kept well wrapped. Eat within 2 days for the best taste and texture.
Video

Recipe Notes
- Baking dish: If you use a 9×13 rectangular baking dish (thin layers) or a 9×9 square baking dish (thick layers), you can cut the gelatin up into small squares and serve like happy little appetizers. This is a good choice if you want to stretch the serving size or if you’re making this for young children.
- Bundt pan: You can also make this in an 8-10 cup bundt pan. It’s especially important to grease this type of pan well or the gelatin may not release properly. After the gelatin is completely set, invert the pan onto a serving plate so that the gelatin pops out, just like a cake. Cut that baby into slices and enjoy!
Measuring Tips
Our recipes are developed using weight measurements, and we highly recommend using a kitchen scale for baking whenever possible. However, if you prefer to use cups, volume measurements are provided as well. PLEASE NOTE: the adage “8 oz = 1 cup” is NOT true when speaking about weight, so don’t be concerned if the measurements don’t fit this formula.
Want to learn more about baking measurements and conversion?
Nutrition
📸Photo Tutorial: How to Make Gorgeous Pastel Rainbow Gelatin Cups
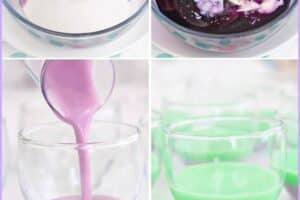
Assembling these rainbow cups couldn’t be simpler. The only tricky part is budgeting enough time, because you will need to briefly chill the cups in between each color. Full instructions are included in the recipe card above.
- Prepare your container(s): Set your 12 glasses on a baking sheet, or lightly spray a baking dish/bundt pan with nonstick cooking spray.
- Boil water: You will need 3/4 cups water for each of the 5 gelatin colors. Boil about 5 cups of water to account for any evaporation.
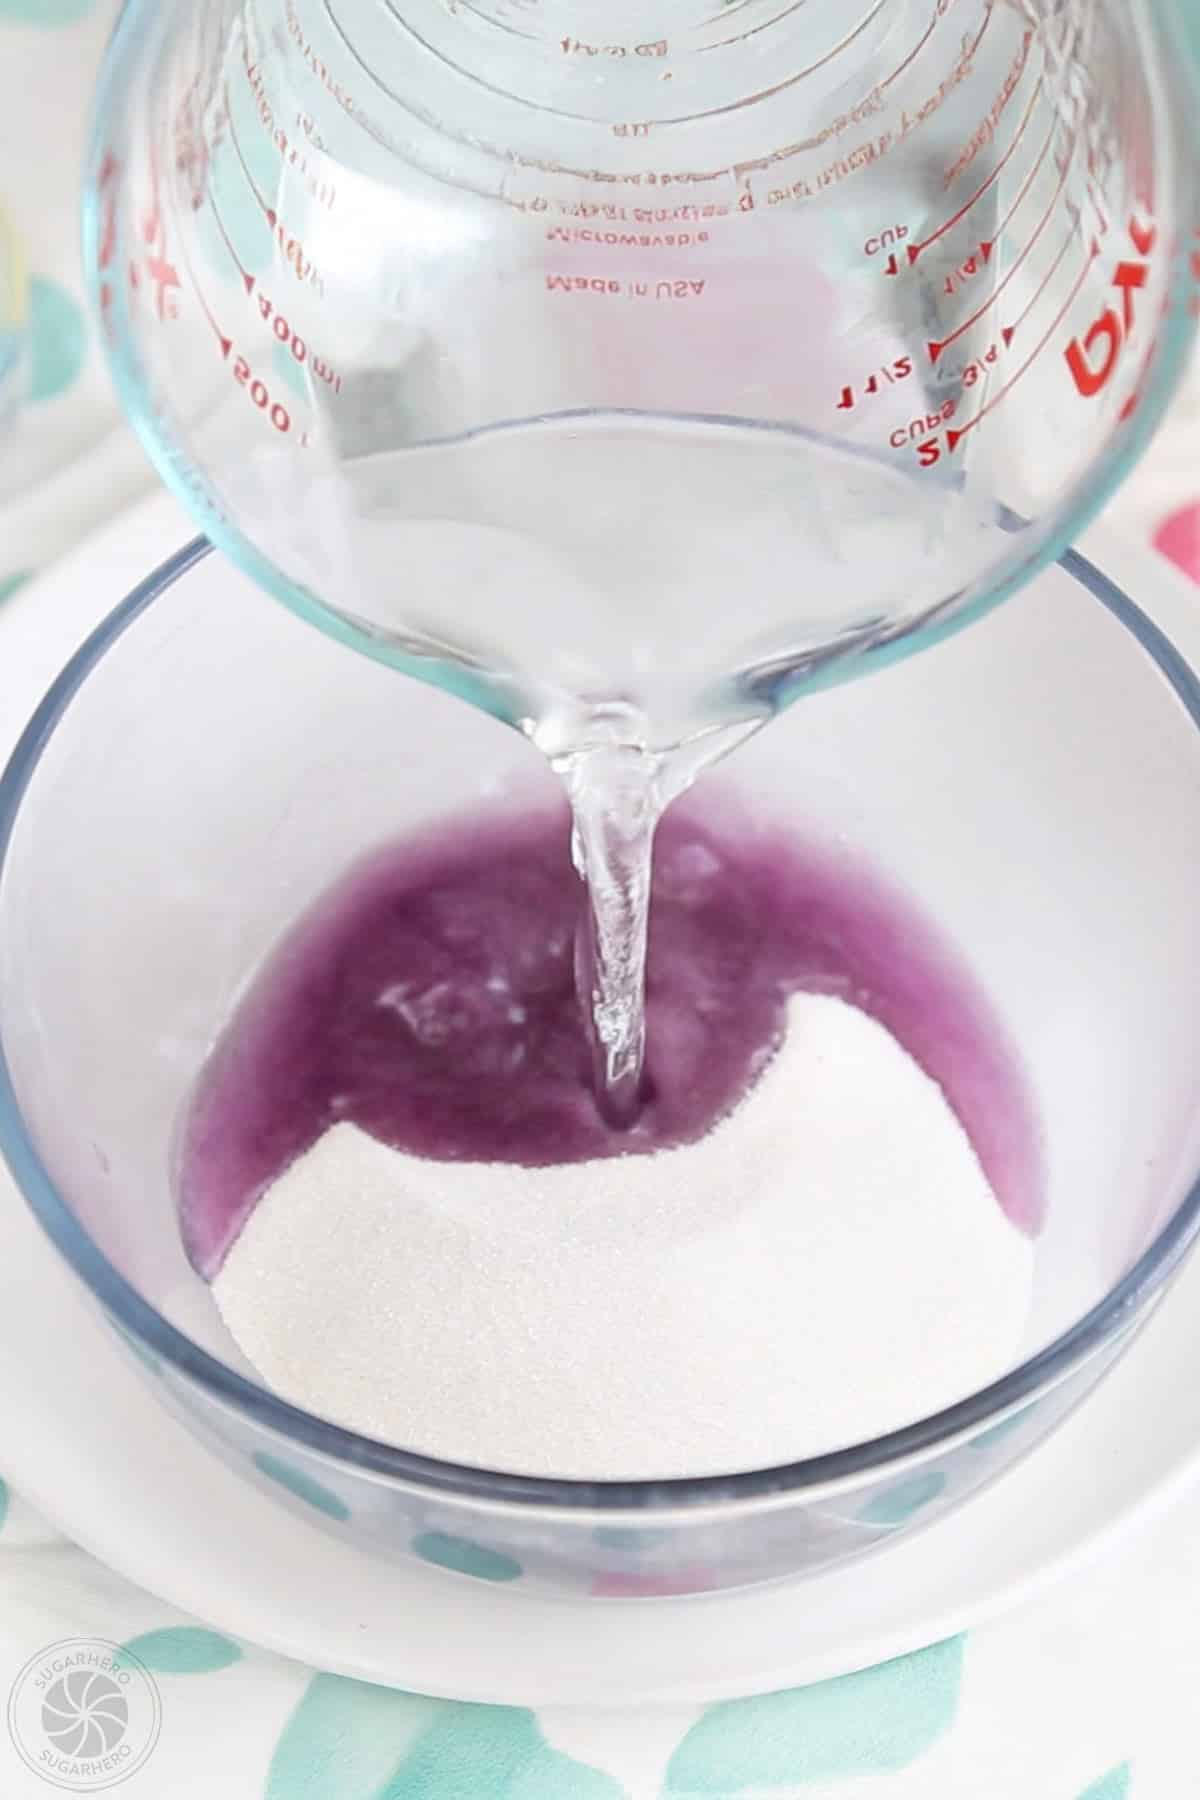

- Mix gelatin with boiling water: Pour each 3-oz package of gelatin into its own medium bowl. Add ¾ cup boiling water to the first bowl, whisk well for about 30-60 seconds to make sure all of the gelatin granules are dissolved. Repeat until all 5 bowls of gelatin have been mixed with boiling water and fully dissolved.
- Cool gelatin, add dairy: The gelatin will be hot and must come to room temperature before adding the yogurt and milk. To speed the cooling time for the first color of gelatin, place it in the refrigerator for 10-15 minutes, until it feels neutral to the touch — not warm. It should not be starting to set, but if you notice setting around the edges, microwave it for 10 seconds and whisk well until completely fluid. (Note: the other 4 bowls of gelatin can cool to room temperature on the counter.)
- Add dairy to first bowl of gelatin: Add ½ cup vanilla yogurt and ¼ cup milk to the bowl of cooled gelatin.

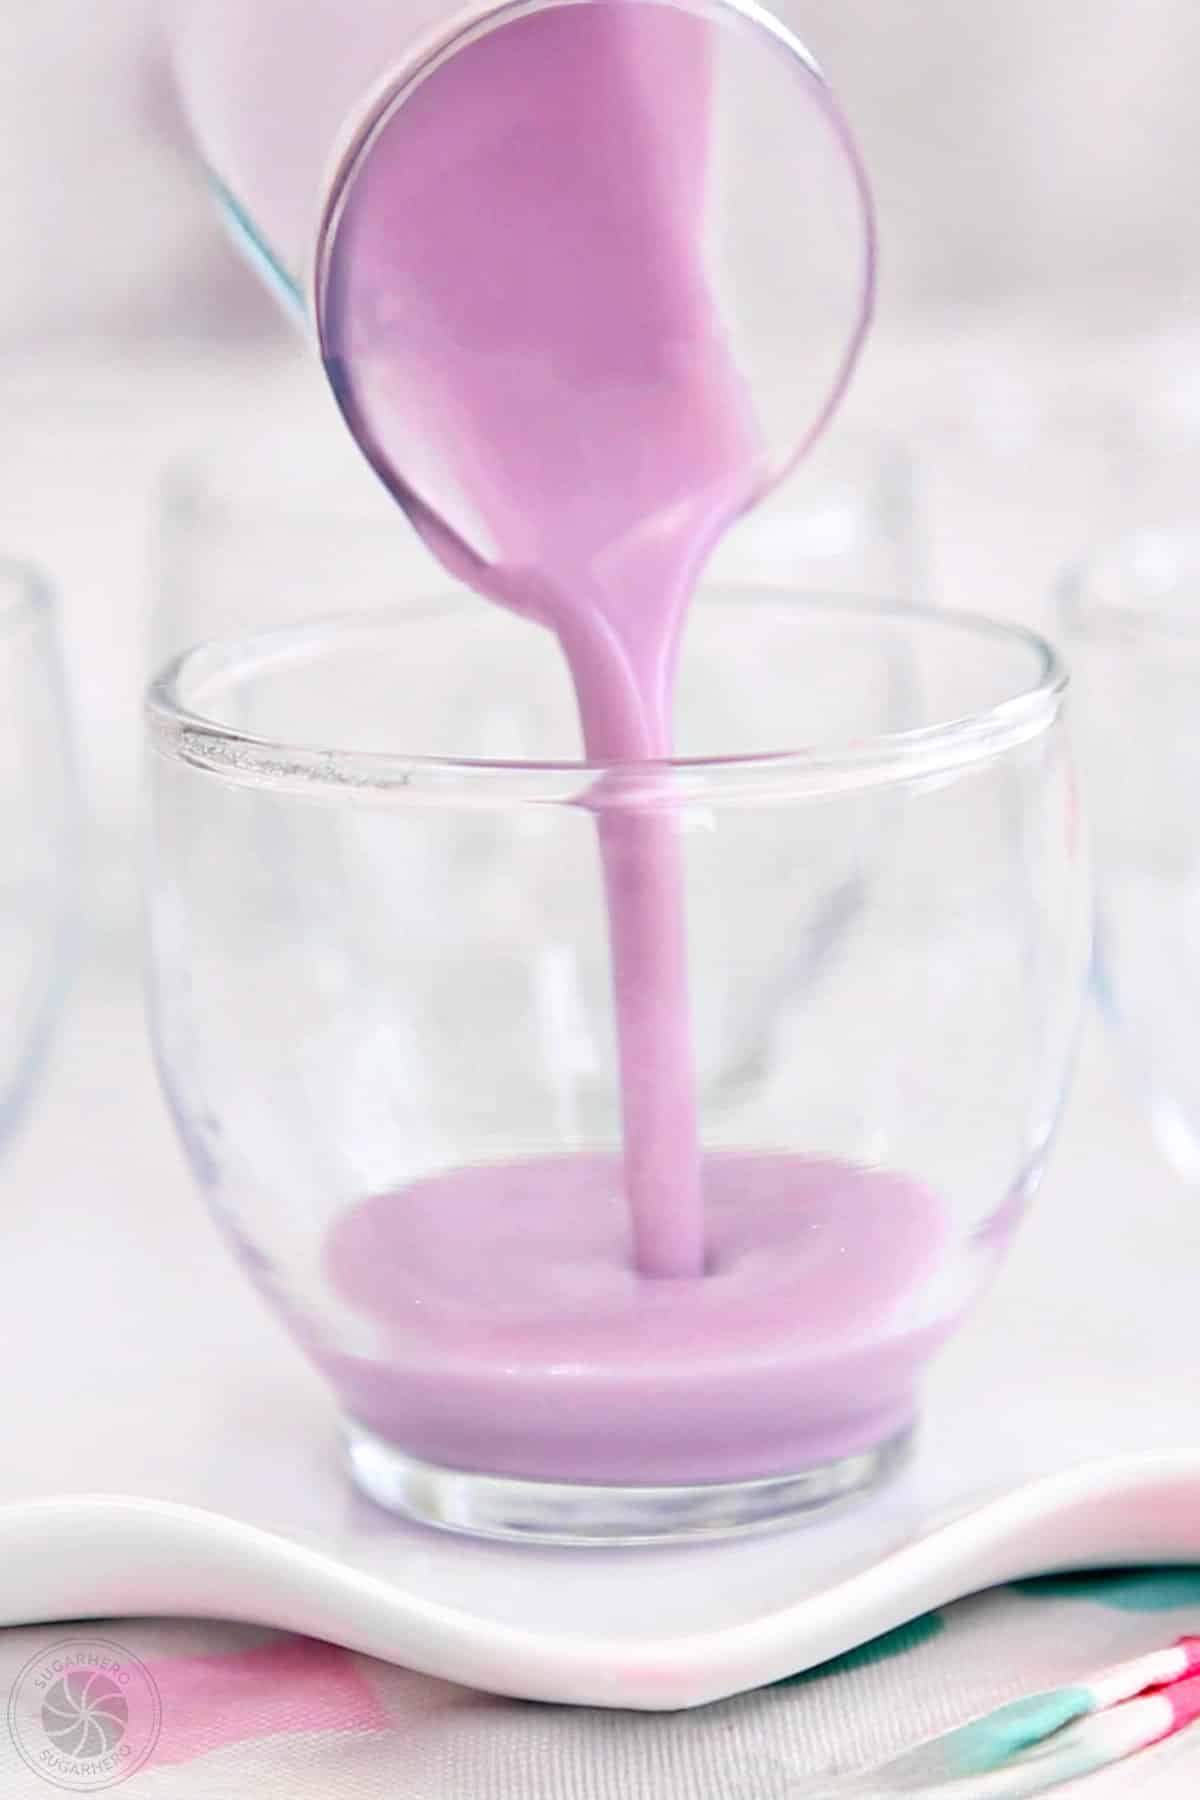
- Blend: Whisk well until smooth and creamy, then divide the mixture evenly between your glasses, about 2 TBSP per glass. If you are using a large pan, pour the entire mixture into the bottom of the pan.
- Chill the first gelatin layer: Place the tray of glasses or cake pan into the refrigerator to set for about 15 minutes. If you’re in a hurry, place it in the freezer for about 8 minutes, but don’t let it freeze completely! (Note: the timing might be slightly different if you are using a baking dish or bundt pan. When you touch the top of the gelatin with your finger, it should feel mostly set, but it’s okay if your finger leaves a slight mark in the top.)
- Add dairy to next bowl of gelatin, layer, and chill: Once the first layer is set, make sure the second bowl of gelatin is room temperature. Whisk in the yogurt and milk until creamy. Pour the second color on top of the first, and chill for another 15 minutes, until mostly set.
- Finish layering the gelatin: Proceed to mix, layer, and set the remaining colors of gelatin. (Note: the bowls of gelatin should still be fine sitting at room temperature, but if you notice setting around the edges, microwave the bowl for 10 seconds and whisk well to make sure it’s fluid before adding the dairy.)
- Refrigerate until fully set: After all 5 colors have been layered, refrigerate the cups or pan for at least 4 hours to fully set the layers before decorating and serving.
- Cover until ready to decorate: This dessert keeps very well in the refrigerator, so you can prepare the cups or cake several days in advance. Before beginning the extended setting period in the fridge, cover the top(s) with plastic wrap to prevent drying out.
- Finish: A few hours before you want to serve the gelatin, top each cup with a swirl of whipped cream, and whatever sprinkles or other decorations you’d like! If you are making a gelatin cake, whipped cream can be spread evenly over the set layers and decorated as desired. Enjoy!
💡Tips and FAQs for Success
Pastel Rainbow Gelatin Cups is a SugarHero fan favorite! Through the years, readers have had a few questions, and I’ve compiled the answers below to make sure everyone can be successful. Check out these tips and tricks before getting started, and your cups are sure to turn out beautifully!
You can use any brand and any flavor of fruit-flavored gelatin. The gelatin must be flavored and sweetened do not use unsweetened gelatin packets!
You can use sugar-free gelatin, which uses sugar replacers instead of granulated sugar. Be aware that packages of sugar-free gelatin weigh less than 3-ounces since the sugar substitute weighs less than sugar. The recipe card uses the weight measurement for standard gelatin so don’t worry if the sugar-free varieties are less; you can still replace the regular gelatin with sugar-free gelatin 1:1.
I also used standard flavors, with one exception. The regular strawberry and raspberry flavors available all produced a bright pink color—not pastel enough for me—so I used a “natural” strawberry lemonade variety I found, made with natural food coloring. This color was much softer and gave me a nice subtle pink. If you can’t find something similar, your pink color might be brighter than mine. I found the natural flavor at my local Target, and it was made by Jell-O.
Here’s the secret for turning bright gelatin pastel: dairy!! You need an opaque dairy product to make that soft pastel color.
In this recipe, the secret weapons for pastel-izing gelatin are vanilla yogurt and milk. These mellow the strong fruit flavor of the gelatin, while also giving it a creamier texture and making it a beautiful soft, opaque color.
The only color that proved to be a little tricky was light pink. I found that standard strawberry and raspberry gelatin was still brighter than I liked after mixing in the dairy. If you really want the soft pink as shown in my cups, you’ll want to look for a red gelatin that uses natural food coloring. I used a naturally colored strawberry lemonade variety I found at Target that was made by Jell-O. If you can’t find something similar, your pink color might be brighter than mine, but your cups will still be gorgeous.
Great questions! It doesn’t really matter what style of yogurt you use as long as it has a neutral flavor (you want something that will taste good with any flavor of gelatin you choose to use). I like the taste of vanilla yogurt, but you could also use other flavors—plain yogurt works fine, or another fruit-friendly flavor, like coconut, would probably be very good.
It’s also fine to use regular yogurt or Greek yogurt. If you like your desserts a little tangy, try swapping in sour cream instead of yogurt!
Make ahead: Gelatin is a GREAT make-ahead dessert. You can make this recipe up to a week in advance. The biggest problem with gelatin desserts in general is that the top dries out and gets rubbery, so be sure that you individually wrap each cup well, to keep the tops from getting dry.
The other concern with these cups is the dairy used. If you are making them in advance, be sure to use fresh yogurt and milk, so that spoiling dairy is not a concern.
It’s also best to decorate them just before serving (a couple hours in advance is fine) because the whipped cream and decorations will not hold up to prolonged storage.
Storage: Return leftovers to the refrigerator as soon as possible and keep well wrapped. Eat within 2 days for best taste and texture.

Browse More:


🌈 COLORFUL RAINBOW DESSERTS 🌈
We’ve rounded up 23 of our FAVORITE rainbow dessert recipes & ideas that are sure to make you smile — click here to get all the recipes!


My kids had so much fun with these! We are going to make them again to bring over to family’s for Easter! 🙂 Thank you!
I love hearing that your kids enjoyed making these! Thank you for your comment Kris!
I love the pretty paste colors! Such a perfect treat for my kids to have this Easter. I know they’ll enjoy this!
I love the pastels too! Happy Easter!
I’m so impressed with how you made these! They are so pretty and festive…what absolutely perfect delight for Easter to surprise everyone with.
Thank you Catherine! I hope your guests enjoy them 🙂
cute but flawed recipe. the mixture will curdle (based on personal experience) if you use ONLY milk. maybe not if combined with yoghurt first, but milk alone will curdle the jello. best NOT to use it at all. you should use cool whip, yoghurt, condensed or evaporated milk so it doesn’t curdle. not sure about plant based milk. recipe should be clarified/ updated regarding milk
Hi, I’m sorry to hear the recipe did not turn out for you. The recipe specifically calls for both milk and yogurt for that very reason. We always want our recipes to work for every one, but can’t anticipate every change, omission, and variation someone might try. Thank you for sharing your results so that other readers can be advised to not try to make it without yogurt or sour cream.
You have many wonderful looking recipes. I am looking forward to using them.
Thank you Linda! I’m so glad you stopped by and found some inspiration. Thanks for leaving a comment!
Should I double the recipe if I’m using a 9×13 dish for the pastel jello cup recipe? Or can this be made using a jello mold… looks adorable
Hi Deb! I’ve got information about how to make it in 9×13, 9×9 pan or a bundt pan (jello mold) on the blog. You won’t need to double the recipe for any of the pan sizes. For future reference you can find all this information at the bottom of the recipe card, but I’ll include it here for you as well.
If you use a bundt pan/jello mold (10-12 cups), make sure you grease it well. After the gelatin is completely set, the pan can be inverted and the gelatin popped out, just like a cake. Cut that baby into slices and enjoy!
If you use a 9×9 square or 9×13 rectangular baking dish, make the recipe as directed. The smaller pan will produce big tall pieces, while the pieces from the larger pan will be much thinner. This is a good choice if you want to stretch the serving size or if you’re making this for young children.
Let me know if you have any other questions. All the best to you!
Very disappointing! Never achieved the pastel colors as shown in the picture. ALL my colors stayed dark and I followed the recipe exactly! Did NOT look Eastery at all with the dark colors. All that work for nothing! Huge disappointment!
Hi Cheryl. I’m so sorry your colors stayed dark after following the recipe. I understand how disappointing that can be. Let me see if I can help you troubleshoot a little. What type of dairy did you use (what type of yogurt or sour cream, brand and style)? Also, what brand/flavors of gelatin did you use? I’ve experimented with a lot of different brands/flavors and have only had problems with getting the light pink color which is noted in the blog in the FAQ section and on the recipe card. I’m happy to experiment with what you used to see if there are new products that are harder to work with. All the best to you!
It is an easy recipe It looks fantastic and it is delicious
Thank you
So glad you enjoyed the recipe Gisele! Thanks for leaving a review and 5-star rating. We hope you had a wonderful Easter.