Customized Chocolate Molds allow you to create the perfect size candy, hard-to-find shape, or meaningful object for any baking project. These molds are fun and surprisingly easy to make!

I own a lot of candy molds. It’s practically a requirement for a candy writer—plus, they’re so inexpensive, it’s easy to buy one here or there and not realize there’s a problem until I’ve amassed a small Mount Everest of candy molds on top of my kitchen shelves. Between candy supply stores and the internet, it’s not hard to find a mold for almost any occasion.
But what if you need a certain size, or a hard-to-find shape, or want to make a personalized mold from a sentimental object? Then it’s time to put your crafty pants on and make your own chocolate mold!

Lately I’ve been experimenting with making my own chocolate molds, and it’s really fun (and surprisingly simple!) I’m going to feature a few upcoming recipes with customized chocolates, so before I post those, I thought it would be helpful to devote a whole post explaining how I make the molds.
There are some methods for making molds that don’t require much in the way of specialized ingredients. For instance, this post explains how to make a chocolate cast out of common kitchen ingredients like brown sugar, powdered sugar, flour, etc. Although I’ve had a little success with these methods, the end result is invariably messy and imprecise. To get really good, clean results, we’re going to have to call in the big guns and buy silicone to make our own silicone molds.

I bought my silicone online from Make Your Own Molds (not an affiliate link or sponsored post). They have several different types, but what you’ll see in this tutorial is Silicone Plastique. There are other suppliers and types out there, so if you go with a different brand, be sure to follow their instructions in case they’re different than the method I’m using here.
Silicone Plastique is sold by the pound, and comes in two parts: a blue part and a white part. (And yes, that is the extent of my scientific knowledge about this product!) So if you order one pound, you’ll get 8 ounces of each. Start by measuring out equal amounts of the white and blue. If you don’t have a scale, you can also measure them out by volume. After they’re mixed together they can’t be stored and re-used later, so try to estimate how much you’ll need and don’t mix up more than what’s required.

Next, knead the blue and white together until it’s a solid color, without any streaks. It’s a nice soft dough, a bit like Play-Doh but less sticky (and without that Play-Doh smell!). Once the two components are mixed together, you have a work time of about 15 minutes in which to make your mold, and then it needs about an hour at room temperature to cure before you can start using it.

Press a very thin layer of Plastique onto the surface of the object you’re going to mold. This step is crucial to making sure that you get a high level of detail—just jamming the object into a clump of Plastique isn’t going to get you great results. So pinch off small pieces and press them firmly into the surface, until the entire front is covered.
In this example I’m molding this Cameo Brooch, but let’s pretend that it’s a meaningful family heirloom instead. Almost anything can be molded, although you should use good judgment—some textures, like furry or hairy fabrics, won’t turn out well, and objects that don’t have a raised surface won’t give you the level of detail you see in these pictures.

So after the surface is covered with a thin layer, you want to press it into a thicker layer of Plastique. I tried this two ways: by just forming some Plastique into a glob and pressing the object on top, and by molding the Plastique in a small container before adding the object. I liked the container method better—I felt like it gave me more control, made it easier to get a thinner layer of Plastique underneath the object, and has a slightly neater result.
In this example, you’ll see I used a small measuring cup, but any appropriately-sized container will work. Add enough Plastique to make a layer about a quarter-inch thick.

Press the object firmly into the Plastique, until the back is flush with the top of the silicone. (Remember, you need to be doing this within your 15-minute window, so it will bond properly with itself.) Run your fingernail, a knife, or a razor lightly around the edge, removing any Plastique that overlaps the back, and making a clean edge for the top of your mold. Let it set for at least an hour at room temperature.

After an hour, you’re ready to see magic happen! Pop that baby out of the measuring cup, then gently pull the object away from the mold. You now have a sturdy, flexible mold that can be used for chocolates, hard candy, gelatin, ice, soap, and on and on…

I’ve only tried the mold with chocolate so far, and it works great. I will say that the thinner the mold is, the more flexible it is, which makes it easier to unmold delicate shapes without any breakage. The big downside to this method is that you end up with only one cavity, so if you need to make a large amount of candies, you’ll either have to make more molds with the same object, or spend a long time making them one at a time. It’s worth it, though, to get this custom level of detail:

If you want to make a solid color, all you have to do is pour in your chocolate and let it set. But if you want to achieve a multi-colored effect, like you see on these cameos, you’ll want to do a little painting first. Melt your chocolate of choice (I’m using candy coating in this example) and paint your mold using a small paintbrush. I like to get tiny brushes from the craft store for this purpose.

If you’re using multiple colors, repeat this step until all the parts of the mold are painted the color you want. I didn’t refrigerate the mold in between steps, but if your colored areas are very close together, or your colors are smearing, you might want to try a brief chill in between.

Finally, pour in enough chocolate just to come up level to the top of the mold, and tap it against the counter a few times to spread it into an even layer and get out any air bubbles. Refrigerate the chocolate for 10-15 minutes, then gently flex the mold to remove it.

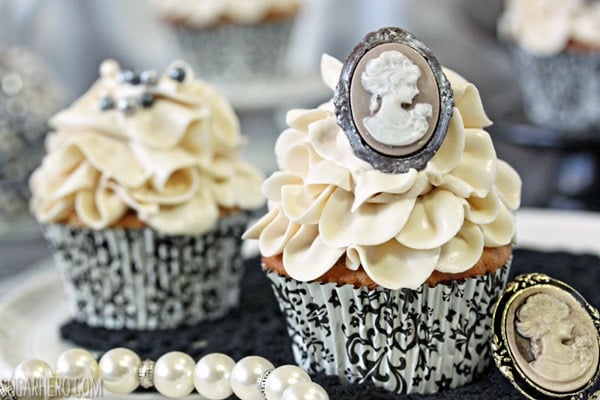
That’s it! You can now make some gorgeous custom chocolates. It’s fun to do this with just about any random shape, but this is also a great way to make something really meaningful for someone you love. Imagine molding some sentimental jewelry, medals, or other keepsakes to commemorate a birthday, anniversary, or other special occasion. (Again, using your best judgment!) I used my cameo chocolates to embellish my Earl Grey Lavender Cupcakes and they were so elegant!
I hope this tutorial is helpful, and I would love to see what you make if you give it a try!
🤎More Chocolate Tutorials
- How to Temper Chocolate
- How to Make Chocolate Leaves
- How to Make Chocolate Feathers
- How to Make Chocolate Bowls
- How to Make Chocolate Flowers
- How to Make a Chocolate Rose
This post contains Amazon affiliate links. For more information, see my Affiliate and Advertising Policy.


what about a mold that allows you to fill a chocolate with ganache like truffles, in a ball or other shape? Have you done anything like that?
Thank you 🙂
Hi Guy, I haven’t tried a 3-D mold like you’re describing with the sphere shape. My guess is that it would be hard to unmold the spherical objects from the mold once it’s set. Most 3-D molds are done in 2 parts but I think that it would be difficult to get the 2 pieces to fit together perfectly. All of which is to say, I haven’t tried it but would be curious to know how it goes if you give it a try!
Use modelling clay, or even Play-doh, as a base. Fill the bottom half of an appropriate container with the stuff, then press whatever you wish to mold “halfway” into the clay, i.e. to its mid-point. Coating the object in vaseline first will make it easier to remove later. Use four glass marbles or something similar, spaced around the object, as well. (The impressions these make will later act as “guides” when fitting the two halves together.)
Then proceed with the steps for making a mold, as noted above. When that first half sets, flip the whole project over and remove the clay or Play-doh. You’ll want to remove the marbles or whatever you used at this point, as well, but leave the object in the silicone of course. Now use vaseline to coat all exposed silicone. This will keep the new silicone from sticking to the old. Repeat the silicone process.
When it’s all cured, you should be able to easily seperate the two halves (due to the vaseline). One half should have marble-sized indents, the other marble sized protrusions, and those will ensure that both halves line up perfectly.
Hope that all made sense. It’s much easier with pictures, but probably you get the idea.
That’s a really great idea. I’d want to check on how food-safe modelling clay or Play-Doh is, but the general method makes a lot of sense. Thanks Jay!
that’s really so creative and interesting .. I’d like to do this soo 🙂 thanks
Thanks Sam! Let me know how it goes if you give it a try!
Hi I love this post. I can’t tell you how at hours I have spent finding molds of all sorts for my kids parties and spent way too much money too but this has opened my eye. I live in maui so I can’t afford to wait for a product to be mailed to me.that being said hoping to find it at Home Depot. Have you made a sheet of molds to make many molds at a time or lollipops etc? If you have pls share. Also do you have a preference for brand of products? Can you use these molds for candy,chocolate and to make things like Pokémon characters ??lolMahalo !!
Same question as Jennifer
Have you made a sheet to make chocolate lollipops?
I like that you provided some tips and instructions on how to make your own chocolate molds. It looks pretty simple to do especially when you provided some illustrations that serve as a helpful guide. I wish I could try it out myself if only I had the proper materials. In the meantime, I’ll probably just look for candy molds available for purchase online. Thanks for sharing this, though.
Thank you!!!!
What a amazing molds! Nice information. Thank you so much for sharing this excellent method and skill for me. I love to do different types of things and experiences.
Hey Evan, Thanks so much for following along. I love hearing that you enjoy this!
Hi! I was wondering if you have found anything similar that is made out of a compostable or infinitely renewable material? In that case I’d be thrilled!
Thanks for a great post!
Hey Julia, I haven’t really looked into that so I can’t say for sure. If you find something that works I would love to hear! My apologies! Good luck!
What an enjoyable read!
Thanks!
this was super helpful and well written, thanks for keeping it simple and to the point
Thank you so much, Sarah! I’m glad you found it helpful. 😀