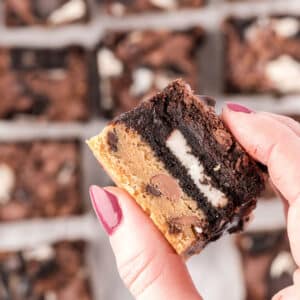
These Tuxedo Brownies start with an ultra-fudgy base packed with white and dark chocolate chunks. They’re topped with a whipped white chocolate-vanilla bean frosting, then finished with a shiny chocolate glaze with beautiful white chocolate ripples.

Maybe you took one look at the gluttonous Bronuts I posted earlier this week and had a small heart attack.
“Well, I never! What are desserts coming to these days! Bacon and potato chips and Sriracha? Filth, utter filth! Jeeves, pass me my smelling salts!”
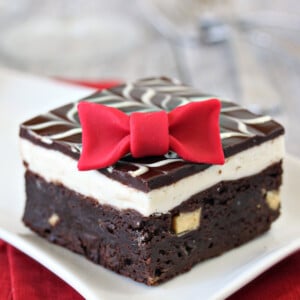
It’s okay, Lord Fussbudget Highnmightypants, I’ve got you covered too. Allow me to present, for your most excellent viewing pleasure, a dessert on the opposite end of the fancy spectrum: Tuxedo Brownies. (With an actual edible bow tie, natch, because I am painfully, literally, and more than a little cheesy.)

This one’s for all the people out there who know the exact purpose of every mysterious fork at the dinner table. Who wouldn’t dream of drinking tea without their pinky out. Who have a spare set of pince nez, just in case something happens to their first pair. Who always wear a tuxedo after 6 pm, because what are they, farmers? Yes, I’ve made these Tuxedo Brownies just for you.

So why are they called Tuxedo Brownies? Well, in addition to the fact that I’m on a Father’s Day kick and thought it would be cute, I was thinking of tuxedo cakes when I came up with them. A tuxedo cake is typically a chocolate cake with white buttercream or whipped cream, finished with a shiny chocolate glaze dripping down the sides. Upcoming holiday + riff off an existing dessert = Tuxedo Brownies are born!
The brownies start with an ultra-fudgy base packed with white and dark chocolate chunks. They’re topped with a whipped white chocolate-vanilla bean frosting, then finished with a shiny chocolate glaze with beautiful white chocolate ripples. (See how the ripples are made here.) And the bow ties! Oh, the bow ties.

Of course the bow ties are completely optional. They add zero flavor, and I won’t object if you roll your eyes and scroll on by. However, if you’re like me and the thought of putting an actual bowtie on a Tuxedo Brownie absolutely tickles you, here’s how you do it!
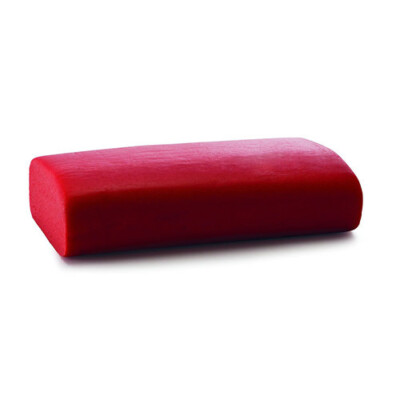
This is my method for making tiny bow ties, and it couldn’t be simpler. The short version is: Roll, Cut, Pinch, and Wrap. Take a ball of fondant and roll it out until it’s about 1/8” thick. Cut it into a small rectangle (mine were about 1 3/4” x 3/4”) and a small strip. Pinch the rectangle together in the middle, then wrap the strip around it and pinch it together in the back. Make any adjustments you need to, like pinching the bow tie’s corners, until it’s a shape you like. Voila!

These are outrageously rich, super substantial and satisfying, and so gorgeous! Serve them in small slivers as part of a dessert tray, or plate them with a big scoop of ice cream for the perfect finish to a special meal.

🤎More Brownie Recipes
- Brown Butter Brownies
- Chocolate-Orange Brownies
- Nougat-Stuffed Brownie Bites
- Peanut Butter Cup Brownies
- Brownie Lava Bites
- Ultimate Fudgy Chocolate Brownies
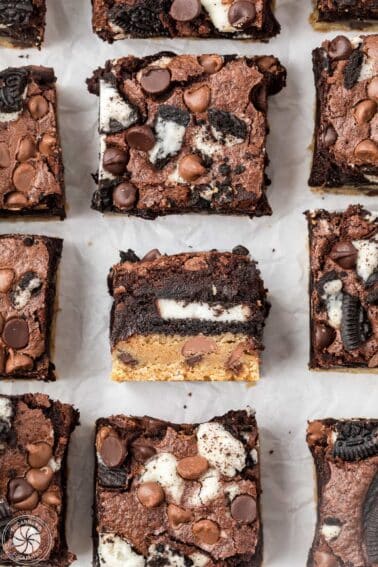
Oreo Brookies

Seven Layer Bars
Tuxedo Brownies
Ingredients
For the Brownies:
- 12 oz semi-sweet chocolate, finely chopped
- 4 oz unsweetened chocolate, finely chopped
- 8 oz unsalted butter, cubed
- 10.5 oz granulated sugar, (1 ½ cups)
- 4 large eggs
- 1 tsp vanilla extract
- 4.25 oz all-purpose flour, (1 cup)
- ½ tsp salt
- 6 oz white chocolate chunks, (1 cup)
- 3 oz chocolate chunks, (1/2 cup)
For the White Chocolate Frosting:
- 6 oz white chocolate, (1 cup), finely chopped
- 8 oz unsalted butter, (1 cup), at room temperature
- 12 oz powdered sugar, (3 cups)
- 1/4 tsp salt
- 1 tsp vanilla bean paste, or 2 tsp vanilla extract
- 2 tbsp heavy cream
For the Chocolate Glaze:
- 6 oz semi-sweet chocolate, finely chopped
- 3 oz unsalted butter, (6 tbsp), cubed
- 1 tbsp light corn syrup
- 2 oz white chocolate, (1/3 cup), finely chopped
- 1 tsp vegetable oil
Instructions
To Make the Brownies:
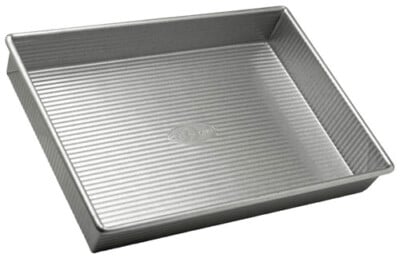
- Preheat the oven to 350 F. Line a 9×13-inch pan with foil, extending the foil up and over the sides, and spray the foil with nonstick cooking spray.
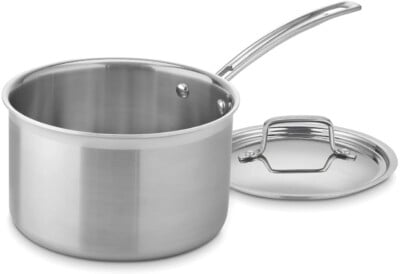
- Place the finely chopped chocolate in a large saucepan, and gently heat it over low heat, stirring often, until it is nearly melted. Add the cubed butter and stir it in until the butter is melted. Remove the pan from the heat.
- Add the granulated sugar and stir it into the chocolate—it will become grainy. Add the eggs one at a time, whisking well after each addition. Add the vanilla extract, and continue to whisk until the batter loses its grainy texture and becomes smoother and thicker—it will start to clump together and feel thick like chocolate pudding. This may take several minutes of whisking, but this process gives the brownies a better final texture.
- Finally, add the flour and salt, and stir it together with a spatula. Add the two types of chocolate chunks, scrape the batter into the prepared pan, and smooth it into an even layer. Bake the brownies at 350 F for 30-35 minutes, rotating halfway through. Bake until a toothpick inserted into the center is no longer gooey but still has moist crumbs attached. Cool completely before adding the frosting.
To Make the White Chocolate Frosting:
- Place the white chocolate in a medium microwave-safe bowl. Microwave in short bursts, stirring frequently, until the white chocolate is melted and smooth. Set aside until it is completely cool to the touch.
- Combine the butter and powdered sugar in the bowl of a large stand mixer. Cream them together until light and fluffy, scraping the bottom and sides of the bowl occasionally. Add the vanilla and cream, and beat them into the frosting. Finally, add the melted (and cooled!) white chocolate and beat it in until the frosting is nice and fluffy. If it seems too thick, add a bit of cream to thin it out, and if it seems too soft, add more powdered sugar until you have a nice spreadable consistency.
- Spread the frosting on top of the cooled brownies in an even layer, and chill for at least 30 minutes before adding the chocolate glaze.
To Make the Chocolate Glaze and Assemble:
- Combine the chocolate, butter, and corn syrup in a medium bowl. Microwave in 30-second increments and stir well until the mixture is melted and smooth. Set aside.
- In another small bowl, combine the white chocolate and vegetable oil and microwave, stirring frequently, until melted. Transfer this white chocolate mixture into a ziplock plastic bag and snip a small hole in one corner.
- Now, pour the chocolate glaze (previously set aside) on top of the brownies and smooth it into an even layer. Use the small plastic bag with the white chocolate mixture in it to pipe white chocolate lines across the pan, spacing them about 1/2-inch apart.
- Take a toothpick and drag it through the lines, creating ripples, then when you reach the far end of the pan, reverse direction and drag it back the other way. Continue until you've created a wavy pattern on top of the brownies. Chill the pan for at least an hour, to set the frosting and glaze completely.
- Lift the brownies from the pan using the foil as handles. Use a sharp knife to cut the brownies into small squares. For the cleanest cuts, cut them when they’re still cold from the refrigerator, but for the best taste and texture, let them come to room temperature before serving. For maximum cuteness top them with a small fondant bow.
Recipe Notes
Measuring Tips
Our recipes are developed using weight measurements, and we highly recommend using a kitchen scale for baking whenever possible. However, if you prefer to use cups, volume measurements are provided as well. PLEASE NOTE: the adage “8 oz = 1 cup” is NOT true when speaking about weight, so don’t be concerned if the measurements don’t fit this formula.
Want to learn more about baking measurements and conversion?


I can always count on you to never pass up on a “what am I, a farmer?” reference. FIST BUMP!
These look so delicious, and those little bows? Good god, LaBau (picture Alec Baldwin saying “good god, Lemon”), you just won Pinterest forever.
I knew you would come through with the 30 Rock reference. Jack Attack!
Wow are these gorgeous! What cute little bow ties! I may try to wear them instead of eat them… 😉
Hah, I’m into that! Fondant bow ties for everyone. Thanks SaraLily!