
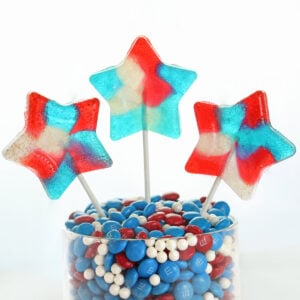
Making lollipops at home could not be faster or easier than this! These Easy Homemade Lollipops use a shortcut technique to make beautiful homemade hard candy in just a few minutes. Plus you can customize them with whatever colors, designs, or flavors you’d like!

🍭Quick and Easy Lollipops
If you’ve ever been intimidated by the thought of making your own hard candy, have I got a recipe for you! Actually, “recipe” might be overstating things–it’s more of a technique (dare I say a hack?) for creating gorgeous, customized hard candies in just a few minutes!
Most traditional lollipops are a pain to make. You have to make a sugar syrup, boil it carefully to prevent crystallization, use a candy thermometer, watch it like a hawk, and heaven help you if you undercook or overcook the syrup.
This method? This method is almost insultingly simple. If you can unwrap cellophane wrappers, you can make these lollipops!
Table of Contents

📃What You’ll Need to Make Easy Lollipops
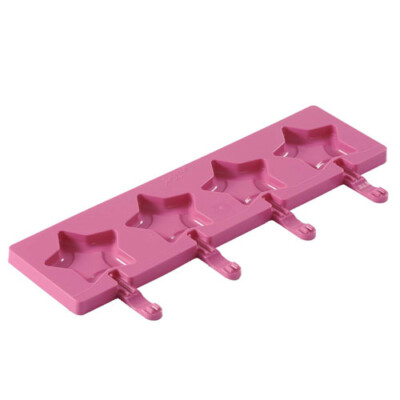
You’re going to need an oven-safe, silicone lollipop mold. Make sure that the packaging says that it’s heat safe. Some molds LOOK like thy might work, because they’re made of a similar flexible plastic, but they might just be intended for chocolate or ice or other non-oven uses. So check the label carefully!
- Silicone Star Lollipop Mold. This is the mold I used. It makes 4 generous lollipops at a time, and is sturdy and easy to clean. Make sure that you wash and dry it well before you use it.
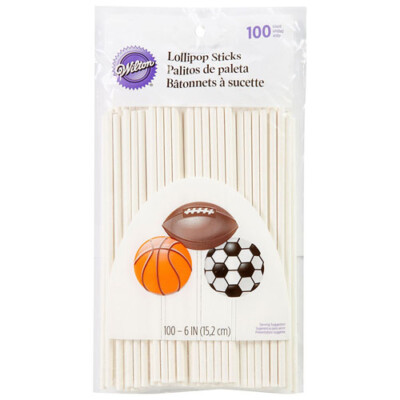
- Lollipop Sticks. You’ll also want to pick up a package of lollipop sticks before getting started.

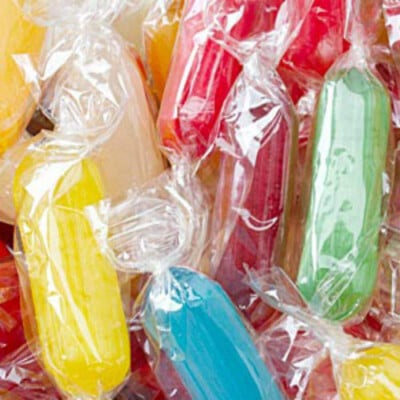
Next, you need to gather your hard candy. Almost any hard candy will work–I’ve tried everything from cheap dollar store generic brands to Starlight Mints to big bags of Jolly Ranchers, and they all work well. The only thing that HASN’T worked for me is rock candy–for some reason, it just doesn’t melt! But most hard candies that you buy at the store should work.
If you’re going to combine colors/flavors like I did here, I recommend using fruity flavors so that they all blend well together. You probably don’t want to eat a lollipop that is a mix of pineapple, berry, and menthol, for instance.
- Assorted Hard Candy Rods. Here’s my pick for an assorted bag of candy to use. There’s a lot of different colors and flavors in the mix, almost all of which will work well together.

📸Photo Tutorial: How to Make Homemade Lollipops
Herer’s everything you need to know to make beautiful Homemade Lollipops! Full instructions are included in the recipe card down below.
Prep the Candy Molds
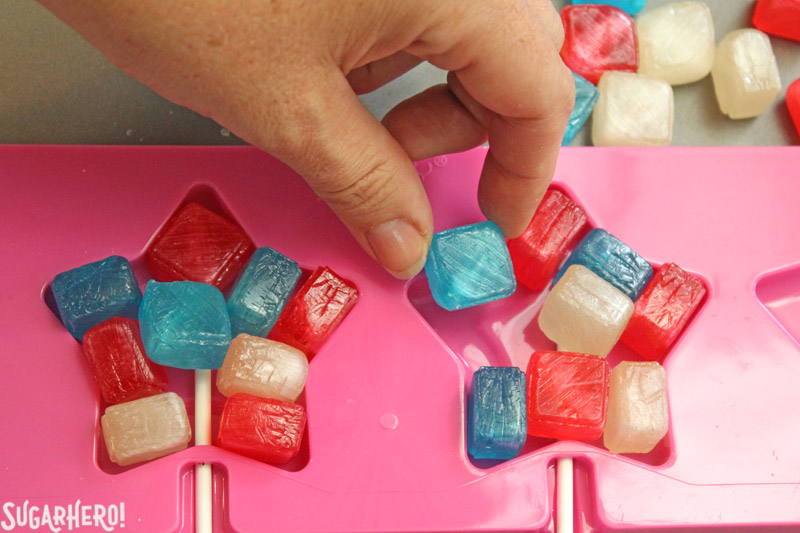
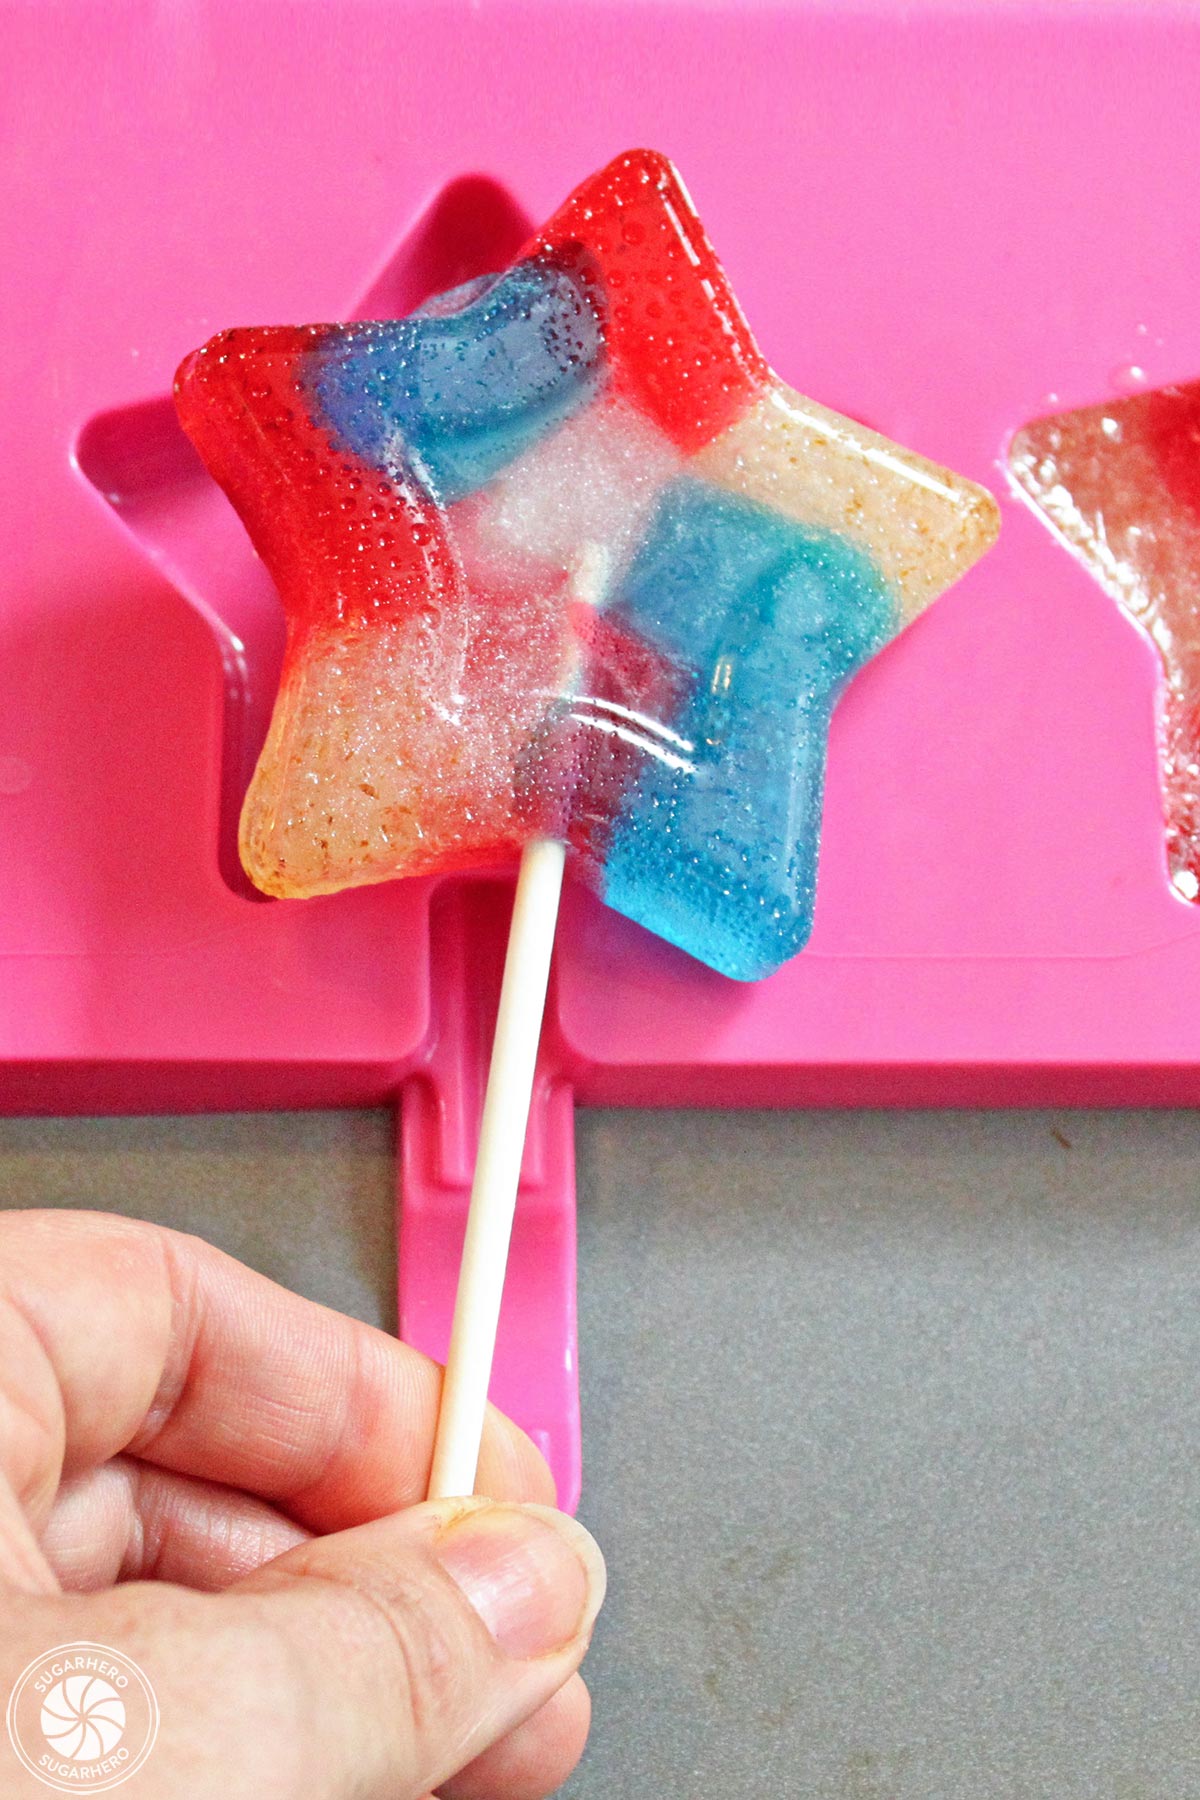
- Here’s the secret to making these easy lollipops: you just pile a bunch of hard candy into the oven-safe mold, and bake it at 350 F just until the candies melt together.
- For these lollipops I wanted bigger “chunks” of color, so I left the candies whole and just wedged them next to each other in the flexible mold.
Experiment With Different Techniques
- You can also crush the candies before putting them in the mold, like I did in this Agate Cake tutorial–check out that post to see how it’s done! Using crushed candies allows you to make really small pockets of color or swirled effects.
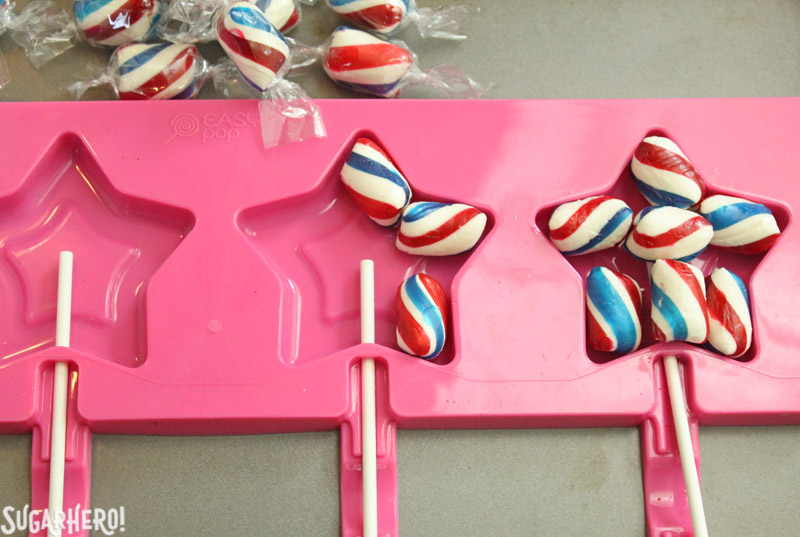
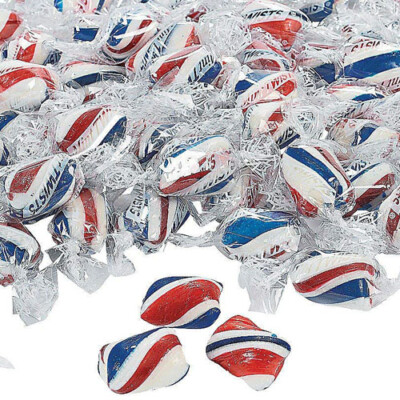
- And if you’re wondering whether this works with other candies, like starlight mints or mint twists? Heck yes they do! You’ll get this cool swirled effect pictured above with zero work!
- Be sure to add more candies than you think you need, and pile them up above the edges of the mold. When you bake the candies and they melt together, the spaces between them disappear, and you’ll be surprised at how thin you candy layer actually is. So compensate by piling those candies high in the mold!

Bake
- Watch them carefully while they bake–the recipe below includes time suggestions, but because every brand/type of candy is different, and different sized molds will produce different results, you’ll want to keep a close eye on the first batch. Bake them until they’re melted together and juuuuuust starting to bubble. Don’t let them bubble too much, otherwise your finished candy will show the bubbly texture!
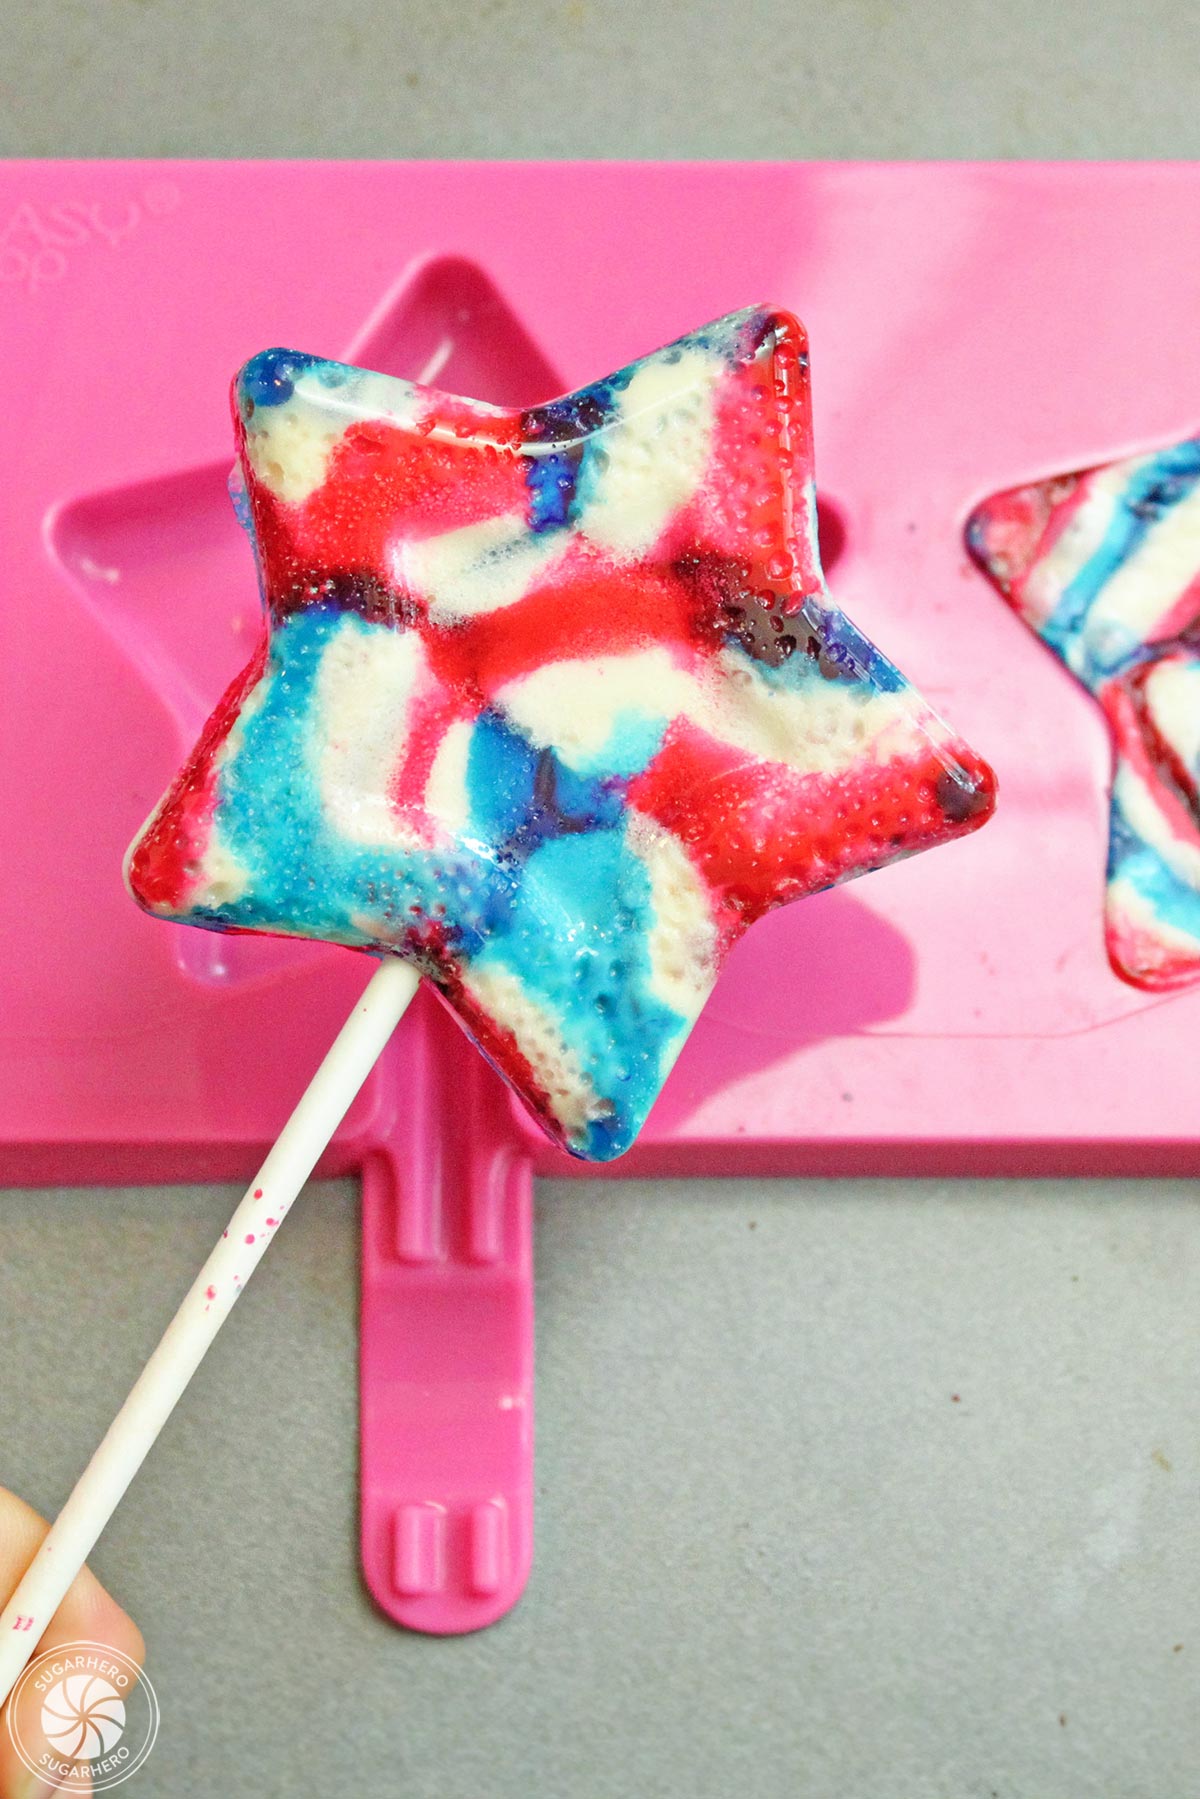
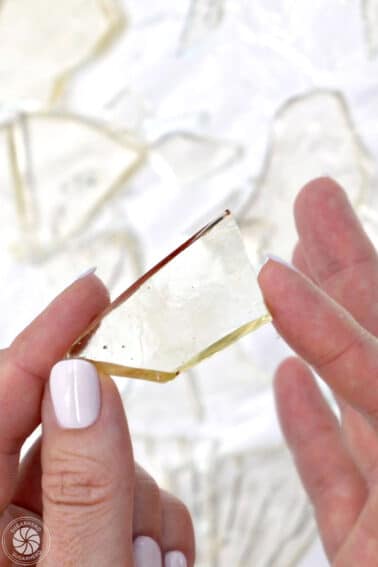
- Let them cool at room temperature, then you can pop them out of the molds and enjoy!

💭Variations
And OF COURSE you can use this technique with non-lollipop silicone molds too! Make custom hard candies with your favorite flavors, in solid colors or beautiful patterns, in just the time it takes you to unwrap and bake some candy.
🧨More Patriotic Desserts
Celebrate the Fourth of July with a bang!
- Fourth of July Layer Cake
- American Flag Layer Cake for the Fourth of July
- Stars and Stripes Sugar Cookies for the 4th of July
- Homemade Fruit Popsicles
- Exploding Cupcakes
- Red White and Blue Cupcakes
Still looking for more inspo? Check out my collection of 35 Fun and Festive 4th of July Desserts!
Leave a Review!
If you make this recipe, let us know! Leave a ⭐️⭐️⭐️⭐️⭐️ rating on the recipe below, and leave a comment, take a photo and tag me on Instagram @elabau, or use #sugarhero on IG!
Easy Homemade Lollipops
Ingredients
- Oven-safe silicone mold
- Lollipop sticks
- Hard candies, I used about 2 oz candy per lollipop
Instructions
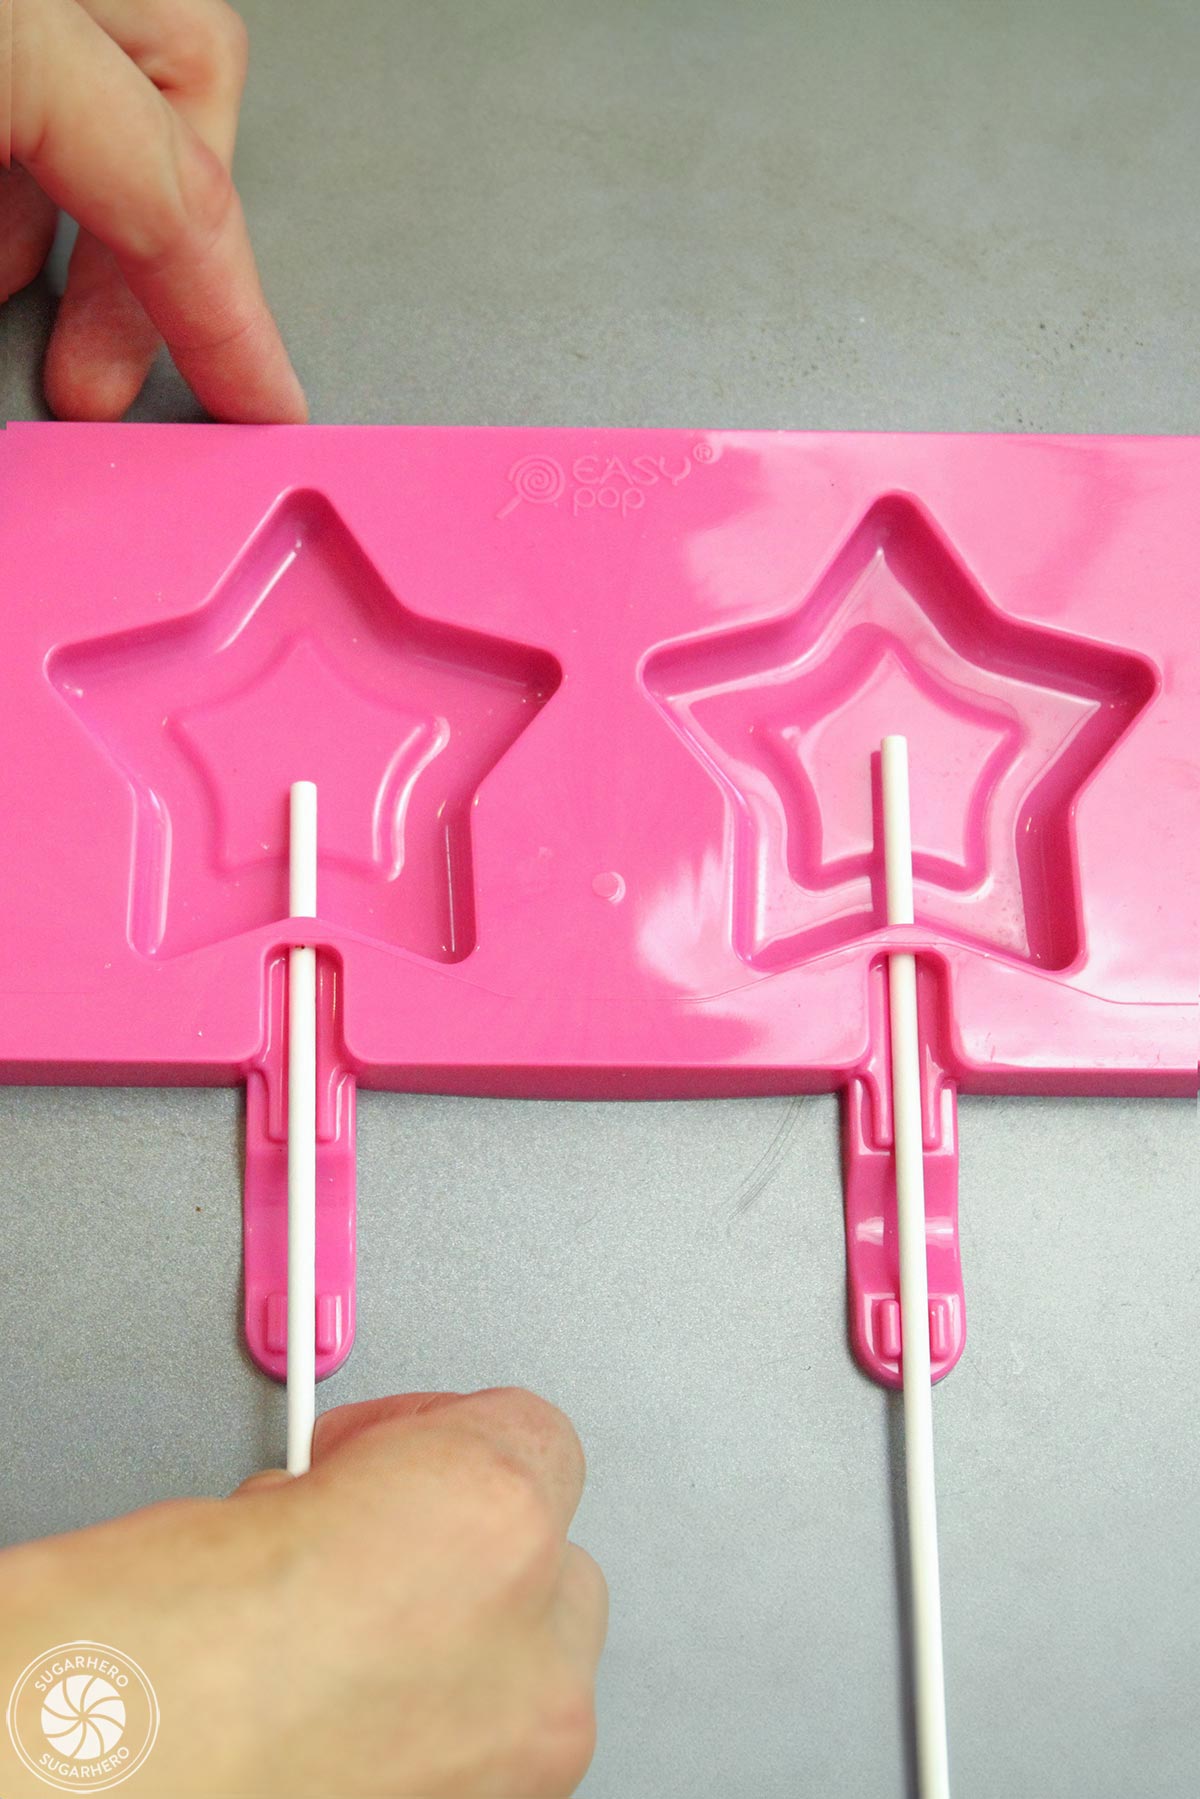
- Wash the silicone mold in hot, soapy water, and dry it well. Place it on a baking sheet, and insert the lollipop sticks into the mold. Preheat the oven to 350 F/176 C.
- If you want smaller pockets of color or swirled colors in your lollipops, divide the candies by color. While they are still in their wrappers, use a meat mallet, rolling pin, or other large, heavy object to crush them into small pieces—the closer you can get to candy dust, the better! Undo the wrapper and pour the crushed candies into small bowls, divided by type of candy.
- If you want larger pockets of color, or if you’re making lollipops that are just a solid color, simply unwrap them from their cellophane wrappers.
- Pile the candies (or candy dust) into the clean, dry molds. For the dust, I recommend layering big pinches of different colors of candies next to and on top of each other—if you use a small pinch, they won’t be distinct colors. For the whole candies, just jam them right next to each other. The molds stretch, so don’t be afraid to squeeze the candies close together, and pile them up above the edge, because they will reduce down as they melt.
- Bake the molds on the baking sheet at 350 F. For larger, thicker lollipops it might take 10-12 minutes, but for smaller, thinner lollipops it might only be 5-6 minutes. The first time you use your particular mold, check the candies every few minutes and watch as they melt together. Remove them from the oven when they’re completely melted but bubbles have not yet formed all around the edges.
- Let the candies cool completely at room temperature before carefully unmolding the lollipops. If you’re not eating them right away, wrap them in plastic wrap or cellophane to prevent stickiness.
Recipe Notes
Measuring Tips
Our recipes are developed using weight measurements, and we highly recommend using a kitchen scale for baking whenever possible. However, if you prefer to use cups, volume measurements are provided as well. PLEASE NOTE: the adage “8 oz = 1 cup” is NOT true when speaking about weight, so don’t be concerned if the measurements don’t fit this formula.
Want to learn more about baking measurements and conversion?
Nutrition


It came out beautiful besides that my sticks melted in the oven. Do u put the sticks in before or after u have made them.. from ur pictures it looks like u baked with them in already… felt a bit sad for that part. Will try again next time
hello my name is miss pat im 74 years old i can very well my family loves my dinners i just dont get my baking goods to great cakes /cupcakes/candy / pies/brownies just deserts right i use too anyway i would like to get some help .my family would be happy smile thank you so much i love your work you go girl smile.
Hello Miss Pat! What kind of help do you feel like you need?