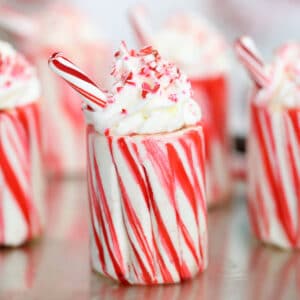
These cute Candy Cane Cups are edible shot glasses, made entirely out of candy canes! Make your own candy cane shot glasses at home, and then fill them with your favorite holiday cocktail, coffee, hot chocolate, or even whipped cream or mousse. The possibilities are endless!

These cute, shot glass-sized cups are made entirely from candy canes! All you need is the right candy mold and a whole bunch of store-bought candy canes, and you’re only 15 minutes away from having these cheerful striped cups. Make them for a party and serve your favorite holiday drinks in a tray full of these. Can you imagine how stunning they are, all lined up together?
My dream world looks a lot like Willy Wonka’s candy factory in Charlie and the Chocolate Factory. You know the one—where you can lick the wallpaper and it tastes just like the fruit pictured, where glossy chocolate rivers flow to chocolate waterfalls, and where everything, absolutely everything, from the trees to the flowers, is edible and delicious.
I’m happy to say that I’m one step closer to making this dream a reality with these Candy Cane Cups.

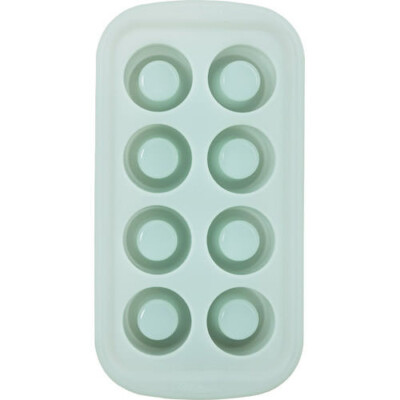
I bought this Wilton silicone shot glass mold a few weeks ago, and I’m already obsessed with it. It can be used for a huge variety of things – making hard candy glasses, like these, but also chocolate, gummy candy, ice (or other liquid glasses), and it’s even heat-safe to 500 F, so you can bake brownie or cookie shot glasses too! (That is an Amazon affiliate link, but this is not a sponsored post. I just want everything in my life to be a delicious dessert. Is that so wrong?) So look out for more edible shot glass recipes in the future!

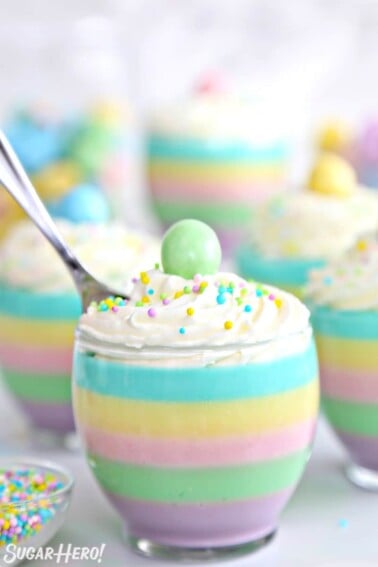
I filled my candy cane cups with some Peppermint Hot Chocolate, a swirl of whipped cream, and of course, a pinch of more candy canes on top. These work for basically any drink, though. Try them with hot chocolate like I did, or coffee, or your favorite holiday cocktail (something with Peppermint Schnapps, perhaps??) or even just fill them entirely with whipped cream or mousse!

The secret to making these candy cups watertight is to really PACK the molds with candy. Since it’s made of silicone it does have some flexibility, so don’t be afraid to shove the canes close together. As they bake they’ll sort of melt into each other, filling in any gaps. If you’ve left too much room between them, you may end up with cracks where liquid can seep out.
The same is true for the bottoms of the candy cups (which are the tops of the molds as they bake). After they come out of the oven, really press down on them with a metal spoon or the flat bottom of a glass, to remove any air bubbles and make sure they’re tightly sealed. As long as you’ve done this, they’ll be solid and you truly can treat them like cups and serve drinks in them without fear of leaks.

Now for the bad news: these cute cups ARE made of sugar, so they WILL get sticky once they’re exposed to liquid! They’re good for several hours of drinking/refilling, but don’t expect to be able to reuse them afterwards. It’s a fun novelty, and I think it’s absolutely worth the effort of making them, just be aware you’ll only get one night’s use out of them.
(That being said, you can definitely make them in advance and store them in a dry, airtight container until you’re ready to use them. The clock only starts ticking once they come into contact with liquid!)

And then? When everyone is done drinking from them? Crunch those puppies up and enjoy a minty mouthful of candy cane, with just the slightest hint of hot chocolate or coffee or whatever else you’ve chosen to serve in them. Willy Wonka, eat your heart out!

💗More Peppermint Recipes You’ll Love
- Peppermint Lava Cakes
- Candy Cane Mousse Cake
- Peppermint Mocha Mousse Cake
- Candy Cane Cake
- Peppermint Hot Chocolate
- Chocolate Candy Cane Cake
- Peppermint Affogato
- Candy Cane Cheesecake
Don’t miss my collection of 35 Peppermint Dessert Recipes!

Candy Cane Hearts

Chocolate Peppermint Kiss Cookies
Candy Cane Cups
Ingredients
- Silicone shot glass mold, (I used this one by Wilton)
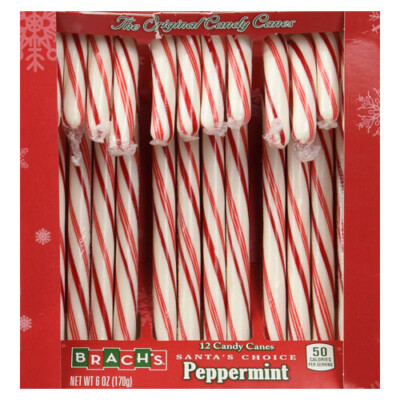
- 48 large candy canes
Instructions
- Before you begin, make sure your shot glass mold has been washed with soapy water, and is clean and entirely dry. Place the mold on a baking sheet, and preheat the oven to 350 F.
- Break the crook off of a candy cane, and remove the plastic wrapping. Set the crook aside for now. Snap the straight part of the cane in half, and place the two halves standing up in one cavity of the shot glass mold. It’s okay if they extend over the top—the candy will shrink lower when it bakes. Continue to fill the cavity with straight pieces of candy cane, until it is entirely full and you can’t fit another one in the mold. (I was able to fit 12 candy cane pieces in each mold.)
- Break the crooks into smaller pieces, and fill the center of each mold with bits of candy cane pieces, coming up to the top of the straight pieces. You will have extra candy cane scraps left over that you can save for another use.
- Bake the candy cane cups in the preheated oven for 12-14 minutes, until the candy has melted together in the cups. You might start to see just a few small bubbles along the edges. Watch it carefully, because you don’t want the candy to turn bubbly and brown. Remove the pan from the oven and immediately use a knife or metal spatula to scrape off any candy that has melted outside of the cups. Use a metal spoon or the bottom of a flat cup to gently press on the candy, to remove any air bubbles and make a completely flat bottom. Let the cups cool completely before proceeding.
- Once cool, turn the cups inside out and gently pull and twist the candy cane cup out of the mold. Fill the cups with your favorite holiday cocktail, coffee, or hot chocolate. You can also fill them with whipped cream or mousse! Once filled, they will start to get soft and sticky, so it’s best not to fill them until right when you’re ready to serve them. Cheers!
Video

Measuring Tips
Our recipes are developed using weight measurements, and we highly recommend using a kitchen scale for baking whenever possible. However, if you prefer to use cups, volume measurements are provided as well. PLEASE NOTE: the adage “8 oz = 1 cup” is NOT true when speaking about weight, so don’t be concerned if the measurements don’t fit this formula.
Want to learn more about baking measurements and conversion?
Nutrition


Hi Elizabeth. I’m SO glad I found you & your site!!! And I can’t wait to make these for Christmas but I’d like to ask if you have to spay the molds with Pam first before adding the candy canes?
I’m looking forward to seeing & learning more about your recipes!
Many thanks.
Susan
And thank you for telling us how many candy canes you used in the molds
Hi Susan! Spraying the molds with Pam is not necessary or recommended. Just make sure to wash and completely dry the molds before getting started and you’ll be good to go!
Hi Elizabeth,
I’m getting ready to make your candy cane shot recipe.
It’s a little early but want to try and get some baking done earlier this year
I bought round, hard candy also and would like to know if I use the same directions for them like your candy cane recipe?
Also can they be frozen?
Sorry for all the questions.
Thank you; I appreciate any help you can give me.
Happy Thanksgiving to you and your family.
Susan
Hi Susan! You can definitely use hard round candy. You’ll just want to make sure that the candy is really packed into the molds. The idea is not to have any gaps between the pieces of candy. You could crush some of the candy to fill in any gaps. Once made, the cups need to be stored in a dry, airtight container until you’re ready to use them. Once they come in contact with liquid (including condensation from the fridge or freezer) they will start to get gummy and will eventually deteriorate. If you live somewhere with high humidity, you can place silica gel packs in the container to help keep moisture away. I hope that helps. Please let us know if you have any other questions. Best of luck!