
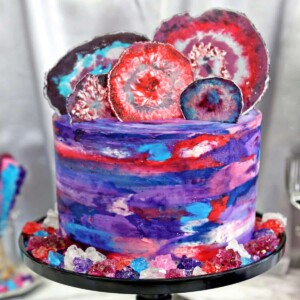
This Agate Cake features gorgeous, EDIBLE candy agate slices on top of a watercolor buttercream cake! It’s a special occasion cake for birthdays, showers, or any time you need a dessert that’s really a show piece!

Even though it’s officially October, it’s not going to be nonstop pumpkin and Halloween desserts ALL the time around here. We need a little break from the orange and the edible blood every now and then, right?! (Or at least that’s what I’m telling myself, since I still have a little stockpile of layer cake recipes + videos I haven’t posted yet…)
This Agate Cake might not be particularly seasonal, but it doesn’t need to be! We all have fun things to celebrate in EVERY season of the year, and this stunning cake would be a perfect addition to any birthday, shower, or party. No pumpkin required.

I’ve been wanting to try my hand at making edible agate slices ever since I saw this tutorial on Instructables a few years ago. I’ve used hard candies to make lots of fun things in the past–most notably these Candy Cane Cups–but it had never occurred to me to make my own agate slices until I saw the tutorial!
Gemstone cakes are so ubiquitous right now–I’m sure we’ve all seen the geode cakes made with rock candy–and making an agate version seemed like a fun twist on the trend. Plus, it’s so easy to do!

All you need to make the agate candy slices is a bunch of hard candy. Go to the dollar store, and buy the variety bags of candy that always looks a little sketchy–you know, the ones with with weird flavors or designs or whatever. Also pick up some Jolly Ranchers, and some clear hard candies if you can find them. The bigger the variety of colors and opacities, the better!
Then get to work crushing them–a meat mallet works well, and as a bonus, you’ll get out any pent-up aggression you might have. Make sure you keep the candies divided by color. Once all of the candies are crushed, you’ll arrange them in concentric circles in foil molds. Because you’re making the molds yourself, you can make them whatever size you want–I did a variety of round and oval shapes, to give the top of my cake some variety.

I found it easiest to use non-stick heavy-duty foil for this project–the finished candy just popped right out of the molds, no sticking and no peeling required. But if you can’t find that, then a little spritz of nonstick cooking spray should help you with this part of the project.
Here’s the magic of this idea: after the candy is arranged in the foil molds, it’s baked for just a few minutes. In the heat of the oven the candy melts together, creating a perfect agate pattern. The clear candies are beautifully translucent, the opaque candies add a stunning contrast, and the rings all blend to create a gorgeous, natural design.
A word of warning: I have NOT been able to get this to work with rock candy. Something about the way it is formed means that it doesn’t melt into liquid in the oven the way most hard candies do. So stick to hard Jolly Ranchers, peppermints, starlight mints, things like that!

Once the candies are baked and cooled, they’re just as firm as regular hard candy, and can be handled with ease. I wanted them to “pop” a little on top of the cake, so I painted the outside edges with a bit of silver luster dust. This step is optional, but since so many real agate slices have a thin band of gold or other metallic accents around the edge, it seemed appropriate.

The agate slices are my favorite part, but I really loved the watercolor buttercream effect too! I stuck to my color palette that I used for the agate, and used different shades of blue, purple, and pinkish red to frost this baby.

(A little smattering of rock candy around the serving plate never hurt anything either…)
The watercolor technique is easy, but can require a bit of futzing to get it right–at least in my perfectionist experience. There’s a video down below that shows you exactly how to do it, and I’ve also linked to a Facebook Live show where I demonstrate it in real time, and go more in depth with tips and tricks for perfecting your watercolor technique!

I haven’t even MENTIONED the actual cake part, because I was so excited about the decorations! But it’s my favorite chocolate cake recipe, filled with multi-colored stripes of vanilla buttercream. The idea was for the cake to look like an agate slice when you cut into it, too, but I’ll admit it was better in my head than it was in execution. Ah well, they can’t all be winners. (The taste was still A+, though…)

💜More Layer Cakes You’ll Love
- Blueberry Layer Cake
- Spring In Bloom Layer Cake
- How to Make A Piñata Cake (with video!)
- Circus Animal Layer Cake
- Gold-Topped Rainbow Cake
- Fourth of July Layer Cake
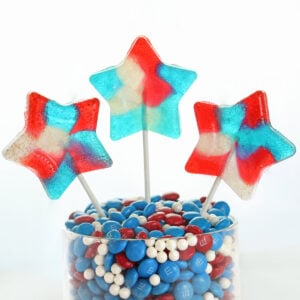
Easy Homemade Lollipops
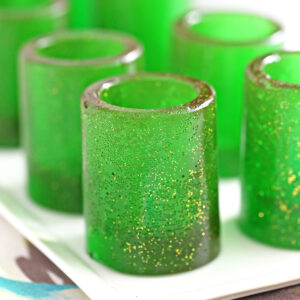
DIY Candy Shot Glasses
Agate Cake
Ingredients
For the Agate Candy Slices:
- Hard candies, assosrted colors, about 1-2 oz per large agate slice
- Non-stick heavy-duty foil
- Silver edible luster dust, optional
- Vodka, optional, if you’re using the silver luster dust
For the Chocolate Cake:
- 6 oz unsalted butter, at room temperature
- 4.75 oz granulated sugar, (2/3 cup)
- 5 oz brown sugar, (2/3 cup), packed
- 2 large eggs, at room temperature
- 2 tsp vanilla extract
- 8 fl oz buttermilk, (1 cup), at room temperature
- 4 oz sour cream, (1/2 cup), at room temperature
- 2 tbsp water , or coffee
- 7.8 oz all-purpose flour, (1¾ cups)
- 3 oz unsweetened cocoa powder, (1 cup)
- 1½ tsp baking soda
- ½ tsp salt
For the Buttercream:
- 6 fl oz pasteurized liquid egg whites, (3/4 cup)
- 24 oz powdered sugar, (6 cups)
- 1/2 tsp salt
- 24 oz unsalted butter, (6 sticks), at room temperature
- 2 tbsp vanilla extract
- Assorted gel food coloring, I used Americolor gel food coloring: electric purple, violet, sky blue, navy blue, electric pink and super red
Instructions
To Make the Agate Candy Slices:
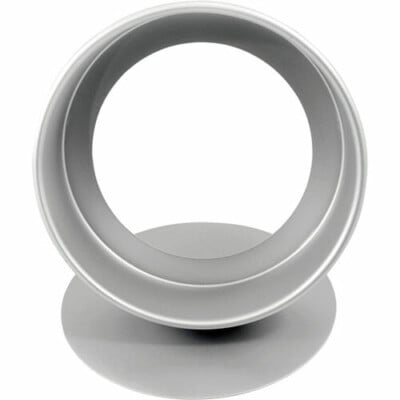
- Take a square of nonstick heavy-duty foil, nonstick side up. Place a small bowl or cup on top, to serve as a guide, and fold up the edges to form a circular mold with at least a 1-inch lip around the center. Repeat, making different shapes and sizes, for as many candy agate slices as you want to make. Place the foil molds on a baking sheet, and preheat the oven to 350 F.
- Divide the candies by color. While they are still in their wrappers, use a meat mallet, rolling pin, or other large, heavy object to crush them into small pieces—the closer you can get to candy dust, the better! Undo the wrapper and pour the crushed candies into small bowls, divided by type of candy. The more varieties of color and opacity you can get, the better! After the candy is crushed, it will start to get sticky as it is exposed to the humidity in the air, so start to form the agate slices immediately.
- Place a few spoonfuls of one color into a foil mold, and use a small food-safe paintbrush to spread it out along the outer edges of the mold in an even layer. (You can use your fingers, but the candy tends to stick to skin, so a paintbrush is faster and less messy.) Make sure that the layer is not too thin—as the candy melts, it will thin out a bit, so make the layer at least ¼-inch tall if possible. Add a second, different color, and brush that one out to the edges next to the first. Continue to make concentric rings of candy pieces in the mold, alternating colors and opacities, until you’ve filled the whole mold with crushed candy. I found I liked it best if I worked in one color scheme (shades of blue, for instance, or warm-toned colors) for each agate slice, but you can experiment to see what works for you.
- Once all of the foil molds are filled, bake them in the oven at 350 F for 4-5 minutes. Check them after 4 minutes to see if all the candy pieces have melted. If some unmelted pieces remain, bake for another 30-60 seconds—just until it’s melted but the bubbling is minimal. Let the candy cool completely, then gently peel back the foil mold.
- If desired, mix some edible silver luster dust with a bit of vodka to make a colored paste, and paint a thin silver line around the edges of the agate slices. Store the slices in an airtight container until you’re ready to decorate the cake.
To Make the Chocolate Cake:
- Line four 8-inch cake pans with parchment, and spray them with nonstick cooking spray. Preheat the oven to 350 F.
- Add the butter and both sugars to the bowl of a large stand mixer fitted with a paddle attachment. Beat them together on medium-high speed, until light and fluffy, about 5 minutes. Add the eggs one at a time, beating well after each addition. Add the vanilla extract and mix it in.
- In a separate bowl, whisk together the buttermilk, sour cream, and water (or coffee, if using). In a different bowl, sift together the flour, cocoa powder, baking soda, and salt. With the mixer running on low, add a quarter of the sifted flour mixture. When the flour streaks have almost all disappeared, add a third of the liquid to the mixing bowl. When that’s incorporated, continue to add the drys and wets in an alternating pattern, ending with the dry ingredients.
- When the dry ingredients are nearly incorporated, stop the mixer. Scrape down the bottom and sides of the bowl with a rubber spatula, and finish mixing the cake by hand. Divide the batter between the prepared pans, giving each one about 11 ounces, and smooth it into an even layer. Bake the cakes for 22-25 minutes, until a toothpick inserted into the center comes out with just a few moist crumbs attached. Cool the cakes completely before assembling.
To Make the Buttercream:
- Combine the whites, powdered sugar, and salt in the bowl of a large stand mixer fitted with a paddle attachment. Mix everything together on low speed, until the sugar is moistened and no dry patches remain. Turn off the mixer, scrape down the sides and bottom of the bowl with a spatula, then turn the mixer to medium speed. Beat on medium for 5 minutes.
- After 5 minutes, turn the mixer to medium-low and start adding the softened room temperature butter, 1-2 tablespoons at a time. Once all of the butter is incorporated, add the vanilla extract and mix it in. Stop the mixer and scrape down the bottom and sides once more. Turn the speed to medium and beat the buttercream for 10 minutes. At the end, you’ll have a frosting with a wonderfully light and creamy texture. It can be used right away, or stored in the refrigerator for up to two weeks, or the freezer for up to two months. If you have chilled the frosting, let it come to room temperature and then beat it for several minutes to smooth it out and restore its texture before using it.
To Assemble:
- Decide what colors you want to use for your cake—I used blue, purple, and pink. Reserve 1 cup of white frosting, tint ½ cup of frosting black, then use gel food coloring to make a dark and light tone for each color you’re going to use (I made dark and light blue, dark and light purple, and dark and light pink.) Place each color in its own piping bag.
- Put a cake layer on a cake cardboard, and place it on a cake turntable. Pipe concentric rings of frosting, inspired by the dark and light bands of agate slices. My first frosting layer had a thin line of black frosting along the outside, then dark blue, then white, then light blue, then black, then a white center. You don’t have to do this exactly, just alternate colors in the same shade family to make concentric rings.
- Add a second cake layer on top, and do the same thing with a different color family: I used shades of red and pink for this layer. Add a third layer, and this time, use another set of colors (I used purple shades). Finally, top with your fourth cake layer. Spread a thin layer of frosting all along the top and sides of the cake, to lock in any crumbs, and refrigerate for 30 minutes until firm.
- Take the piping bags of colored frosting, and pipe dots and small lines of different colors of frosting all along the sides of the cake, until it’s nearly covered with a random assortment of different colors. Take a metal spatula or bench scraper and hold it against the side of the cake while slowly turning the cake on the turn-table. It will smooth out the frosting and cause the colors to blur together in a watercolor effect. Wipe off the excess frosting from the scraper, and repeat until the sides are smooth and you are happy with the design. If there are places that look too light or too dark, pipe a few dots of another color there and go back with the bench scraper to smooth it out.
- Do the same thing with the top of the cake, piping different colored dots and lines, then smooth it out with an offset spatula. Go along the edges and remove any excess buttercream from the edges of the cake. If you want to touch up the design, refrigerate the cake for 30-45 minutes, until the buttercream is hard, then go back in with a small spatula and blend in different colors onto the cake—it’s easier to get a nice blend if you’re working with a firm base layer of buttercream.
- Finally, press skewers or long toothpicks into the top of the cake so they stick out an inch or two, and use those to support the agate slices. Arrange the candy slices on top in an overlapping pattern. Serve at room temperature, and enjoy!
Video

Recipe Notes
Measuring Tips
Our recipes are developed using weight measurements, and we highly recommend using a kitchen scale for baking whenever possible. However, if you prefer to use cups, volume measurements are provided as well. PLEASE NOTE: the adage “8 oz = 1 cup” is NOT true when speaking about weight, so don’t be concerned if the measurements don’t fit this formula.
Want to learn more about baking measurements and conversion?


I tried making this for my 6 year old’s birthday yesterday. Unfortunately, my AC went out. It was like a jungle in here. lol The cakes kept cracking and sticking, and the buttercream was acting up, too. I managed to salvage it. I had to use so much buttercream as glue, that it’s not smooth. lol I’d share a picture, but I’m not sure how to on your site. It’s no where near as pretty as yours, but I guess it’s not too bad compared to all the issues I was having! I also couldn’t find rock candy locally. I just used the leftover crushed candy because they bound together to form cool chunks.
I’m having trouble with the rocks. They turn out fine except the colors blend together and bleed into each other. The pretty circles didn’t stay. Help!
Hi Jane, I’m sorry to hear that you’re having trouble with the rocks. I’m not quite sure I understand what’s going on, since the colors are supposed to blend in with each other a little bit when they’re baking. Are you saying they’re blending too much and becoming one color, or is something else happening? Any chance you can send me a picture or more details via email? When you say the pretty circles didn’t stay, do you mean the candies don’t hold their shape at all, like they don’t firm up, or just the colors don’t stay in their shape? I’d love to help you troubleshoot, so please leave a little more info so I know what you mean. Thanks!
Hi there. My daughter made the agates for her cake and the making process was not a problem but after she put them on her cake after a couple of days they started to melt. She is entering it in her county’s fair and it can’t be melting while it sits there on display. The cases are not refrigerated. Is there anything she can treat it with before putting it on her cake to help with the melting? Thanks
Hi ReNell,
Most sugar candy will definitely start to melt when exposed to air for long periods of time because sugar is hygroscopic, meaning it absorbs moisture from the air. Having the candy sit on a moist cake with buttercream also increases the amount of water it’s absorbing. Most cake decorators use isomalt if they need their sugar work to last for long periods. Isomalt is a sugar substitute and is the preferred medium for making sugar sculptures because it does not get sticky in the same way sugar does. If switching to isomalt is not an option, she can try spraying it with a clear confectioner’s glaze. I like the one from PME linked below. I would also look for a way to create an unobtrusive barrier between the agate slices and the cake. I’m not sure how this would best be accomplished and how close the judges will get to the cake, but if there’s a way for her to rest them on pieces of cardboard or press n’ seal or something that will protect them from the cake and buttercream, that might help.
Both the clear glaze and removing them from being in contact with the cake should help the slices last longer, but in general, these candies aren’t meant to hold up for days exposed to air, so there’s only so much you can do. I wish her the best and would love to hear how everything turns out!
https://amzn.to/2SiUGsk
This recipe would be so much better if the measurements were actually accurate, if you look it actually says 24oz powdered sugar (6cups) now, I’m pretty new and tried making this for a birthday so was a little late realizing that it didn’t add up.
Hi Brad, the recipe measurements are correct. 1 cup of powdered sugar is 4 oz, so 6 cups is 24 oz. You can learn more about scale vs cup measurements here:
https://www.sugarhero.com/frequently-asked-questions/#measurements
excellent, i am not a cake person although it looks gorgeous, but omg those candies…
so went and bought tons of candies to try.. i am true proof of you need to respect thd professionals of the area… ❤️❤️❤️❤️❤️
so i think i over baked, none of my 8 slices looked like agate slices, but yummy for sure…. my 4 year old daughter had a blast….
thank you