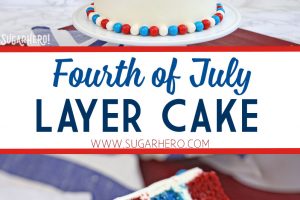
Celebrate Independence Day with a bang by making this Fourth of July Layer Cake! Four tall layers of red and blue velvet cake are finished with silky-smooth buttercream and a fun assortment of red, white, and blue candy on top. It’s the perfect party cake!

🌟A Simple Patriotic Cake
You may not think of the Fourth of July as a big dessert holiday, but in my opinion, EVERY holiday, no matter what, should be a big dessert holiday. So if there’s even the slightest chance of a get-together, gathering, shindig, hoedown, or box social happening, you can bet I’m showing up with a big ole layer cake, ready to get the party started.
I’m no stranger to giant Fourth of July cakes — this American Flag layer cake I made a few years ago is still one of the most ambitious and fun cakes I’ve ever made! But this year, I kept the inside of the cake a LOT simpler, with just four layers of alternating red and blue velvet cake.
Table of Contents

💙Red, White and Blue Decorations
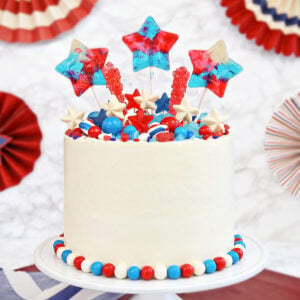
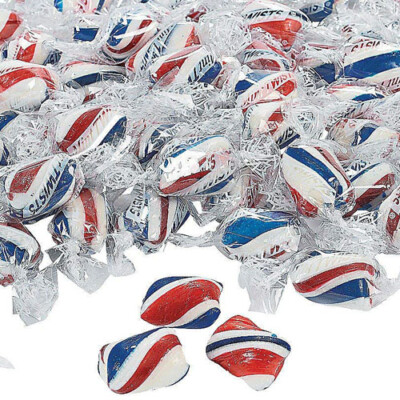
The real stars of the show are the candy decorations on top, bursting out of the cake like a fireworks display. This might just be my incurable sweet tooth talking, but I LOVE candy-topped cakes with a passion.
They’re incredibly fun, with a beautiful variety of colors and textures from all of the different candies used. Here’s what my spread looked like:

I’m a bit of a candy hoarder, and admit that my pantry has some big bags of M&Ms and gumballs that are left over from old projects, so I didn’t go out and buy all of the candy just for this cake. I recommend seeing what’s in your kitchen, using what you have, and then supplementing with a couple fun and eye-catching candies from the store.

I do like to add some vertical height to these cakes, so I recommend you definitely include lollipops (try my Easy Homemade Lollipops here!) and rock candy, if possible. Otherwise, it’s just a matter of using what you like! I found some fun red, white, and blue gummy stars in a bulk bin at my grocery store, and they were my favorite addition to the top of the cake.

🥣Buttercream Frosting
I did something a little different with this cake, and used buttercream instead of traditional cream cheese frosting. My thinking was twofold: one, I wanted a sturdy frosting that could stand up to all those cake layers (and all those candies poking into the top!) and two, cream cheese frosting is ALWAYS paired with red velvet, and honestly, sometimes a girl wants a change and just wants to enjoy regular buttercream!

That being said, I know I live with a family of cream cheese lovers, so I compromised and added some cream cheese flavoring to the frosting. I used this LorAnn Cream Cheese Icing Super Strength oil, which is my favorite way to add cream cheese flavor without actually using cream cheese. It’s not quite the same as the real thing, but it does a good job of adding a cream cheese flavor without changing the texture of the buttercream.
Enjoy!

⭐More 4th of July Recipes
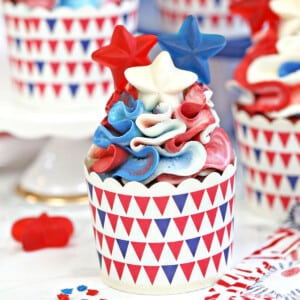
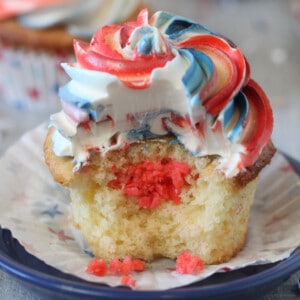
Red, White and Blue Cupcakes
Exploding Cupcakes
Leave a Review!
If you make this recipe, let us know! Leave a ⭐️⭐️⭐️⭐️⭐️ rating on the recipe below, and leave a comment, take a photo and tag me on Instagram @elabau, or use #sugarhero on IG!
Fourth of July Layer Cake
Ingredients
For the Red Velvet Cake:
- 11.25 oz all-purpose flour, (2 1/2 cups)
- 10.5 oz granulated sugar, (1 1/2 cups)
- 1 tsp baking soda
- 1 tsp salt
- 2 tbsp unsweetened cocoa powder
- 8 fl oz vegetable oil, (1 cup)
- 12 fl oz buttermilk, (1 1/2 cups)
- 2 large eggs
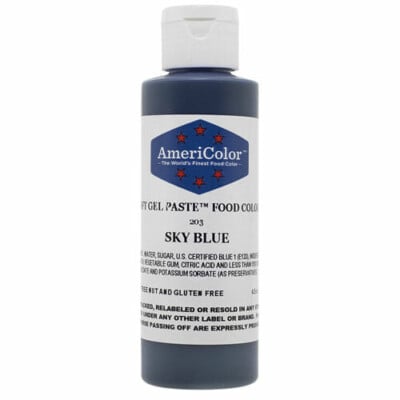
- 2 tbsp red gel food coloring, I like Super Red from Americolor
- 1 tsp white vinegar
- 2 tsp vanilla extract
For the Blue Velvet Cake:
- 11.25 oz all-purpose flour, (2 1/2 cups)
- 10.5 oz granulated sugar, (1 1/2 cups)
- 1 tsp baking soda
- 1 tsp salt
- 8 fl oz vegetable oil, (1 cup)
- 12 fl oz buttermilk, (1 1/2 cups)
- 2 large eggs
- 2 tbsp blue gel food coloring, I like Americolor brand
- 1 tsp white vinegar
- 2 tsp vanilla extract
For the Buttercream:
- 6 fl oz pasteurized liquid egg whites, (3/4 cup)
- 24 oz powdered sugar, (6 cups)
- ½ tsp salt
- 24 oz unsalted butter, (6 sticks, or 3 cups), at room temperature
- 2 tbsp vanilla extract
- 1-2 tsp LorAnn Cream Cheese Icing Super Strength flavoring, optional
To Decorate:
- Assorted candies, gumballs, lollipops, rock candy, or anything else!
Instructions
To Make the Cakes:
- Preheat the oven to 350 F. Line four 8-inch pans with parchment rounds, and spray the pans with nonstick cooking spray.
- First, prepare the red velvet batter. In a large bowl, sift together the flour, sugar, baking soda, salt, and cocoa powder.
- In the bowl of a large stand mixer fitted with a paddle attachment, combine the vegetable oil, buttermilk, eggs, red gel food coloring, vinegar, and vanilla extract. Mix on medium-low speed until well-combined.
- Add the dry ingredients and mix on low speed until combined. Scrape down the bottom and sides of the pan with a spatula, then mix on medium speed until the cake batter is smooth and all the lumps of flour have disappeared.
- Divide the cake batter between two of the prepared pans. If you’re using a kitchen scale, each pan should get about 25 oz of batter.
- Repeat the process to make the blue velvet layers. They are made exactly the same, except you’ll want to omit the cocoa powder from the blue layers as it tends to make the color very muddy. Divide the blue batter between the remaining two pans.
- Bake the cakes at 350 F for 36-40 minutes, until they pull away from the sides and spring back when lightly pressed with your fingertips. Cool completely before using. The cakes can be baked several days in advance. If making in advance, wrap the cooled cakes in cling wrap and freeze until ready to use.
To Make the Buttercream:
- Combine the whites, powdered sugar, and salt in the bowl of a large stand mixer fitted with a paddle attachment. Mix everything together on low speed, until the sugar is moistened and no dry patches remain. Turn off the mixer, scrape down the sides and bottom of the bowl with a spatula, then turn the mixer to medium speed. Beat on medium for 5 minutes.
- After 5 minutes, turn the mixer to medium-low and start adding the softened room temperature butter, 1-2 tablespoons at a time. Once all of the butter is incorporated, add the vanilla extract, and 1 tsp cream cheese flavor, if using, and mix it in. Stop the mixer and scrape down the bottom and sides once more. Turn the speed to medium and beat the buttercream for 10 minutes. At the end, you’ll have a frosting with a wonderfully light and creamy texture. Taste, and adjust the flavoring as desired.
- This buttercream can be used right away, or stored in the refrigerator for up to two weeks, or the freezer for up to two months. If you have chilled the frosting, let it come to room temperature and then beat it for several minutes to smooth it out and restore its texture before using it.
To Assemble and Decorate:
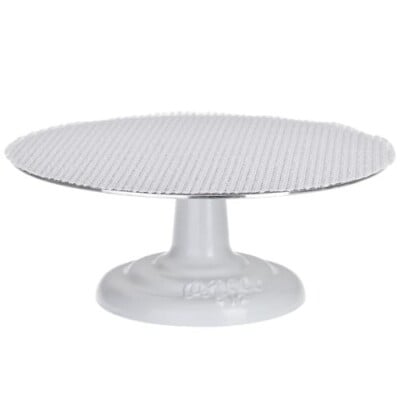
- Place the cake rounds on 8-inch cardboard cake circles. Place one layer on a cake turntable. Place a big dollop of frosting on the cake layer—about 1 generous cup—and use a metal spatula to spread the frosting into an even layer going all the way out to the edges of the cake.
- Top the cake round with a second cake layer, and repeat the frosting process again. Do it with a third layer, and finally, add the last cake layer. Cover the top and sides of the cake with a very thin layer of frosting—this is the crumb coat, which locks crumbs into the frosting and also provides some stability to the cake. Refrigerate the cake for 45-60 minutes, until the crumb coat is set and the cake feels firm and stable.
- If the buttercream has started to get spongy, re-whip it briefly until it is smooth and silky. Cover the top and sides of the chilled cake with a thicker layer of frosting. Use a bench scraper or metal spatula to smooth out the sides and top of the cake as much as possible. Chill for another 30 minutes before decorating.
- Decorate with the candy as desired. I like pressing M&Ms or gumballs around the base of the cake to make an easy and eye-catching bottom border. Decorate the top with candies of different heights, like lollipops, rock candy, large gumballs, small sprinkles, and everything in between!
- For the best taste and texture, serve this cake at room temperature. It can be stored in the refrigerator for up to a week, although the texture is best within the first few days of assembly. Prolonged storage in the refrigerator may cause the candies to get sticky or bleed colors.
Video

Measuring Tips
Our recipes are developed using weight measurements, and we highly recommend using a kitchen scale for baking whenever possible. However, if you prefer to use cups, volume measurements are provided as well. PLEASE NOTE: the adage “8 oz = 1 cup” is NOT true when speaking about weight, so don’t be concerned if the measurements don’t fit this formula.
Want to learn more about baking measurements and conversion?
Nutrition


Hi Elizabeth,
This cake is beautiful — and is there really any other way to go than “giant” with a cake? Not in my book, lol. Thanks for the great resources page too!
Looks great but I would use Ermine icing. It was the original icing for Red Velvet cake and it is the only way I will eat Red Velvet. Very few people make it this way but it is the only way I know for Red Velvet cake.
Yes, I LOVE ermine frosting with red velvet! For a cake like this, I would still recommend using a stiffer frosting around the outside, for stability, but ermine would be fantastic between the layers. Thanks Dianna!
Do you by egg whites in a carton at the grocery store? Or crack open eggs?
Hi Ron! You will want to purchase pastuerized egg whites in a carton. You can usually find them next to the eggs and other egg products. It’s important to use egg whites from a carton because of the pastuerization process (that’s what makes the buttercream safe to eat without cooking the buttercream). I hope that helps. Good luck making the recipe!