

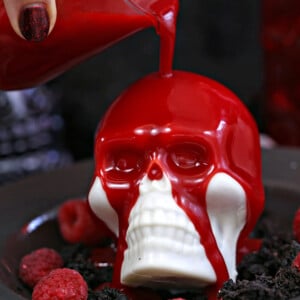
Melting Chocolate Skulls are the ultimate creepy Halloween dessert! White chocolate skulls are filled with brownies and fresh raspberries, and then a blood-red ganache is poured on top. The warm ganache melts the skulls in a spectacular and spooky way, revealing the goodies hidden inside.

These Melting Chocolate Skulls might just be my favorite Halloween dessert I’ve ever made, EVER. (And this is coming from a certified egomaniac, so you know that’s saying something.) They just hit that sweet spot of really cool concept, gorgeous presentation, fun gimmick, and oh yeah, completely delicious flavor.
But don’t take my word for it. In order to be convinced, you have to see them in action. Check out this gorgeous melting goodness in the video below…
It’s like dessert meets mad scientist experiment meets horror movie, and I am HERE FOR IT in a major way. If this recipe intrigues you, you’ll love my collection of Halloween Baking Ideas!
Table of Contents

How to Make Melting Chocolate Skulls
There are 3 main components to these Melting Chocolate Skulls: the dark chocolate brownies, the white chocolate skulls themselves, and the blood-red ganache that’s poured on top. A few tips and tricks about each of these components, as well as the full recipe and equipment list are below…
The Brownies
The white chocolate skulls are resting on crumbled brownie “dirt,” and inside the hollow skulls are a small brownie bar and fresh raspberries. I made homemade cakey brownies to put in and around the skulls. I tested the recipe with regular brownies too, and they were just a little too dense and chewy for me–I wanted something that sort of melted into the ganache and white chocolate, and cakey brownies were perfect for this. (And I’m usually a fudgy brownie girl all the way, so you know that’s saying something!)
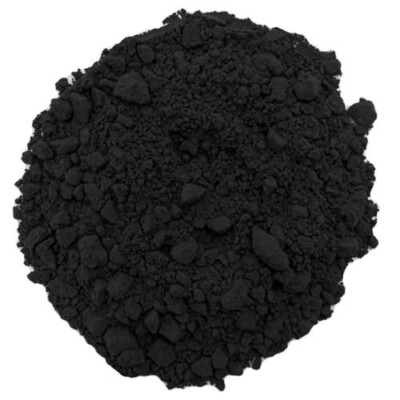
Because I was making my own brownies, I was able to play with them a bit, and I swapped some of the regular cocoa powder for black cocoa. Black cocoa has a really intense dark cocoa color and flavor, and it really made these brownies extra-creepy. I do find that it can be drying to bake with, so I usually only substitute 1/4- 1/3 of the cocoa for black cocoa. This mix is the best of both worlds–brownies have a black color and a deep flavor, while still preserving the moist texture.

The skulls
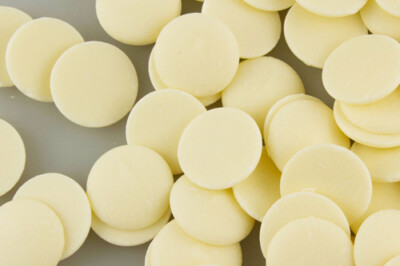
How great do these skulls look?! I’ve been calling them “white chocolate skulls,” but the truth is that they’re made with white candy coating. (Sometimes called candy melts or candy wafers, they’re imitation white chocolate.) Candy melts are great because when they set they’re hard and shiny, and they’re easy to unmold from candy molds. Real white chocolate can also be used, but it tends to get soft and sticky at room temperature, plus it’s expensive and also usually a beige color, not truly white. For all of these reasons, candy coating is my choice for projects like these.
The skulls are completely hollow, the better to fill with goodies! In addition to brownies, cake, or fruit, you could also fill them with nuts, marshmallows, whipped cream, or even ice cream! Anything looks cool when it’s seen through the holes in a disintegrating chocolate skull.

The Ganache
The blood-red ganache is the key to this whole dessert. It needs to be HOT when you pour it on the skull. If you’ve timed it right, a quick drizzle around the top of the skull and the chocolate will almost immediately start melting. It’s the coolest thing in the world!
Ganache is technically a cream + chocolate mixture, but this one is made with cream + red candy coating. Sue me, sticklers! I wanted something BRIGHT red, vivid, intense, and unmistakably bloody. Melted candy coating and cream to the rescue! You can also use white coating + red candy color, if you’d like.

Substitutions for Melting Chocolate Skulls
I get a lot of questions in my recipes about substitutions, so I thought I would provide a little list of swap-outs that might be helpful. Of course there are a million other ways you can modify this dessert, too!
- For the brownies: I happen to like these dark cakey brownies, but you can swap in your favorite brownie or chocolate cake recipe. A box mix works great, too! No judgment here.
- For the red ganache: bright red ganache might not be everyone’s cup of tea. Consider using a berry puree instead! Blend fresh or (defrosted) frozen raspberries until liquid, then add sugar to taste, and a bit of juice or water to thin it out. Heat it until quite hot, then pour it on the skulls like you would a ganache. It won’t have the same bright red “blood” effect, but the taste will more than make up for it!

What You’ll Need
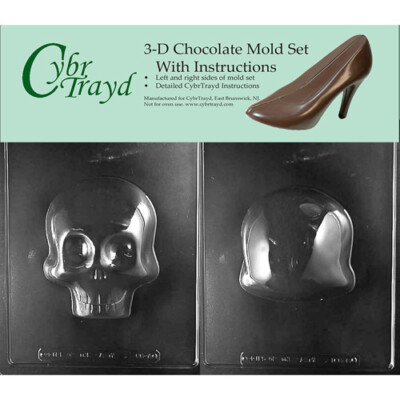
- Skull Mold: The one I used was made by Wilton, and is no longer available. (sad face) This 3D Skull Mold by CybrTrayd is about the same size, and looks to be a good substitute!
- Black cocoa powder: Not technically a necessity, but it sure makes Halloween desserts fun! Because you only use a portion of it in any given recipe, a 1-lb supply lasts a very long time. (I’ve had mine for over a year now, I think.) I used this black cocoa powder.
- White candy melts: Much cheaper and easier to use than real white chocolate. I used these white candy melts by Wilton.
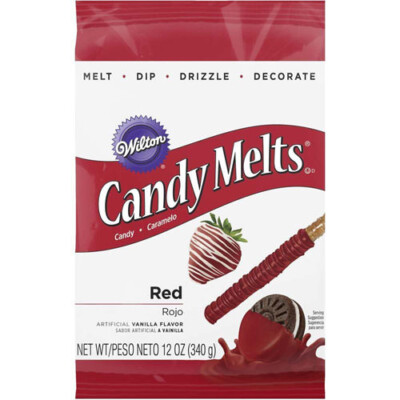
- Red candy melts: A MUST for getting that bright red blood color! I used these red candy melts by Wilton.

Troubleshooting Melting Chocolate Skulls
I hope you’ll give these melting chocolate skulls a try! To save you some frustration, here are a few common pitfalls I want to help you avoid:
- Skulls cracking when removing or assembling them: The thickness of the skulls is very important. Too thin, and they’ll crack. Too thick, and they won’t melt. I like to use a paintbrush to paint the insides of the mold, to give myself the most control over the thickness. I also like to wait until the coating is warm but not hot, so it’s thickened up a bit and is not quite so fluid. To help avoid cracking, make sure the coating is VERY set when you remove them–when in doubt, pop it into the freezer for a few minutes before removal, then flex the mold very gently and pull the skulls out. If you do end up with a small crack, they can usually be repaired by painting the inside of the skull with a little melted coating to strengthen that area from the inside. Large cracks and complete breakage requires the skull to be re-melted and re-molded, unfortunately.
- Skulls don’t melt quickly, requiring lots of ganache: again, thin skulls are key! You’ll get a feel for how thin they need to be with practice, but in general, try to coat the molds evenly with just one coat. Make sure the skulls are room temperature when you’re trying to melt them, not fresh from the refrigerator. Also, make sure your ganache is as hot as you can get it–bubbling around the edges is fine! Finally, if you’re filling the skulls with something cold, like whipped cream or ice cream, don’t let it touch the top of the skulls–the cold temperature will transfer and make the chocolate difficult to melt.
☠ More Halloween Desserts You’ll Love ☠
- Red Velvet Hot Chocolate
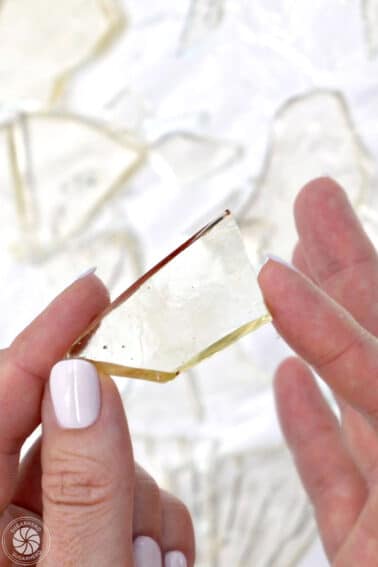
- Bloody Glass Cupcakes
- Caramel-Stuffed Chocolate Cupcakes with Caramel Skulls
- Vampire Bite Cupcakes
- Donut Hole Monster Eyeballs
- Bloody Halloween Cake Balls
- Skull Cupcakes
Don’t miss the step-by-step tutorial showing how to make Melting Chocolate Skulls – check out the web story here!
Melting Chocolate Skulls
Ingredients
For the Brownies:
- 4 oz unsalted butter
- 8 oz granulated sugar, (1 cup + 2 TBSP)
- 2 oz unsweetened cocoa powder, (2/3 cups, I used a mix of regular and black cocoa)
- ½ tsp salt
- ½ tsp baking powder
- 2 tsp vanilla extract
- 2 large eggs
- ¼ cup water
- 3.37 oz all-purpose flour, (3/4 cup)
- 2 pints fresh raspberries
For the Skulls and Red Ganache:
- Large 3D skull candy mold
- 20 oz white candy coating melts
- 24 oz red candy coating melts
- 12 fl oz whipping cream, or heavy cream
Instructions
To Make the Brownies:
- Preheat the oven to 350 F. Line an 8×8-inch pan with foil, and spray the foil with nonstick cooking spray.
- Melt the butter in a large bowl in the microwave. Once the butter is melted, stir in the granulated sugar until well-mixed.
- Sift the cocoa over the bowl, and add the salt, baking powder, and vanilla, and stir well.
- Add the eggs one at a time, whisking well after each addition, then whisk in the water. After the water is added, the mixture should look glossy and no longer grainy.
- Finally, stir in the flour, stirring until no streak of flour remain. Scrape the batter into the prepared pan and smooth it into an even layer. Press fresh raspberries into the top of the brownie batter, evenly spaced out, and gently use a spatula to smooth the top of the brownies. You’ll probably only use 20-25 raspberries—reserve the rest for when you’re assembling the dessert.
- Bake the pan at 350 F for 25-27 minutes, until the brownies are puffed, pulling away slightly from the sides of the pan, and a toothpick inserted into the center comes out with just a few moist crumbs attached. Cool completely before using. The brownies keep very well, so they can be made several days in advance and kept, well-wrapped in the refrigerator, until you’re ready to assemble the skulls.
To Make the White Chocolate Skulls:
- Place the white candy coating in a large microwave-safe bowl. Microwave the coating in 30-second increments, stirring after every 30 seconds to prevent overheating.
- Let the melted coating cool until it is no longer warm, but is still fluid. It should thicken a bit as it gets closer to room temperature. This will make it easier to get a good coating on the mold in one layer. When it is the right temperature, pour several generous spoonfuls of white coating into each cavity of a clean, dry 3D skull mold.
- Use a clean paintbrush to paint the coating up the sides of the mold. The goal is to the white chocolate layer thick enough to be able to assemble the skulls without cracking, but as thin as possible, so the warm ganache melts it easily. If you have a lot of excess coating in the mold, turn it upside-down and let the excess drip out.
- Scrape an offset spatula or knife around the top edges of the mold to remove any excess coating and make a clean line around the edge. Refrigerate the mold to set the coating completely, for about 20 minutes. Once set, gently flex the mold to loosen the skull. If it’s fully set, you should be able to grip the inside of each piece with your fingers and gently pull them out. If you have trouble, don’t force it—instead put the mold in the freezer for 1-2 minutes, then try again. Repeat until you have enough piece to make 8 full skulls. Reserve any extra white coating for later.
To Assemble:
- Cut 8 brownie bars that will easily fit inside the hollow skulls. (Mine were about 1.5” x 3”, but yours might vary depending on your specific mold.) Set the bars aside, and crumble up the remaining brownies to make brownie “dirt.”
- Divide the brownie dirt between 8 wide, shallow bowls. (Dessert plates with a high lip will also work.) Add a few fresh raspberries scattered around the dirt.
- Place the bottom of a skull on top of the dirt on each plate, and put one of the brownie bars inside each hollow skull. Add fresh raspberries on top.
- Re-melt the extra white coating, and place it in a small piping bag or paper cone. Pipe a thin layer of white coating around the edges of the skull, and carefully place the top of the skull on the base. Run your finger along the edge to remove any excess coating and make it smooth.
- Combine the red candy coating and cream in a large bowl. Microwave in 30 second intervals, whisking often to prevent overheating. You want the red “blood” to be completely smooth and fluid, and also hot to the touch—even bubbling a bit around the edges is okay!
- Immediately transfer the red ganache to a container with a spout, and pour it on top of a white chocolate skull. Continue to pour as the heat from the ganache melts the white chocolate and causes the skull to disintegrate, revealing the brownies and berries inside. Enjoy while it is warm!
- The red ganache can be made hours or even days in advance—just press a piece of plastic wrap directly on top so it doesn’t form a skin. Reheat right before serving, until hot, and then pour as described above.
Video
Recipe Notes
Measuring Tips
Our recipes are developed using weight measurements, and we highly recommend using a kitchen scale for baking whenever possible. However, if you prefer to use cups, volume measurements are provided as well. PLEASE NOTE: the adage “8 oz = 1 cup” is NOT true when speaking about weight, so don’t be concerned if the measurements don’t fit this formula.
Want to learn more about baking measurements and conversion?
Nutrition


I think cherry juice (from fresh cherries) might give a more realistic blood appearance. A very fun idea!
That sounds GREAT! Cherry juice + chocolate brownies would taste amazing, too!
You’re so creative! I love seeing your blog posts!
Rosie, you are so sweet! Thank you for making my day. 🙂
These are SO awesome!!! I can’t wait to make them.
Thank you, Beth! I can’t wait to see your awesome interpretation–you always do the COOLEST stuff!
amazing and beautiful recipes! Can’t believe I had never seen your blog before. It’s so inspiring! Keep up with the good work. Already a super fan
Thank you, Thayse! I so appreciate it–comments like this make it all worthwhile! Thank you for reading, and I hope you’ll stick around. 🙂
Very nice
Your skull cake is fantastic. One question for you if you crumble the brownie do they dry out. How long before a party would you crumble the brownies. Thanks again. Excited to have found your site.
Anita
Thank you so much, Anita! If possible, I would cube the brownies and assemble the skulls the same day you’re planning on serving it. It’s not the biggest deal if you did it the day before, since the sauce poured over the skulls helps with any potential dryness, but freshest always tastes best. 🙂 And of course the brownies themselves can be made several days in advance and be kept well-wrapped until you’re ready to cube them and assemble.