

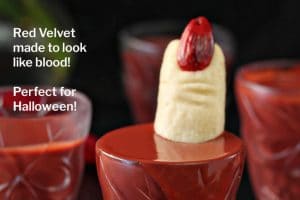


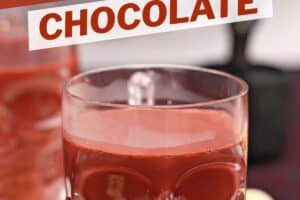


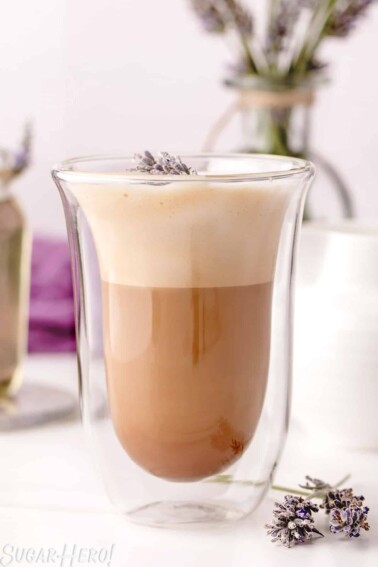
Red Velvet Hot Chocolate is the perfect drink for cold and spooky nights! This Halloween hot chocolate recipe has a not-too-sweet chocolate flavor, blood-red color, and a frightfully rich and creamy texture.

🩸 A Bloody Delicious Halloween Hot Chocolate Recipe
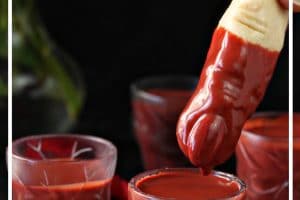
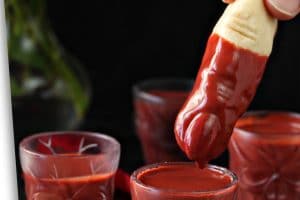
Looking for a unique drink to warm up your Halloween night? Try our red velvet hot chocolate recipe. This tasty twist on regular hot cocoa combines the rich flavor of chocolate with a hint of cream cheese, all decked out in a striking deep red color. It’s perfect for dunking Witch Finger Cookies, sipping while handing out candy, or enjoying at a Halloween party.
So grab your cauldron (or saucepan), round up the ingredients, and let’s stir up some Halloween magic that’s sure to have everyone asking for seconds!

What Makes this Red Velvet Flavored?
To me, the signature characteristics of red velvet cake are the buttermilk, and light cocoa flavor of the cake. Without the buttermilk in the batter it’s just a boring, not-very-chocolatey cake, so as I was developing this recipe, I wanted to find a way to incorporate that uniquely tangy dairy flavor into the drink.
Rather than using actual buttermilk (because that sounded iffy) I blended a little cream cheese into the milk before heating it. Voila! Adding cream cheese makes it thicker and richer, and gives it a flavor that calls to mind not only red velvet cake, but also the signature cream cheese frosting.
The cream cheese isn’t overwhelming—I only use 3 oz for 20 oz of milk—so it’s more of a subtle background note. But it does add a wonderful texture and just a hint of cream cheese flavor that blends nicely with the semi-sweet chocolate. The hot chocolate’s flavor is complex and not too sweet, perfect for enjoying in small sips throughout the night.
Table of Contents
🧾 What You’ll Need

Ingredients
Here’s what you need to know as you gather your ingredients. (Links are affiliate links and I earn a small commission from qualifying purchases.)
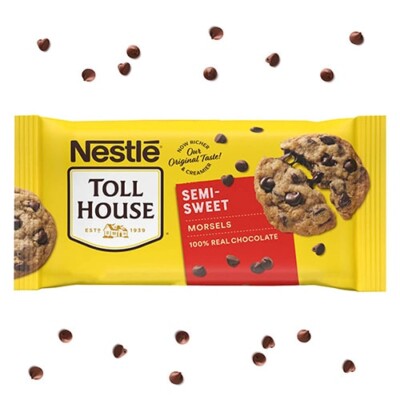
- Chocolate: I recommend using semi-sweet chocolate bars, chopped into small pieces. You could also use good-quality chocolate chips. A good rule of thumb is, since this chocolate provides all the flavor, you should use chocolate you enjoy eating. Using old, waxy, or cheap chocolate will lead to disappointing results.
- Milk: Any fat percentage will work, but I like to make this with 2%, which makes it rich enough without being too rich.
- Cream cheese: Cream cheese provides a subtle “tangy” flavor that replicates real red velvet flavor. Not a fan? Swap in some heavy cream. It won’t have the same taste, but will add a bit of fat that makes the drink more rich.
- Brown sugar: Adds a note of caramelized sweetness to the drink.
- Vanilla and salt: Both of these additions are subtle, but they add depth of flavor and shouldn’t be skipped.
- Red food coloring: If you want a spooky blood-red color, you’ll need to use red food coloring. I use and recommend Americolor Super Red gel food coloring. If you’re only interested in the flavor and not the color, you can skip the coloring.

Equipment
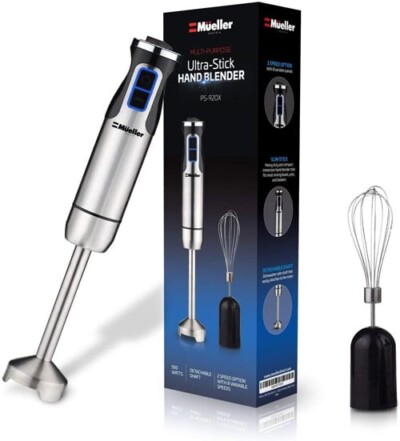
- Blender: I recommend a stick blender to easily blend the milk and cream cheese, but you can use a standard blender (or even a whisk and some elbow grease!) if that’s what you have.
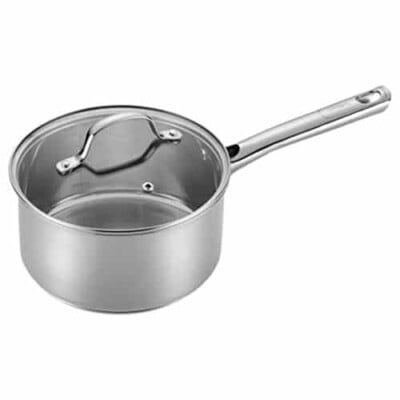
- Saucepan: A medium (2-3 quart) saucepan is perfect for this recipe.
- Whisk:An absolute must to evenly disperse the chocolate as it melts.
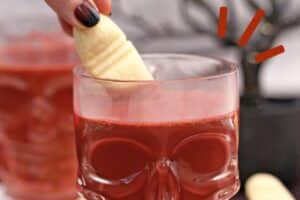
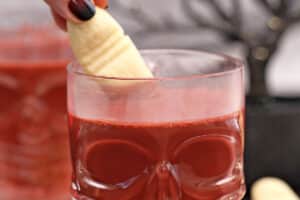
- Skull mugs: Optional but very fun! Here are some skull mugs similar to the ones used in the post.

🎃 More Halloween Recipes

Leave a Review!
If you make this recipe, let us know! Leave a ⭐️⭐️⭐️⭐️⭐️ rating on the recipe below, and leave a comment, take a photo and tag me on Instagram @elabau, or use #sugarhero on IG!

Red Velvet Hot Chocolate
Ingredients
- 2 1/2 cups milk, (20 fl oz), any fat percentage
- 3 oz cream cheese, at room temperature
- 6 oz semi-sweet chocolate, (1 cup), finely chopped
- 2 tsp vanilla extract
- 2 TBSP brown sugar
- 1/4 tsp salt
- 2 tsp red gel food coloring, optional, I used Americolor Super Red
Instructions
- Place the milk and cream cheese in a blender and blend them together until smooth. If you have a stick blender, you can just place them in a saucepan and blend them together right in the pan.
- Pour the milk-cream cheese mixture into a medium saucepan, and add the chocolate, vanilla, brown sugar, and salt.
- Place the pan over medium heat and warm the milk, whisking occasionally, until the chocolate is completely melted and your mixture is smooth.
- Whisk in the red food coloring, adding more until you get a color you like. Serve hot!
- Red Velvet Hot Chocolate can be made several days in advance and kept in the refrigerator until ready to use. Reheat it in the microwave or in a saucepan on the stove, and whisk well until it's shiny and smooth.
Recipe Notes
Measuring Tips
Our recipes are developed using weight measurements, and we highly recommend using a kitchen scale for baking whenever possible. However, if you prefer to use cups, volume measurements are provided as well. PLEASE NOTE: the adage “8 oz = 1 cup” is NOT true when speaking about weight, so don’t be concerned if the measurements don’t fit this formula.
Want to learn more about baking measurements and conversion?
Nutrition
📸 Photo Tutorial: How to Make Red Velvet Hot Chocolate
Making this hot chocolate is wickedly easy – here’s how it’s done!


Blend the Milk and Cream Cheese
- Combine 2 1/2 cups of milk and 3 oz of room temperature cream cheese in a blender. (Or, if you have an immersion blender, place them right in your medium saucepan.)
- Blend them together until smooth and completely incorporated.


Add the Other Ingredients
- Add 6 oz chopped semi-sweet chocolate, 2 tsp vanilla extract, 2 TBSP brown sugar, and 1/4 tsp salt to the saucepan.
- Place the pan over medium heat and warm the milk, whisking occasionally, until the chocolate is completely melted and your mixture is smooth.


Color and Serve!
- Add a generous squirt of red gel food coloring. I recommend adding a little at a time, whisking in between, until you get a color you like. Be aware that it will require more food coloring than you’d think to get a bright red.
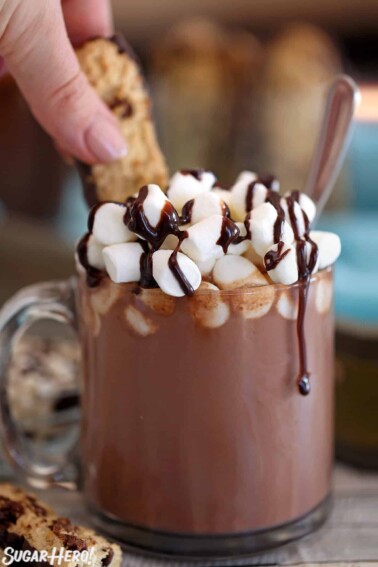
- Serve while it’s still hot – in skull mugs if you’ve got ’em!
💡 Tips for Success
Here are some helpful tips for making red velvet hot chocolate:
- Use high-quality chocolate for the best flavor.
- Make sure the cream cheese is at room temperature so it’s easy to blend, and blend or whisk it with the milk until it’s very smooth.
- If you prefer a richer drink, use whole milk instead of low-fat milk.
- If you find the hot chocolate too thick, thin it out with a little more milk.
- To achieve the perfect blood-red color, you’ll need to use a concentrated food coloring, like gel color or powdered food coloring, and you’ll need to use a lot of it! (I used Americolor Super Red for mine.) If you don’t want to use so much coloring — understandable! — you can skip it or use less, just know that you’ll have more of a brown or burgundy beverage.
- If making for a crowd, keep it warm in a slow cooker set to low heat, stirring occasionally.
- The key to great red velvet hot chocolate is balancing the chocolate flavor with the subtle tang of cream cheese, so feel free to adjust the ingredients to suit your taste preferences.

💀 Serving Suggestions
When it comes to serving your red velvet hot chocolate for Halloween, there are plenty of fun and easy ways to make it extra festive.
- One simple idea is to use Halloween-themed mugs or cups, like these skull mugs I used. You could also wrap plain mugs with Halloween-themed ribbon, or add stickers for a quick decoration.
- For toppings, consider adding a swirl of whipped cream and then sprinkling it with black or orange sprinkles.
- For a more dramatic look, try drizzling some red syrup (like strawberry or raspberry) over the whipped cream to create a “bloody” effect.
- Another fun idea is to use ghost-shaped marshmallows or cut regular marshmallows into ghost shapes.
- Finally, if you’re serving to adults, you could even rim the mug with red sugar to mimic the look of a cocktail glass.


So fun and festive for the holiday season! My kids will love it
Thanks Michelle! I hope your kids do!
How fun is this recipe?! Perfect for a spooky night with the family! And those glasses are so fun!!
Right?!? The glasses were such a fun find. Love this time of year.
I love red velvet cake, but would never would have thought to do this. I can’t wait to try.
Hi Dannii! I promise this recipe does not disappoint. It’s one of my favorite ways to enjoy red velvet.
Such a cozy and festive way to enjoy Halloween! I might even treat myself and add some red wine next time.
Thanks Matt! I’d love to hear what you think of adding red wine to it. Might be a great variation!
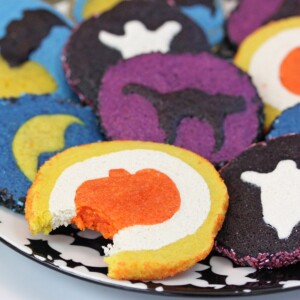
Can I use less milk if I just want a dipping sauce for the fingers instead of hot chocolate drinks?
Hi Sandy! You can definitely use less milk and make it a dipping sauce. The cocoa is really thick to begin with . . . I’d call it sauce adjacent . . . and the cookies taste really good when they’re dipped in it. I’d say to add the milk a little at a time until it’s just the consistency you are looking for. Good thinking.