
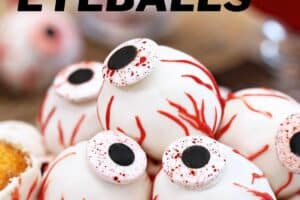

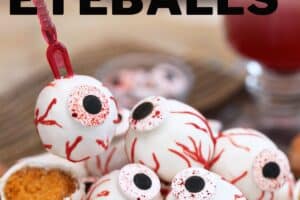


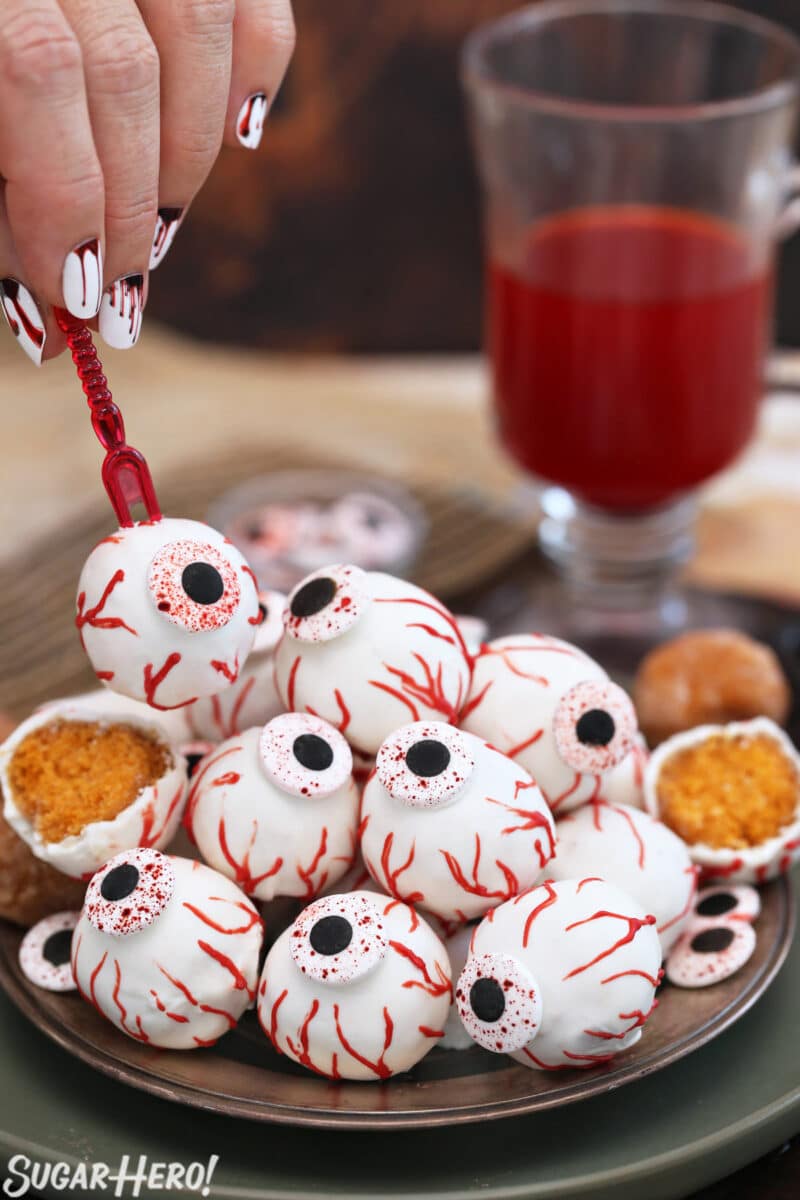
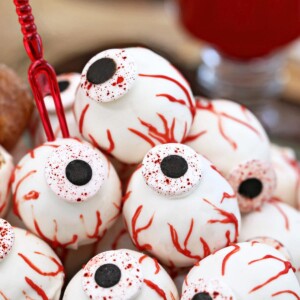
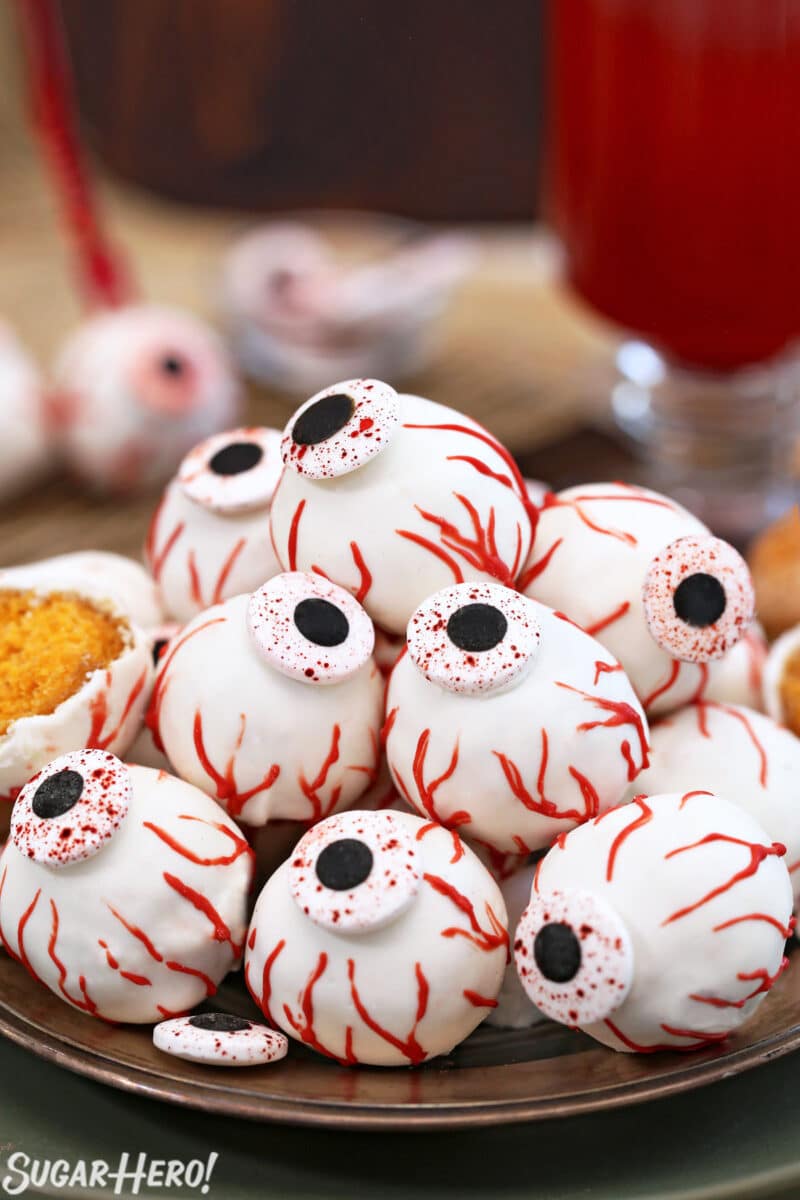
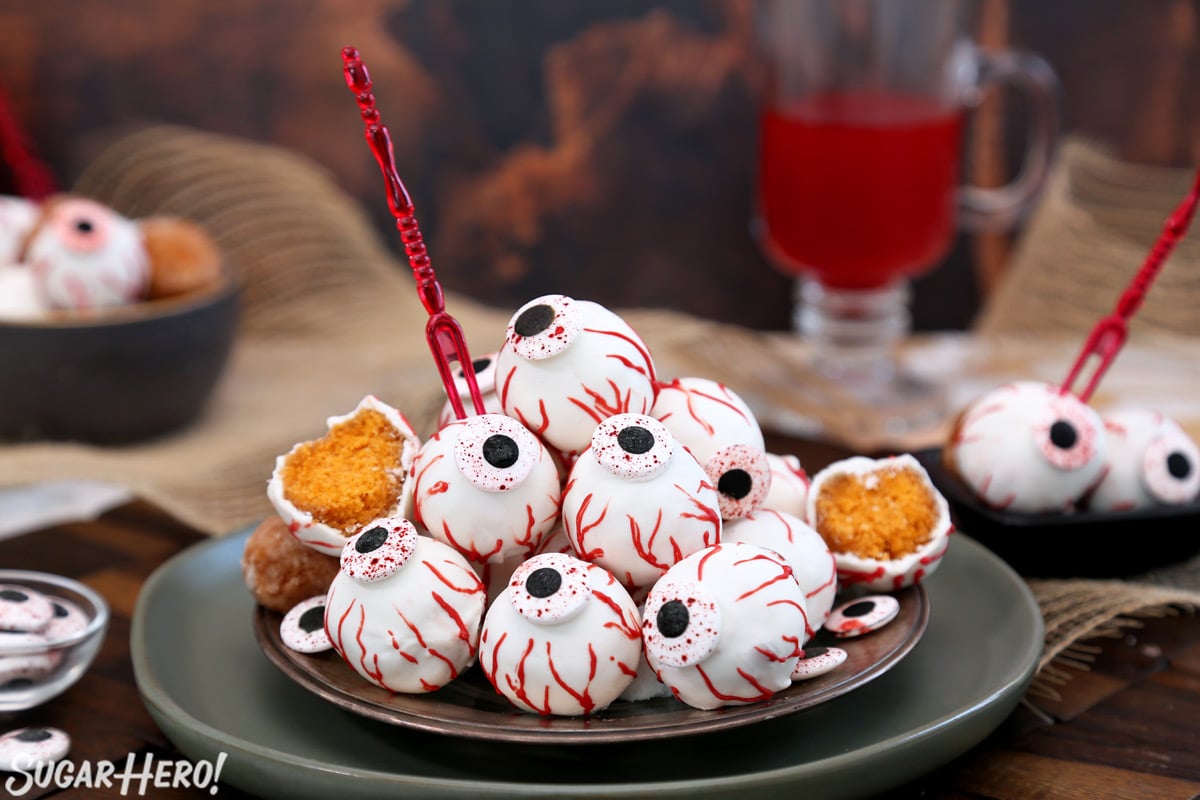
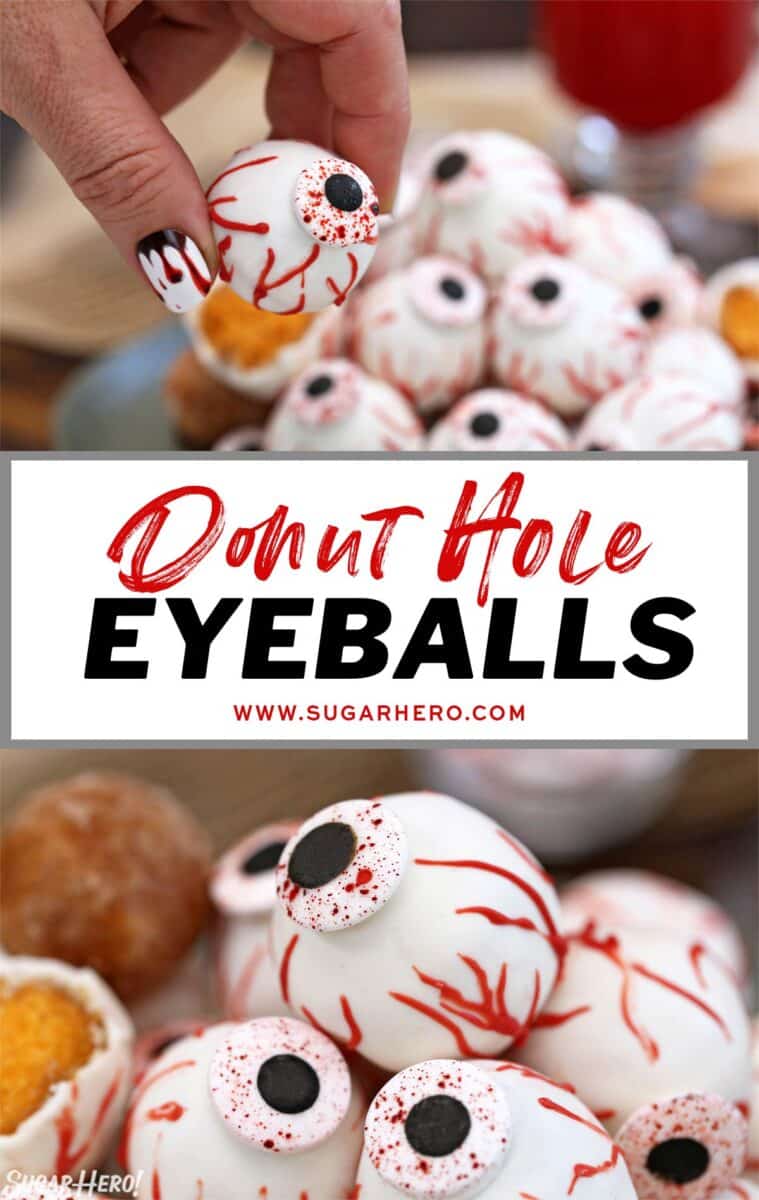
You won’t be able to take your eyes off these Donut Hole Eyeballs! All you need is 4 ingredients and 15 minutes to whip up this creepy-cool Halloween treat. Kids and adults both love them, so make them for your next Halloween party and watch them disappear.
👁 Turn Donut Holes Into Creepy Halloween Eyeballs
About 10 years ago, I published a Halloween recipe for Donut Hole Monster Eyeballs on SugarHero. Both the doughnuts and glaze were made entirely from scratch, and the recipe produced approximately eleventy bajillion donut holes. I loved those weird misshapen eyes, but if I’m being honest, no one wants to make eleventy bajillion donut holes and then decorate each one individually. I created the recipe, and even I didn’t want to make it again! The concept was solid, but the execution needed serious work.
So this year, I revisited the idea of donut hole eyeballs, but took some major shortcuts to make the recipe fast and easy to pull together. After all, these are the quintessential Halloween party treat, so you need to be able to bust out a ton of them without blocking out a day and a half in the kitchen.
These donut hole eyeballs are made with just 4 ingredients, and use entirely store-bought components so you can spend all your time decorating them, not deep-frying anything! This is a great dessert for little ones to help with, and kids and adults both love them, so they’re perfect for any Halloween party or movie night.
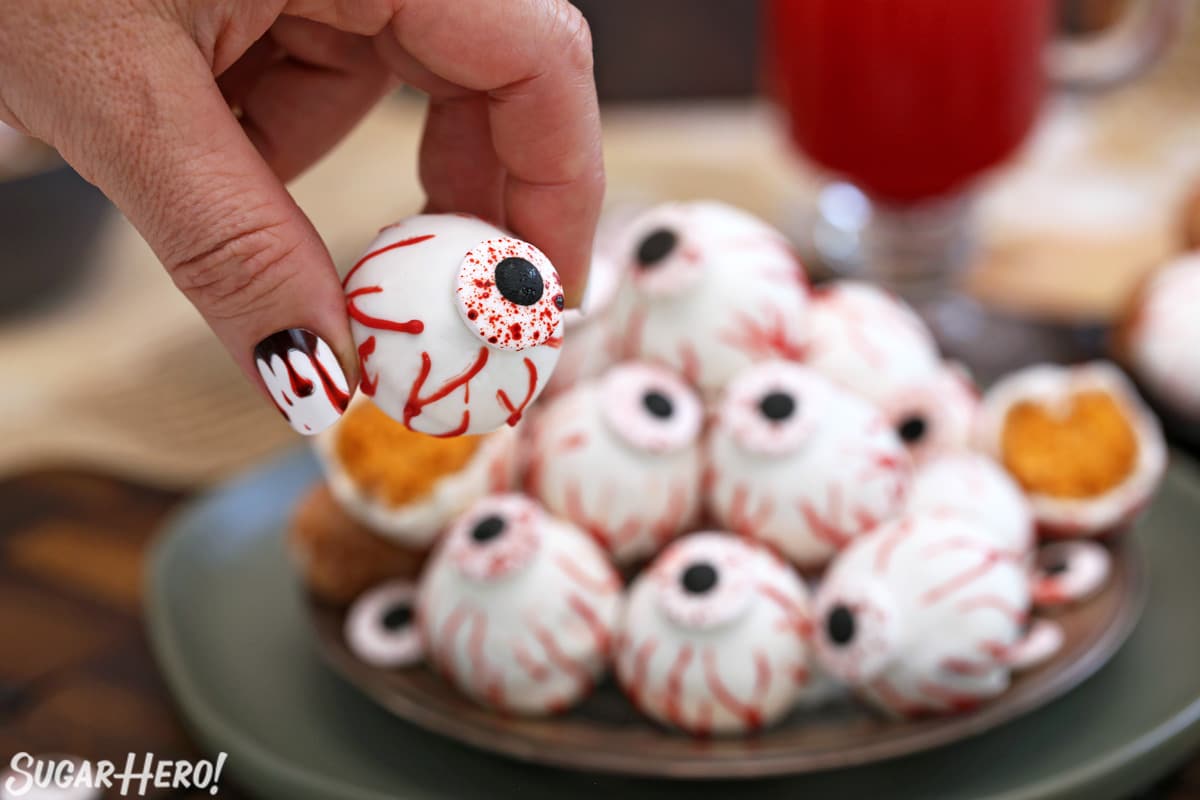
Table of Contents
🧾 What You’ll Need
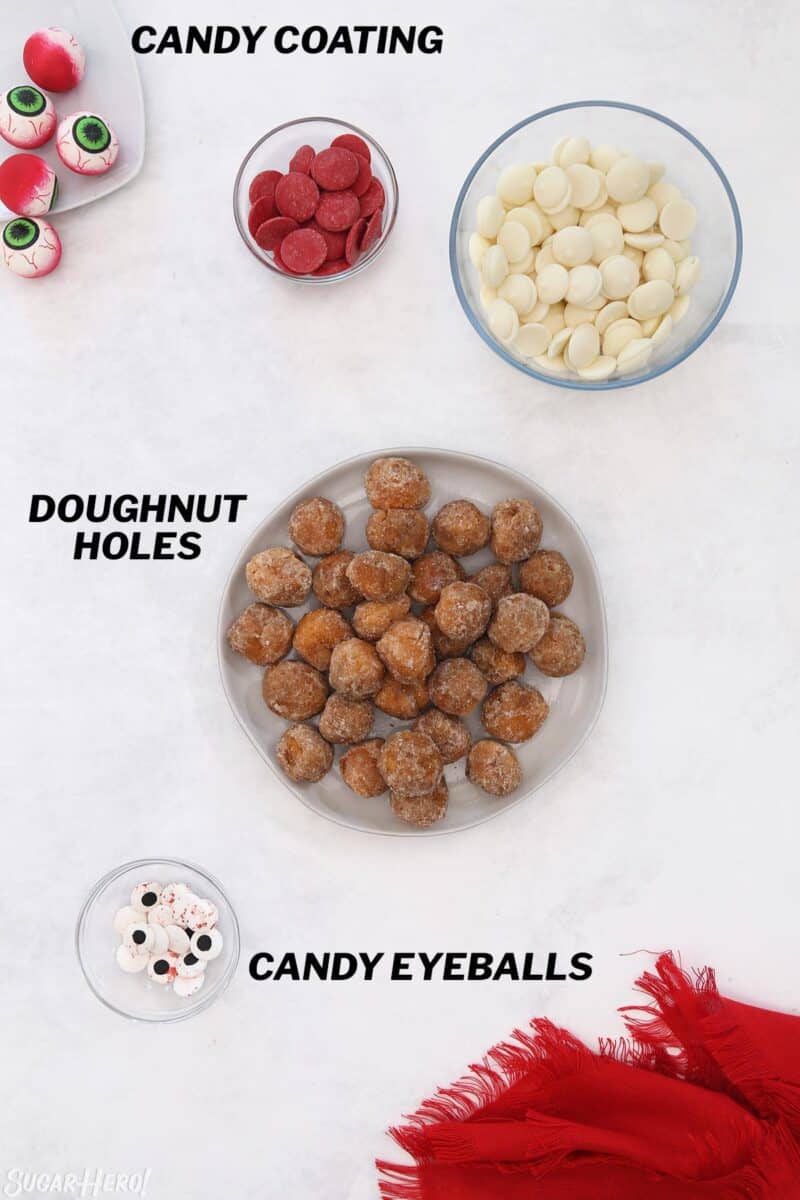
Ingredients
Semi-homemade fans, this is the perfect recipe for you! Grab these simple ingredients from the store, and you’re ready to go. (Links are affiliate links and I earn a small commission from qualifying purchases.)
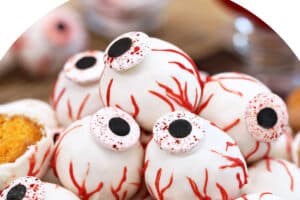
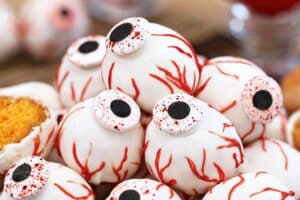
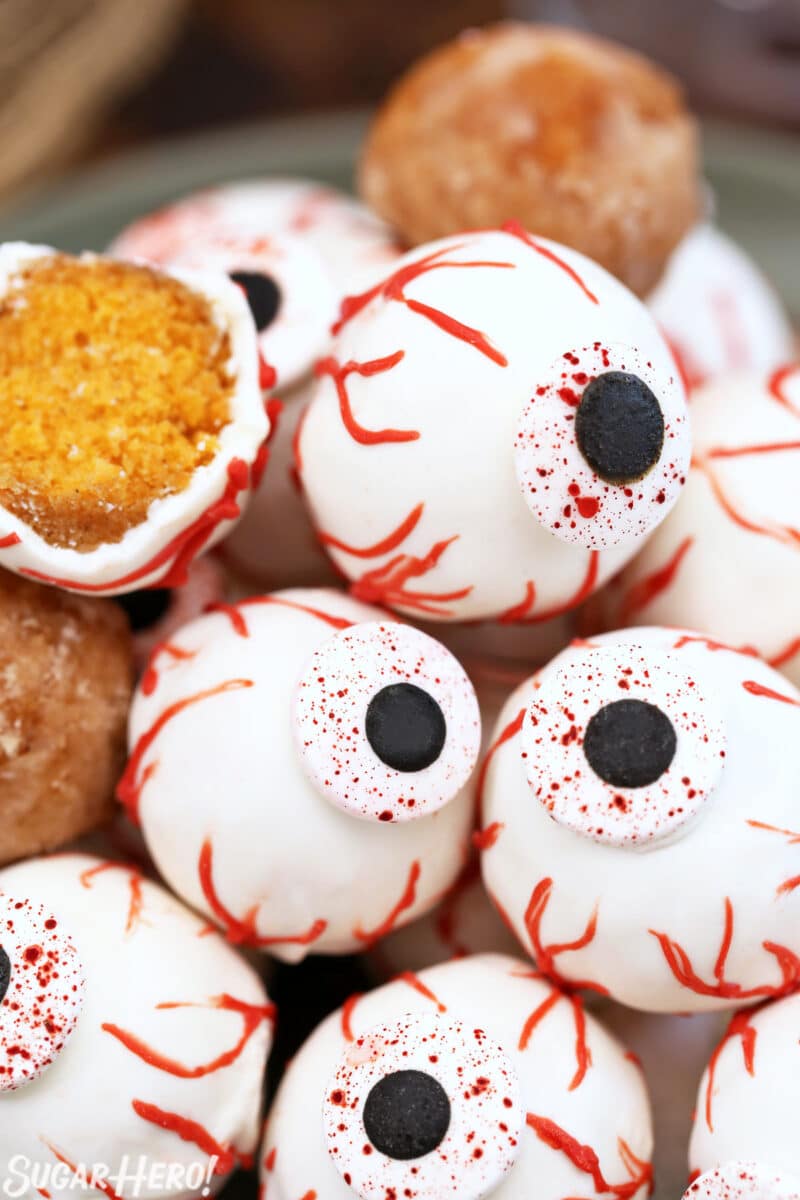
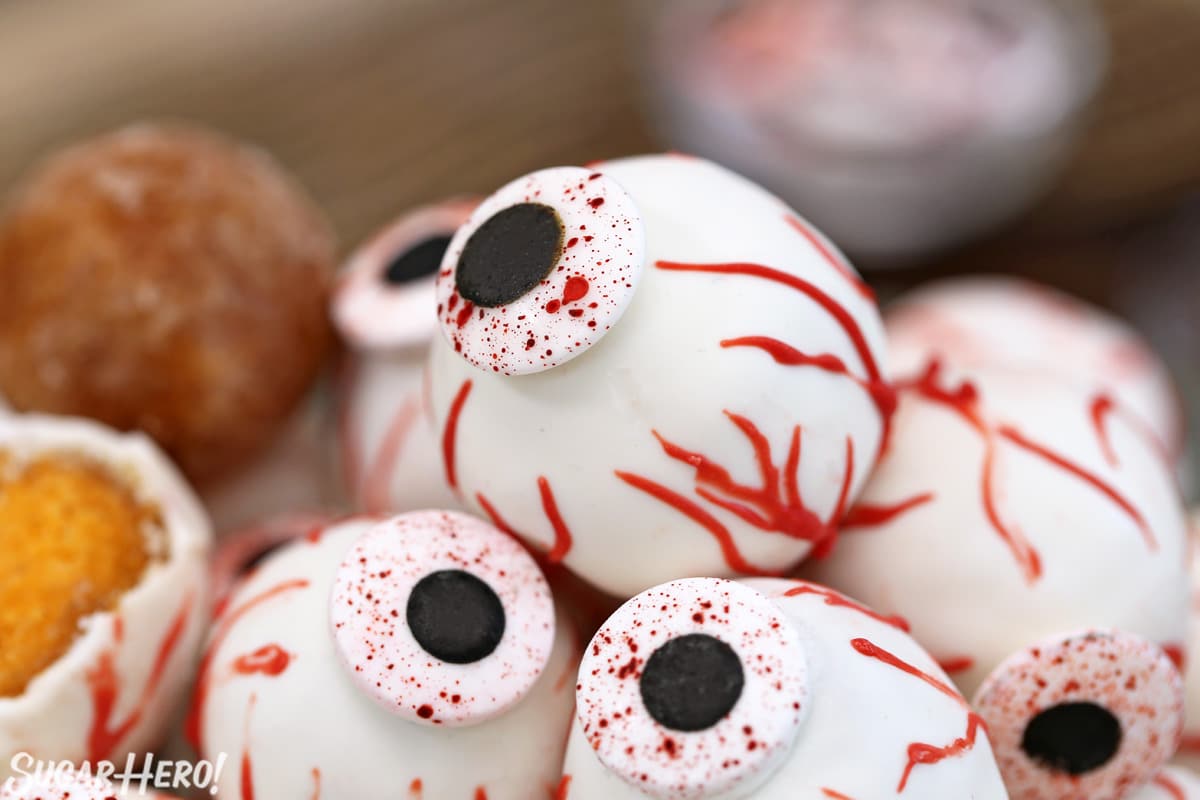
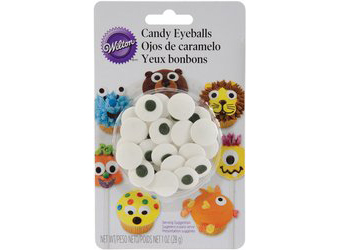
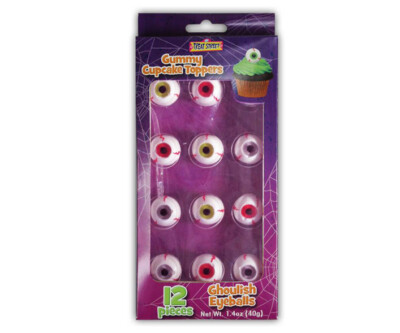
- Candy eyeballs: I like using the large size candy eyeballs, because they look more proportionate, but any candy eyeballs you can find will work. If you can’t find the blood-stained ones I used, check out the Tips section below for some advice on making your own.
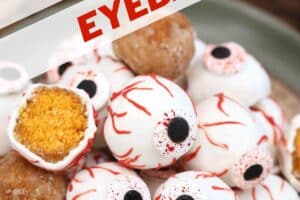
- Donut holes: You need donut holes that are sturdy enough to be skewered and dipped. While I love freshly made donut holes from a donut shop, they can be too light and delicate to work well. I’ve had more success with the boxed grocery store variety, like Entenmann’s brand. The ones I used in the pictures are pumpkin spice flavor, which is why they’re pumpkin colored on the inside.
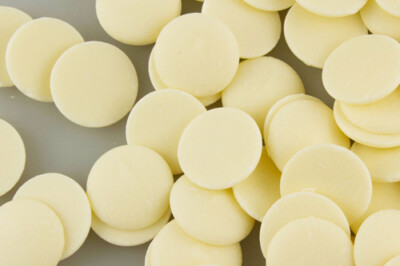
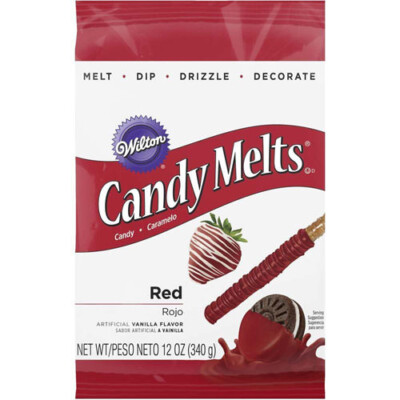
- Candy coating: We are using bright white candy coating to cover the donut holes, and red candy coating to give them creepy blood vessels (optional but awesome!).
Equipment
These are an easy treat to make, and you’ll only need a few things to make the process easier! (Links are affiliate links and I earn a small commission from qualifying purchases.)
- Long toothpicks: You can use long toothpicks (4″ or longer) or wooden skewers to dip the donut holes in candy coating.
- Piping bag: A piping bag is a must for piping the thin red blood vessels on the sides.
- Bowl and spatula:You’ll need several microwave-safe bowls to melt the candy coating, and spatulas to stir the colors.
- Styrofoam block: I save large pieces of styrofoam from packages to use as a drying base when dipping lollipops or cake pops. If you don’t have any styrofoam, try a cardboard box, egg carton, or anything else you can stick the donut hole skewers into.
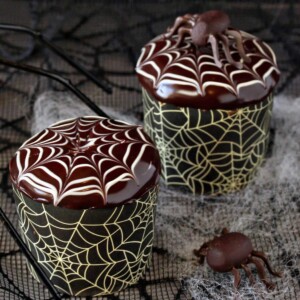
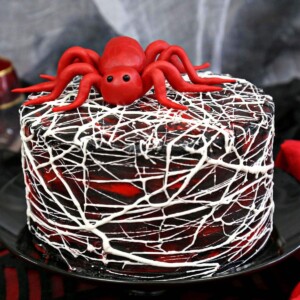
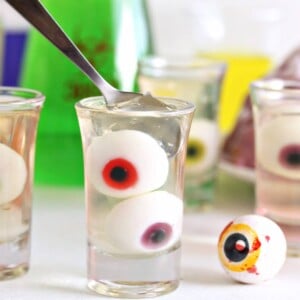
🦇 More Spooky Sweets


Leave a Review!
If you make this recipe, let us know! Leave a ⭐️⭐️⭐️⭐️⭐️ rating on the recipe below, and leave a comment, take a photo and tag me on Instagram @elabau, or use #sugarhero on IG!
Donut Hole Eyeballs
Ingredients
- 24 donut holes
- 12 oz white candy coating melts
- 4 oz red candy coating melts
- 24 candy eyeballs
Instructions
- Stick long toothpicks firmly into the center of your donut holes.
- Melt the white candy coating in the microwave in 30-second intervals. I recommend using 50% power, if possible, so the coating melts slowly and doesn’t overheat or get clumpy. Once most of the coating is melted, stir well until it is completely smooth and fluid.
- Dip a donut hole in the white coating until it is completely submerged. Take it out of the bowl and let the excess drip back into the bowl. Gently scrape the bottom of the donut hole against the lip of the bowl to get off any extra drips.
- Stick the toothpick into a foam block to set. While the coating is still wet, press a candy eyeball into the top of the donut hole. Repeat with the remaining donut holes and let the white coating set completely.
- Melt the red coating and transfer it to a piping bag. Snip off a tiny bit of the tip, and pipe squiggly red lines up the side of the eyeballs to look like blood vessels.
- When everything is set, gently twist the toothpick to loosen it, and slide it out of the donut hole.
- For the best taste, eat assembled donut holes within a week. Store in an airtight container at room temperature or in the refrigerator. See Note below.
Video

Recipe Notes
Measuring Tips
Our recipes are developed using weight measurements, and we highly recommend using a kitchen scale for baking whenever possible. However, if you prefer to use cups, volume measurements are provided as well. PLEASE NOTE: the adage “8 oz = 1 cup” is NOT true when speaking about weight, so don’t be concerned if the measurements don’t fit this formula.
Want to learn more about baking measurements and conversion?
Nutrition
📸 Photo Tutorial: Donut Hole Eyeballs
Yes, it is this easy! Peep these step-by-step photo instructions, then grab the printable recipe above.


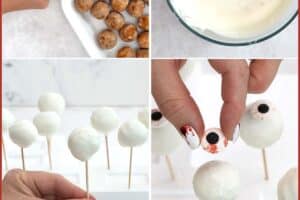
Skewer the donut holes
- Skewer donut holes. Stick long toothpicks firmly into the center of 24 donut holes.
- Melt white candy coating. Melt 12 oz white candy coating and stir until it is completely smooth and fluid.


Dip the donuts
- Dip and drip. Dip a donut hole in the white coating until it is completely submerged. Take it out of the bowl and let the excess drip back into the bowl.
- Set. Stick the toothpick into a foam block to set.


Decorate
- Place candy eyeballs. Press a candy eyeball into the top of each donut while the coating is still wet.
- Pipe red veins. Heat 4 oz red candy coating in the microwave until smooth. Pipe squiggly red lines up the side of the eyeballs to look like blood vessels.
- Remove toothpicks. When everything is set, gently twist the toothpick to loosen it, and slide it out of the donut hole.
💭 Variations
If you want to take your eyeballs up a notch, try one of these variations:
- Eyeball lollipops: Instead of toothpicks, skewer the donut holes with lollipop sticks. First dip the tip of a stick in melted coating, and let it set so the stick is firmly held in place. Then dip and decorate as usual. When everything is set, you can wrap the pops individually for a fun party treat!
- Cake pops: Use this same decorating idea with cake pops instead of donut holes. Just as eerie, just as delicious!
- Use them as decorations: You can enjoy these eyeballs on their own, but they also make awesome edible decorations! Put them on top of cupcakes or layer cakes to transform them from cute to creepy.
- Make giant donut eyeballs: Why stop at donut holes? Make a mega eyeball instead! Take a powdered sugar donut and fill the center with a gummy or chocolate eyeball. Don’t forget the red blood vessels on the sides!
Don’t miss the step-by-step tutorial showing how to make Donut Hole Eyeballs – check out the web story here!
💡 Tips and FAQs
Just a couple of tips to make sure your donut holes turn out perfectly!
Candy eyeballs can sometimes be hard to track down, but fortunately you don’t have to have them! Consider using gummy rings (like gummy Lifesavers) and adding a mini chocolate chip in the center. Speaking of chocolate chips, pressing a large chocolate chip into the top of the donut hole can also mimic an eyeball.
I love the look of the blood-splattered eyeballs, but if you can’t find them, they’re easy to replicate at home. First, make sure you are wearing gloves to protect your hands. Take a brand new toothbrush and dip the tip of the bristles in red food coloring. Put the candy eyeballs on a tray, and working over a sink (for easy cleanup), run your thumb over the bristles to splatter the eyeballs with small drops of food coloring. Let it set completely, and you’re ready to go!
These are very kid-friendly treats, but the red blood vessels can be tricky for little hands to make. You can always skip this step, or if you want the bloody effect, pick up some candy writing markers and draw the red lines on them instead.
The good part about using store-bought donut holes is that they are meant to have a long shelf life! And the candy coating helps keep the donuts inside from drying out too much. These are best eaten within a week of assembling them, and can be stored in an airtight container at room temperature or in the refrigerator. Note that the refrigerator humidity might cause the candy eyeballs to bleed, so if you are hoping to make these in advance, consider a small test batch to see what storage solution works best.


I love these so much! I hope you had a Pan’s Labyrinth moment and walked around with doughnut eyeball hands (I would totally do that).
Let’s go to doughnut mountain Charlie <—hope that reference was not lost XD
-Aya
http://healthy-appetite.blogspot.de/
Haha, excellent call! The photo shoot was as far as we got–now I’m kicking myself!
I can’t decide which is more awesome about these – how delicious they look pre-frosting and pre-monster squish, or how disturbing the picture of the smooshed eyeball with ooze in the middle is. . . . Oh, and the fur? It was my very first thought when I saw the pic! Love it.
Thanks Sara! It was actually really fun smashing the doughnut, and made me think that maybe I should do more smashed desserts more often. 🙂
This is such a great idea for Halloween! The kids love it!
Thanks Holley! Hope you have a Happy Halloween!
These are spooktacular! I love the combination of creepy, cute, and tastiness. You really did a great job on this one.
Hi Beth! Thanks for the rave review! You are making me blush! Happy Halloween!
What a fun and tasty treat for Halloween! Looking forward to giving these a try; my kids will love them!
Hi Sara! Thanks for leaving a comment. I hope your kids enjoy them!
We are hosting Halloween this year. These would be perfect for the party
Hi Nancy! Sounds like you will be having some tasty fun in the very near future! Hope your guests enjoy. Thanks for leaving a comment.
These are absolutely perfect for a Halloween party! I love that there are shortcuts too. I love made-from-scratch recipes, but I’m also more inclined to make them over and over again when they’re easier.
Right?!? Short cuts can really save the day when you are in a pinch. I hope you enjoy!