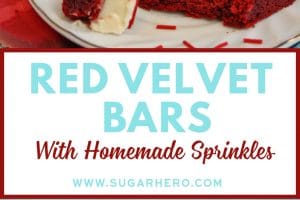
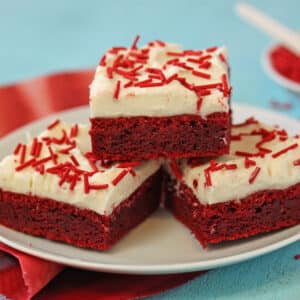
These Red Velvet Bars have the great taste of red velvet cake, in a portable cookie bar! The moist red velvet base tastes JUST like cake, and it’s topped with a tangy cream cheese frosting and homemade sprinkles!

So, what’d you do this weekend? I didn’t do anything special…went to the gym, did some work, avoided doing chores, had dinner at a friend’s, made my own sprinkles…
You know, because making your own sprinkles is a completely sane activity. A good use of valuable weekend down-time. A great way to relax and unwind while doing a serene kitchen task.
Okay, making sprinkles may be none of those things, but it is highly satisfying in an “I can out-Martha Martha Stewart” sort of way. It also lets you post mysterious photos on instagram that look more like dead worms than sprinkles in the making. Plus, homemade sprinkles led to this:

So all in all, I’d say it was well worth it.
First things first, I absolutely cannot take the credit for the sprinkles idea or recipe. I first read about them on Bravetart, and if you guys aren’t already reading Stella’s blog, you should. She is legit. She has a recipe for both rainbow sprinkles and chocolate sprinkles on her site, and as soon as I saw them, I was gone. I have a knack for making things harder than they should be, and for looking for trouble in the kitchen, so of course I needed to make my own sprinkles.
The process itself isn’t complicated, but I found it physically difficult to form the sugar strands. I was worried about making the candy paste too thin, and as a result I think it was too thick. Let’s just say there were a lot of contortions, and some serious applied physics as I worked out the best way to leverage my body weight to get the sprinkles to squeeze out of the dang pastry bag. There might have been whimpering.
But, on the bright side, my extra-thick sprinkles dried in a few hours flat, so…the system works!

So, aside from bragging rights, why make your own sprinkles? In the case of these red sprinkles, I admit there’s not much reason to do so. It’s pretty easy to find red jimmies (or even cuter red heart sprinkles) in most stores. In general though, I do think it’s a valuable trick to have up your sleeve. You could make custom colors to go with a cake or party decorations. You could add exotic extracts to give your sprinkles a little extra flava. Or you could make them different sizes—some jumbo-sized jimmies could be really cute on a giant layer cake.

But enough about the sprinkles, let’s talk about the sprinkle delivery system, aka these Red Velvet Bars! They may look like a sheet cake, but in taste and texture they’re actually most similar to brownies or blondies. However, calling red cookies “blondies” seemed wrong, and “reddies” really wasn’t doing it for me…so “bars” it is. They’re a wonderfully chewy bar cookie with a crackly top and a light cocoa-buttermilk flavor.

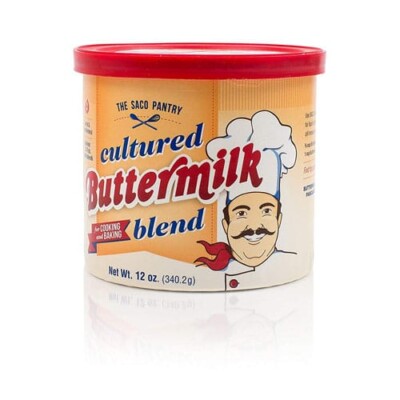
I didn’t just want to add red food coloring to a regular blondie recipe, I really wanted these to taste like real red velvet cake. So in addition to some cocoa powder, I added my secret weapon: powdered buttermilk. Just a little bit added to the batter gave the bars a great depth of flavor. I wouldn’t say they’re overtly tangy, but they do have a more complex, less sweet flavor than bars made without the powder. (I say this from experience, because I actually made this recipe 3 times before I was happy with it.) This wasn’t a freebie and this isn’t a sponsored post…I just think powdered buttermilk is kind of a brilliant product, and it definitely does good things to these bars.

The bars are topped with a whipped cream cheese frosting, all the better to reinforce the red velvet cake connection. Since I made 3 batches we’re up to our ears in red velvet bars over here, but we’re definitely not complaining. Bring on the bars and pass the sprinkles!
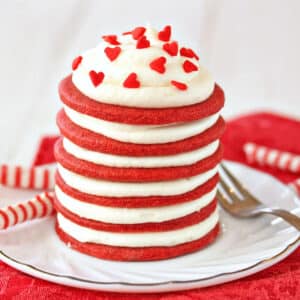
Red Velvet Icebox Cakes
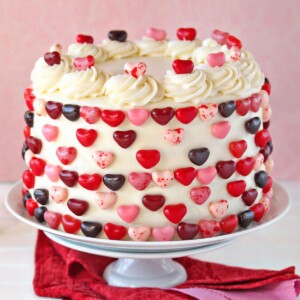
Sky-High Pink and Red Velvet Cake
Red Velvet Bars with Cream Cheese Frosting
Ingredients
For the red velvet bars:
- 8 oz unsalted butter
- 2 cups granulated sugar
- 1/2 cup brown sugar, packed
- 2 large eggs
- 2 large egg yolks
- 1 TBSP vanilla extract
- 1 TBSP red gel food coloring
- 2 1/4 cup all-purpose flour
- 1/4 cup unsweetened cocoa powder
- 1/4 cup powdered buttermilk
- 1 tsp salt
- 1/2 tsp baking soda
For the cream cheese frosting:
- 4 oz unsalted butter, slightly softened to room temperature
- 8 oz cream cheese, slightly softened to room temperature
- 1/4 cup marshmallow cream
- 1 tsp vanilla extract
- 1 pound powdered sugar, (4 cups)
- 1 TBSP heavy cream, or milk
For the sprinkles:
- 1 large egg whites, (about 1 oz)
- 1/2 tsp salt
- 8 oz powdered sugar, (2 cups)
- 1 tsp vanilla extract
- 1 tsp red gel coloring
Instructions
To make the red velvet bars:
- Preheat oven to 350 F. Line a 9×13 pan (I prefer metal pans for this recipe) with foil and spray the foil with nonstick cooking spray.
- In a large saucepan, melt the butter over medium-low heat and remove once almost melted. Do not bring it to a boil. Let it cool for a few minutes, then add the sugars and whisk them in. Add the eggs and egg yolks one at a time, whisking after each addition. Add the vanilla and the red food coloring, and whisk well until everything is well-combined.
- In a small bowl, sift together the flour, cocoa powder, buttermilk, salt, and baking soda. Add the dry ingredients to the saucepan with the wet ingredients, and stir with a spatula just until everything is blended and no flour streaks remain. You will have a thick, sticky batter. Scrape it into the prepared pan and smooth it into an even layer.
- Bake the bars at 350F for 30-35 minutes, until a toothpick inserted into the center of the pan comes out with just a few moist crumbs attached. Let cool completely before frosting and cutting.
To make the cream cheese frosting:
- Combine the butter, cream cheese, and marshmallow cream in the bowl of a large stand mixer fitted with a whisk attachment. Cream them together until they’re very light and fluffy. Add the vanilla and salt, and mix it in.
- Add the powdered sugar and cream, and mix it on low speed until it the sugar is moistened. Turn the speed to medium-high an whip until the frosting is fluffy and light. Add more cream or sugar as desired, to get your optimal texture.
- Spread the cream cheese on the cooled red velvet bars and top with sprinkles!
To make the sprinkles:
- Combine all ingredients in the bowl of a stand mixer fitted with a paddle attachment, and beat on medium-low speed until the sugar is moistened and you have a thick paste. Scrape the paste into a piping bag fitted with a multi-opening attachment (ie, #134, #89, or #43.) If you don’t have one, you can use a single-opening tip, you will just have to pipe a lot more lines!
- Lay a sheet of parchment over a baking sheet, and pipe long thin lines onto the parchment, taking care to not let them touch each other. Let the lines dry and harden completely, for 24 hours. (Mine were done sooner, but my paste was very thick and I live in a dry climate.) When they’re dry and brittle, use a spatula to scrape them onto a cutting board. Chop the sprinkles into small pieces. Store in an airtight container at room temperature.
Recipe Notes
Measuring Tips
Our recipes are developed using weight measurements, and we highly recommend using a kitchen scale for baking whenever possible. However, if you prefer to use cups, volume measurements are provided as well. PLEASE NOTE: the adage “8 oz = 1 cup” is NOT true when speaking about weight, so don’t be concerned if the measurements don’t fit this formula.
Want to learn more about baking measurements and conversion?


“Just because I could” is a totally legitimate reason to do something! Especially in the kitchen. Mad respect.
*fist bump*
OMG! I have never thought about making my own sprinkles. I think I have to make these now. Recipe seems easy enough – hopefully I can handle it.
It’s super simple! I think I made mine too stiff, so my advice would be to have a little extra egg white (or flavoring) available, to thin it out if you need to. Of course it should be stiff enough to easily hold its shape, but you should also be able to pipe it without giving yourself a claw for a hand…speaking from painful experience here… 🙂
I have seen dried buttermilk in the grocery store, but have never used it. Thanks to you, I now have an excuse!!
It’s awesome, because I always end up with half a carton of buttermilk that goes to waste before I can use it. By using powdered buttermilk, I never have to buy the real stuff and toss it out. Winner!
Elizabeth, if we were all completely sane, first we probably wouldn’t spend so much time baking and blogging and second the world would be a very boring place 🙂 I can’t wait to try making my own sprinkles. Thanks for the recipe! The answer to,”Why are you doing that?” is “Because I can!” 🙂
Oh Wendy, the number of nights I’ve stared blearily at the computer, trying to edit cake photos, wondering “…and why am I doing this again, when I could be asleep?!” We food bloggers are a crazy bunch for sure. It’s just nice to know I’m not alone in the craziness!
Let me know if you end up trying the sprinkles, and what you think!
You are a super star!! Check you out, making your own sprinkles. I’m so impressed! Now, you’ve inspired me and I am just going to have to make sprinkles from scratch. So cool!
Haha thanks Kate! Now I’m wishing I’d gone ahead with SugarStar instead of SugarHero. Homemade sprinkles are definitely more for the bragging rights–but hey, bragging can be fun now and then. 😉
Yay, homemade sprinkles!! These look very festive!
Homemade sprinkles? Really? That is beyond awesome!
I don’t know if the consistency would allow you to but could you use one of those garlic presses with all the little holes to squeeze out the strands for the jimmies? Then you could cut them to size. We used to use it on colored modeling clay (Sculpey – you baked it to set it) and it worked great.
Thats a good idea, I’m afraid it wouldn’t work because the texture is closer to an icing than a clay! If you do try that, let me know how it goes! Thank you so much!
I just wanna know the shelf life of these bars..