


Make the popular Trader Joe’s Root Beer Float Pieces at home! This copycat candy recipe combines vanilla sandwich cookies, popping candy, and root beer coating to produce a homemade candy that tastes just as delicious as the original.

🍻 Make Root Beer Float Pieces at Home
Can a grocery chain be your soulmate? If so, I’ve been in a (one-sided) love affair with Trader Joe’s for years now.
It’s no secret I love a wacky food combo, and TJ’s is always taking bold swings and coming out with creative new products. (I swear they’re one step away from releasing dill pickle ice cream or ube-flavored mustard.)
So when I saw these new Root Beer Float Pieces on the shelves, of course I bought them immediately, even though they sounded insane. They’re described as “vanilla sandwich cookie pieces with popping candy covered in a root beer flavored coating.”
Real talk: that description sounds like something I would come up with in a dream, write down in the middle of the night, and then wake up the next morning, read it, and think “…what?! Why did I think this was a great idea?”
These Root Beer Float Pieces are, in fact, bizarre. Your mouth is telling you the texture is like a chocolate-covered Oreo, but your tongue is telling you it tastes like a root beer float, and just when you’re starting to accept these competing ideas, the popping candy bursts into the mix all, POP FIZZ POP POP POW in your mouth and then you have no idea WHAT is going on. It’s confusing.

All that is to say, I love these little oddballs. I went back and bought several more bags. I kept them in the office so I wouldn’t have to share with the kids. And sometime deep into my second or third bag, I had the idea to try and make them at home. To the SugarHero laboratory! 👩🏻🔬
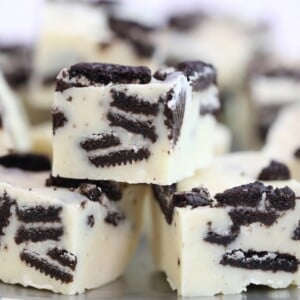
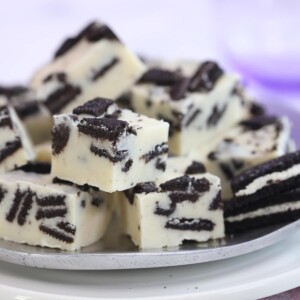
No false modesty here: After 4 different attempts to nail the ratio of candy to cookie and get the root beer coating juuuuuust right, I’ve done it! These homemade Root Beer Float Pieces are SO good, and – with apologies to my secret boyfriend T. Joe – even better than the original! Here’s a comparison shot:

The homemade ones have the perfect mix of smooth root beer flavored coating, crunchy cookie pieces, and fizzy popping candy. The store-bought ones are also delish, but they mostly suffer from age. They’ve spent who-knows-how-long jostled around in a bag together, getting scuffed and slowly losing their freshly-made taste.
If you want to try making these yourself at home, I have alllllll the info and lots of advice for you in this post. Before we begin, you should know:
- You will need some specialty ingredients, listed and linked in the Ingredients section below. Unless you live in a magic land where unflavored popping candy is on every store shelf, you’ll need to plan ahead and order a few things online. Sorry ‘bout it.
- I didn’t do any math, but I can’t imagine it’s cheaper to make these candies at home. If you make 4 or 5 batches, you’ll probably break even, but this isn’t a “cheap Trader Joe’s hack.” This is for the weirdos like me who think it’s fun to play with their food and try new things for the sake of trying. I see you out there and I love you.
So without further ado (there has been so much ado already!), here’s how to make your own root beer float pieces at home, complete with step-by-step photos. Let’s gooooooo!
Table of Contents
🧾What You’ll Need

Ingredients
As you might imagine, a unique recipe like this requires a few unique ingredients. I’m linking the exact products I used and recommend. You’re welcome to make substitutions if you’d like, but I can’t guarantee you’ll get similar results. (Links are affiliate links and I earn a small commission from qualifying purchases.)
- Vanilla Sandwich Cookies: I used Double Stuf Golden Oreos because I love maximum cream fillling, but the cookies don’t matter too much – any tasty vanilla sandwich cookie should work.
- Unflavored Popping Candy:These are sweet little candy pieces that look like crushed rice crispies, and produce a popping sensation when they come into contact with moisture (like in your mouth!) While flavored popping candy is fairly common (“Pop Rocks” is one well-known brand), for this recipe we don’t want fruity flavors, so we need the much less common unflavored variety. I used this Unflavored Popping Candy and had great results – the popping effect was strong and long-lasting in the candy.
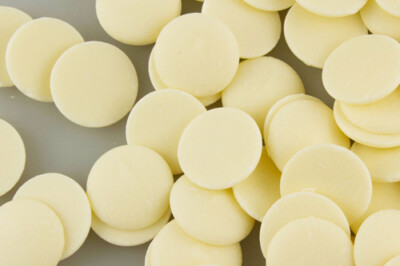
- White Candy Coating:Also known as “candy melts” or “confectionary coating,” these vanilla-flavored wafers melt smoothly and are great for making dipped candies. Caution: water will cause melted candy coating (and chocolate) to thicken, seize, and become unworkable, so you should only use oil-based coloring or flavoring.
- Brown Candy Coloring: This is optional, but if you want your candy to look like the original TJ’s product, you will need to color the white coating with brown oil-based candy coloring, NOT regular food coloring. (Why not just use brown candy melts? Because they’re always chocolate flavored, boo!) You can certainly leave your candy coating white if you’d like – the coloring is only for aesthetics.
- Root Beer Flavoring: I used Lor-Ann Super Strength Root Beer Flavor, which has a nicely realistic root beer taste. Unfortunately this product does contain some water (I couldn’t find a completely oil-based root beer flavor) but the good news is that it’s formulated so that it can still be used in candy coating! It won’t cause your coating to seize, but it will make it thicker and harder to work with. That’s why our last ingredient is…
- Paramount Crystals (or vegetable oil): I highly recommend paramount crystals any time you want to thin our your candy coating. These little flakes of magic are added to melted candy coating to make it thinner. They’re made from the same fat that’s in candy coating, so they blend beautifully, make the coating nice and fluid, and help it set shiny and hard. Substitution: you can use vegetable oil or canola oil to thin out your coating instead, but you might find your coating sets softer than normal. Instructions for oil are in the Notes section of the recipe card.
Equipment
- Dipping tools: Dipping tools aren’t a necessity, but they make dipping candy much easier, and I’d recommend picking some up if you regularly make candy. If you don’t have dipping tools, a regular fork is fine to use.

🍬 More Fun Candies
Leave a Review!
If you make this recipe, let us know! Leave a ⭐️⭐️⭐️⭐️⭐️ rating on the recipe below, and leave a comment, take a photo and tag me on Instagram @elabau, or use #sugarhero on IG!

Homemade Root Beer Float Pieces Recipe
Ingredients
- 16 vanilla sandwich cookies
- 16 oz white candy coating
- Brown oil-based candy coloring, optional
- 1 TBSP root beer flavoring, or to taste
- 1 oz paramount crystals, (¼ cup)
- 0.75 oz unflavored popping candy, (2 TBSP)
Instructions
- Chop the cookies. Chop the sandwich cookies roughly into quarters and set aside.
- Melt the coating. Place white candy coating in a medium microwave-safe bowl. Melt it for 1 minute at 50% power, then stir. (If you can’t adjust the power setting, melt it in 30-second intervals instead.) Microwave it for an additional minute at 50% power, then stir again. Continue to heat in smaller spurts, stirring regularly, until the coating is completely melted and smooth.
- Color the coating (optional). Add a generous squirt of brown oil-based candy coloring, and stir until completely mixed. Add more until you’re happy with the color.
- Add root beer flavor. Add the root beer flavoring and stir well. The flavor will cause the coating to thicken as you stir – this is expected.
- Thin the coating. Add a spoonful of paramount crystals to the coating and stir gently while they melt. Continue to add the crystals, a bit a time, stirring often so they are well-incorporated. Add crystals until the coating is once again fluid enough to dip candies in. I found ¼ cup (1 oz) was a good amount for me, but yours might vary depending on the candy coating used. If your coating cools down too fast, microwave it briefly so it stays warm and fluid.
- Alternative: use oil to thin. If you don’t have paramount crystals, you can use a neutral-flavored oil like vegetable oil or canola oil instead, using the same procedure. Add a bit at a time to thin out the coating, up to a maximum of about 3 TBSP (1.1 oz or 32 g).
- Combine popping candy and coating. Place the popping candy in a large bowl and add about ½ cup melted coating on top. You can eyeball the measurement – it doesn’t need to be precise. Stir the popping candy and coating together until well-mixed. You’ll hear the popping candy start to pop a bit during this step.
- Add the cookies. Add the chopped cookies to the large bowl, and stir so that they’re lightly coated with the root beer coating/popping candy mixture. Make sure everything is well-mixed and there aren’t big pockets of naked cookies or unmixed chunks of popping candy. Add a bit more coating if you need to, just enough to help the popping candy stick to the cookie pieces.
- Chill the cookie chunks. Scrape the cookie pieces out onto a baking sheet covered with parchment. Separate the pieces into smaller clumps – having it in small chunks will make things easier later. Chill the tray for 10-15 minutes to set the coating.
- Prepare for dipping. The bowl of melted coating will have cooled a bit at this point, so microwave it briefly so it is warm (but not hot!) and fluid. Cover another baking sheet with parchment, and have your dipping tools or fork ready to go.
- Dip the cookie chunks. Using a dipping tool or fork to dip a chunk of cookie into the melted coating. Tap the fork on the edge of the bowl a few times to get excess coating to drip back into the bowl. Set the dipped candy on your prepared baking sheet, and continue to dip the remaining pieces.
- Chill until set. Once everything is dipped, place the sheet back in the refrigerator for at least 15 minutes to fully set the coating.
- Enjoy! For the best taste and texture, serve these candies at room temperature. They can be kept in an airtight container at room temperature. Nothing in these candies will spoil quickly, but I’ve found the popping candy is most effective within the first week.
Video

Recipe Notes
Ingredient notes:
- Color: The brown coloring is completely optional, and is used to make the candies look more like the original version. You can skip it and leave your coating white if you’d like. Another option is to mix complimentary colors of candy coating (red and green, or orange and blue), which should produce a muddy brown color. Or, if you can find brown candy coating that isn’t chocolate flavored, that works too! (I wasn’t able to find any.) If you do decide to color it, be sure that your coloring is oil-based, not water-based.
- Flavor: I used Lor-Ann brand root beer flavoring. Other brands might work, but I can’t guarantee it. If you do use another variety, I recommend adding much less flavoring and taste it as you go, since brands can vary so much in strength.
- Thinning: Add the paramount crystals (or oil) a bit at a time, stirring VERY well the whole time to incorporate the fat. Add only as much as you need to get a dippable texture – less is better!
Yield:
You should get 50-60 candies from this recipe. Your yield will vary depending on how you cut the cookies and separate the cookie clusters.Measuring Tips
Our recipes are developed using weight measurements, and we highly recommend using a kitchen scale for baking whenever possible. However, if you prefer to use cups, volume measurements are provided as well. PLEASE NOTE: the adage “8 oz = 1 cup” is NOT true when speaking about weight, so don’t be concerned if the measurements don’t fit this formula.
Want to learn more about baking measurements and conversion?
Nutrition
📸Photo Tutorial: How to Make Root Beer Float Pieces
Grab the printable recipe from the recipe card above, then follow along as I show you just how easy it is to make these Root Beer Float Pieces!


- Chop the cookies. Chop 16 vanilla sandwich cookies roughly into quarters.
- Microwave the coating. Place 16 oz white candy coating in a microwave-safe bowl. Microwave at 50% power in one-minute intervals, stirring after every minute. If you can’t change the power of your microwave, stir after every 30 seconds instead – you don’t want to accidentally overheat it.


Color and Flavor the Coating
- Melt the coating. You can stop heating when there are just a few small pieces of unmelted coating remaining – the residual heat will melt them as it sits.
- Add coloring. Add oil-based candy coloring and stir it in. (See the recipe card notes for alternatives.) I used Colour Mill chocolate brown, along with a touch of black. As you can see, it was still more of a reddish-brown, but our next step will help with that…


- Add root beer flavor. Add 1 TBSP of root beer flavor and stir well. The good news is that it adds a lot of color too, making our coating a richer dark brown. The bad news is that it causes the coating to thicken up a lot, but don’t freak out – it will be okay!
- Thin the coating with paramount crystals. Add a spoonful of paramount crystals to the coating and stir gently while they melt. Continue to add the crystals, a bit a time, stirring often, until the coating is once again fluid enough to dip candies in. I found ¼ cup (1 oz) was a good amount for me, but yours might vary depending on the candy coating used. If you’d like to use vegetable oil instead, check the recipe card notes for instructions. Use only as much as you need and no more – less is better!


Mix Everything Together
- Combine popping candy and coating. Place 1 oz (1/4 cup) popping candy in a large bowl and add about ½ cup melted coating on top. You can eyeball that measurement – it doesn’t need to be precise.
- Stir together. Stir the popping candy and coating together until well-mixed. You’ll hear the popping candy start to pop a bit during this step.


- Add the cookies. Add the chopped cookies to the large bowl, and stir so that they’re lightly coated with the root beer coating/popping candy mixture.
- Mix well. Make sure everything is well-mixed and there aren’t big pockets of naked cookies or unmixed chunks of popping candy. Add a bit more coating if you need to, just enough to help the popping candy stick to the cookie pieces. At this point, it’s looking like dog food (or worse). Trust the process!
- Chill. Scrape the cookie pieces out onto a baking sheet covered with parchment. Separate the pieces into smaller clumps, then chill the tray for 10-15 minutes to set the coating. If you leave it in the fridge for a long time and it gets very cold, let the candy come close to room temperature before moving on to dipping.


Dip the Candy
- Dip the cookie chunks. Make sure your melted coating is warm and fluid. Using a dipping tool or fork to dip a chunk of cookie into the melted coating. Tap the fork on the edge of the bowl a few times to get excess coating to drip back into the bowl.
- Chill again. Set the dipped candy on a parchment-covered baking sheet, and continue to dip the remaining pieces.

💡 Tips & FAQs
What To Do With Extra Candy Coating?
You’ll most likely be left with extra root beer-flavored coating after dipping your candies. It’s the nature of the beast – in order to have enough coating to make dipping easy, you’ll need more than is strictly necessary in the recipe. So what to do with the extra?
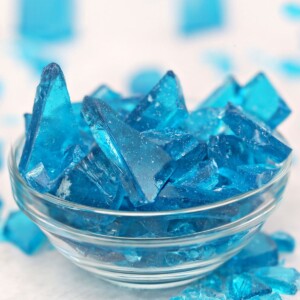
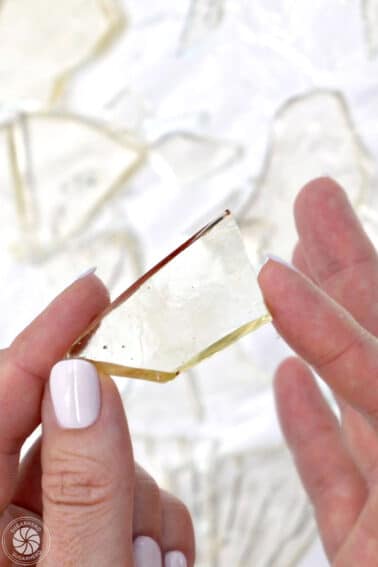
- If you don’t want to make another candy right away: pour out the remaining coating onto a piece of parchment or waxed paper, and spread it into an even layer. Once it sets, break it into thin shards and store in a bag or container for later. I always do this with my leftover coating – the thin pieces melt quickly and it’s easier to grab just as much as I need for the next project.
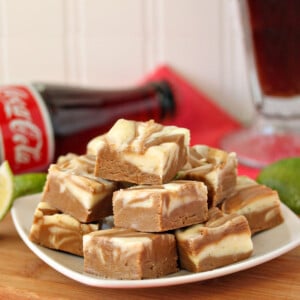
- Root Beer Rocky Road Candy: add mix-ins like mini marshmallows and toasted almonds, then drop clusters of candy onto a piece of parchment to make root beer rocky road!
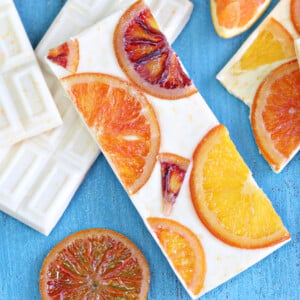
- Root Beer Float Bark: pour the root beer coating out onto parchment and spread it into an even layer. Dollop vanilla coating over the root beer, then swirl them together. Let it set, then break it into uneven pieces to serve.
💭 Candy FAQs
There are a LOT of reasons candy coating can be too thick! The biggest culprits are:
⓵ old coating. The older it is, the thicker it gets when you try and heat it. If it’s been kicking around your cupboards at home for over a year, time to buy a new batch! (Hopefully what you purchase in a store is fresh, but there’s always a risk you’re buying older product since you can’t know how long it has been sitting on store shelves or in a warehouse before you buy it.)
⓶ overheating. This is a BIGGIE. The biggest rule in heating candy coating is low and slow. Heat in intervals at 50% power, stirring often. The worst thing you can do is heat it too much – it will clump together into one big ball and at that point, you basically can’t save it. So be very gentle! A good rule of thumb is to stop heating when there are still a few small lumps of candy unmelted – the residual heat will melt them and this way you won’t overheat accidentally.
⓷ Adding water. (Boy did I talk about this a lot in the post!) This includes random droplets from the sink, steam from a water bath, etc. And as mentioned above, you should avoid water-based flavorings or colorings as much as possible. And yes, in this recipe, we do use a flavoring with water, and it does thicken the coating. But when possible, use only oil-based additives.
If your coating is too thick, you can add a bit of paramount crystals (my top recommendation), shortening, coconut oil, or vegetable oil to thin it out.
Sometimes, candy coating dries with whitish or grayish streaks. This is called “fat bloom” and it’s totally harmless, but can look a bit unappetizing! It happens when fat from the candy coating separates and comes to the surface, usually due to temperature fluctuations.
My best advice for avoiding fat bloom is to:
⓵ not overheat the candy coating
⓶ not dip candies when they are very cold (slightly chilled is okay, but closer to room temp is always better)
⓷ place your dipped candies in the refrigerator to set as soon as you’re done.
I most often get bloom when my candies set at room temperature, or when they are partially set and then I refrigerate them. You want to go from dipping to the fridge as soon as possible! This is called “shock-chilling” and while it’s not something you should do with tempered chocolate, it helps candy coating to avoid bloom and have a shiny surface.
Theoretically, these should keep for a long time! None of the ingredients will spoil quickly. However, “edible” and “most delicious” are two different things. I’ve found that after a week, the cookies get soft and the popping candy loses a lot of its “pop.” It’s still there, just…muted. So I will say you CAN keep these for weeks, but probably SHOULD eat them within a week or less of making them.


You are a genius! I would love these, but would never make them. The people in my house are way too health-conscious. I know. What’s up with that? Maybe the next time I’m home alone for a few days…