


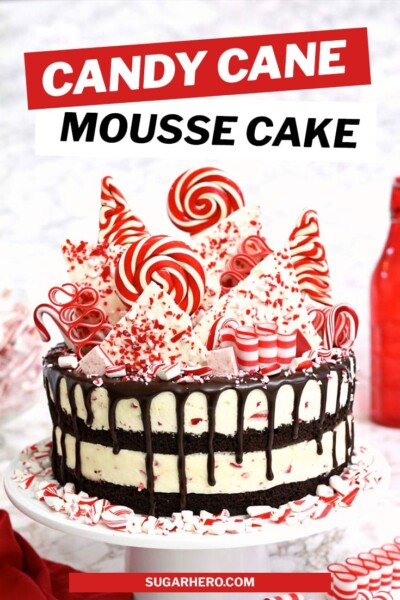
This Candy Cane Mousse Cake is a knockout Christmas dessert! It has alternating layers of moist chocolate cake and candy cane mousse, covered with a shiny chocolate glaze and a spectacular candy cane topping.

My Very Favorite Christmas Cake
At the risk of bragging, this is one of the best Christmas cakes I’ve ever made.
To say I am obsessed with this Candy Cane Mousse Cake is an understatement. I’ve made it four times in the last two weeks, and I’m not tired of it yet! (Don’t worry—in addition to gorging on it ourselves, we’ve also shared it with family, coworkers, and neighbors.)

This cake just hits all of my pleasure spots. Rich, dark chocolate cake? Check! Light and fluffy mousse? Check! Minty flavor that’s refreshing but not too strong? Checkity check check! Subtle, understated decorations? Che—wait, no. You didn’t forget the SugarHero motto, did you? “Go big, and then go bigger.” That’s the SugarHero way!
So let’s talk about what’s really going on with this beast of a candy cane cake.

This is another cake based on my popular Chocolate Raspberry Mousse Cake. (I also have a Pumpkin Chocolate Mousse Cake, if you want to see an autumn-themed version as well! The autumn version also includes a video.) That cake is one of my very favorites, and I’ve decided I’m not going to be happy until I’ve tried new variations of it for every season and every holiday. Repeat with me: Go big, and then go bigger! Should I embroider that on a throw pillow for my house? Asking for a friend.
If you love peppermint, you will also love my Candy Cane Cheesecake, Chocolate Candy Cane Cake, Candy Cane Cake, Peppermint Lava Cakes, and Peppermint Mocha Mousse Cake! And, don’t miss my collection of 35 Peppermint Dessert Recipes!

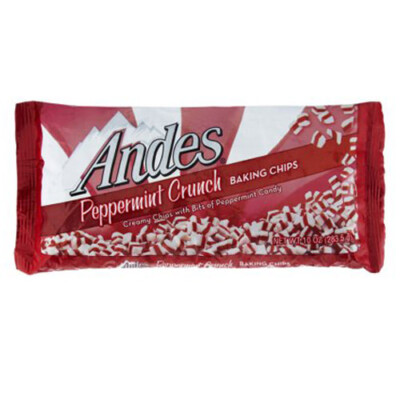
This cake has two layers of my moist, flavorful chocolate cake, and two layers of light, fluffy, minty candy cane mousse. It’s white chocolate-based, and it gets its flavor from a bit of mint extract, as well as a bunch of Andes peppermint crunch chips.
I recommend Andes chips instead of candy cane bits, because candy cane bits get soft and sticky very quickly. They wouldn’t stand a chance when mixed into the mousse! If you can’t find the peppermint crunch chips, any pieces of chocolate-mint candy will do. As long as you avoid hard mint candies in the mousse, you’ll be fine!

So let’s talk about the decorations. After the mousse cake was set, I added a top layer of shiny chocolate ganache dripping down the sides. And on top? A winter candy wonderland, of course!

I used every red and white candy cane treat I could find! Homemade peppermint bark, lollipops, ribbon candy, mini candy canes, and crushed candy cane pieces all got scattered on the top in a wild display of sugar and stripes. Of course this is optional, and you can keep things as simple as leaving the chocolate ganache plain, or go as crazy as I did and add a whole candy cane forest.
When should I add the candy canes to the top of the mousse cake?
A quick word of warning: everything I said about candy canes getting sticky still applies to the toppings, so I would recommend not adding all of these decorations until shortly before serving. (I’d give them an hour or two in advance, tops.) You can make the cake and ganache in advance, but as soon as you add that sugar candy, you’ll want to serve the cake soon.

💡Tips, Tricks, and FAQs
You need a 9-inch pan with sides at least 3-inches tall and the ability to remove the bottom. Either a cake pan with a removable bottom or a springform pan will work.
I used an acetate collar to line the cake pan and get clean lines when unmolding the mousse. They’re inexpensive and very handy for lots of kitchen projects, but if you don’t have them, you can use waxed paper or parchment paper instead. The cake will still unmold, but the outside might not be as neat and clean.
The most common reason whipped cream collapses is because it has been overworked (whipped for too long). Perfectly whipped cream should have the texture of shaving cream — thick, with a lot of body. It should hold peaks but still have some softness to it. Stop whipping the cream just before stiff peaks start to form. This will give you a little more wiggle room when you start folding the whipped cream into the mousse.
Most likely, the chocolate is a little too cool when you start adding the whipped cream. When the chocolate comes in contact with the cream, it’s beginning to set prematurely. I recommend mixing them together when the chocolate is a bit warmer. The chocolate should be about body temperature, or slightly above, to mix properly with the cream. It’s definitely a balancing act, because you don’t want the chocolate to be too hot and melt the cream.
You can make your cake 2-3 days in advance. Wrap it well and store it in the fridge. Thankfully the mousse layers won’t collapse since they are made with gelatin. It really helps with stability and longevity. However, with time the mousse will begin to dry out which eventually creates a less appetizing texture.
You can also freeze the cake. Make it several days in advance and freeze it. You’ll need to wrap it well, or cover the pan with a lid, so that it doesn’t dry out. Thaw it overnight in the fridge the day before you plan to eat it.
Whether you store it in the fridge or freezer, I also recommend waiting to dress it with the ganache, whipped cream, and truffles until the day you plan to eat it. Happy Baking!

This truly is one of my very favorite holiday desserts, and I hope you’ll give it a try!
 More Christmas Desserts You’ll Love
- Gingerbread Cookie Mug Toppers
- Oreo Cookie Christmas Ornaments
- Christmas Present Cookie Boxes
- Pull-Apart Cupcake Wreath
- Red Velvet Trifle
- Grinch Cake
- Snow Globe Cupcakes

Candy Cane Hearts

Candy Cane Cheesecake
If you make this recipe, please let me know! Leave a  rating on this recipe below and leave a comment, take a photo and tag me on Instagram @elabau or use #sugarhero.

Candy Cane Mousse Cake
Ingredients
For the Chocolate Cake:
- 4 oz unsalted butter, at room temperature
- 3.5 oz granulated sugar, (1/2 cup)
- 3.75 oz brown sugar, (1/2 cup)
- 2 large eggs, at room temperature
- 2 tsp vanilla extract
- 8 fl oz buttermilk, (1 cup), at room temperature
- 5.3 oz all-purpose flour, (1 1/3 cup)
- 2 oz unsweetened cocoa powder, (2/3 cup)
- 1 tsp baking soda
- 1/2 tsp salt
For the Candy Cane Layers:
- 18 oz white chocolate chips
- 3.5 cups heavy cream
- ½ tsp salt
- 4 tsp unflavored powdered gelatin
- 4 TBSP water
- 1 tsp peppermint extract
- 8 oz Andes peppermint crunch baking bits, (1 1/3 cup), or similar chocolate-mint pieces
To Glaze and Decorate:
- 4 fl oz heavy cream, (1/2 cup)
- 3 oz semi-sweet chocolate, finely chopped
- Peppermint candies, peppermint bark, lollipops, ribbon candy, candy canes, etc.
Instructions
To Make the Chocolate Cake:
- Line two 9-inch cake pan with parchment, but do not spray with nonstick cooking spray. Preheat the oven to 350 F.
- Add the butter and both sugars to the bowl of a large stand mixer fitted with a paddle attachment. Beat them together on medium-high speed, until light and fluffy, about 5 minutes. Add the eggs one at a time, beating well after each addition. Add the vanilla extract, and beat well until everything is fully incorporated.
- In a separate bowl, sift together the flour, cocoa powder, baking soda, and salt. With the mixer running on low, add a quarter of the sifted flour mixture. When the flour streaks have almost all disappeared, add a third of the buttermilk to the mixing bowl. When that’s incorporated, continue to add the drys and wets in an alternating pattern, ending with the dry ingredients.
- When the dry ingredients are nearly incorporated, stop the mixer. Scrape down the bottom and sides of the bowl with a rubber spatula, and finish mixing the cake by hand. Divide the batter between the prepared pans, and smooth it into an even layer. Bake the cakes for 22-25 minutes, until a toothpick inserted into the center comes out with just a few moist crumbs attached. Cool the cakes completely before using. They can be made in advance and kept in the freezer for up to several weeks until ready to use.
To Make the Candy Cane Mousse:
- Prepare your pan. You need a 9-inch pan with sides at least 3 inches tall, and the ability to remove the bottom. Either a cake pan with a removable bottom or a springform pan will work. Line the inner wall with a 4-inch high acetate cake collar or a strip of aluminum foil. Make sure the acetate or waxed paper is long enough so that it overlaps itself, and if you are using foil/waxed paper, make sure you cut the strip tall enough to extend at least an inch over the pan’s sides, since the cake is about 4 inches tall.
- Place a cake cardboard in the bottom of the pan, then carefully place the baked cake on top of the cardboard. This is optional, but it makes it easy to transfer the cake cleanly and neatly to your serving plate.
- Prepare the first mousse layer: combine 9 oz (1 ½ cups) white chocolate, 3/4 cup of cream, and ½ tsp salt in a microwave-safe bowl. Microwave in 30-second increments, stirring every 30 seconds, until the chocolate has melted and the mixture is smooth. Pour it into a large bowl, and let it cool to room temperature, stirring occasionally.
- While you wait for the white chocolate mixture to cool, prepare the gelatin. Whisk together 2 tsp gelatin and 2 TBSP cold water in a small bowl, and set it aside to let the gelatin absorb the water. When the chocolate is at room temperature, microwave the bowl of gelatin for 10-15 seconds, until it is melted. Whisk the melted gelatin and white chocolate mixture together, then whisk in ½ tsp peppermint extract.
- Whip 1 cup heavy cream to firm peaks. Fold half of the whipped cream into the white chocolate, and once it’s incorporated, gently fold in the remaining whipped cream. Add 2/3 cup (4 oz) of the Andes peppermint pieces, and gently stir them into the mousse. Scrape the mousse on top of the cake in the pan, and spread it into an even layer. Refrigerate the cake for 15 minutes, until the mousse has just started to set and is firm enough that the cake layer can be added.
- Gently place the second chocolate cake layer on top of the mousse, then repeat the mousse-making process with the second candy cane mousse layer. Scrape the mousse on top of the cake, and refrigerate for at least 5-6 hours, preferably overnight, until the mousse is very firm and set.
To Glaze and Decorate:
- To finish the cake, push the bottom out from the pan, or unhinge the sides, and unwrap the acetate strip. Transfer the cake to your serving platter. Make a quick chocolate ganache by putting the chopped chocolate in a small bowl and heating the cream to a simmer. Pour the hot cream over the chopped chocolate and whisk gently until the chocolate melts and you have a smooth, shiny mixture.
- Pour the ganache over the top of the cake, and use a spatula to nudge it right to the edge and over in evenly spaced drizzles. Don’t worry if the top is not smooth—it will be covered up! Let the cake sit for 10 minutes so the ganache starts to set, then top it with your candy of your choice—try using different sizes and shapes, like shards of peppermint bark, lollipops, candy canes, and ribbon candy. Sugar candy will get sticky over time, so don’t top the cake more than an hour or two in advance of when you plan to serve it.
- For the cleanest slices, cut the cake when it is well chilled. Use a large sharp knife, and wash it frequently between cuts. For the best taste and texture, allow the cake slices to sit at room temperature for 10-15 minutes before serving.
Measuring Tips
Our recipes are developed using weight measurements, and we highly recommend using a kitchen scale for baking whenever possible. However, if you prefer to use cups, volume measurements are provided as well. PLEASE NOTE: the adage “8 oz = 1 cup” is NOT true when speaking about weight, so don’t be concerned if the measurements don’t fit this formula.
Want to learn more about baking measurements and conversion?


Hi! What happens if you don’t wait the time to refrigerate the mousse before you put the next layer on top? Also, does this cake NEED to be refrigerated once finished? Will the mousse hold up if it isn’t?
Hi Stephanie. It’s really important to follow the directions for refrigeration when working with mousse. The refrigeration period gives the mousse time to set enough that it can support the weight of the cake layers and additional mousse without caving in. It’s a must for stability. When you finish the mousse cake, it’s very important to give the cake 5-6 hrs in the fridge so that it can fully set. After the cooling period, I recommend keeping it refrigerated until you are ready to serve it. Add the ganache and candy canes at the last minute for the best taste and texture. Ganache can lose a little of it’s shine after being refrigerated and candy canes will become sticky with exposure to the cold air in the fridge. If you’ve done all the refrigeration as instructed, the mousse will hold up really well. I’d recommend refrigerating any leftovers as soon as possible.
Is there a video of this recipe? Some of the instructions are a tiny bit confusing to me.
Hi Sue! I’m sorry to say we don’t have a video of this recipe yet. We do have a video of the Pumpkin Mousse Cake, which uses a very similar recipe and method (except the decorating part!) I’ll link it below if you’d like to check it out. And of course feel free to reach out if you have any questions or run into any problems.
https://www.sugarhero.com/pumpkin-chocolate-mousse-cake/
Like Sue I wish there was a video to this recipe. I also agree with Sue the instructions are a bit complex (especially the mouse) and I would hate to waste so much food by ruining the cake. I have bought everything for this cake including the topings which cost me an arm and a leg lol but I am really wanting to make it since last year been t I am a bit intimidated by the complexity of it. Decisions decisions…
Hi Chantal. I know it can be scary to buy so many ingredients and try something new. Thanks for the feedback about wanting a video. I made myself a note to look into making a video for this post. Fingers crossed for next year. In the meantime, here are a couple of suggestions. I have a video on my Pumpkin Chocolate Mousse Cake. That will give you a good place to start. The process is very similar and will show how to make mousse. And, I’ve got quite a few tips on my Chocolate Raspberry Mousses Cake. I hope that will help for now. All the best.
I have finally made the cake I can say that I am happy I did it and it was easier than I thought. The only thing I changed was to add Hersey’s kids candy cane chocolate in the mousse because where i live we don’t have the Andes chips so I needed to find an option but next time I won’t add any because I thought that with the peppermint extract was intense enough. I must say that the mousse is insanely amazing. I did put a picture on Pinterest thank you for giving me the 2 links to help me make it easier