


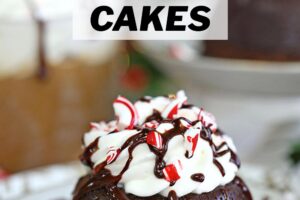


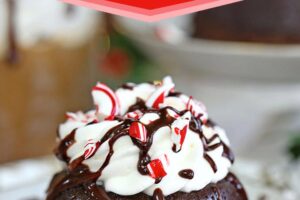
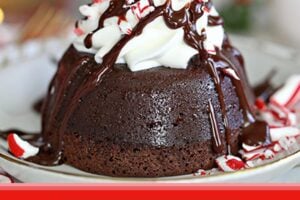


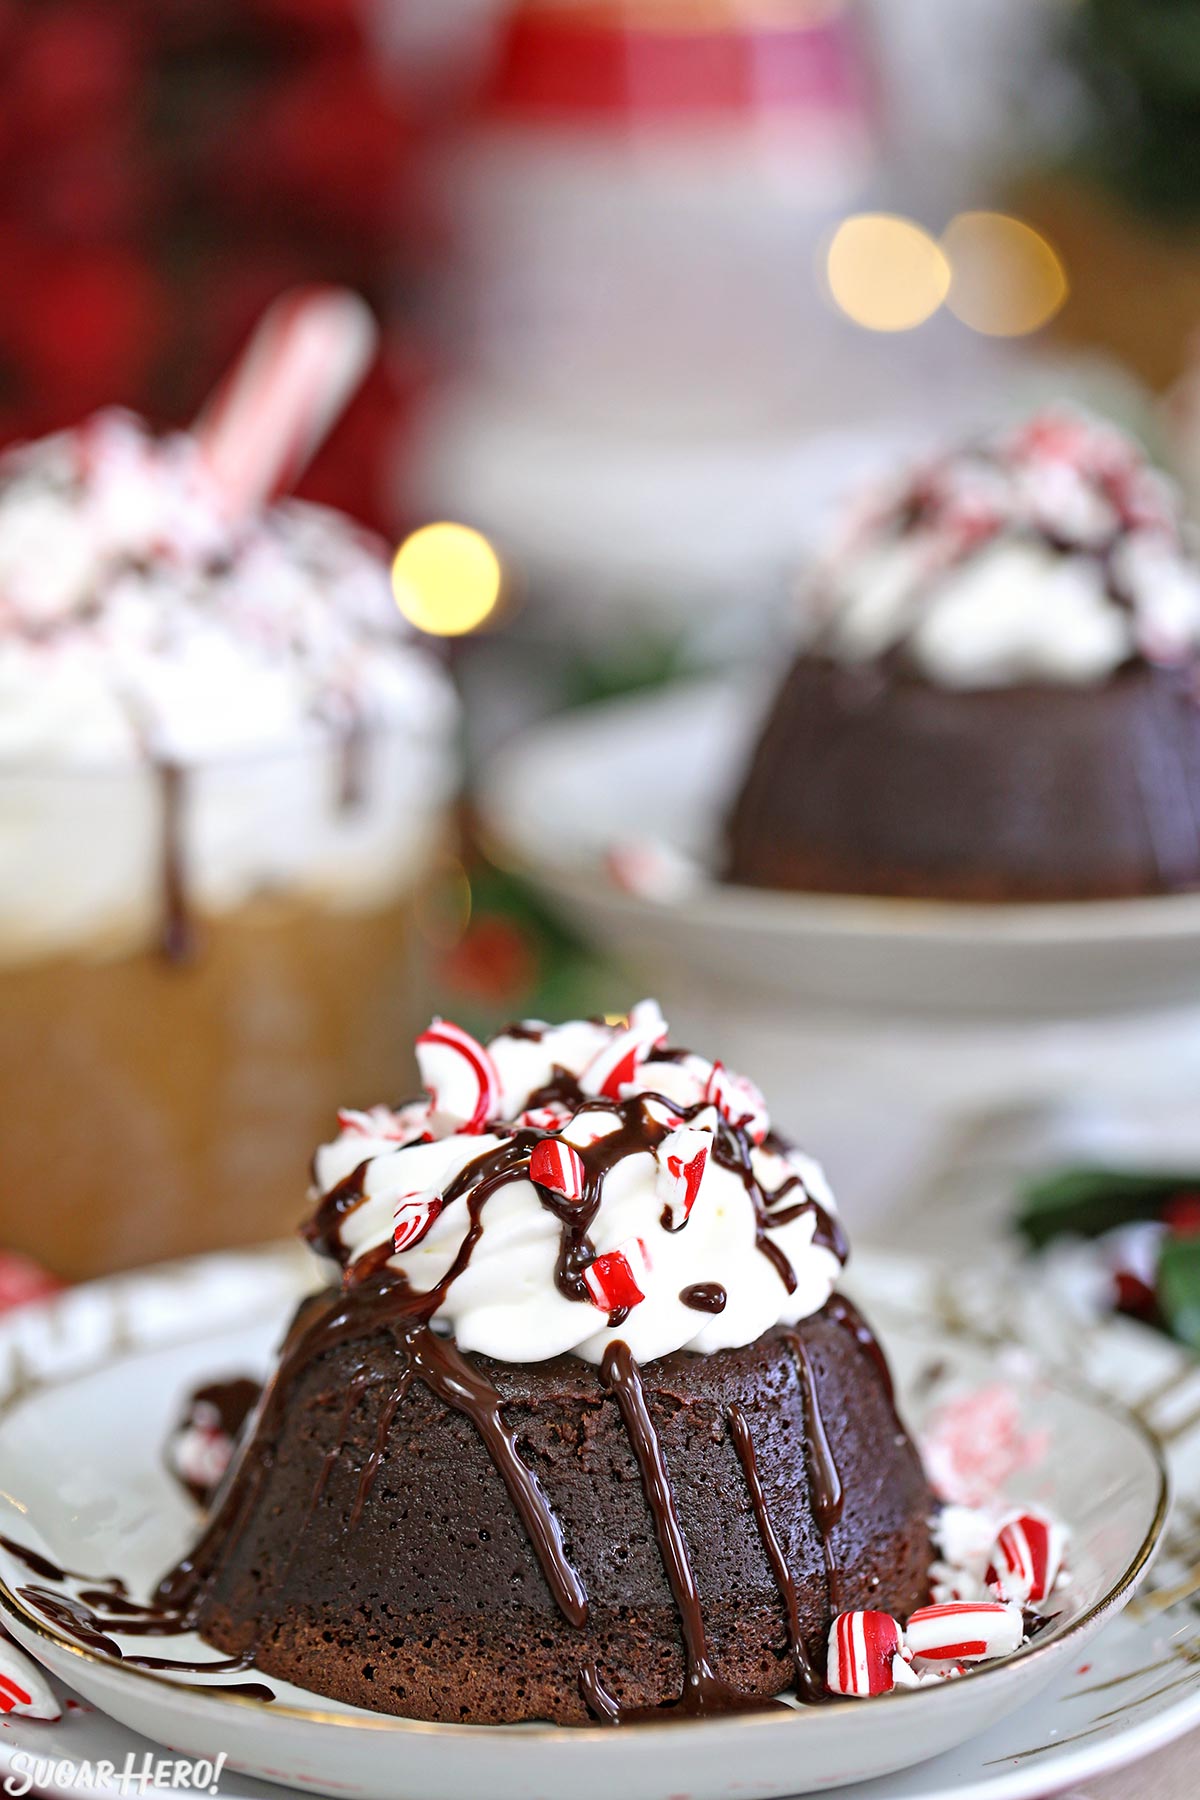
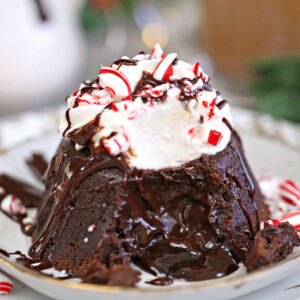
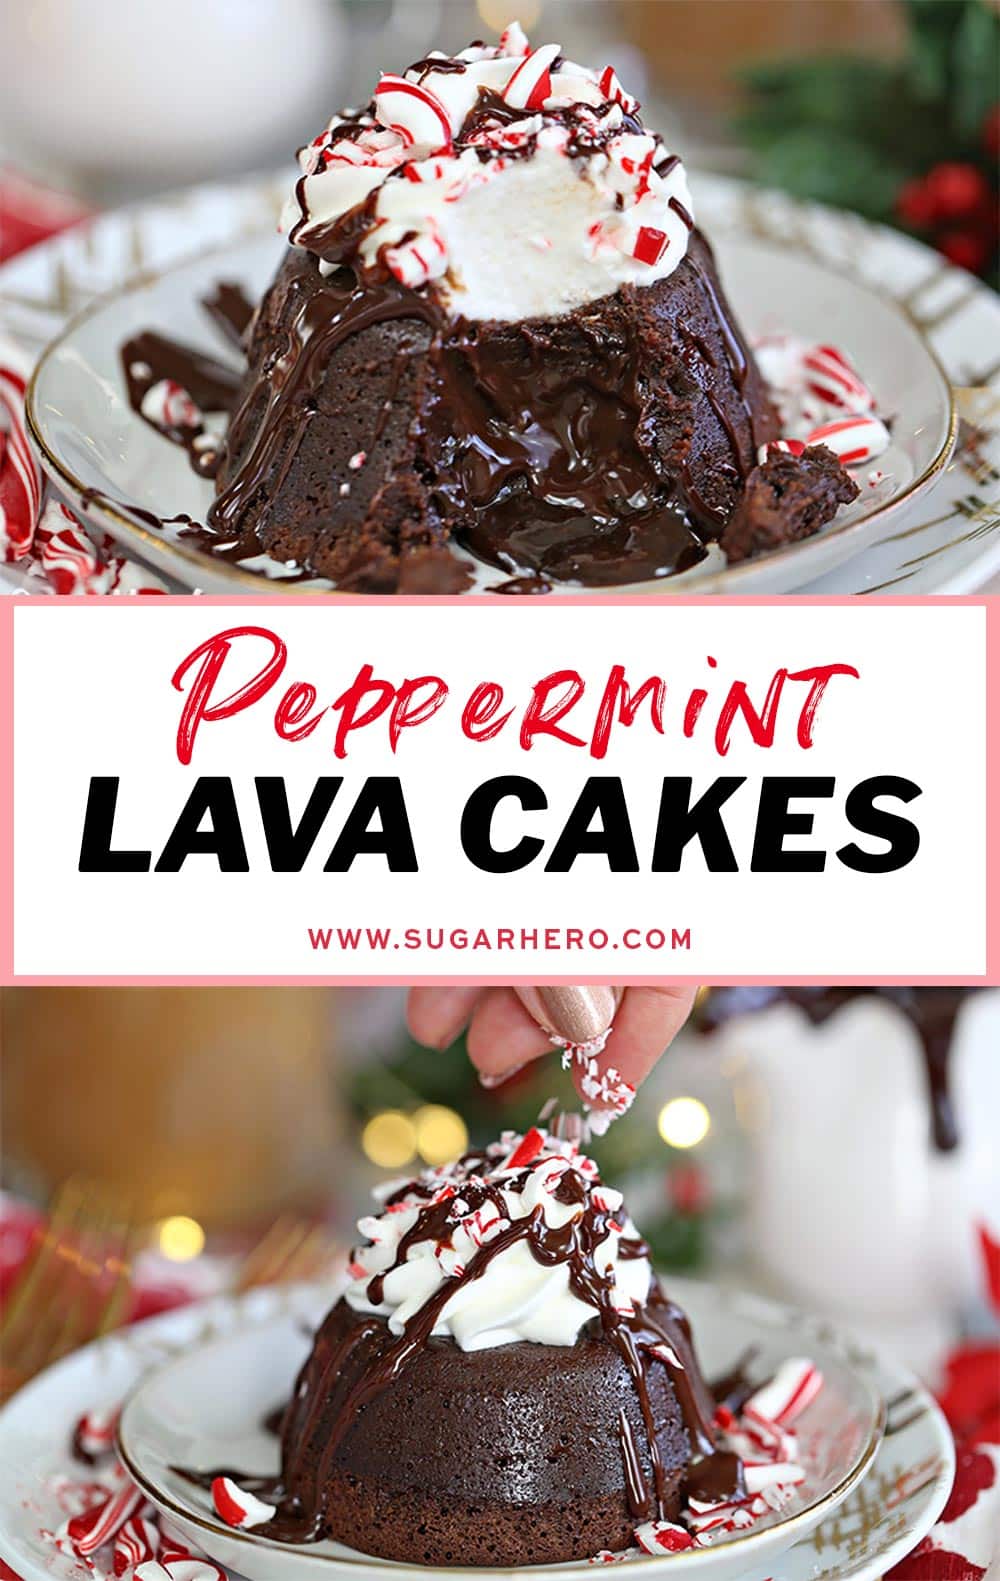
Chocolate lovers will go crazy for these Peppermint Lava Cakes – mini chocolate cakes with a hint of peppermint and a molten chocolate center. They make a great holiday dessert—they’re indulgent, they can be made in advance, and any extras keep very well.
🍬 Molten Chocolate Lava Cakes with Peppermint
Lava cakes are basically the perfect dish. If I had my way, EVERY food would be filled with a gooey chocolate center, but unfortunately there are things like “vegetables” and “fruits” and “grains” in this world, all of which are healthy, none of which involve molten chocolate inside.
So we’ve gotta take our chocolate pleasures where we can get them. Think about it: is there anything better than a single-serving cake filled with ooey, gooey chocolate that flows out of it like lava when you take a bite? Top that baby with some ice cream or whipped cream, and a drizzle of chocolate sauce, and you’ve got perfection on a plate.
Love peppermint? Don’t miss this collection of 35 of the Best Peppermint Desserts!

Table of Contents
🍫 The secret to gooey lava cakes, every time
The traditional lava cake texture can be achieve by simply baking the cake batter until it’s set around the edges and still soft in the middle. However, this method relies on precise and consistent timing. When I was working in restaurants, I got into the habit of adding a chocolate truffle to the center of my lava cakes before baking. This ensured that they ALWAYS had a perfectly gooey center, no matter what kitchen mishaps might befall–baked a few extra minutes? Left to languish in the refrigerator for a day or two? No problem, just heat them up and you’re back to lava territory!
Ever since then, I’ve made my lava cakes this way, and I’m never disappointed. They always have a liquid center, and the additional chocolate from the melted truffle just makes them taste even better!
If you’re craving more chocolate in your life, don’t miss some of our most popular chocolate recipes: Ultimate Fudgy Chocolate Brownies, Slow Cooker Hot Chocolate, Chocolate Peppermint Kiss Cookies and Chocolate Tiramisu.
🧾 What You’ll Need
Ingredients
Here’s what you need to know as you gather your lava cake ingredients and supplies: (Links are affiliate links and I earn a small commission from qualifying purchases.)
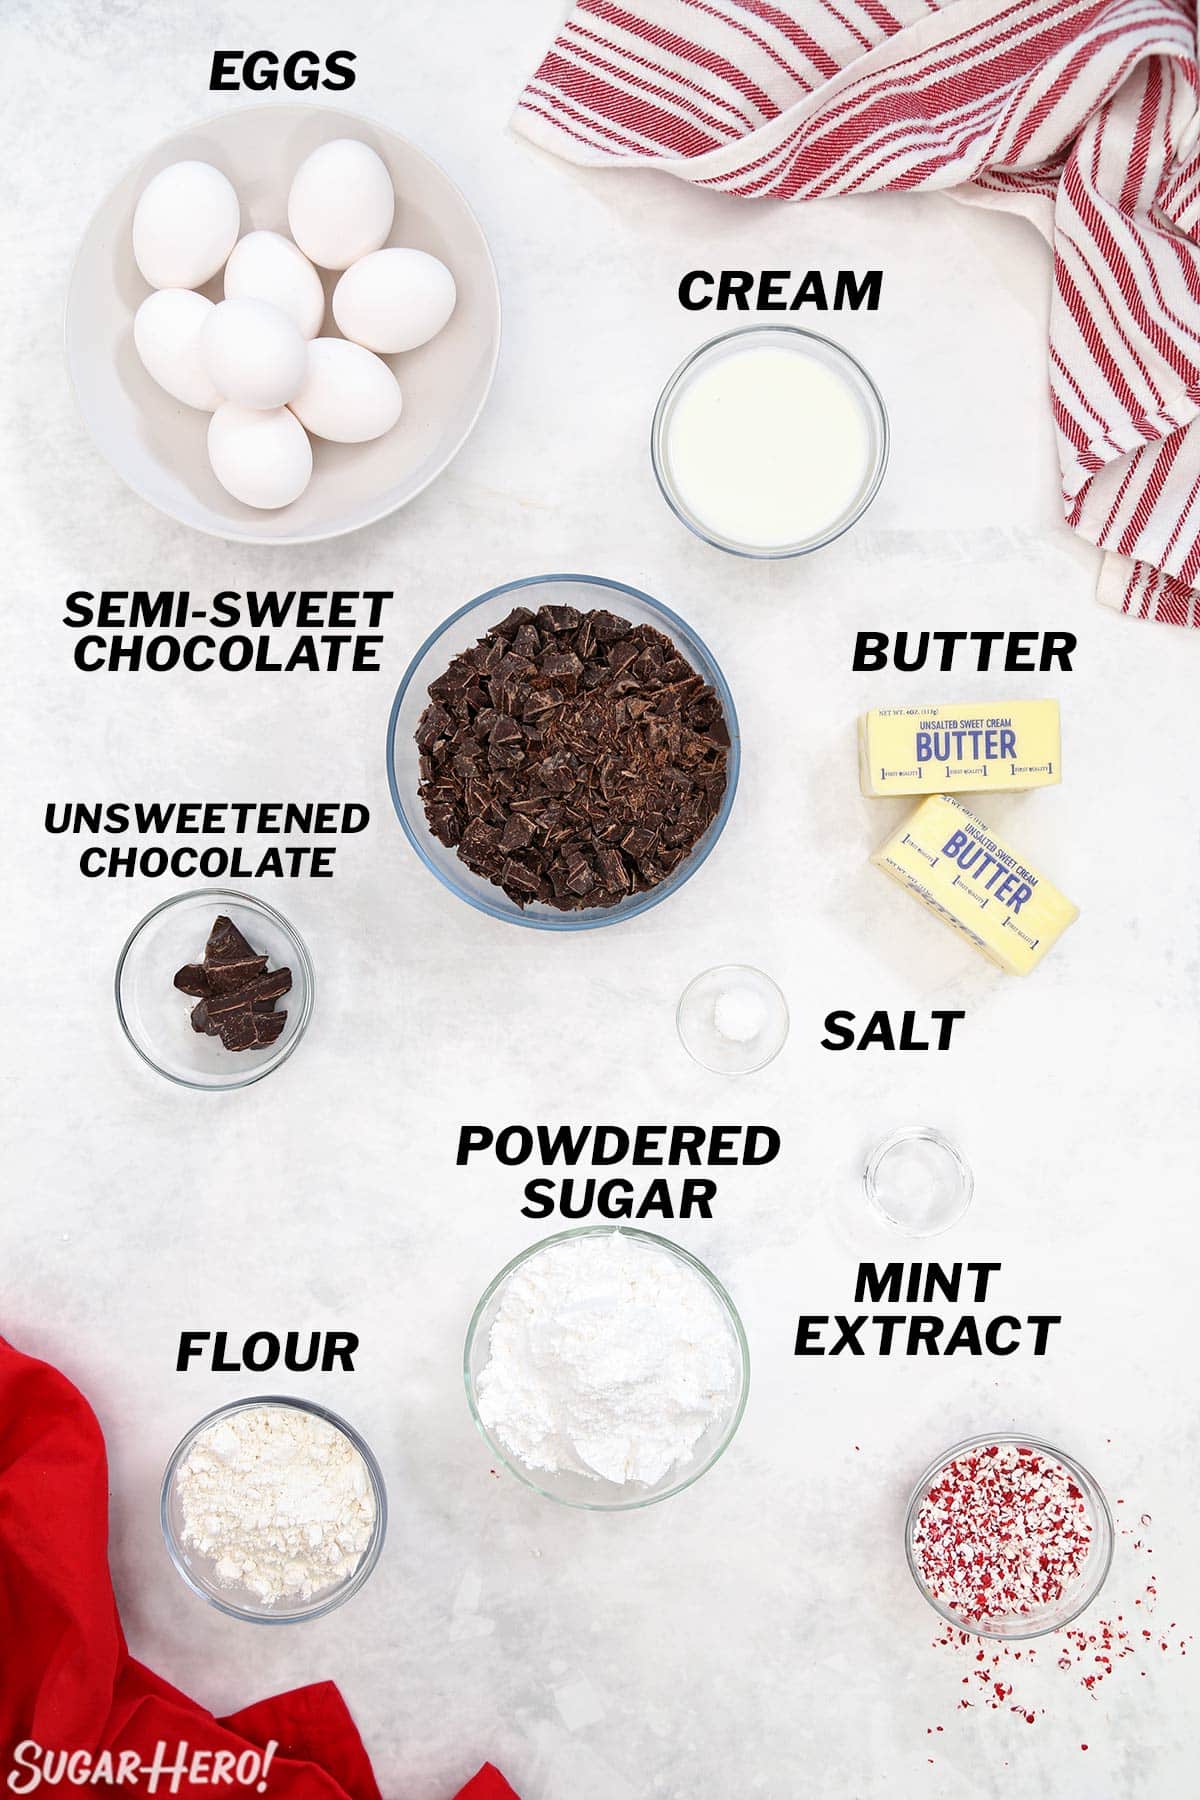
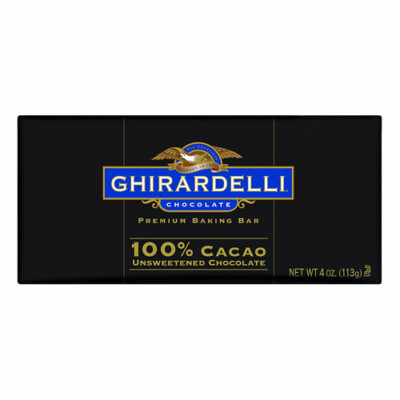
- Semi-sweet chocolate: This recipe uses semi-sweet chocolate in both the filling and the cake batter itself. Since all of the cake’s flavor comes from the chocolate, it’s important to use a high-quality, flavorful chocolate that you enjoy the taste of. Using old or waxy chocolate chips will produce disappointing results! Instead, get quality semi-sweet chocolate bars and chop them up for this recipe. I recommend Trader Joe’s Pound Plus Bars, if those are available to you. Other good options are Lindt, Guittard, and Ghirardelli bars.
- Unsweetened chocolate: The cake batter uses a small amount of unsweetened chocolate to deepen the flavor. If you don’t have unsweetened, you can use a bittersweet chocolate instead, or just use more semi-sweet. The cake will still be delicious, just a touch sweeter.
- Butter: We’re using butter in the cake batter, and also just a bit in the ganache filling to make it extra rich and creamy. I recommend using unsalted butter in this recipe, but if you have salted butter, leave out the additional salt in the cake batter.
- Cream: I like heavy cream best for the rich texture it gives to ganache, but you can use whipping cream if that’s what’s available to you.
- Eggs & yolks: This recipe uses four eggs and four egg yolks, to make a supremely tender and melting cake texture. Here’s my full guide to separating egg yolks and whites if you need a refresher, and don’t forget to save the egg whites for a future batch of Meringue Cookies or buttercream!
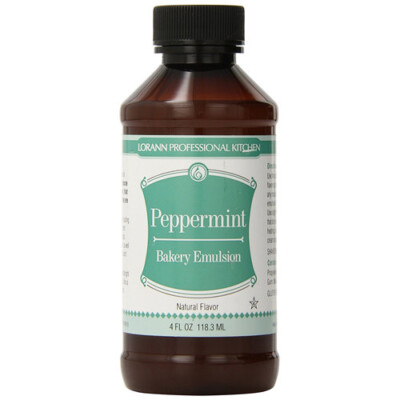
- Peppermint extract: Peppermint extract adds a brisk, refreshing flavor that’s a perfect contrast to the rich chocolate! It’s easy to find in grocery stores, usually in the baking or spices section. If you’re purchasing online, I prefer this Peppermint Bakery Emulsion from LorAnn over a traditional alcohol-based extract. It can stand up to high heat, so the flavor doesn’t evaporate during baking and it produces consistent results, every time.
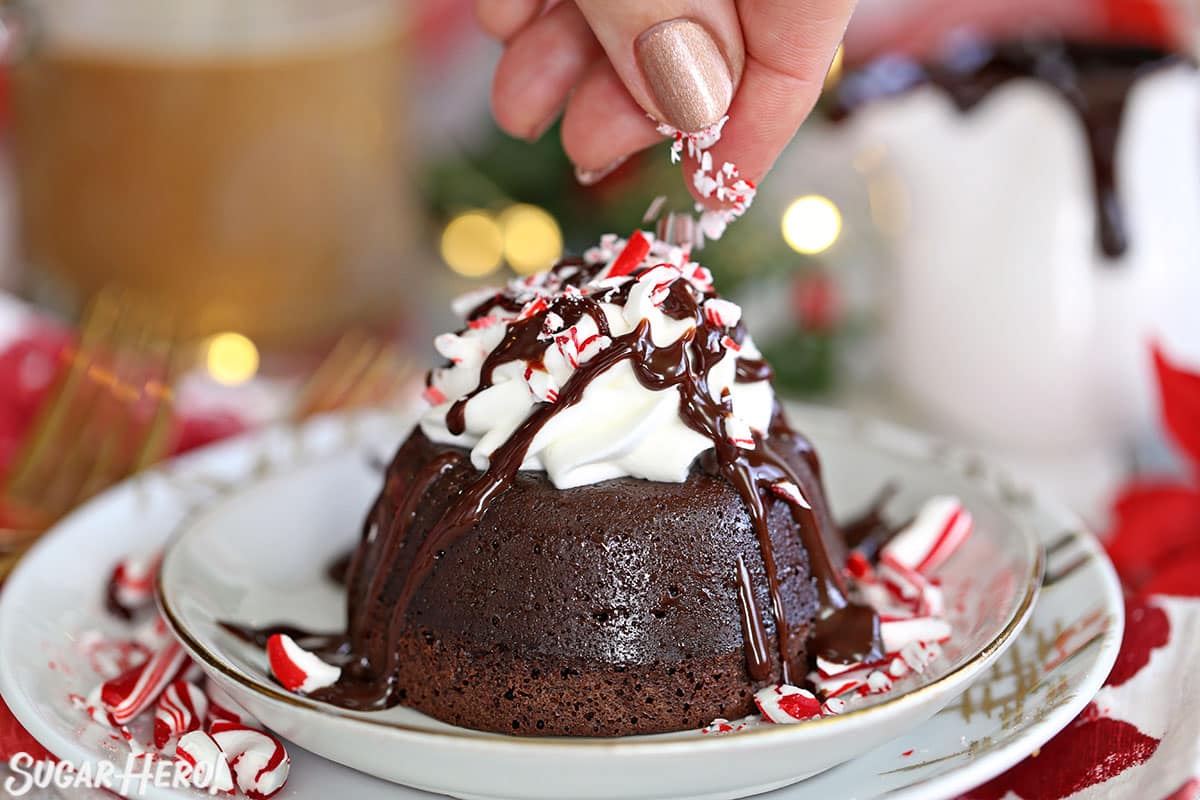
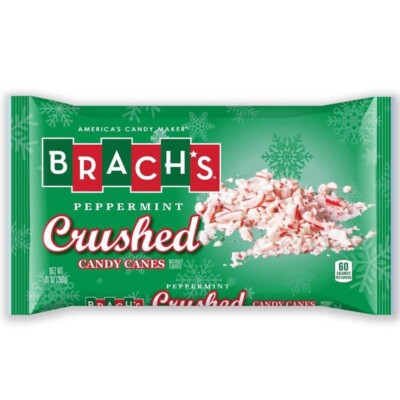
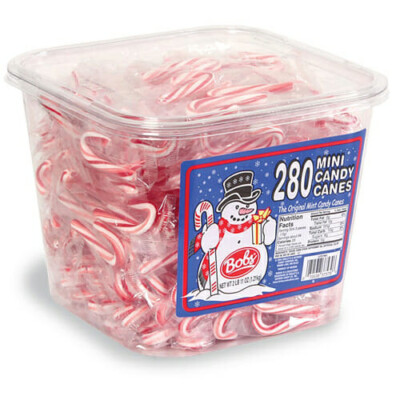
- Candy cane bits: I like to sprinkle a pinch of crushed candy canes bits on top of the cakes right before serving. You can either crush up candy canes yourself, or purchase a bag of candy cane pieces. Sometimes called “Candy Cane Bits,” these little minty pieces are super convenient, and a great way to add candy cane taste and texture to your desserts!
- Powdered sugar: Powdered sugar is whipped with the eggs to create a super frothy cake base. It is important to use powdered sugar and not substitute granulated or brown sugar in this recipe.

Equipment
- Candy scoop: A candy scoop makes it fast and easy to create consistently sized truffle balls in just a few minutes.
- Ice cream scoop: Use a large ice cream scoop to quickly portion out the cake batter into ramekins.
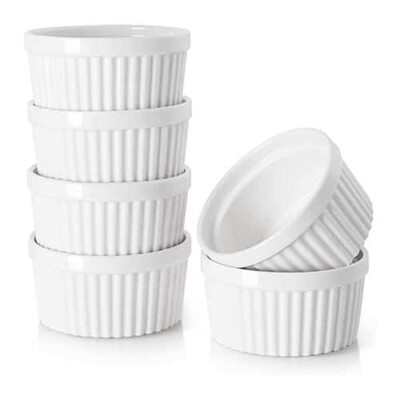
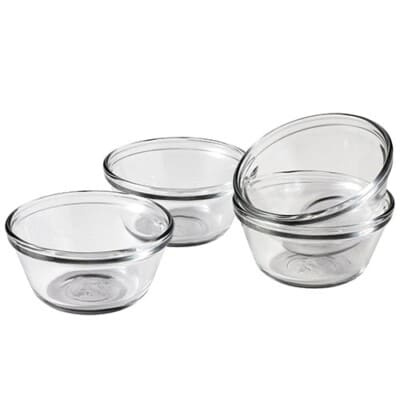
- Ramekins:Ramekins or small bowls are a MUST when making lava cakes! White ramekins are the more traditional option, and this ramekin set is high-quality and economical. If you want to use bowls like I did, I used and recommend this set of glass “custard cups.”
- Mixer: You will need some kind of mixer to properly beat the eggs and sugar to make the right texture for the cake batter. Either a stand mixer or hand mixer will work fine.
📋 Instructions
Here’s a quick overview of how to make peppermint lava cakes. You can find full printable instructions in the recipe card down below.
Make the Truffle Filling
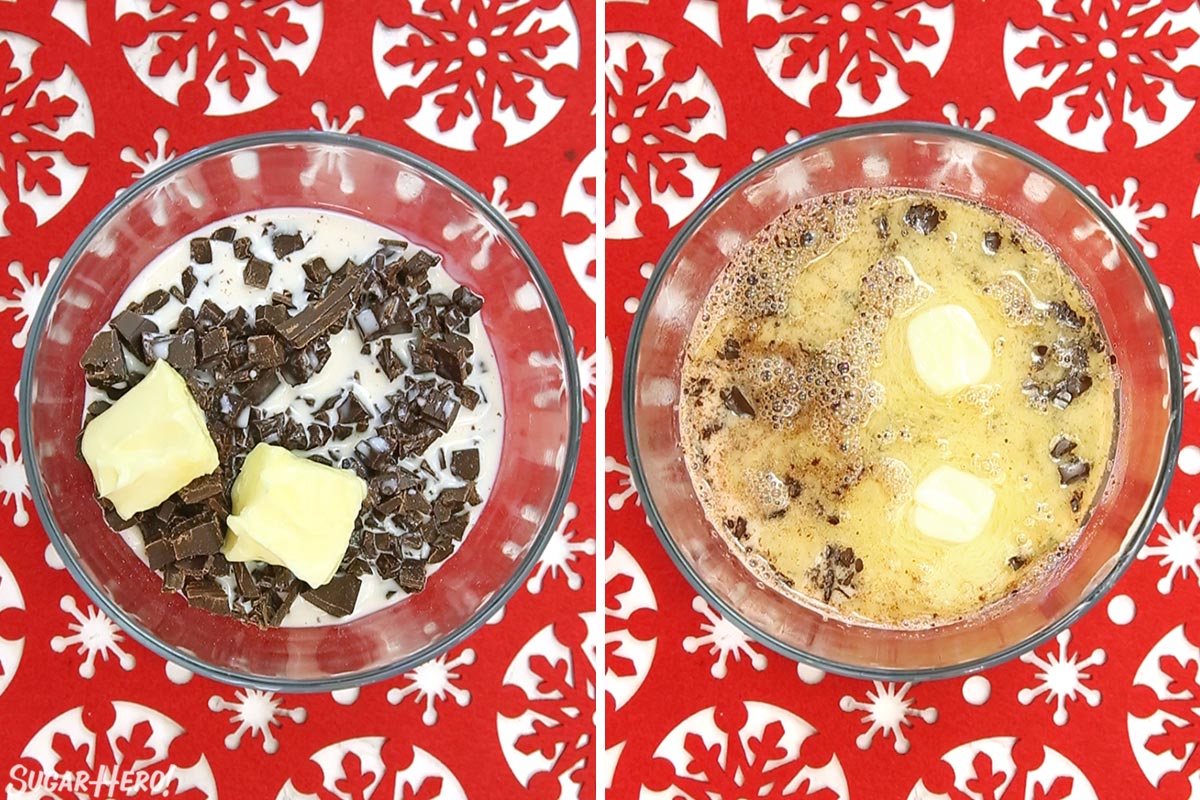
- Combine chopped chocolate, cream, and butter in a medium bowl.
- Microwave for 45 seconds, then whisk well.
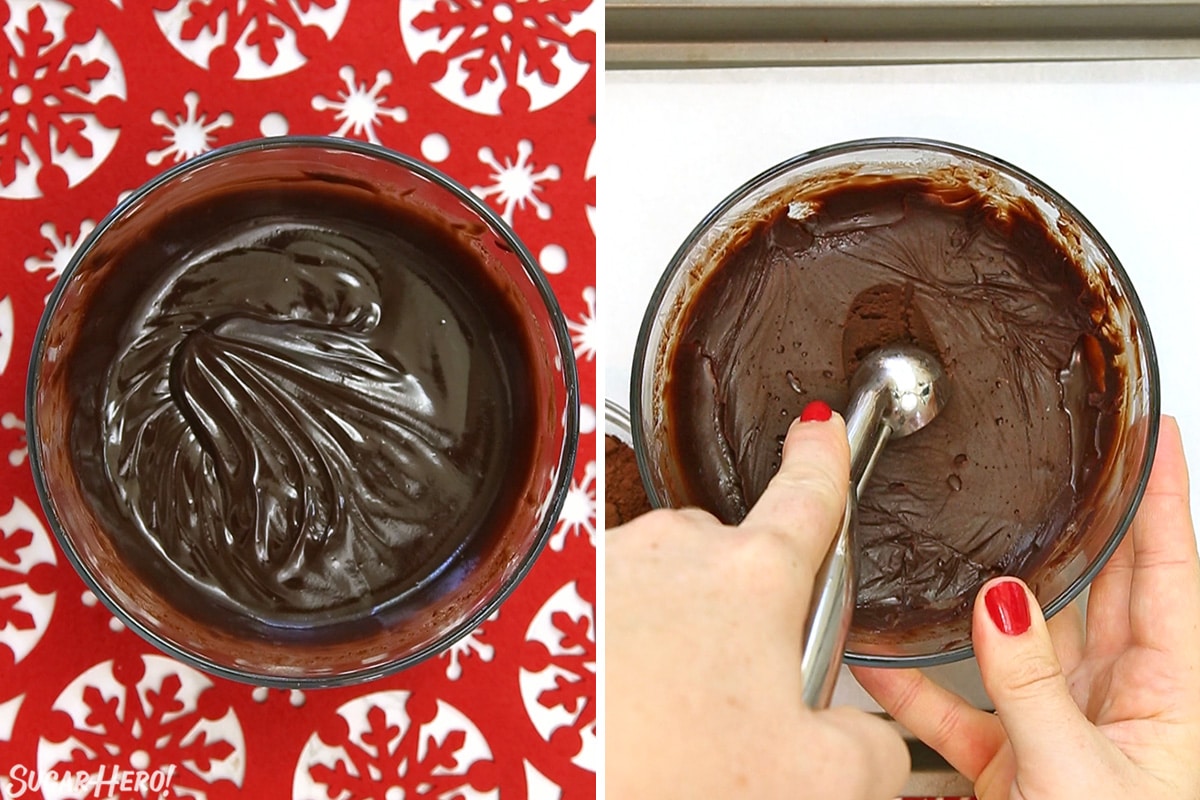
- Whisk until the chocolate mixture is smooth and shiny. If a few chunks of chocolate remain, continue to heat it in small bursts and whisk until everything is melt and glossy. This is your “ganache.”
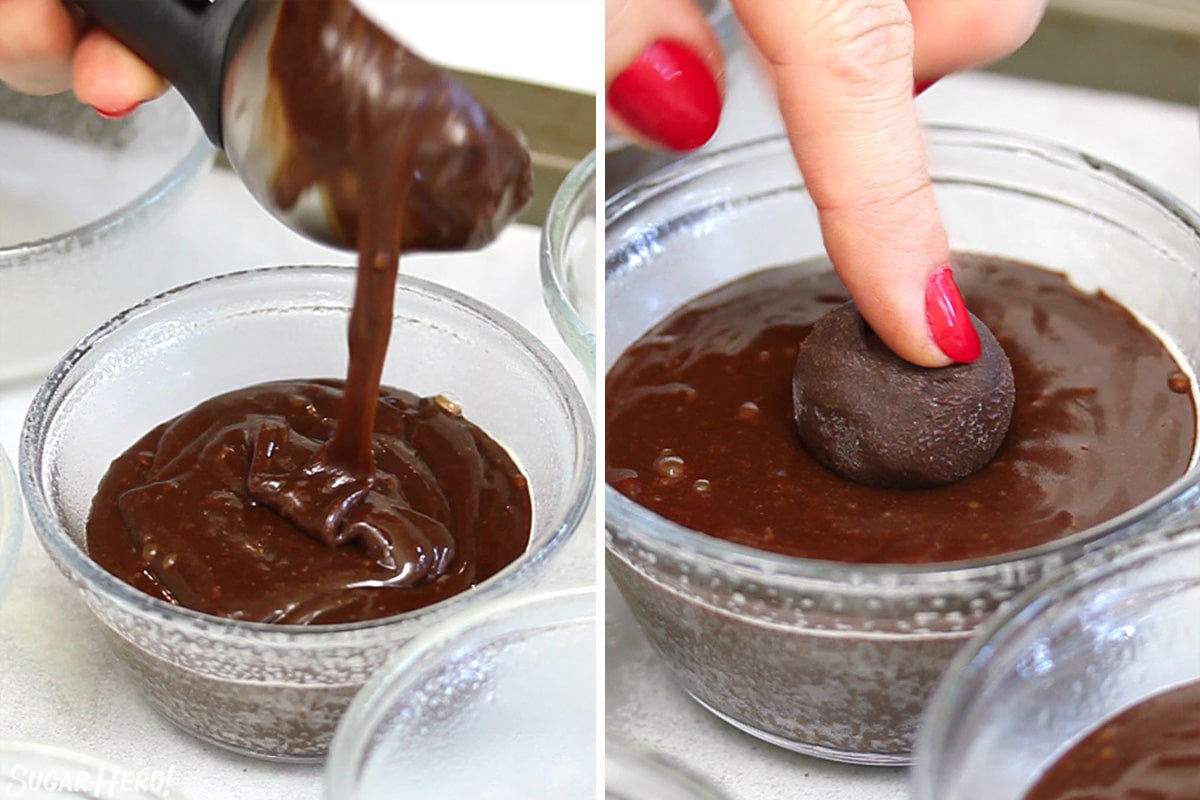
- Press a layer of plastic wrap directly on top of the chocolate, and refrigerate for about 90 minutes. It might still be slightly soft, you just need to be able to scoop and roll it.
- Use a small candy scoop to scoop up a small ball of ganache.
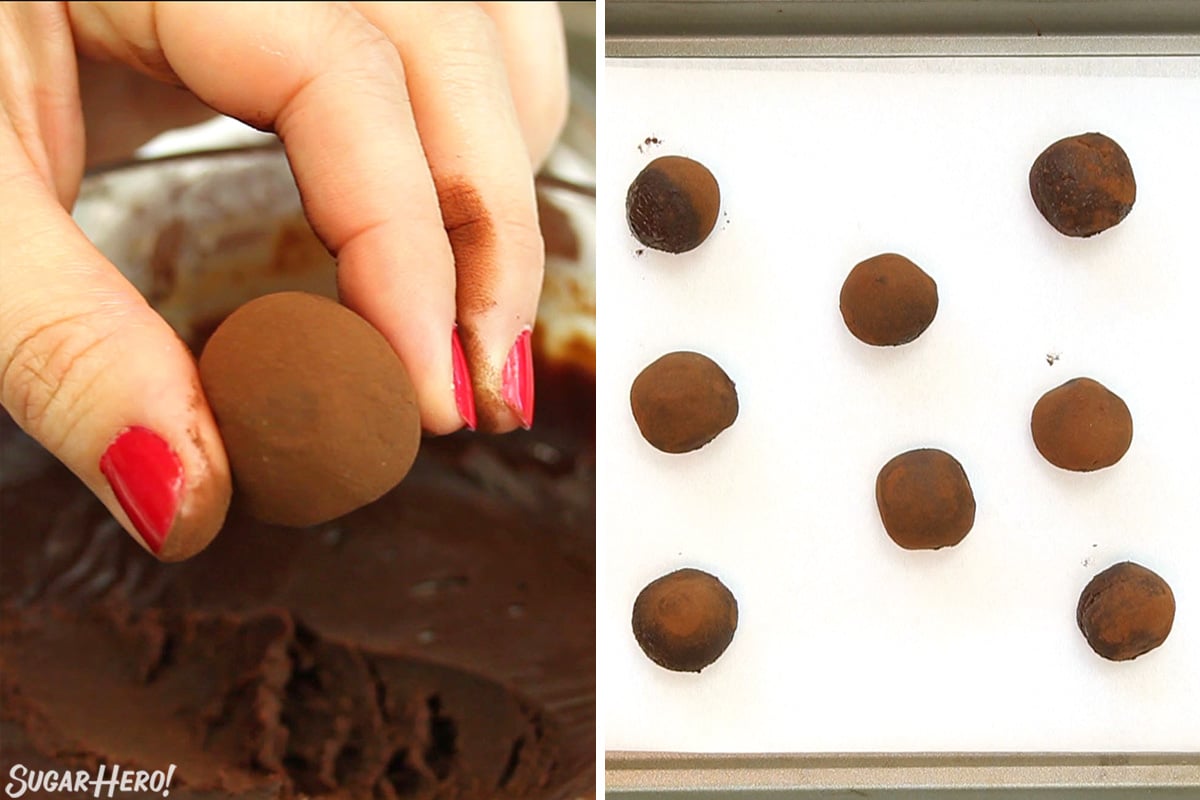
- Dust your hands with cocoa powder, and roll the ganache into a round ball.
- Set the truffle on a parchment-covered baking sheet, and repeat until you have 8 truffles.
- Place the tray of truffles in the freezer while you make the lava cake batter.
- Set aside the remaining ganache to use as a chocolate sauce for serving.
Make the Lava Cake Batter
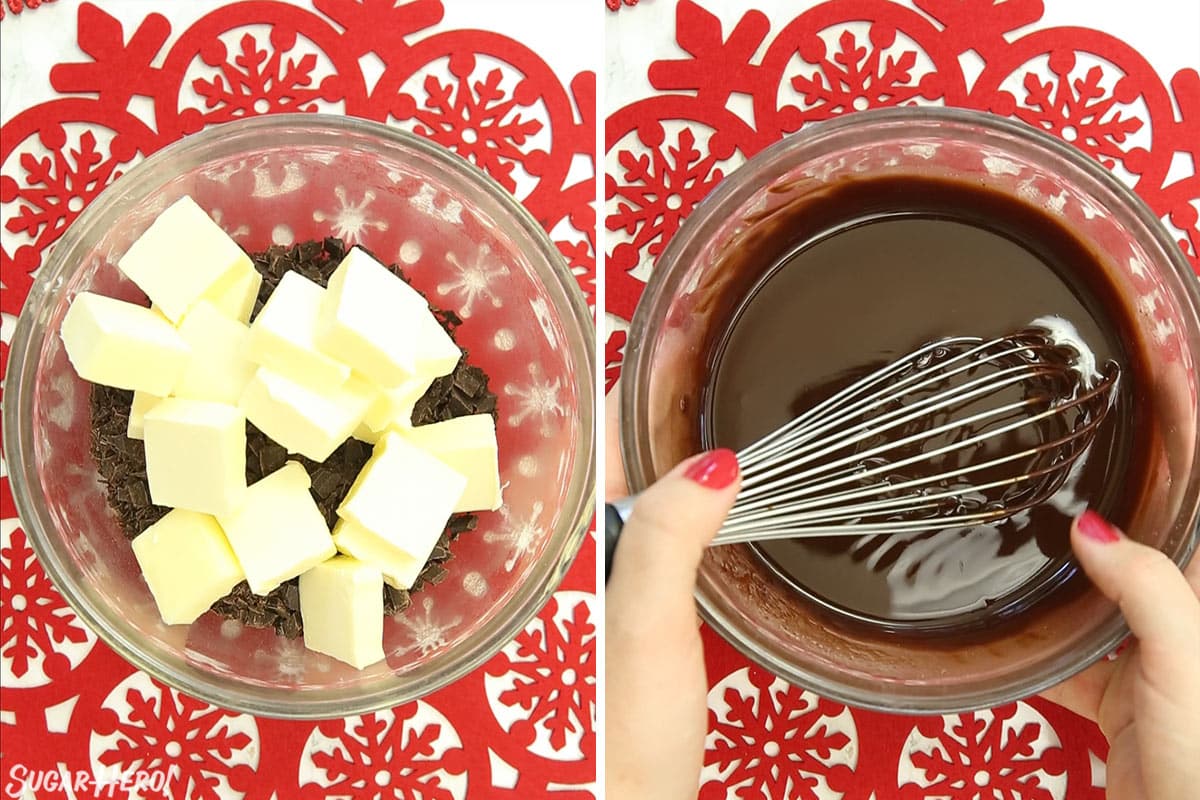
- Combine the semi-sweet chocolate, unsweetened chocolate, and butter in a medium microwave-safe bowl.
- Microwave for 1 minute, then whisk well. If chunks remain, heat in short bursts and whisk until the mixture is completely smooth and melted.
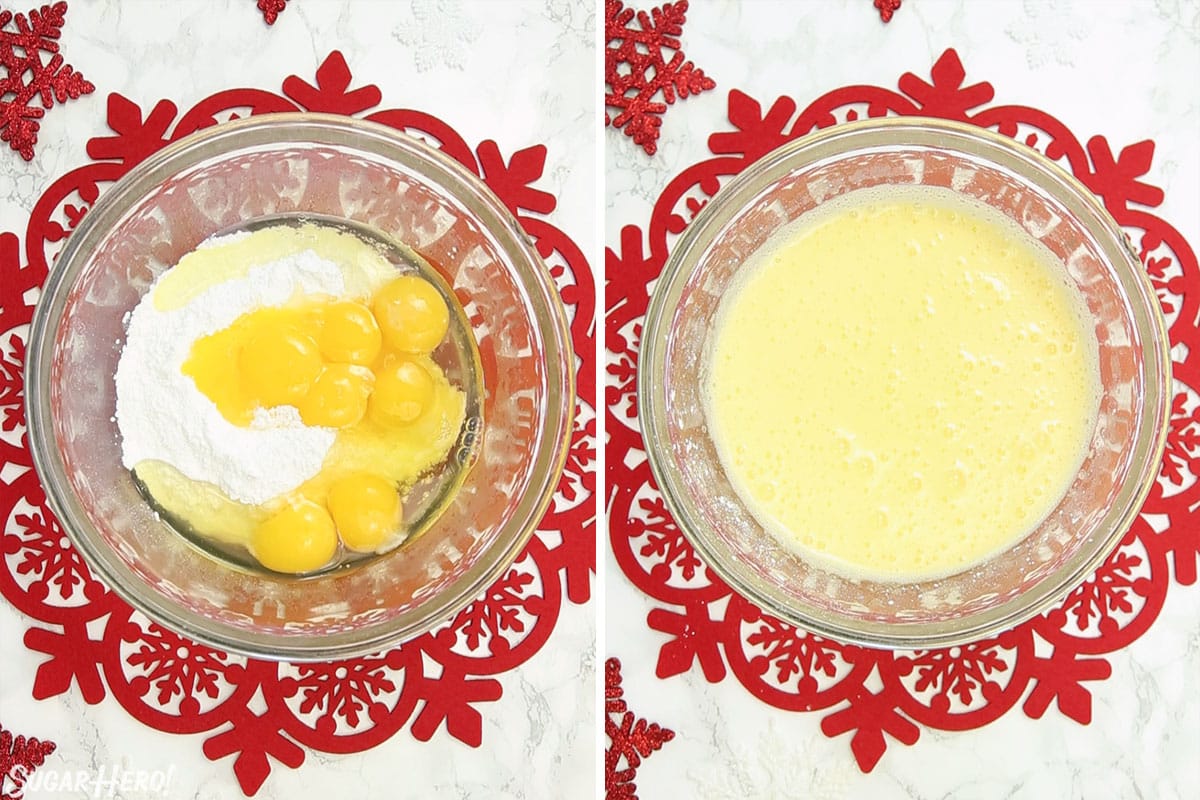
- In a large mixing bowl, combine the eggs, yolks, and powdered sugar.
- Whip them for 1-2 minutes, until light in color and very voluminous and frothy.

- Add the melted chocolate to the egg mixture and mix until combined.
- Finally, add the all-purpose flour and peppermint extract, and gently fold everything together until no streaks of flour remain. The cake batter will be thick and glossy.
Scoop and Bake the Cakes
- Divide the lava cake batter evenly between the ramekins.
- Press a frozen truffle into the center of each cake, and gently swirl the top of the batter to cover the truffle.
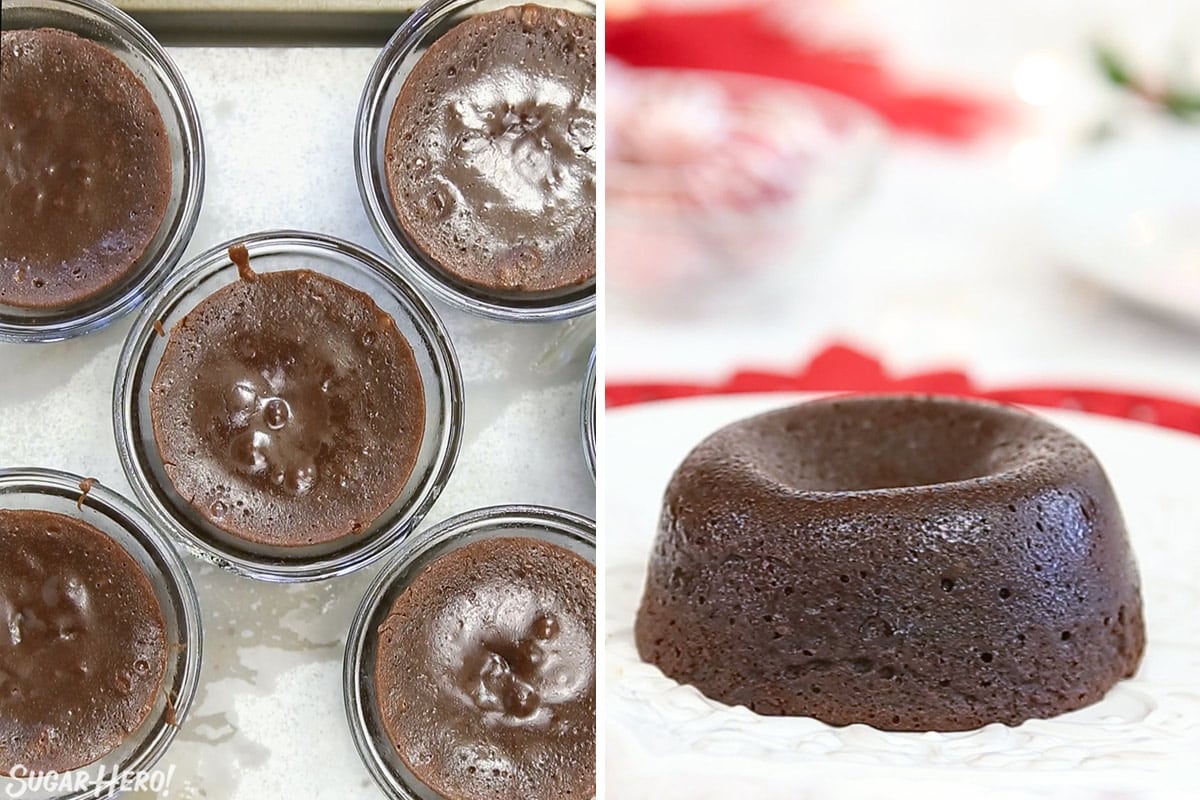
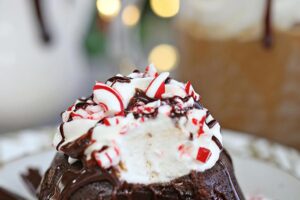
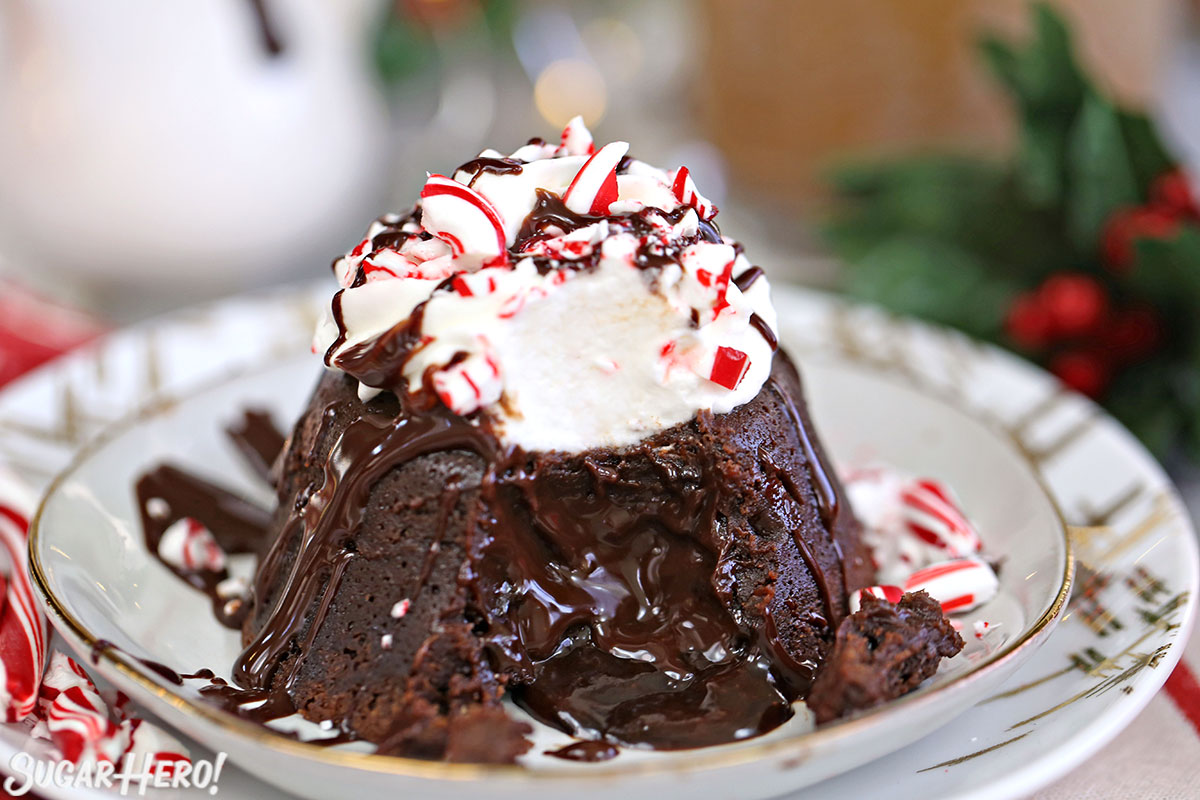
- Bake the cakes for 14-16 minutes. They should be set around the edges, but very soft and jiggly and almost “wet” looking in the middle.
- IMPORTANT: do not overbake these! If you bake until they look set and dry in the center, their final texture will be too dry.
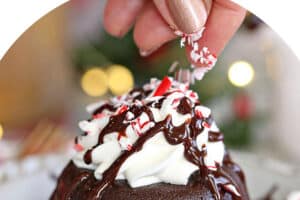
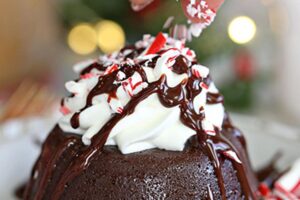
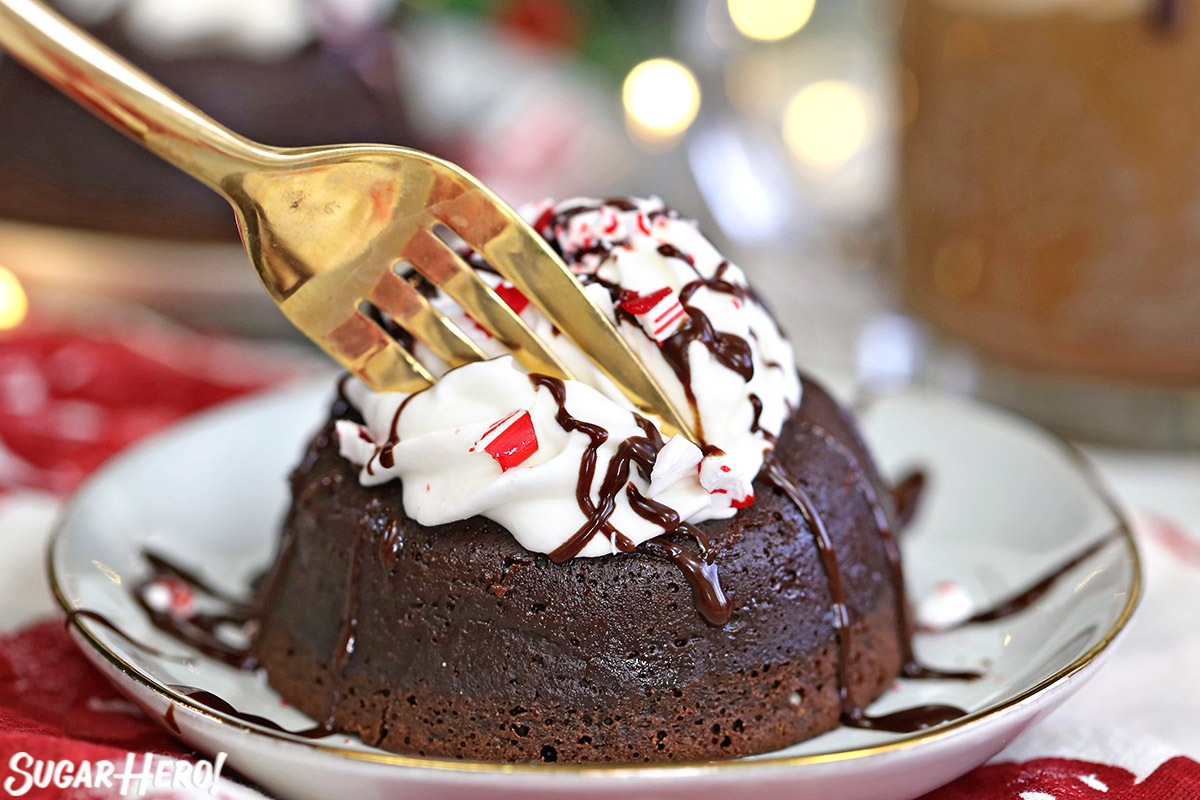
- Let them sit for 10 minutes, then carefully unmold the cakes onto your serving plates. Top with whipped cream or ice cream, and a drizzle of warmed-up ganache. Enjoy warm!
💭 Variations
If you want to play around with this recipe, try one of these ideas:
- Plain chocolate lava cakes: not a fan of chocolate and mint? No problem! Omit the peppermint extract and you have a delicious, deep dark lava cake. You can also swap in other extracts, like orange, lemon, almond, or coconut, to make a wide variety of different lava cake flavors.
- Leave out the truffle centers: if you are pressed for time or just want to simplify, you can omit the truffle center entirely. The cakes will still have a melting chocolate center as long as you don’t overbake them. They won’t be as gooey, but some people prefer them that way!
- White chocolate center: you can make a white chocolate truffle to put in the center instead. Follow the recipe but reduce the cream to 1/4 cup instead, and dust your hands with powdered sugar instead of cocoa powder.
- Peppermint mocha variation: Who doesn’t love a good peppermint mocha? Add 2 tsp of instant espresso powder when adding the melted chocolate in step 4 to give your cakes a light coffee undertone.
💡 Tips and FAQs
🎂 Top your lava cakes with…
- Ice cream: there’s nothing better than a scoop of ice cream melting on top of a warm chocolate cake! Try vanilla bean, chocolate, or chocolate mint swirl ice cream.
- Whipped cream: pillowy whipped cream or chocolate whipped cream is a delicious addition!
- Dessert sauce: You can warm up the additional ganache to drizzle over as a sauce, or you can add caramel sauce, butterscotch sauce, or hot fudge sauce.
- Crunchies: candy cane pieces are the obvious topping, but don’t stop there. You can add a pinch of candied nuts, chocolate curls, or your favorite sprinkles.
💖 More Desserts You’ll Love
- Peppermint Hot Chocolate
- Gingerbread Cheesecake
- Oreo Fudge
- Peppermint Patty Flourless Chocolate Cake
- Vintage Christmas Card Cakes
- Peppermint Mocha Mousse Cake
Candy Cane Mousse Cake
Oreo Peppermint Ice Cream Bonbons
Don’t miss the step-by-step tutorial showing how to make Peppermint Lava Cakes – check out the web story here!
Leave a Review!
If you make this recipe, let us know! Leave a ⭐️⭐️⭐️⭐️⭐️ rating on the recipe below, and leave a comment, take a photo and tag me on Instagram @elabau, or use #sugarhero on IG!
Peppermint Lava Cakes
Ingredients
For the Truffle Filling:
- 6 oz semi-sweet chocolate, (1 cup), finely chopped
- 4 fl oz heavy cream, (1/2 cup), can use whipping cream instead
- 1 oz unsalted butter, (2 TBSP)
- 1/2 tsp peppermint extract
For the Lava Cakes:
- 8 oz semi-sweet chocolate, (1 1/3 cup), finely chopped
- 1 oz unsweetened chocolate, finely chopped
- 8 oz unsalted butter, (1 cup), cubed
- 4 large eggs
- 4 large egg yolks
- 6 oz powdered sugar, (1 ½ cups)
- 3.5 oz all-purpose flour, (3/4 cup)
- 1 tsp peppermint extract
- Crushed candy canes, to decorate, optional
Instructions
To Make the Truffle Filling:
- Combine the chocolate, cream, butter, and mint extract in a medium microwave-safe bowl. Microwave for 45 seconds, then whisk well. If chunks of chocolate remain, microwave in short bursts, whisking after each one, until the chocolate is melted and smooth. This is your "ganache."
- Press a layer of cling wrap on top of the ganache and refrigerate it for about 90 minutes, until set. (It will still be slightly soft, you just need to be able to scoop and roll it.)
- Dust your hands with a light coating of cocoa powder. Use a small candy scoop or a teaspoon to scoop a one-inch ball of chocolate into your hands, and roll it until it is round and even. Set the truffle on a baking sheet covered with parchment or waxed paper, then repeat until you’ve made 8 truffles.
- Place the truffles in the freezer while you prepare the lava cake batter. Reserve the remaining ganache to pour over the lava cakes later.
To Make the Lava Cakes:
- Preheat the oven to 350° F (176 C°). Spray eight 1-cup ramekins with nonstick cooking spray, and set them on a baking sheet.
- Combine the semi-sweet chocolate, unsweetened chocolate, and butter in a medium microwave-safe bowl. Microwave for 1 minute, then whisk well. If chunks remain, heat in short bursts and whisk until the mixture is completely smooth and melted.
- In a large mixing bowl, combine the eggs, yolks, and powdered sugar. Whip them together for about 1 minute, until frothy.
- Add the melted chocolate to the egg mixture and mix until combined. Finally, add the all-purpose flour and peppermint extract, and gently fold everything together by hand until no streaks of flour remain.
- Divide the lava cake batter evenly between the prepared ramekins. Press a frozen truffle into the center of each cake, and gently swirl the top of the batter to cover the truffle.
- Bake the cakes at 350° F for 14-16 minutes. They should be set around the edges, but very soft and jiggly and almost “wet” looking in the middle. Do not over bake them! If you wait until they look full set on top, they will be dry.
- Let them cool for about 10 minutes at room temperature, then gently pull the cakes away from the sides of the ramekins with your fingers to loosen them. Place a plate on top of a ramekin, flip it upside down, and remove the ramekin to release the cake onto the plate.
- Top the lava cakes with whipped cream or a scoop of ice cream, and a pinch of crushed peppermint candy. Heat the remaining ganache in short bursts and whisk until smooth to make a chocolate sauce you can drizzle over the cakes. These cakes are best enjoyed warm, so the centers are still fluid when you cut into them.
- If you want to make the lava cakes in advance, they keep very well for up to a week. You can store them in the ramekins, or remove them carefully and store them on a baking sheet. However you do it, make sure they’re well-wrapped in plastic wrap, so they don’t dry out, and keep them in the refrigerator.
- To serve lava cakes that have been made in advance, warm them up in the microwave for 20-30 seconds (err on the shorter side to start!) so that the inside becomes molten chocolate again. Enjoy!
Video

Recipe Notes
Measuring Tips
Our recipes are developed using weight measurements, and we highly recommend using a kitchen scale for baking whenever possible. However, if you prefer to use cups, volume measurements are provided as well. PLEASE NOTE: the adage “8 oz = 1 cup” is NOT true when speaking about weight, so don’t be concerned if the measurements don’t fit this formula.
Want to learn more about baking measurements and conversion?
Nutrition


These look amazing! Could you use a large muffin pan instead of ramekins?
I really love this meal. Thank you. I am glad that everything turned out so well. Where did you get your fantastic recipes?