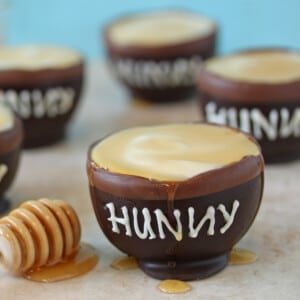
A cute recipe kids (and fluffy yellow bears) will love! These Chocolate Hunny Pots are filled with honey mousse and covered with a smackerel of honey on top.

I was one of those weird kids who didn’t watch “normal” tv. When I was younger, we had a PBS-only rule in my house, so I could tell you all about what was happening on 3,2,1…Contact or Square One, but couldn’t begin to tell you what The Simpsons were about, or what a “cowabunga” was. And those fancy cable kid’s shows? Fuggedaboutit. [Now, when my youngest brother was growing up? That’s a different story. The rules were so relaxed for him, he was practically watching The Godfather in first grade. But I’m not still holding a grudge about it or anything…]
We did have a stash of movies I was allowed to watch, and one of my favorites was . I loved Pooh. I had the classic editions of the books that I read over and over again, and for some time I collected Eeyore memorabilia, in the way that little girls always seem to have a collection of some sort.

Now that I’m a parent, I think much more about children’s entertainment, and how our kids are formed by what media they consume. (And I have a little more sympathy for my parents’ strict rules, as well.) I’m looking forward to sharing with my own son. It’s sweet and fun and full of wonderful characters and gentle lessons about love and friendship.
To celebrate the movie, I decided to make a dessert version of one of Winnie the Pooh’s favorite treats: hunny pots.

These pots are entirely edible, made of chocolate and decorated with a Pooh-inspired “HUNNY” label. The filling is a quick and simple honey-white chocolate mousse. I think of this as a “cheater’s” mousse because it’s so dang easy—no separating eggs or whipping yolks and whites required! The pots are finished with a smackerel of honey on top, so they look like they’re filled to the brim and overflowing with honey.

These chocolate bowls are one of my favorite ways to fancy up dessert. They’re easy to make—Pooh might say they’re very little bother—but they look elegant and always impress people! If honey-white chocolate mousse isn’t your thing, you can fill them with ice cream, whipped cream, curds, or other mousses instead. They can even be used to hold candies or other treats at parties. There’s a picture tutorial and full recipe below—give them a try!

💛More Mousse Recipes You’ll Love
Check out my tutorial for making Chocolate Bowls!

Chocolate Pots de Creme

Butterscotch Pots de Creme
Ingredients
Chocolate “Hunny Pots” – yield: 10 or more hunny pots (make as many as you can, in case some break!)
- 12 oz dark chocolate candy coating melts, I like Merckens brand
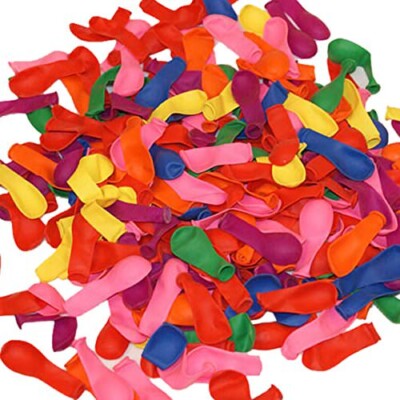
- Water balloons, small and round
- 6 oz light chocolate candy coating melts
Quick Honey-White Chocolate Mousse
- 3 oz white candy coating melts
- 12 oz white chocolate, chopped, I used Lindt
- 1/4 tsp salt
- 2 cups heavy cream, divided use
- 6 tbsp honey
- 2 tsp unflavored powdered gelatin
- 8 tsp cold water
Instructions
To Make the Chocolate "HUNNY Pots" :
- Melt the dark chocolate candy coating in a microwave-safe bowl, stirring after every 30 seconds to prevent overheating. Once it’s completely melted and smooth, set it aside to cool until it is just barely warm, stirring occasionally. If the coating is too hot, it will cause the balloons to burst, so it’s important that it be nearly room temperature, but still fluid enough to dip.
- Blow up the water balloons until they’re about 4” tall. They should be well inflated but not stretched to their maximum. Your hunny pots will be about the size of the bottom half of the balloon, so use this to judge how much you should inflate them.
- Cover a baking sheet with waxed paper. Holding a balloon by the knot at the top, dip it into the barely warm candy coating. I find it easiest to press it down until it’s half-submerged, then twirl it around while pressing down so that the coating comes up around the sides in an even layer. Remove the balloon from the chocolate and let the excess drip back in the bowl, then set it down on the prepared baking sheet. Repeat with as many balloons as you can make with your candy coating. Refrigerate the tray to set the coating, for about 30 minutes.
- Once the coating is set, grip a balloon just below the knot, and cut a small hole in the balloon above your fingers. Slowly and steadily let the air out, controlling it with your grip. If you let the air out too fast, it’s more likely that the bowl will crack or the balloon will burst or tear, making it harder to remove. When most of the air is out of the balloon, hold it by the bottom and gently pull the balloon from the inside of the bowl. Repeat with the remaining bowls.
- Melt the light chocolate candy coating, stir it until smooth, and let it cool until it’s just barely warm. Hold a bowl by the bottom lip and dip the top of the bowl into the coating, covering 1/4-1/2” of the top rim. Once all of the bowls are dipped, refrigerate them again to set the light chocolate coating.
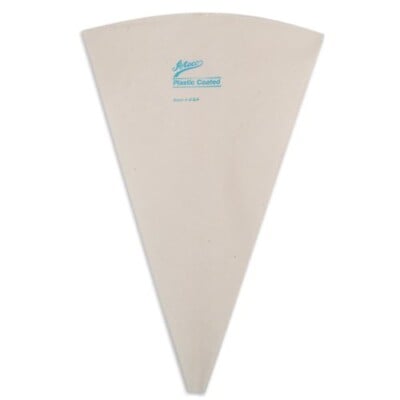
- Finally, melt the white coating. Pour it into a piping bag fitted with a small round tip, or a paper cone. (A small plastic bag with a hole cut in the corner might also work, or you can try using a toothpick.) Write the word “HUNNY” on the front of the bowls. Let the coating set one final time before filling the pots.
To Make Quick Honey-White Chocolate Mousse :
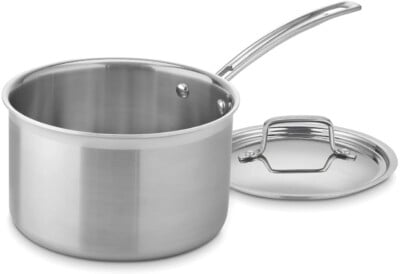
- Combine the chopped white chocolate, salt, 3/4 cup heavy cream, and honey in a medium saucepan. Place the pan over low heat and gently warm it up, stirring frequently, until the white chocolate has melted and the mixture is smooth. Remove from the heat, pour it into a large bowl, and let it cool to room temperature, stirring occasionally.
- While you wait for the white chocolate mixture to cool, prepare the gelatin. Whisk together the gelatin and the cold water in a small bowl, and set it aside to let the gelatin absorb the water. When the white chocolate is at room temperature, microwave the bowl of gelatin for 15 seconds, until it is melted. Whisk the melted gelatin and white chocolate together.
- Whip the remaining 1 1/4 cups heavy cream to firm peaks. Fold half of the whipped cream into the white chocolate, and once it’s incorporated, fold in the remaining whipped cream. Pour the mousse directly into 8 3/4-cup chocolate pots, ramekins, or other serving containers. Refrigerate for 2 hours before serving. Mousse can be made several days in advance and kept in the refrigerator until ready to serve. If desired, top “hunny pots” with a thin layer of honey on top of the mousse, for visual appeal.
Recipe Notes
Measuring Tips
Our recipes are developed using weight measurements, and we highly recommend using a kitchen scale for baking whenever possible. However, if you prefer to use cups, volume measurements are provided as well. PLEASE NOTE: the adage “8 oz = 1 cup” is NOT true when speaking about weight, so don’t be concerned if the measurements don’t fit this formula.
Want to learn more about baking measurements and conversion?


Wouldn’t the chocolate absorb chemicals from the balloon?
Hi Jen, I’m not a chemist and can’t say for sure, but my opinion is that since this is a product that people routinely put in their mouths (when blowing up balloons) it’s probably in the very-very-low risk category. I did some googling and didn’t find any troublesome information, with most sites saying things like “You wouldn’t want to eat them, of course, but from what I can tell, there actually seems to be little reason to be alarmed about balloons.” (reference below). If you have additional information or sources about this, I’d be happy to hear about it.
http://grist.org/green-living-tips/2011-08-22-ask-umbra-on-whether-balloons-are-eco-friendly/
Oh my Gosh! The Cutest dessert ever but I will NEVER make it again! I will have to hire you to do it for me! The amount of work, steps involved and the exact temperature and popping chocolate everywhere is enough to make you nuts!!!
Awesomely cute idea but very stressful dessert!
Hi Julie, So sorry it was stressful, hopefully you ended up with some cute honey pots anyhow!
Thank you so much,look amazing!!!
Thanks Vera! Let me know if you give them a try!
I’ve just made these and I was actually surprised they worked out. I thought they’d be a Pinterest fail but you did say easy so I gave them a go for a Disney themed cooking club night where I was rostered on dessert. They weren’t perfect – I couldn’t find water balloons anywhere so had to use regular balloons. This meant that the bowls came out a bit lopsided from how the balloons had sat up in the fridge. Also, doing the rim of the bowls was very tricky, with the heat of where I live, I couldn’t handle the bowls long enough to get them done evenly and without drips, so decided after a few decided not to do the rims. Thankyou, very creative!
Haha! “Not a Pinterest fail” is seriously high praise! I’m so glad they worked for you and that you liked them. Thanks Gemma!!
PS I’m not sure where you live and what stores are available to you, but I always have very good luck finding water balloons at my local dollar store just about year-round. Maybe give that a try next time?
My parents were happy with Hunny Pots Recipe! Thank you Elizabeth
That is so cute the first thing that popped in my mind was Winnie although piglet was my favorite but I still love that fact that they are so creative yet cute
Is there a conversion of this recipe in grams?
Thanks in advance!!
Help! I have never prepared unflavored gelatin. Can you explain how to prepare the unflavored gelatin as required for this recipe using 2 tsp of unflavored gelatin?
Second, I would like to prepare the mousse the day or two before the event. Do I just store it in Tupperware in the refrigerator or do I pour it immediately into the chocolate pots?
can they be made the day before and stored in the fridge or does that ruin the chocolate……
Hey Anne, They can definitely be made in advance. There may be some condensation on the chocolate depending on the temperature and humidity. It will still taste the same so I wouldn’t let that stop you from doing it in advance it should be great! I would love to see pictures and hear how it goes! Thanks!
At what stage do you put the mouse into the honey pots? Should the mouse already be fully set for 2 hours in the fridge before combining? I’m working on the honey pots now, but have never worked with chocolate or mouse before, so this is a great adventure in dessert making and I am a little unsure of myself. Thanks for the help!
Hey Amy, I am so sorry that is unclear. I am so thrilled to hear you are trying out this recipe! I will be fixing that recipe card here shortly. The answer is that you make the chocolate honey pots first. After you make the honey pots you can start the mousse and once its all mixed together you will want to put it into the honey pots directly after mixing to let it set the two hours in the honey pots. I hope that helps! Again, sorry for the confusion. I would love to hear how it goes once you have given it a try!
Money saw this recipe and is a young mother who lives with her grandparents and did not realize that she only had the ingredients and not the directions so the night before the party after going to the store she asked me to help her fix some and when I started going through everything I realized that she did not have everything . My mother had decided that the word honey needed to be written in chips the color of birthday cake and bought three bags because we quadrupled the recipe and so we ended up having to use the birthday cake instead of white chocolate because she bought the white chips instead of white chocolate and birthday cake chips instead of white chips for the words lol then finally after a couple hours we got all this stuff together and ended up making the honey pots themselves by 5:30 in the morning we went to bed and had to get up and rush trying to make the moose it ended up in the freezer for 30 45 minutes and called good it despite all that we had a pretty good time and I have a feeling that next time my niece is going to listen to my advice when I said read the full recipedo the math for how many you need write down what you need from the store and then go to the store and get what you need lol so today is been a very challenging day however we did get them and they are perfect Thank you so m