


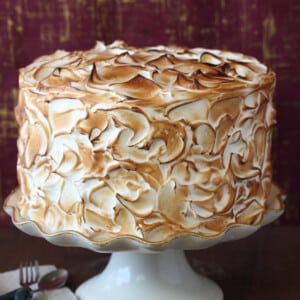
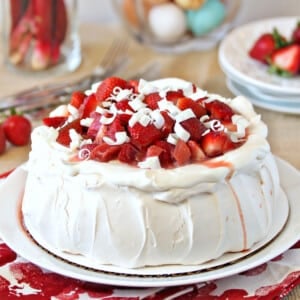
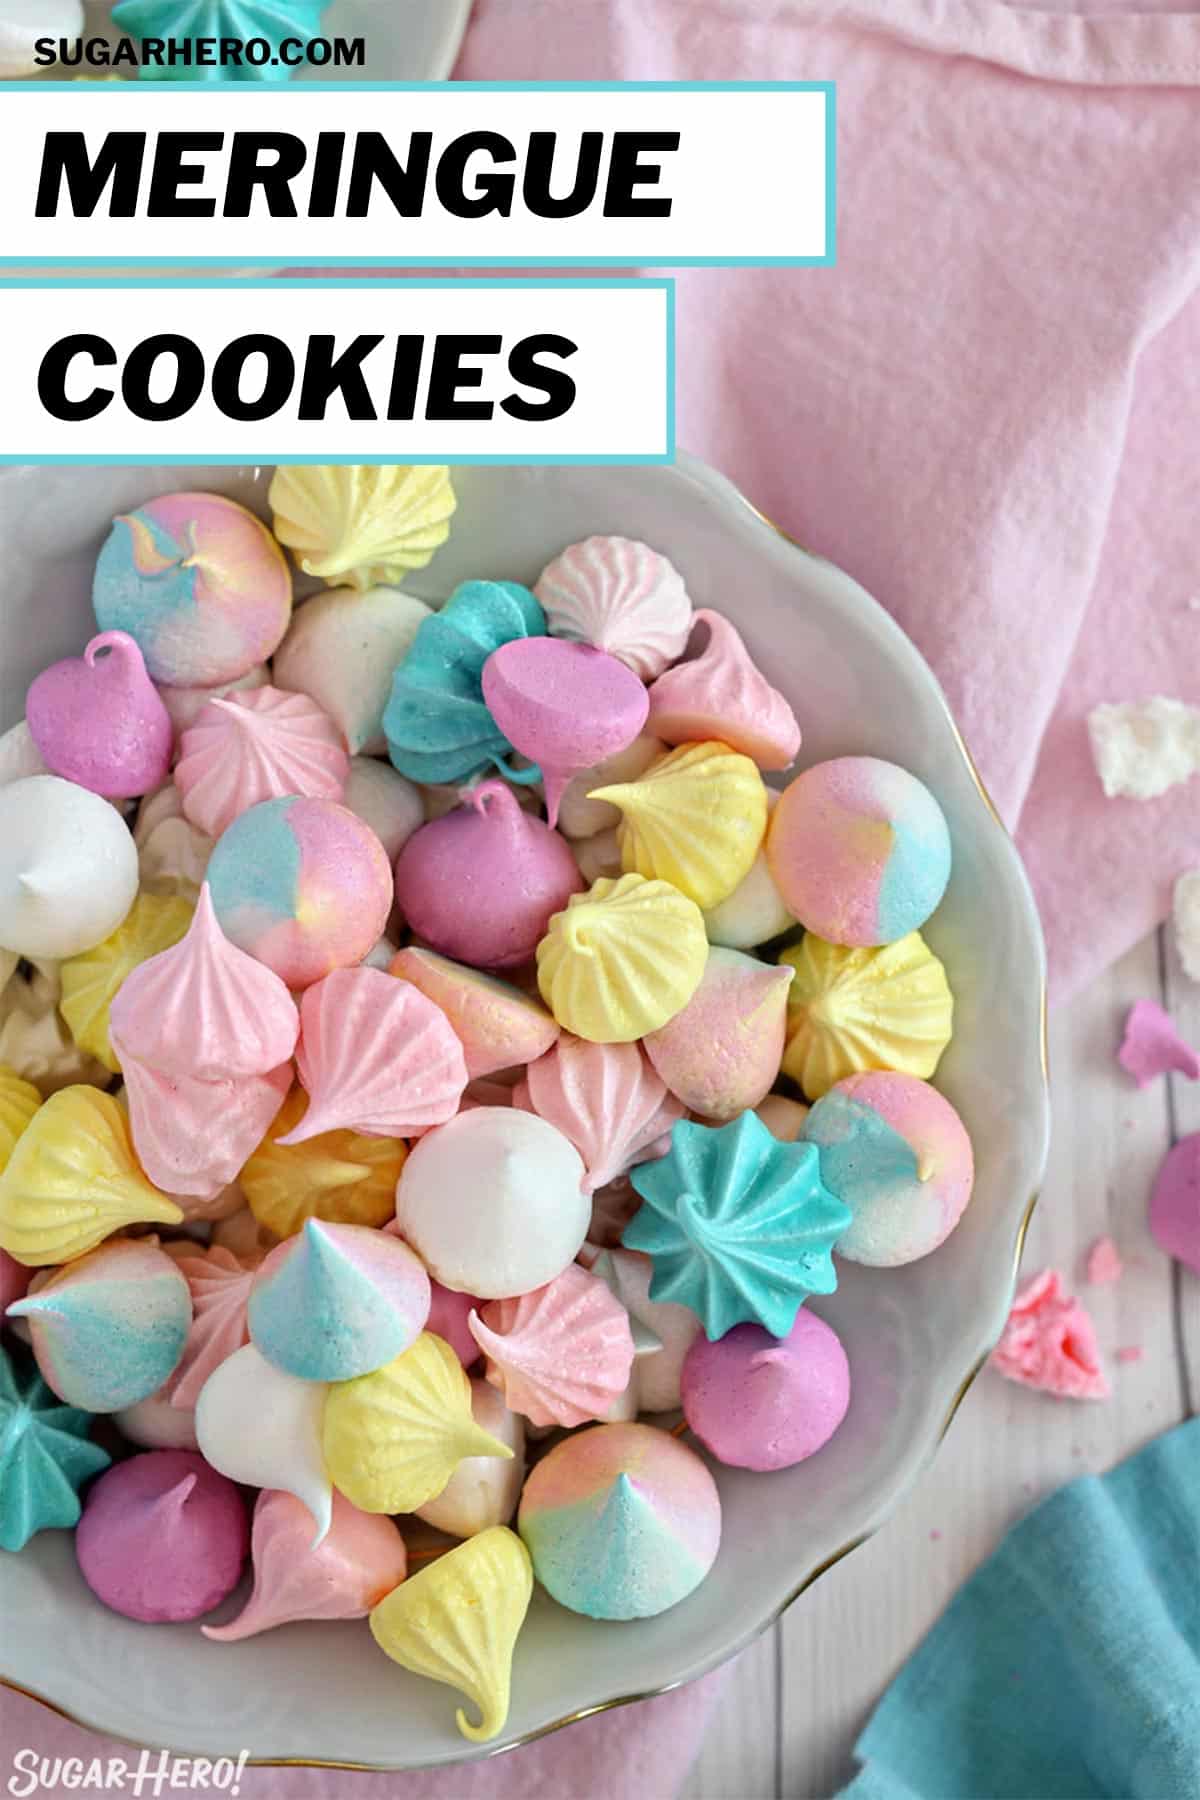
Everyone will love these classic Meringue Cookies! This meringue recipe is lighter than air, super crunchy, and naturally fat free! Enjoy them plain, or use them as decorations on cakes, in Eton mess, or on cream tarts.

Perfect Meringue Cookies – Crunchy and Lighter than Air!
Meringue cookies are the best kind of culinary magic trick–you start with egg whites, sugar, and your flavoring extract of choice, and through a bit of kitchen chemistry, they transform into sweet and crispy bite-sized desserts!
Calling meringues “cookies” might spark some debate, as they are a far cry from most traditional cookies. No melty chocolate chips or crackly cinnamon-sugar crust here! But they’re baked on a cookie sheet, they’re a sweet after-lunch or dinner indulgence, and depending on how large you make them, they’re a decent 2-4 bite treat. If that’s not a cookie, then it’s at least a close cousin!

Many people are intimidated at the thought of making meringue cookies, because it involves beating egg whites into a fluffy foam. It’s true that things can go wrong during this process. But I have lots of tips, tricks, and pictures to guide you every step of the way, to make sure you produce PERFECT meringues the first time, and every time after that! Let’s go!
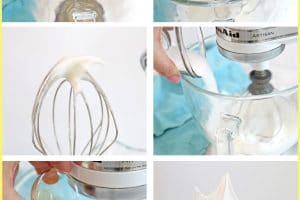
How to Make Meringue Cookies
1. Pour the egg whites into a stand mixer fitted with a whisk attachment. Make sure the mixing bowl and whisk you’re using are dry and very clean–egg whites won’t beat properly if there is fat or yolk residue anywhere.

2. Whip the egg whites until they are foamy–this means that they should be white and bubbly, but not yet starting to hold any sort of peaks.

3. Add the cream of tartar to the foamy egg whites, then mix on low speed until the cream of tartar is mixed in.

4. Whip the egg whites to soft peaks. This means that when you lift the whisk from the whites, the whites form a peak that droops down gently rather than sticking straight up and down. Once you reach this “soft peak” stage, you’re ready to begin adding the sugar!

5. Once at soft peaks, add the sugar a spoonful at a time, while mixing the egg whites at medium-high speed. You don’t have to measure it precisely, but the point is to add it very gradually so it gets slowly incorporated. I wait at least 1-2 minutes between each addition before adding more, to make sure that it really is well-mixed in.

6. Now you can add any flavoring extracts you like! For this recipe, I went with classic vanilla, but any standard extracts will work. Avoid oil-based flavorings, as the oil will cause the egg whites to deflate.

7. Continue to whip the whites until they are very stiff. This means that when you remove the whisk from the meringues, the whites stand up straight and don’t droop down at all–this is called “stiff peaks” stage. The meringue should also not feel gritty or grainy from the sugar.

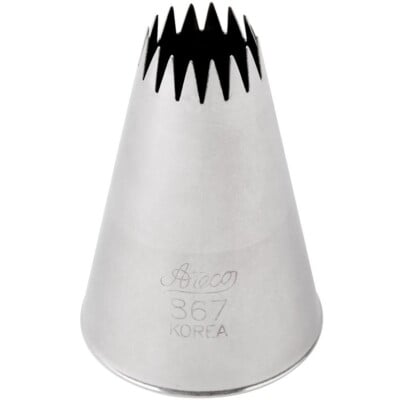
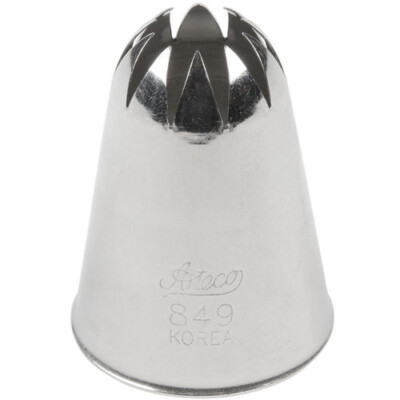
8. Time for piping! If you want to color the meringue, gently fold in gel food coloring with a spatula and stir just until the color is even. Then place the meringue mixture in a piping bag. You can use a regular round tip for round kiss-shaped meringues, or use a star tip for stars. If you want lots of ridges, a French star tip is what you’re looking for!

9. Pipe the meringues on parchment paper. They won’t spread much, so you can put them fairly close together. I like to make smaller ones (1-1.5 inches) but you can make larger ones if you’d like! You’ll just want to adjust the cooking time and keep a close eye on them in the oven.

10. Once the meringues are baked, turn the oven off and let them cool completely in the oven. Going from hot oven to cold room can sometimes cause your meringues to crack, so gradually lowering their temperature is best for keeping your meringues looking good!

Tips For Making Meringues
Now that you know the basics of making meringues, here are some tips and tricks to ensure your meringues come out perfectly, every time!
Egg Whites 101
For the very best results, your egg whites should be:
- very fresh (don’t use old eggs for this recipe!)
- room temperature
- completely free of any fat or yolk
Wondering how best to separate your eggs so they don’t get yolks in them? Check out my guide to separating eggs four different ways!
They also whip best when they’re room temperature, not cold from the refrigerator, so if possible, let them sit out for 20-30 minutes at room temperature to warm up before making meringues. Egg whites from a carton do not work well when making meringue cookies, so they are not a good choice for this recipe.
Use Super Fine Sugar For The Best Results
Super fine sugar is called “caster sugar” in the UK, and it’s just granulated sugar with a smaller grain. It’s typically used to make drinks and simple syrup, but it’s also useful in baking and candy making, because the smaller grains of sugar dissolve faster. In meringues, super fine sugar dissolves beautifully, and produces a meringue without a grainy or gritty texture.
If you can’t find super fine sugar, you can either make it yourself, by whizzing regular granulated sugar in a food processor until it is finely processed, or just use regular granulated sugar and be very slow and methodical when adding the sugar to the egg whites in the recipe, to avoid any grittiness in the final result.

Monitor the Oven Temperature
A too-hot oven is a prime cause of meringue woes. Cracked meringues are NOT cute, and a $6 gadget can solve your problems! Get an inexpensive oven thermometer (I like this one!) and keep it in your oven to monitor the temp. This way, even your oven runs too hot or too cold, you can adjust the temperature accordingly and maintain a consistent temp for your meringues. If you are new to using a thermometer, check out my guides for how to use a thermometer and how to test and calibrate a thermometer correctly.
Cream of Tartar is NOT Optional
Okay…technically it IS optional. But please don’t omit it! Cream of tartar adds a lot of necessary stability to egg whites when they’re being whipped for meringue. Adding cream of tartar is like a little extra insurance policy that your meringue will turn out, stiff peaks will form, and all will be right in the world. If you can’t find any and really want to make meringues, by all means, proceed, and just keep your fingers crossed. But if you have easy access to cream of tartar, then you have no excuse not to use it.
Questions About Meringues

Why do meringues crack?
Cracked meringues are probably the most common problem people run into, and there are multiple causes behind it! The most common reasons meringue cookies crack include an oven temp that’s too high (get those oven thermometers!), being cooked for too long, or being over-whipped and having too much air incorporated into the meringue mixture. Fortunately, a cracked meringue still tastes great, it’s just a cosmetic flaw.
The solution to preventing cracks in future batches is to monitor your oven temperature and keep it low, don’t over-bake your meringues, and be sure to only beat your egg whites on medium-high speed, not the highest setting, which can incorporate too many air bubbles and cause cracks to form during baking.
How do I know when the meringues are done?
Your meringue cookies are done when they’re crisp and hard to the touch, and can be easily removed from the parchment paper, but have not taken on any color around the edges. (This is easier to see when baking white meringues vs colored.)

How long can I store meringue cookies? Can they be refrigerated?
Noooooo! Please don’t refrigerate your meringues! Humidity is the natural enemy of the meringue, and refrigerators tend to be very humid places. Meringues have a naturally short shelf life, and are best enjoyed within just a few days of baking them. If you live in a dry environment, your meringues may last a bit longer, and if you store them in an airtight container in a dry place you may get up to 5-6 days from them. If you live in a very humid environment, their best shelf life may be as short as 2 days.
My meringues are chewy 🙁 Can they be fixed?
Possibly! Chewy meringues can be caused by underbaking the meringues in the first place, in which case they might always be slightly chewy, or by the meringues naturally absorbing moisture from the air over time, in which case they may be able to be crisped up a bit. To try and crisp up your baked meringues, place them back on a parchment-covered baking sheet and put them in a 200-degree F oven for 10-15 minutes. After baking, let them cool then test them–they should be crispy again!
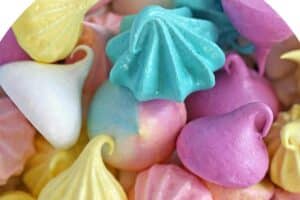
How Do I Make Unicorn Meringues?
When I was testing recipes for this post, I was playing around with different meringue colors and used some extra batter to create these swirled multi-colored “unicorn meringues,” inspired by The Meringue Girls. I posted some teaser pics on Instagram stories, and people went crazy asking how to make them. Fortunately, it’s super easy!

To create these pretty pastel meringue kisses, all you have to do is prepare different colors of meringue batter–in this case I had white, yellow, pink, purple, and teal. I had them in piping bags already, and I just squirted the different colors of batter into a larger piping bag fitted with a round attachment, trying to space the colors evenly around the sides so that they would all come out the opening together. You could also use a spatula to place them in a piping bag. Pipe the batter in dollops on a baking sheet, and you’re done!
🌈More Meringue Recipes
- SEE ALL COOKIE RECIPES
- Trendy Cream Tarts (use them as a topper!!)
- Eton Mess (crumble them up!)
- Blueberry Pavlova
- Meringue Mushrooms
- Raspberry Lemon Meringue Trifle
- Lemon Meringue Teacup Cakes
- Hazelnut Meringue Cake
Banana Meringue Cake with Cinnamon-Sour Cream Ganache
Strawberry Rhubarb Pavlova

Meringue Cookies
Equipment
Ingredients
- 4 large egg whites, at room temperature
- ½ tsp cream of tartar
- 7 oz super fine sugar, (1 cup), can substitute granulated sugar
- Pinch of salt
- 1 tsp vanilla extract
- Assorted gel food coloring, I recommend Americolor brand
Instructions
- Preheat the oven to 200 degrees Fahrenheit (90 C). Place the room temperature egg whites in the clean bowl of a stand mixer fitted with a whisk attachment. (Alternately, you can use a large bowl and a hand mixer with the whisk attachments.)
- Turn the mixer to medium speed and beat until the egg whites are foamy. Turn the mixer off, add the cream of tartar, and beat again on medium until the whites have turned an opaque white color and just start to hold soft peaks.
- At this point, start adding the sugar a few spoonfuls at a time with the mixer running. Adding the sugar slowly helps it incorporate and prevents the meringue from becoming grainy. Continue to add the sugar very gradually, and once all of the sugar is added, add the pinch of salt. Beat the egg whites until they are very thick, glossy, and a shiny white color. When you stop the mixer and lift the whisk out of the whites, the whites should have a very stiff peak. This process will take about 5-10 minutes in a stand mixer.
- Finally, stop the mixer, add the vanilla extract, and mix it in briefly. If you want to color the meringues just one color, add a small amount of gel food coloring to the mixing bowl and fold it in to the meringue mixture with a spatula, stirring gently. If you want to make multiple colors, divide the meringue first and work quickly to color each batch your desired color.
- Cover two baking sheets with parchment paper. Scoop your meringue mixture into a piping bag fitted with a large tip—a star tip or a round tip both work well. Put a dab of meringue mixture under the corner of each parchment sheet to stick it down and make piping easier.
- Pipe stars or kisses of meringues on the baking sheets, about 1 – 1 ½ inches wide. The meringues will barely spread, so they can be piped close together. Bake the cookies at 200 F for 60 minutes. After an hour, turn the oven off, keep the door closed, and allow the meringues to sit until completely cool, for about an additional hour.
- Once the meringues are crisp and room temperature, carefully remove them from the parchment paper.
- Meringues can be stored in a cool, dry place in an airtight container at room temperature for 3-4 days. If they become chewy, you can revive them by placing them back in a 200-degree F oven for about 15 minutes. Let them cool completely, then test them—they should be crispy again!
Recipe Notes
Measuring Tips
Our recipes are developed using weight measurements, and we highly recommend using a kitchen scale for baking whenever possible. However, if you prefer to use cups, volume measurements are provided as well. PLEASE NOTE: the adage “8 oz = 1 cup” is NOT true when speaking about weight, so don’t be concerned if the measurements don’t fit this formula.
Want to learn more about baking measurements and conversion?
Nutrition


adorable!! I just have a question on the unicorn multi color Meringues. is it like piping the multi color frostings? I use plastic wrap and place in the piping bag but is it too hard to do it this way? I am not picturing how you are doing this. apologies for the confusion. do you have a video on how you do this? thank you for the recipe!! can’t wait to try it.
kind regards,
Connie Myrick
Bothell, WA
Hi Connie! Yes, the method is very similar to what you are doing with the frosting. When I first made these cookies I had different colors of meringue batter already in several different piping bags. So, I just squirted the different colors of batter into a larger piping bag fitted with a round attachment, trying to space the colors evenly around the sides so that they would all come out the opening together. I haven’t tried it in plastic wrap but I use that method for swirled frosting and think it would work with the meringue batter. You might want to do a small amount first to make sure you like the look. Sadly, I don’t have a video for this recipe, but there is a ‘Questions’ section just above the recipe card where I explain the technique (same info as my response to you now). I hope that helps. Let me know if you need anything else.
Can the sugar be substituted with something like stevia or monkfruit?
Hi Susan! We’ve never tested this recipe with stevia or monkfruit. The sugar gives the cookies a lot of their structure so our guess is that replacing the sugar with a different sweetener would likely change the texture of the cookies a lot. If you do decide to give it a try, we’d love to know how they turned out. Good luck!