
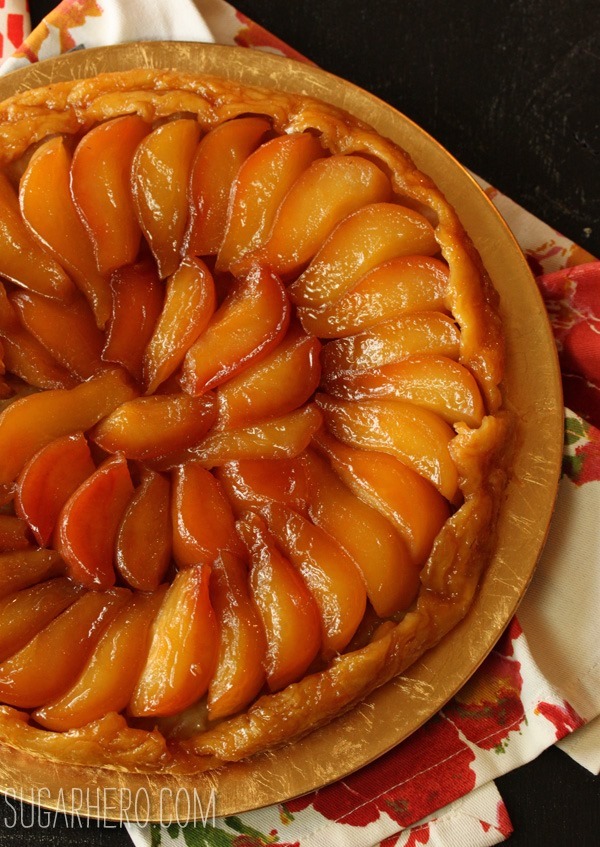
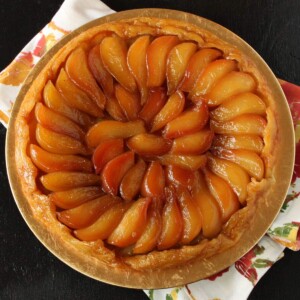
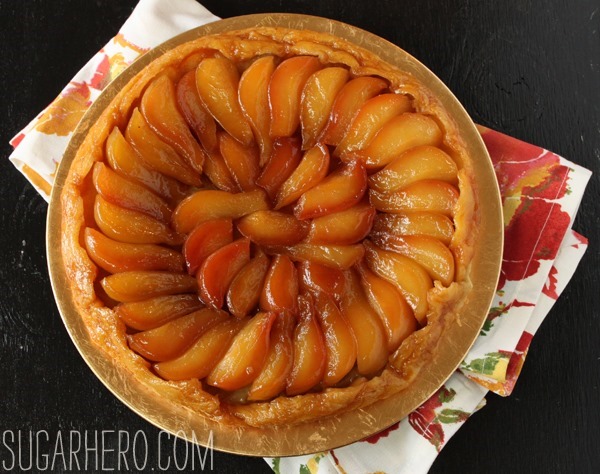
This Pear Tarte Tatin nestles juicy caramelized pears and buttery caramel in a golden, flaky puff pastry crust. It’s an elegant French dessert that’s easier to make than it looks and absolutely stunning on the table! Serve with vanilla ice cream and a drizzle of caramel sauce.
🍐 Upside Down Pear Tart
This recipe took me back to my first pastry job at an upscale bakery in Los Angeles. Working there wasn’t easy, but it did teach me many valuable lessons about how to work hard and how to work clean. It also taught me to always use the best ingredients and to not cut corners. This is also where I learned how to make a traditional apple tarte tatin — the inspiration for my pear tart tatin.
If you’ve never made a tarte tatin before, let me warn you, it requires some patience. Unlike quick versions you might find online that call for cooking the fruit for 15 or 20 minutes, this tarte tatin takes its time. The pears cook low and slow in a buttery caramel on the stovetop and are then finished in the oven until they’re deeply golden, perfectly tender, and practically translucent. The result is a tart with pear slices that gleam like jewels and melt on the fork without a whisper of resistance. Worth every minute.
More Pie and Tart recipes
Check out my collection of Tart Recipes where you’ll find more gorgeous, fruit-studded recipes like Pear Pistachio Tart with Rosemary Crust, Fresh Peach Tart, and Mini Strawberry Rose Tarts.
Table of Contents
🧾What You’ll Need
Ingredients
Only 5 ingredients and a few basic tools are needed to make this caramelized pear tart. Here are some tips to help you gather your supplies. Full ingredient amounts can be found in the recipe card. (Links are affiliate links and I earn a small commission from qualifying purchases.)
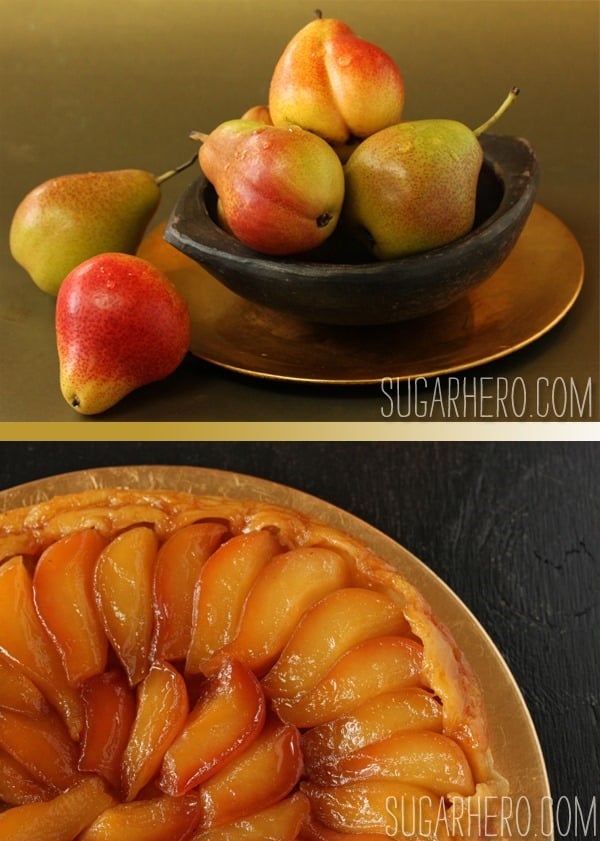
- Firm pears: Use firm pears like Bosc or Anjou. Ripe but firm is the sweet spot. Soft or overripe pears will turn to mush during the long cooking process. Avoid Bartlett pears, which are too soft and watery.
- Fresh lemon juice
- Granulated sugar
- Unsalted butter: Bring it to room temperature first and cut it into cubes.
- Puff pastry: You’ll only need 1 sheet, which is half of a standard 17-oz pack. Thaw before use.
Equipment
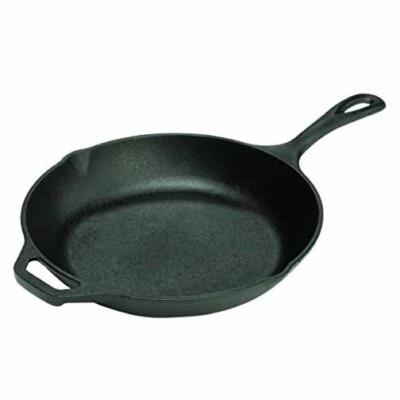
- 10-inch oven-safe skillet: I recommend using a cast-iron skillet.
- Rolling pin: I like to use a French-style wooden rolling pin.
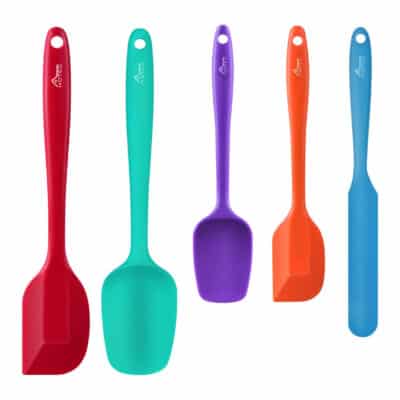
- Rubber spatula: Using a rubber spatula to tuck in excess puff pastry will protect your fingers from getting burned.
💚 More Pear Recipes
Leave a Review!
If you make this recipe, let us know! Leave a ⭐️⭐️⭐️⭐️⭐️ rating on the recipe below, and leave a comment, take a photo and tag me on Instagram @elabau, or use #sugarhero on IG!

Pear Tarte Tatin
Ingredients
- 2 lbs firm pears, about a dozen
- 1 tbsp lemon juice, fresh
- 2 tbsp water
- 1 1/4 cup granulated sugar, divided use
- 3 oz unsalted butter, cubed and at room temperature
- 1 (8.5 oz) sheet puff pastry dough, half of a standard 17-oz pack, thawed
Instructions
- Prep the pears: Peel the pears, cut them in quarters, and core them.
- Start caramel: In a 10-inch oven-safe skillet over medium heat, combine the lemon juice, water, and 1 cup of granulated sugar. Stir them together until the sugar dissolves, then stop stirring and let the mixture come to a boil. Continue to boil the sugar syrup. Swirl the pan occasionally so that the sugar doesn’t scorch. Cook the sugar until it is a lovely golden brown color and smells caramelized.
- Finish caramel: Add the butter cubes and stir it in. The mixture might look separated at first, but continue to cook it, stirring occasionally, until it comes back to a boil and bubbles slowly like thick caramel.
- Add pears: Arrange the pear slices on their sides in a concentric ring around the outer edge of the pan, with the wide bottom at the edge and the tapering top pointing to the center. Try to pack them in as closely as possible. Add a second ring in the center going the other way. Depending on the size of your pears, you may need to trim the slices in the center so that they fit. Don’t worry if it’s not perfect, as the pears cook they will shrink a bit so you can always do touch-ups later.
- Cook low and slow: Sprinkle the remaining 1/4 cup of sugar on top of the pears, and cover the skillet with a lid or a tight layer of foil. Reduce the heat to a little under medium and cook the pears, covered, for 45 minutes. Check them once or twice and if they seem to be in danger of burning, reduce the heat a bit more. As they shrink try and add another sliced pear or two, so that they’re packed tightly. After 45 minutes, remove the cover and cook for an additional 15-25 minutes. The pears should look golden brown along the edges, somewhat translucent, and should be tender and easy to slice through.
- Prepare the pastry: While you’re waiting for the pears to cook, prepare the pastry. Preheat the oven to 400°F. Sprinkle a work surface lightly with flour, and roll out the thawed but cool puff pastry dough into a 12-inch circle. It should be large enough to cover the skillet, with about a inch extra on all sides. Once rolled out, cover the pastry and cutting board with plastic wrap, and refrigerate it until you’re ready to use it.
- Top pears with pastry: When the pears are ready, remove the skillet from the heat. Carefully drape the pastry over the top of the skillet, and tuck the excess dough down along the inside of the skillet between the pears and the pan’s side. (I like to use a rubber spatula for this step to preserve my fingers!) Don’t worry if it wrinkles or bunches up a bit—it’s not meant to be perfect.
- Bake in the oven: Cover the top of the pastry with a loose layer of aluminum foil, and bake it for 15 minutes. Remove the foil and bake the pastry for an additional 15 minutes, until it’s golden brown and puffed all around. Take it from the oven and let it rest for 10 minutes.
- Drain off juices: Press a plate to the top of the skillet and gently, gently tilt it to the side so that the juices run out of the pan and into a bowl. (This step is easiest if you have a helper to help wrangle the plate.) Try to get as much juice out as possible, but be careful to not mangle the tart.
- Unmold tart: Once the juice is removed, press a large plate to the top of skillet. In one firm motion, flip it upside down so that the tart drops from the skillet onto the plate, crust side down.
- Make caramel topping: While the tart cools a bit, transfer the caramel-pear juice to a small skillet. Boil it for several minutes, until it thickens (it will continue to thicken as it stands).
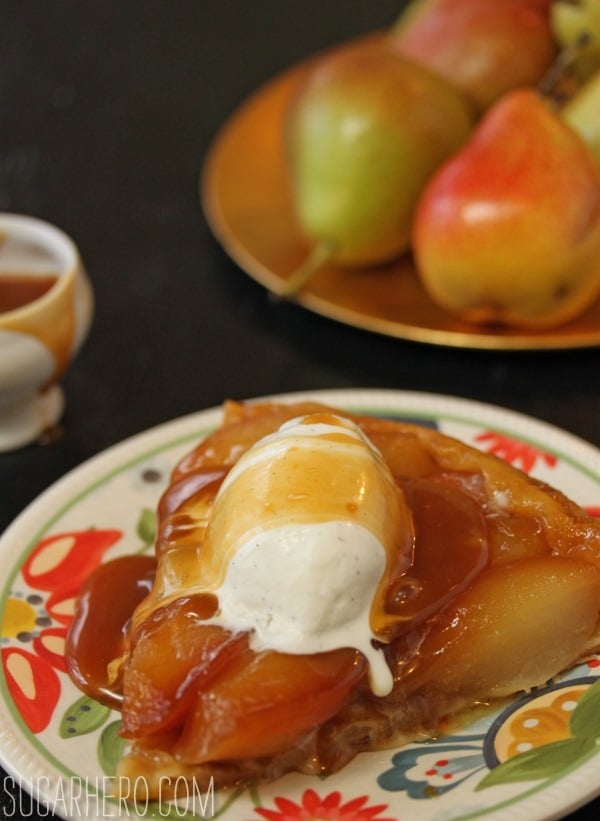
- Serve: This tart is best served the day it is made. Serve slices with a scoop of vanilla ice cream and a drizzle of homemade caramel-pear sauce.
Measuring Tips
Our recipes are developed using weight measurements, and we highly recommend using a kitchen scale for baking whenever possible. However, if you prefer to use cups, volume measurements are provided as well. PLEASE NOTE: the adage “8 oz = 1 cup” is NOT true when speaking about weight, so don’t be concerned if the measurements don’t fit this formula.
Want to learn more about baking measurements and conversion?
Nutrition
📸Photo Tutorial: How to Make a French Pear Tart
Here’s a quick overview of how to make Pear Tarte Tatine! Full instructions are included in the recipe card above.
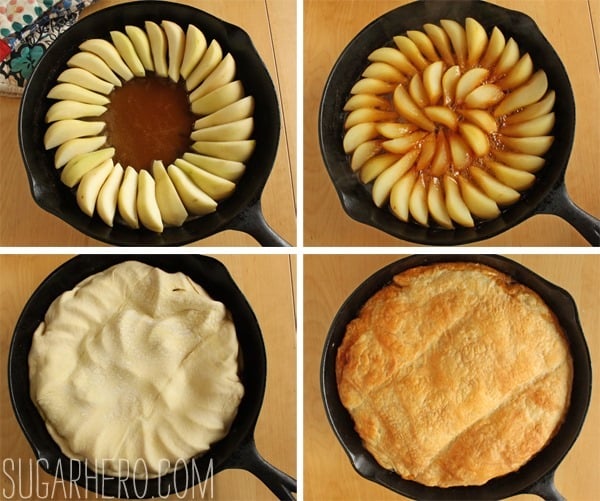
- The process starts with making a simple caramel from lemon juice, sugar, and butter in a cast iron skillet.
- Once the caramel is thick, arrange the pear slices on their sides around the outside edge of the pan, packing them together as closely as possible.
- Add a center ring of pears going the other way.
- The pears will shrink and soften as they slowly cook.
- Once the pears are perfectly tender, place a sheet of puff pastry over the top and bake until golden and puffed.
Easy Caramel Topping
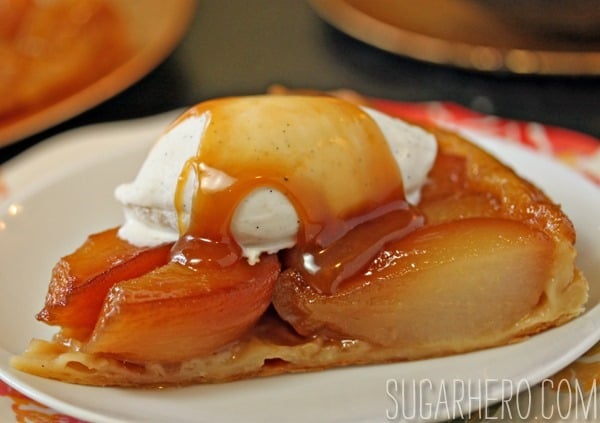
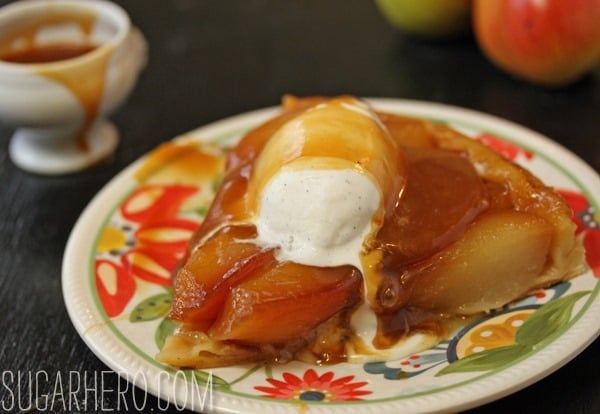
Before unmolding, carefully tilt the skillet to drain off any excess caramel and pear juice. This helps the final tart hold together better and not turn soggy. Don’t throw that juice away! Boil it for a few minutes and you’ll have the most incredible thick caramel pear sauce to drizzle over the top. Serve with vanilla ice cream or a drizzle of crème anglaise for a truly showstopping dessert.
💡Tips and FAQs for Success
- Don’t stress about a perfect arrangement. Depending on the size of your pears, you may need to trim the center slices so everything fits snugly in the pan. Don’t worry if it looks a little imperfect at first. As the pears cook down and shrink, you’ll have room to nudge things around and do any touch-ups.
Absolutely! A classic tarte tatin is actually made with apples. Use firm baking apples like Granny Smith or Honeycrisp and follow the same method.
Make sure you have a serving plate that is larger than your skillet. Place the plate firmly on top of the skillet, then flip quickly and confidently in one motion. Let it sit for a minute before lifting the skillet so that gravity does most of the work. Have a kitchen towel nearby to catch any drips.
For the best texture, this tart is best served the day it is made. Leftovers can be stored covered in the refrigerator for up to 3 days. The pastry will lose some of its crispness but the flavor is still wonderful. Reheat individual slices in a 300°F oven for best results.
Browse More:















My dream was to one day work in a pastry kitchen until I actually did. I don’t know if it was the bakeries I worked in but man some of the people I had to deal with, nightmare status! This Pear Tarte Tatin looks gorgeous and I am sure it taste equally as amazing.
It definitely wasn’t you–something about the restaurant environment seems to attract crazies like flies to flypaper. I always laugh when people tell me they want to be a pastry chef, or that it seems like a glamorous job–if only they knew!
I have the weirdest dreams, but none of them seem to involve food. Um, unfair!
Also, I stared at each photo for a good 30 seconds, even the one of just the pears. Beauties! All of them!
AND also, this is doing nothing for my “talk self out of buying another cast iron skillet for tarte tatins and other sweet stuff” project.
Thank you friend! I bought my skillet at an estate sale for dirt cheap. It was in terrible condition, but I thought, “How hard could re-seasoning a skillet be?” Cut to two weeks later when I’m finally chipping all of the grime off…lesson learned! Next time I’ll save myself some time, pay the $20 bucks and buy a new one. (But at least I know mine has “history.”)
Did you use to make your own puff pastry? I don’t mind pie crust, but I can never get puff pastry to work for me. This tarte looks amazing! Especially the caramel at the end 🙂
Yes! But we had a sheeter (a machine that rolls out dough) so it wasn’t quite as backbreaking as it sounds.
And honestly, I think puff pastry, like croissant dough, is one of those things that’s rarely worth it to make at home. If you buy a good-quality one made with all-butter, you don’ts sacrifice much taste but save hours of time.
Yum! It looks super decadent with the vanilla ice cream on top. I have some serious cravings now
Hey there! I’ll be making this tonight, but right now I am working on making puff pastry dough. Do you know if I will be cutting the dough in half and just need half? Or maybe I only need 1/4 of it? The recipe makes about 2 lbs of dough.
Hi Sarah! I used one (premade) 8.5 oz sheet of puff pastry for the tart. So if your recipe makes 2 lbs, you’ll only need about a quarter of it. Homemade puff pastry sounds awesome!
I loved your post, all of it. The photos are delicious, the precision of your recipe applauded but I most related to your story of working as a professional chef. In my case I’m a cuisine chef but 25 years in I can still remember Day 1 in a professional kitchen like it was yesterday. For me it was a super positive high but I certainly rolled through my share of crazies as well. However as you said, you learn/take away something from all of them. Thanks for the great post.
The concept is good…. The flavor is ok – but wayyyy too much time, too messy. If you want the puff pastry instead of regular pie crust, cook the pears; bake the pastry in a dish; drain the pears and put in the baked shell. This was a mess, and even flouring the pears, as I knew they’d sweat gobs – it just didn’t work. Modify as necessary – a good baker May appreciate some concepts here.
What a gorgeous Tart. It is so beautiful and looks easy enough to make. I have been following you for a long time now and have learned so much and baking pretty good now My stuff is still not as Beautiful as your is but boy is it tasty. Thank you for all you do for all of us.
Hi Donna! Thank you so much for the recipe review and thank you for following my blog. I’d love to see some of your beautiful creations sometime. Happy baking to you!!