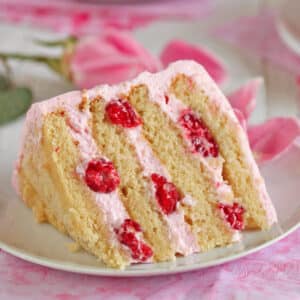
Radiant Orchid Mini Cakes have layers of vanilla cake, vanilla buttercream, and fresh blackberries in the center. They are vivid, cheerful, and playful – just like dessert should be!

The Prettiest Color For Mini Cakes
The first thing you should know about me is that I am NOT a design geek or decorating enthusiast. We moved into our current place four years ago, and I literally just hung some art in the living room a few months ago. Before that, we lived with bare walls painted a charming industrial beige. Apparently I save all of my creativity for the world of cakes, because my poor apartment is not getting any decorating love.
The second thing you should know about me is that I have been obsessed with the idea of making cakes inspired by Radiant Orchid, Pantone’s 2014 Color of the Year, for months now.* It is a shock that I even know what Pantone is, so I cannot rationally explain how I knew what the color of the year was, or why I was driven to make Radiant Orchid cakes. And what color is Radiant Orchid, you ask? Well, it’s certainly not industrial beige:
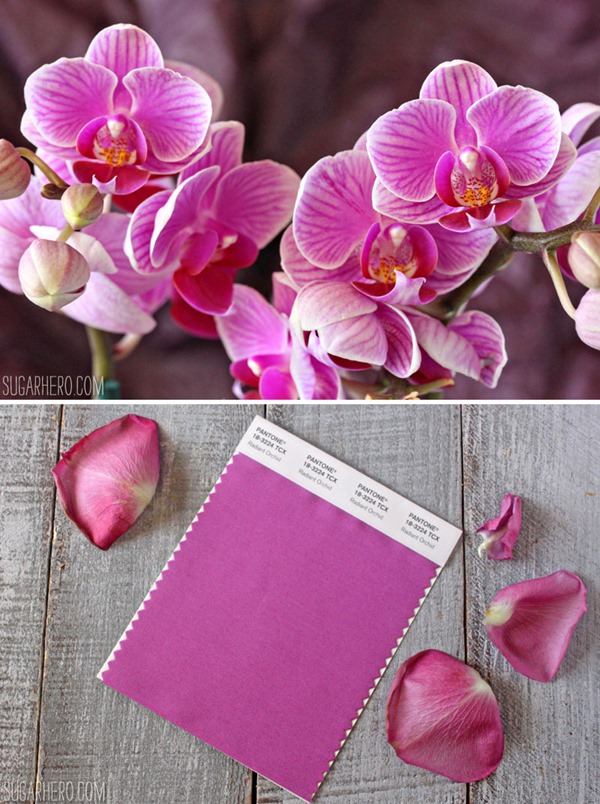
Snaps to Trader Joe’s for having orchids in exactly the right color. Awwww yeah.
Honestly, I don’t know what planted the bug in my head. Maybe I was sleep-Pinteresting (hush, you know you’ve done it too) and accidentally clicked on a design blog? All I know is, I saw the bright pinkish purple color, heard the words “Radiant Orchid,” and immediately had to buy all the purple food dye (and nail polish!) I could find.

Blackberry and Vanilla Mini Cakes
And, then the dream for these mini cakes was born. I kept things simple with the flavors: vanilla cake, vanilla buttercream, and fresh blackberries in the center. A layer of blackberry jam would also be a welcome addition to these cakes. One recipe makes three mini cakes, so you’ll have a few opportunities to experiment with decorating ideas and flavors!


Decoration Ideas
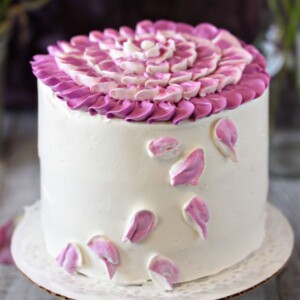
I played around with a few (okay, five or six) cake designs, but the ones I liked best were these cakes with contrasting petals ringing the top, with a few stray petals falling down the sides. I did it in both purple/white and white/purple, and although there’s nothing terribly “orchidy” about the design, I thought it suited the color and flower theme.

I also covered a cake in purple sprinkles (fail: the sprinkle company did not get the proper Radiant Orchid memo), tried a watercolor effect (mixed results) and covered a cake with fondant and candied purple rose petals. The petals are super fast and easy if you’re interested—I give instructions on how to make candied rose petals here. Just make sure you’re using pesticide-free roses if you’re planning on munching on them!

Vivid, Cheerful Mini Cakes
So while I really wish there was a compelling story behind these cakes, the truth is that I was captivated by the color and just wanted to make something bright and beautiful. Simplicity: it’s what’s for blog posts. Radiant Orchid is vivid, cheerful, and playful—just like the best desserts. Let’s not overthink things.

*In case it wasn’t clear, this post is sponsored entirely by my weird brain and its obsession with random colors. Pantone doesn’t know who I am, isn’t sponsoring this post, and is probably like, “Giiiiiirl, it took you four years to hang a painting? Get it together.”
🌸More Beautiful Cake Recipes You’ll Love!
- Hydrangea Cakes
- Giant Rose Cake
- Chocolate-Covered Strawberry Cakes
- Spring In Bloom Layer Cake
- Strawberry Swirl Bundt Cake
Raspberry-Rose Cake

Blueberry Layer Cake
Radiant Orchid Mini Cakes
Ingredients
For the Cakes:
- 8 oz unsalted butter, at room temperature
- 14 oz granulated sugar, (2 cups)
- 4 large eggs, at room temperature
- 1 tbsp vanilla extract
- 12 oz cake flour, (3 cups)
- 1 tbsp baking powder
- 1/2 tsp salt
- 1 cup milk, at room temperature
For the Buttercream:
- 9 large egg whites
- 14 oz granulated sugar, (2 cups)
- 1 lb unsalted butter, soft but still cool
- 1 tbsp vanilla extract
- 1/4 tsp salt
To Assemble:
- 1 pint fresh blackberries, (6 oz)
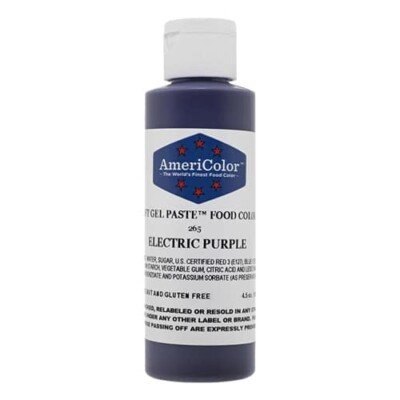
- purple gel food coloring, I used Americolor: Electric Purple and Regal Purple
- Piping bags
- Couplers
- Rose piping tip
Instructions
To Make the Cakes:
- Preheat the oven to 350 F. Line a 12×18-inch baking pan with a 1″ rim (also called a half sheet pan) with parchment paper, and spray the paper and sides with nonstick cooking spray.
- Sift together the flour, baking powder, and salt in a medium bowl. Set aside for now.
- Combine the butter and sugar in the bowl of a large stand mixer fitted with a paddle attachment. Mix on medium-high speed until light and fluffy, about 2-3 minutes.
- Add the eggs one at a time, beating well after each addition, then add the vanilla extract. With the mixer running on low, add third of the flour mixture, then when the flour streaks have disappeared, add half of the milk. Add half of the remaining flour, the rest of the milk, then finish with the last of the flour. Stop the mixer and scrape down the bottom and sides of the bowl with a rubber spatula to fully mix the batter.
- Scrape the batter into the pan and smooth it into an even layer, then bake at 350 for 18-20 minutes, until the top is golden and a toothpick inserted into the center comes out clean. Cool the cake completely before proceeding. Cake can be made several days in advance and stored, well-wrapped in plastic wrap, in the refrigerator or freezer.
To Make the Buttercream:
- Combine the egg whites and the granulated sugar in the bowl of a large stand mixer, and whisk them together. Choose a small saucepan that lets you fit the base of the stand mixer snugly into the top of the saucepan—this is your makeshift hot water bath. (Alternately, you can use a different bowl or an actual bain marie and then transfer the mixture to a mixing bowl once it’s heated.) Add an inch of water to the bottom of the saucepan, and bring the water to a simmer.
- Place the mixing bowl on top of the saucepan, making sure that the bottom isn’t in contact with the water, and heat the egg white mixture. Whisk frequently so that the egg whites don’t cook. Continue to heat the whites until they are hot to the touch, and when you rub a bit between your fingers, you don’t feel any grittiness from the sugar. Once the whites are hot, transfer the mixing bowl to your mixer and fit it with a whisk attachment.
- Beat the whites on medium-high speed until they are a shiny, stiff, voluminous meringue, and are no longer warm to the touch—feel the outside of the bowl, and make sure that it is around room temperature. Depending on your mixer and the temperature of your environment, this may take 15-20 minutes, or more. Reduce the speed to medium-low and add the softened but cool butter in small chunks, a tablespoon at a time, making sure to wait in between additions. It may separate or look a little gloopy at this point—fear not. Once all of the butter is added, increase the speed again and whip until it comes together and is light and fluffy. If, after 5 minutes, it hasn’t come together, refrigerate the mixing bowl for 5-7 minutes, to cool the mixture down, and whip it again until it has thickened and is smooth and silky. Add the vanilla extract and salt.
- The buttercream can be made in advance and kept at room temperature if you’re going to use it the same day, or refrigerated. If it has been chilled, let it sit at room temperature until completely soft, then re-whip it to get the smooth texture back before you use it.
To Assemble:
- Use a 3.5″ or 4″ circular cutter to cut nine rounds out of the cake. (This will yield you 3 cakes with 3 rounds each.) You can save the scraps for munching, or use them for making cake pops. Cut three cardboard circles the same diameter as the cake rounds, and place one round on each cardboard base. Coarsely chop the fresh blackberries.
- Set aside 1 cup of buttercream, and color the rest of the frosting with the food coloring. I used mostly Americolor Electric Purple, and added a few drop of Regal Purple to deepen it and get a true Radiant Orchid shade. Fit a piping bag with a coupler or other wide, round tip, and fill it with some of the purple frosting.
- Pipe a ring of frosting around the outside of one of the cakes on a cardboard base. Spread a thin layer of frosting inside the buttercream ring. Press some chopped fresh blackberries into the frosting, taking care to stay inside the buttercream ring so the berries won’t poke out the edge of the cake.
- Place a second cake round on top of the first and repeat the process with the frosting and berries. Finally, add a third cake round on top. Spread a very thin layer of buttercream on the top and sides of the cake to act as a crumb coat. Repeat with the other cake rounds until you have 3 mini cakes assembled. Refrigerate them for an hour, so that the frosting chills and hardens.
- Once the frosting is set, go back and add another layer of buttercream on the outside of the cakes, this time trying to get it even and smooth. After spreading a thicker layer of frosting around the sides, I like to use a bench scraper to go around the sides and get them very straight and clean. To do this, hold the bench scraper in your dominant hand, straight against the sides of the cake. With your other hand turn the cake turntable so the scraper removes any excess frosting from the sides. Use an offset spatula to smooth the frosting on the top of the cake.
- To make the petal design, fit a piping bag with a rose tip. Take some of the reserved white frosting and smear it against one side of the piping bag, on the same side as the narrow edge of the rose tip. Fill the remaining space in the bag with purple frosting. Squeeze the bag until the frosting comes out in two colors—white near the narrow tip, and purple near the wider tip. (It can sometimes take a few squeezes before both colors work their way out of the tip.)
- Hold the bag perpendicular to the top of the cake, with the wide end of the tip on the outer edge of the cake and the narrow end closer to the center. Squeeze the bag as you move it in a slight circular motion to create a “petal” shape that is broader on the outside and narrows to a point in the middle. Pipe another petal next to it, and go around the entire edge of the cake. Make a second layer of petals inside the first, overlapping the bottom of the first layer slightly. Continue adding overlapping layers of petals to the top of the cake, until the whole top is covered. If desired, add a few petals to the side of the cake, as if they were falling from the top of the cake.
- For the best taste and texture, serve these cakes at room temperature.
Recipe Notes
Measuring Tips
Our recipes are developed using weight measurements, and we highly recommend using a kitchen scale for baking whenever possible. However, if you prefer to use cups, volume measurements are provided as well. PLEASE NOTE: the adage “8 oz = 1 cup” is NOT true when speaking about weight, so don’t be concerned if the measurements don’t fit this formula.
Want to learn more about baking measurements and conversion?
Nutrition
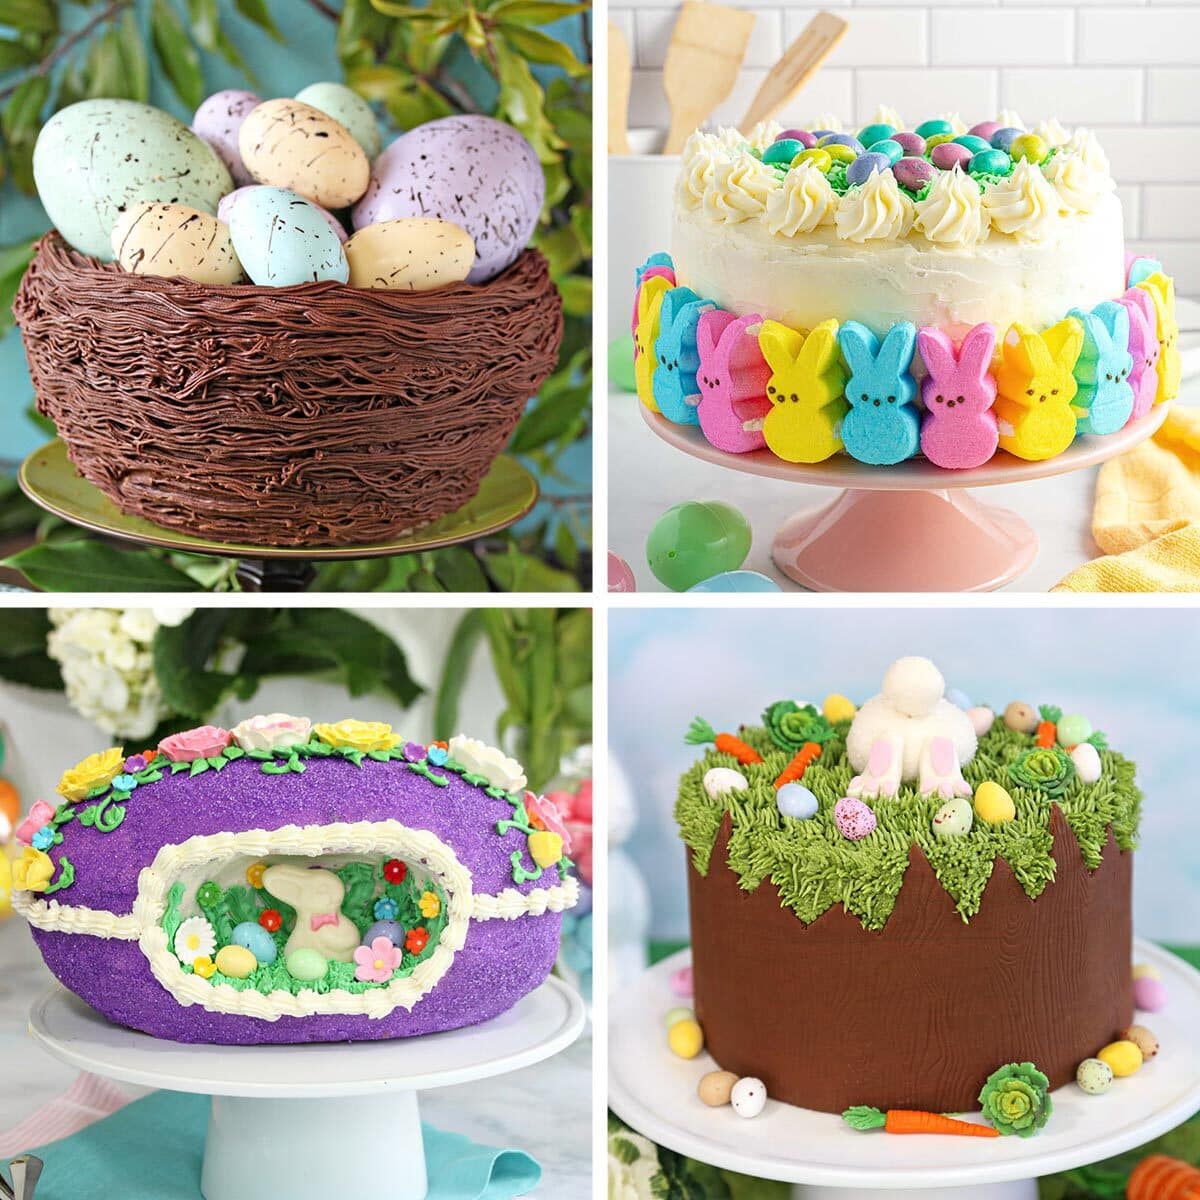
EASTER CAKE RECIPES 🐇
We’ve rounded up 35 adorable Easter cake recipes that will make your holiday extra-special — click here to get all the recipes!
This post contains Amazon affiliate links. For more information, see my Affiliate and Advertising Policy.


What a gorgeous cake! I love orchids as well and am impressed that TJs had the orchids in the color you wanted!
Thank you Eva! I love orchids too, but I’m intimidated by them because I can never seem to keep them alive. If you have any tips, I’m all ears. 🙂
I have the feeling that I always tell you the same whenever I visit your blog, but wow girl, you’re one talented human being. These look soooooo stunning! Those petals on top are the most adorable thing I’ve ever seen,and yeah, the color is absolutely beautiful!
I remember hearing about Radiant Orchid and how much I loved the color. It’s just so pretty and girly – I am beyond excited that you created these fabulous cakes in its honor. Not only do they look absolutely perfect, but I almost died when I saw the berrylicious inside. Yum!!!
So cute, love love the photo where you´re holding one of them.. even your nail varnish matches 😉 and the top of that one is my favourite 🙂 Happy week!! xoxo
Oh my! Look at you with your brilliant ideas and luxurious mane of hair. This is such an awesome idea. Now, I want to do a cocktail to match.
And, while I did get around to decorating my bachelorette pad (somewhat), my office is bare bare BARE. It makes me look psychotic, seriously (and I’ve been here for 6 years).
I can think of nothing I want to do more than stand in your living room, staring at what I’m sure is some kick-ass art, and eat radiant orchid-inspired cakes together. That’s my idea of a good time.
All of these cakes are so gorgeous! I love that you were inspired simply by a color. 🙂 I think the ones with the piped petals on top are my favorites too, but they are all beautiful! 🙂
It is SO HARD to find interesting, original content for my Radiant Orchid Pinterest board! And I’m not just saying that! Thanks for contributing to my life in a meaningful way. 🙂 And these are gorgeous of course as always. Thanks for keeping me entertained!
These cakes might be the most gorgeous things I have seen all day!
Beautiful!! You captured radiant orchid perfectly ❤️ I love how you did it in so many different ways and they’re all so unique!