
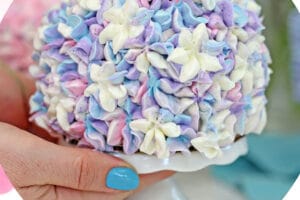
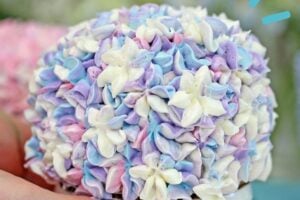
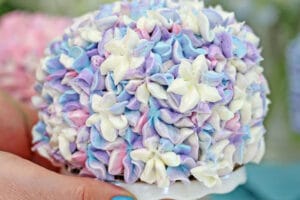
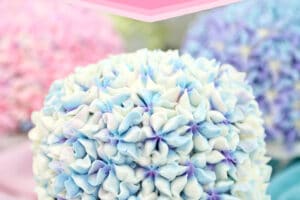
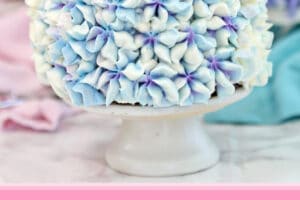

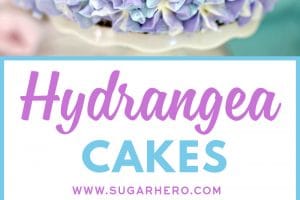
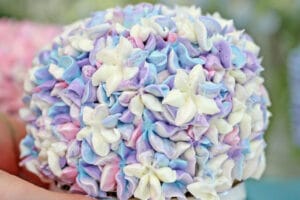

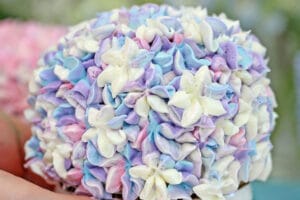
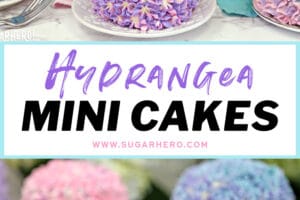
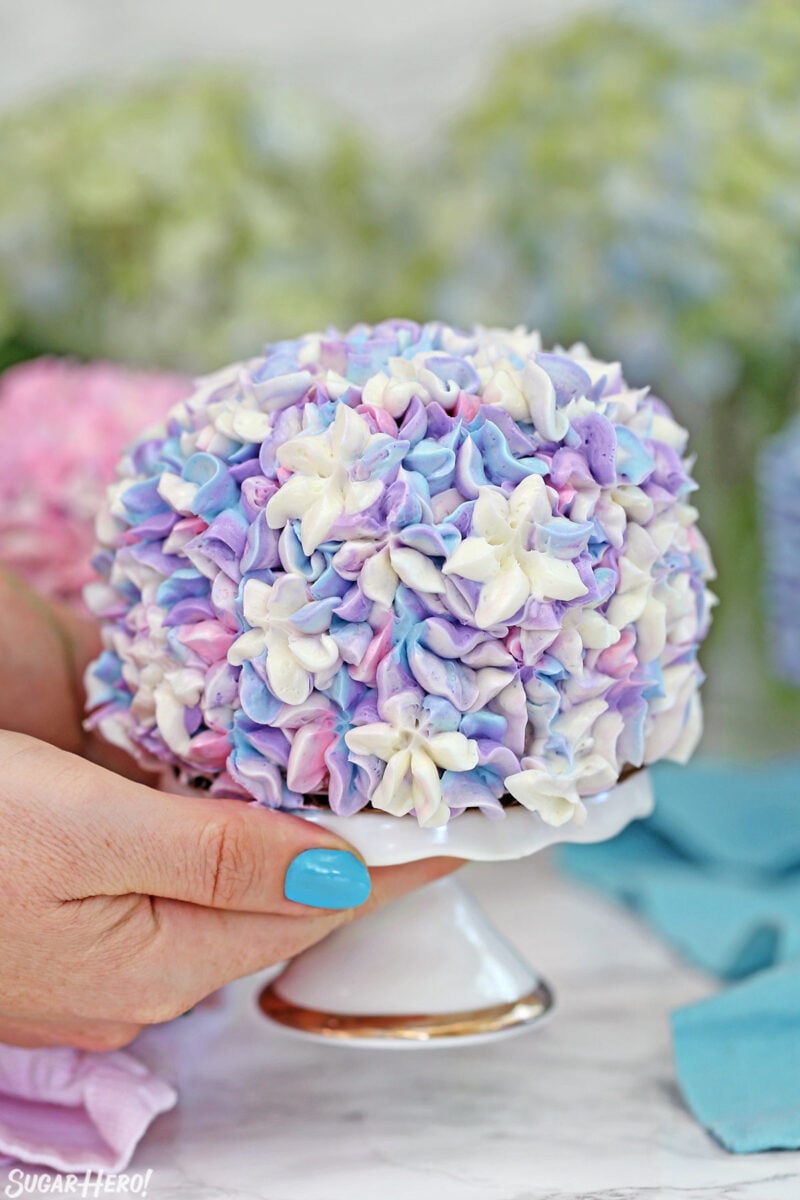
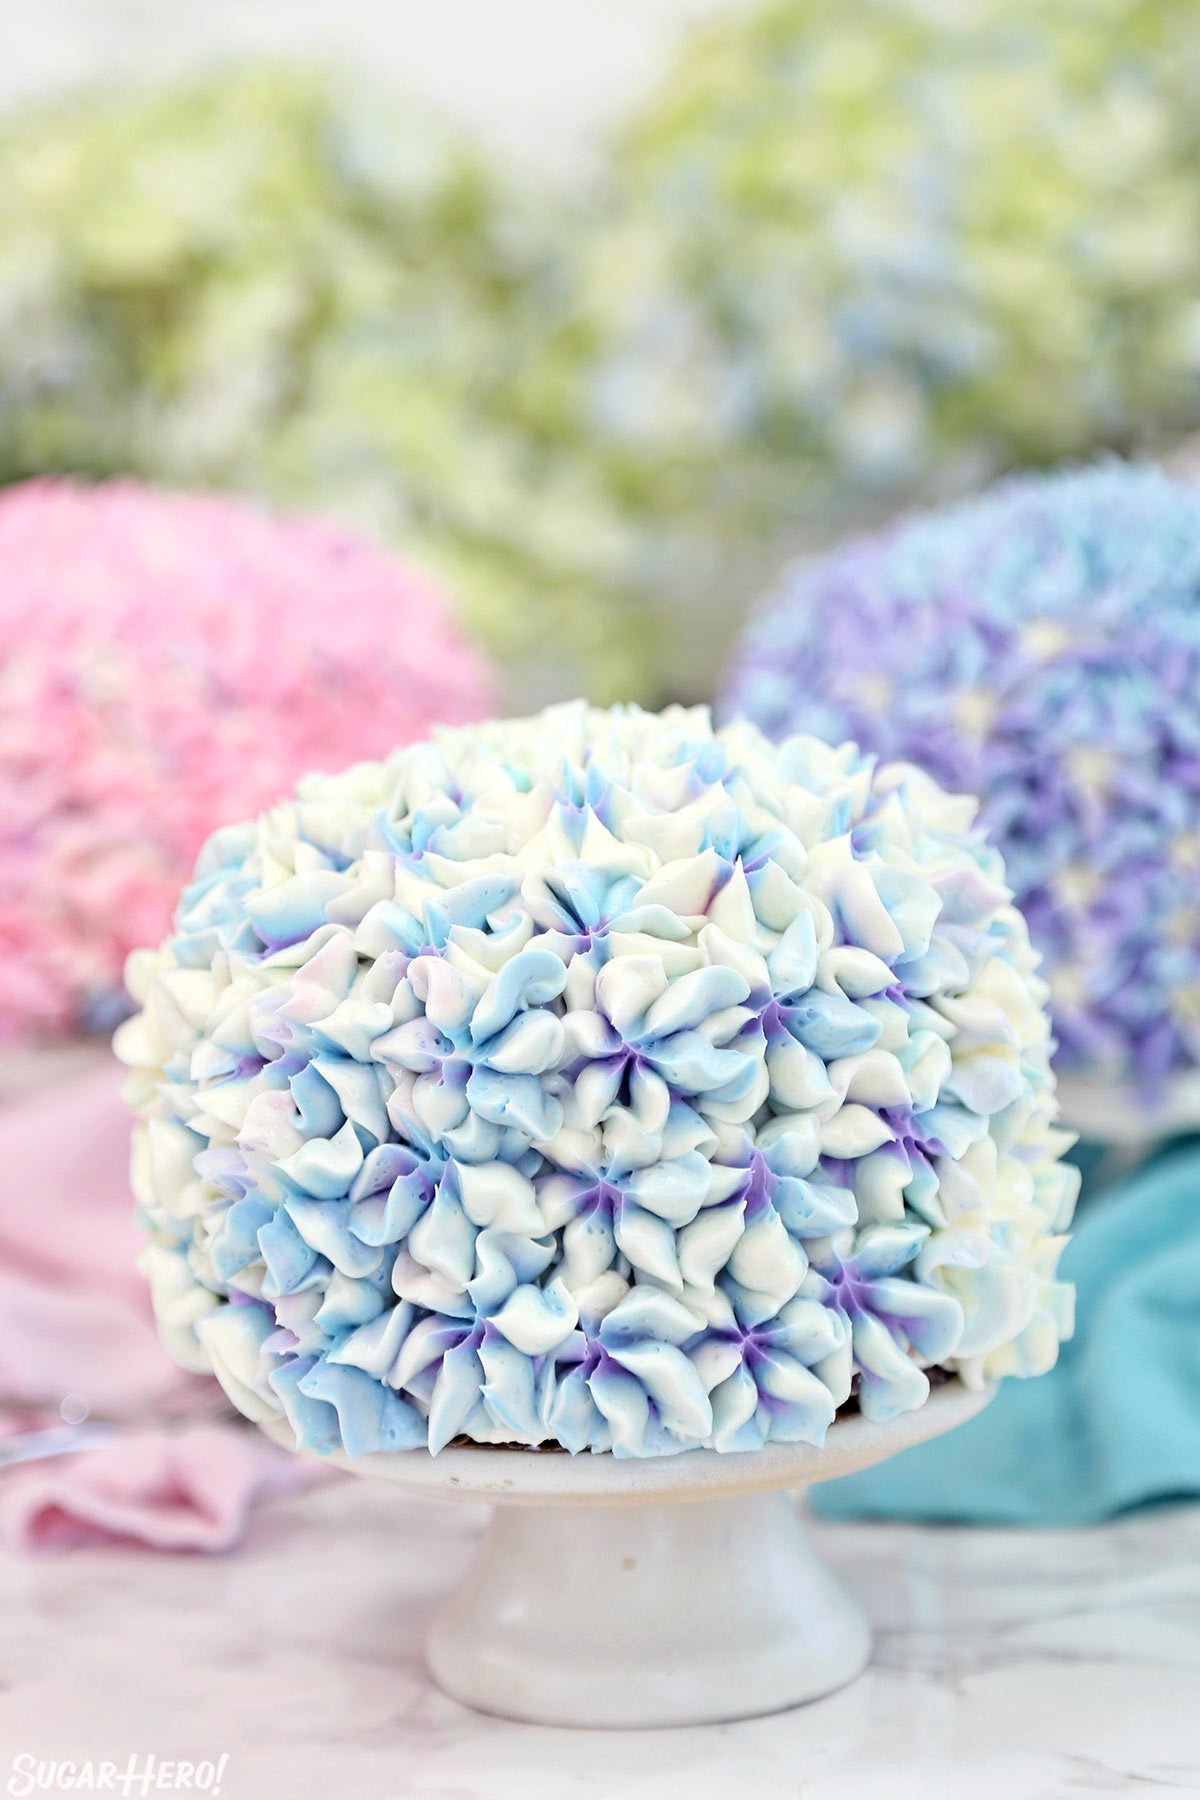
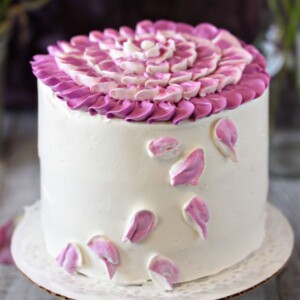
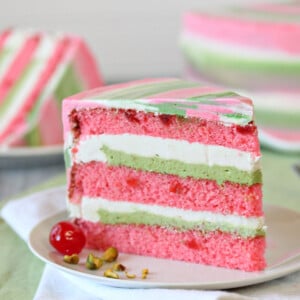
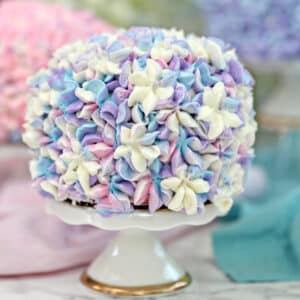
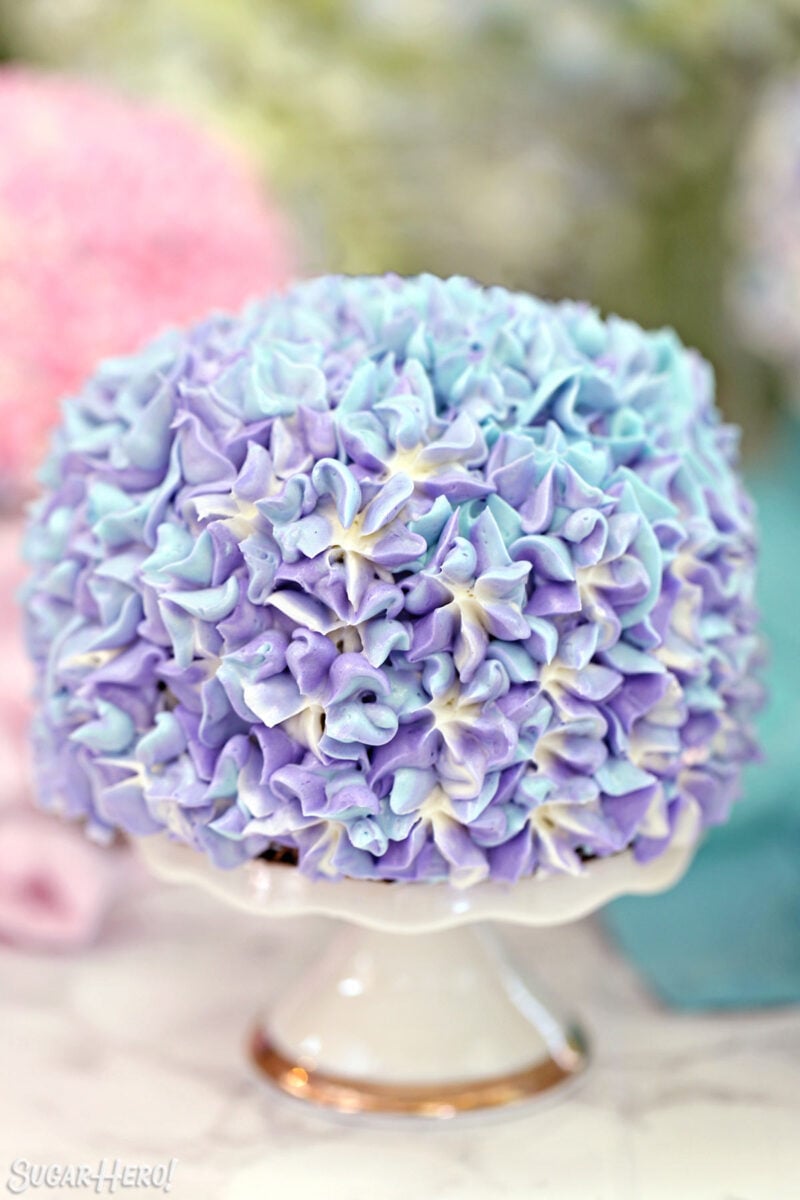
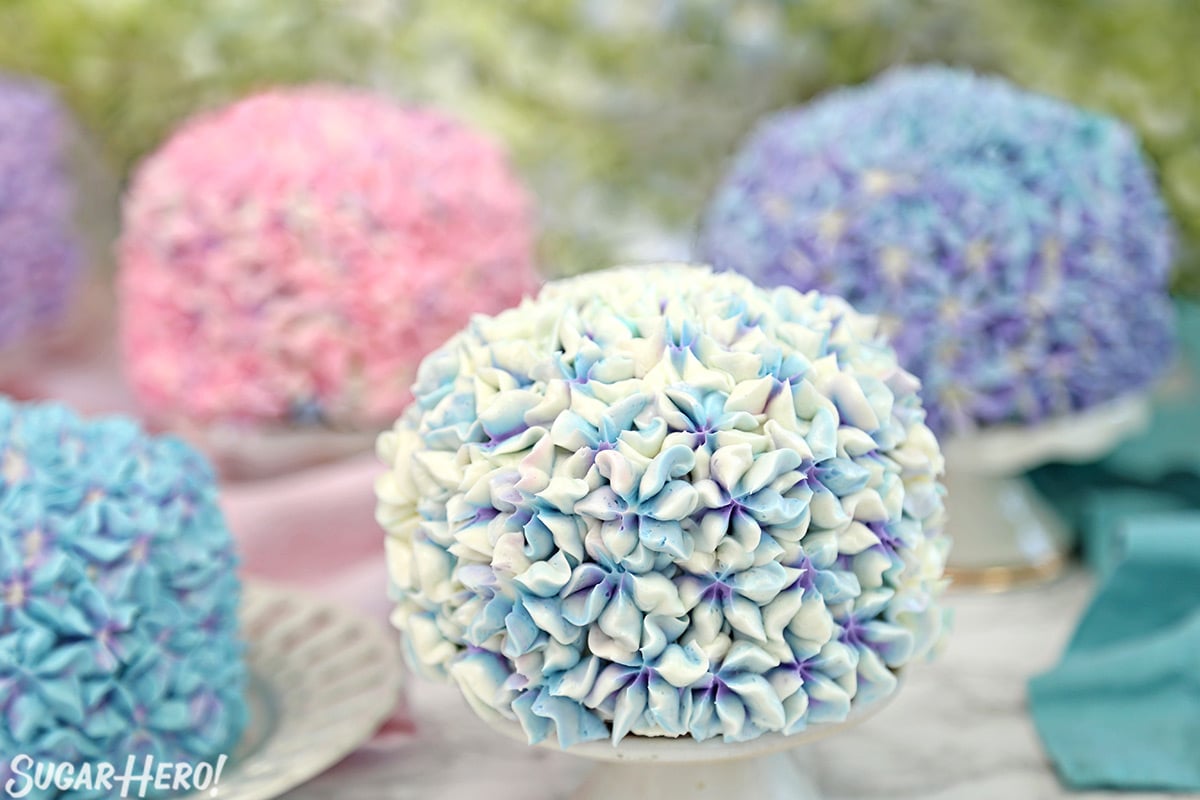
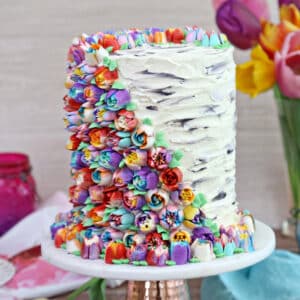
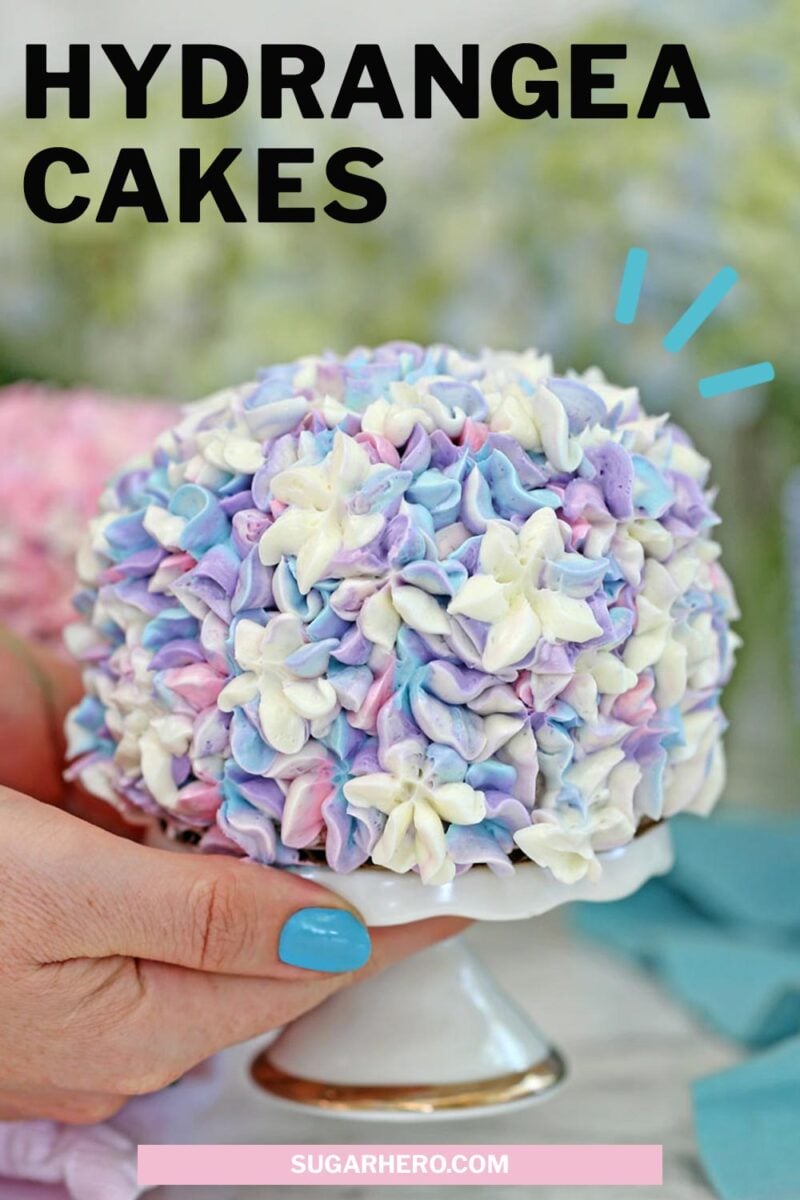
These gorgeous Hydrangea Cakes are mini layer cakes, decorated with pastel buttercream to look like fresh hydrangeas. You’ll be surprised to learn how easy it is to make the pretty, colorful blossom design on the outside. They’re perfect for weddings, showers, birthdays, and more!
🌸Easy Buttercream Flower Cakes
These Hydrangea Mini Cakes were first published in 2017, and since then, they’ve become a beloved SugarHero reader favorite. Hundreds of people have made them–and made them their own, including changing the colors, making them into a cupcake bouquet, making full-size cake versions, and even turning them into wedding cakes!
It’s easy to see why these cakes are so popular. Their pretty pastel blooms look fancy, but they’re surprisingly easy to decorate. (My husband said he could do it himself, and that is SAYING SOMETHING.) They’re a good project for someone dipping their toe into cake decorating, and don’t require much in the way of special equipment.
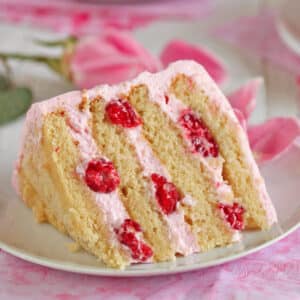
Finally, they’re not all about the looks–they taste fantastic, too! My Hydrangea Cakes are made with a velvety white cake batter. It’s super soft and tender, with the most delicate crumb and a soft vanilla flavor. If you’re looking for a shortcut, though, the good news is that this decorating technique works equally well with cake mix cakes, so go with whatever works for you!
Table of Contents
🧾 What You’ll Need
Ingredients
You can find the full ingredient list in the recipe card below, but here are a few notes to help you assemble your ingredients and other supplies. (Links are affiliate links and I earn a small commission from qualifying purchases.)
- Granulated sugar
- Cake flour: The recipe calls for cake flour which is a very fine flour with a low protein content–perfect for creating light, fluffy cakes. It is typically sold in the baking aisle by the other types of flour. If you can’t find it, in a pinch you can make your own–see instructions here for making your own cake flour.
- Baking soda
- Large egg whites: Between the cake and frosting, this recipe uses a LOT of egg whites! If you don’t have some on hand already from other baking projects, I recommend buying a carton of 100% pasteurized egg whites to use–it is usually found right next to the eggs in the grocery store. This will save you time and ingredient waste.
- Milk: Any percentage is ok to use but I prefer to use a higher fat milk like 2% or whole.
- Vanilla extract: For the best taste, use a flavorful vanilla extract.
- Unsalted butter and salt: You’ll need butter and salt for the cake and frosting. I use unsalted butter and add a specific amount of salt to control the flavor more precisely. If you don’t have unsalted butter, you can use salted — just omit the additional salt. It’s also best to bring the butter to room temperature before getting started.
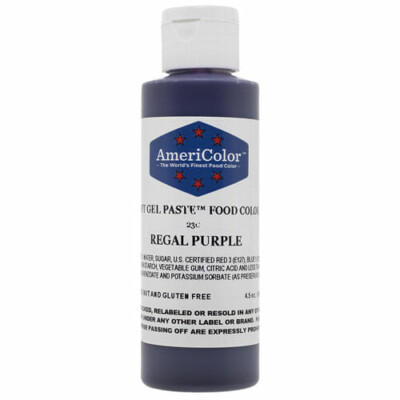
- Gel food coloring: I always recommend gel colors, as opposed to liquid food coloring, because they are more concentrated, so you need less coloring to get your desired shade. I used Americolor brand colors: Electric Purple, Regal Purple, Sky Blue & Soft Pink.
- Powdered sugar: The buttercream relys on powdered sugar and its added cornstarch for stability. I don’t recommend reducing the amount of sugar the recipe calls for.
Equipment
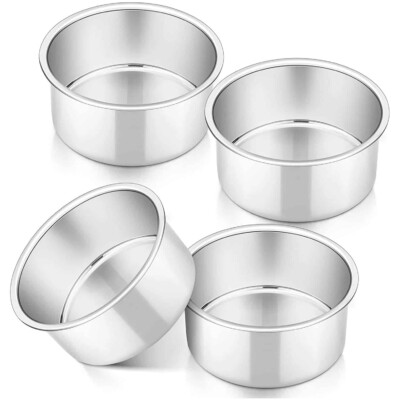
- 4-inch cake pans: If you want to re-create these cakes the way they look in the post, it’s easiest to use 4-inch cake pans. Your other alternatives are to bake larger cakes and either decorate them that size, or cut out rounds from the cakes to make the minis. But using 4-inch pans is fastest and results in the least amount of waste.
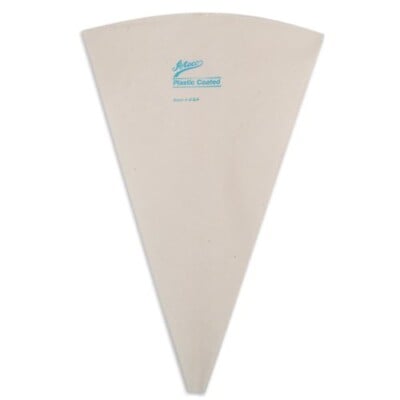
- Piping bags: I always have a pack of these piping bags on hand. Although they are technically “disposable,” I wash them out and reuse them for multiple projects.
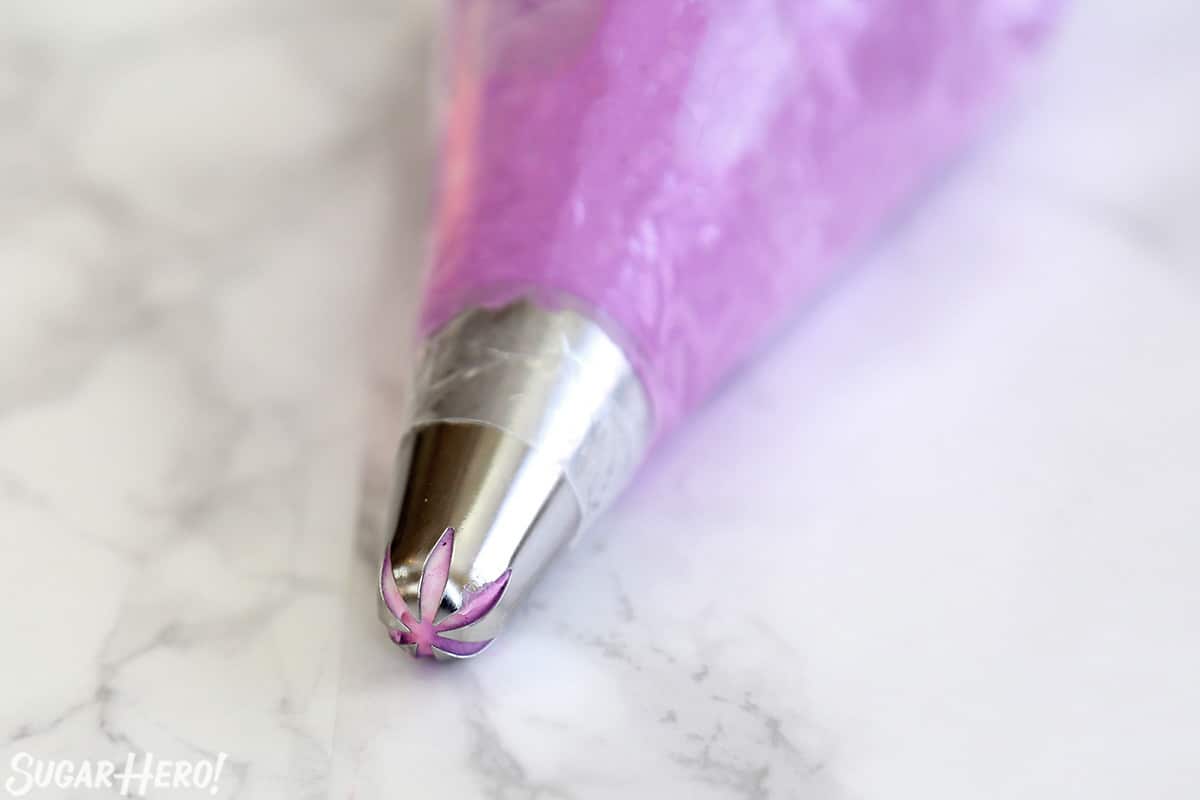
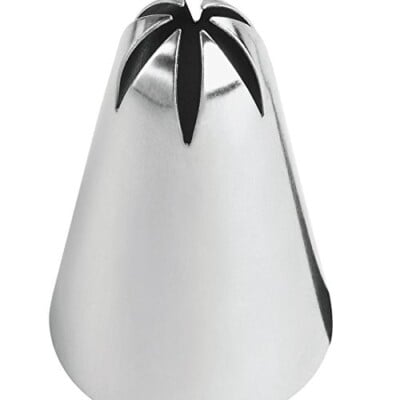
- Drop flower tip: You’ll need a drop flower piping tip like the Wilton 2D to decorate these cakes. If possible, grab a few of the same tip, so you can have multiple piping bags with different color schemes going at the same time. Check out our post on making Rosette Cupcakes for more ways to use this versatile and pretty piping tip!
- Plastic wrap: Regular kitchen plastic wrap is the secret for making multi-colored frosting!
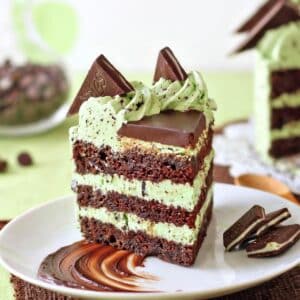
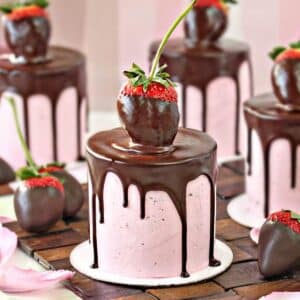
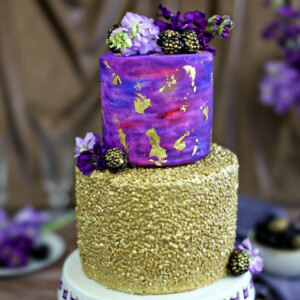
🩵More Cake Recipes

Leave a Review!
If you make this recipe, let us know! Leave a ⭐️⭐️⭐️⭐️⭐️ rating on the recipe below, and leave a comment, take a photo and tag me on Instagram @elabau, or use #sugarhero on IG!
Hydrangea Cakes
Ingredients
For the Cakes:
- 10.5 oz granulated sugar, (1 1/2 cups)
- 10.5 oz cake flour, (2 2/3 cups)
- 4 tsp baking powder
- 3/4 tsp salt
- 4 fl oz large egg whites, (1/2 cup) — see Note below
- 8 fl oz milk, (1 cup)
- 1 TBSP vanilla extract
- 6 oz unsalted butter, (1.5 sticks), at room temperature
- Assorted gel food coloring, I used Americolor brand Electric Purple, Regal Purple, Sky Blue & Soft Pink.
For the Buttercream:
- 6 fl oz pasteurized liquid egg whites, (3/4 cup) — see Note below
- 24 oz powdered sugar, (6 cups)
- ½ tsp salt
- 24 oz unsalted butter, (3 sticks), at room temperature
- 2 TBSP vanilla extract
- Assorted gel food coloring, I used Americolor brand Electric Purple, Regal Purple, Sky Blue & Soft Pink.
Instructions
To Make the Cakes:
- Prepare to bake. Preheat the oven to 350 F. Line six 4-inch cake pans with parchment rounds, and spray the parchment and pan sides with nonstick cooking spray. (Note that you can make these cakes in different sizes depending on what size pans you have. If you make larger cakes, just extend the baking time and watch them closely.)
- Mix dry ingredients. Combine the sugar, cake flour, baking powder, and salt in the bowl of the stand mixer fitted with a paddle attachment. Mix on low speed for about a minute to combine the dry ingredients.
- Combine egg whites, milk, and vanilla. Lightly whisk together the egg whites together with a quarter of the milk and the vanilla extract, and set aside for now.
- Add milk and butter to dry ingredients. Add the remaining ¾ cup milk and the softened butter to the large mixing bowl and mix on low speed until the dry ingredients are moistened. Turn the mixer to medium speed and mix for a minute and a half.
- Mix in egg white mixture. Add the egg white mixture in three batches, mixing for 20-30 seconds after each addition, until you have a smooth batter. Scrape the bottom and sides of the bowl with a rubber spatula, and give the batter a few more stirs to make sure everything is incorporated.
- Divide and color batter. Divide the batter into 4 even portions, and color one purple, one blue, and one pink. Leave one portion white.
- Fill cake pans. Use a spoon to scoop spoonfuls of the batters and plop them in a random pattern in the prepared cake pans. Fill them about halfway full—each pan should have about 7 oz of batter.
- Bake. Bake the cakes at 350 F for 30-35 minutes, until the sides just start pulling away from the pan, and a toothpick inserted into the center comes out clean.
- Cool. Let the cakes cool on a wire rack for 10 minutes, then gently turn them out and let them cool completely. I find it’s easiest to cut and stack cakes that have been chilled, so if you have time, wrap them with plastic wrap and put them in the freezer for at least 30 minutes, until they are firm but not frozen all the way through. If you are making these in advance, they can stay in the freezer for up to several weeks. Let them partially defrost, until they are firm but not rock-hard, before assembling.
To Make the Buttercream:
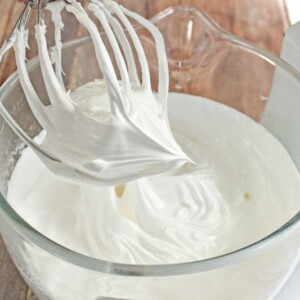
- Mix egg whites, powdered sugar, and salt. Combine the whites, powdered sugar, and salt in the bowl of a large stand mixer fitted with a paddle attachment. Mix everything together on low speed, until the sugar is moistened and no dry patches remain. Turn off the mixer, scrape down the sides and bottom of the bowl with a spatula, then turn the mixer to medium speed. Beat on medium for 5 minutes.
- Add butter and vanilla. After 5 minutes, turn the mixer to medium-low and start adding the softened room temperature butter, 1-2 tablespoons at a time. Once all of the butter is incorporated, add the vanilla extract and mix it in. Stop the mixer and scrape down the bottom and sides once more. Turn the speed to medium and beat the buttercream for 10 minutes. At the end, you’ll have a frosting with a wonderfully light and creamy texture.
To Assemble and Decorate:
- Cut cake and layer with buttercream. Place the cakes on small cake cardboard rounds, and set one on a cake turntable. Use a sharp serrated knife to cut it into 3 layers. Spread a layer of white buttercream between each layer, and cover the top and sides with a thin layer of frosting.
- Repeat with the other 3 cakes. Repeat with the other cakes, so they are all layered and covered with a thin coat of frosting. Refrigerate while you prepare the buttercream.
- Color buttercream, fit piping bag. Divide the remaining buttercream into smaller bowls. Leave some white, and color the rest different shades of blue, purple, and pink. You can do as many colors as you want, but I like to do at least 4-5 to give all the cakes a different look. Fit a piping bag with a large star tip – I recommend a Wilton 2D, but a 1M would also work.
- Spread layer of frosting on plastic wrap. To make multi-colored flowers, lay out a piece of plastic wrap about 16 inches long. Spread a rectangle of frosting on the plastic wrap, about 10 inches by 6 inches.
- Top with second layer of frosting. Take a second color of frosting and spread it on top of the first. If desired, add a third or even a fourth color on top.
- Roll and twist frosting-filled plastic. Roll the frosting over itself to make a cylinder. Grasp the ends of the plastic wrap in each hand, and twirl it quickly so the frosting is burrito-shaped and the ends of the plastic are tightly twisted. Snip off one of the plastic wrap “tails” and insert the frosting cylinder into the piping bag, snipped-side down.
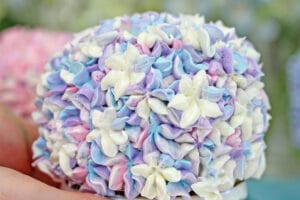
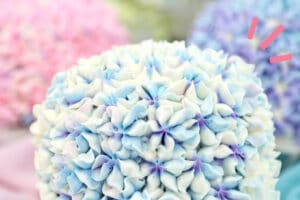
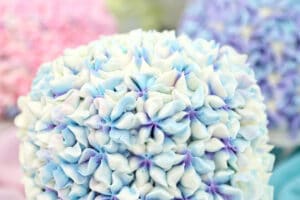
- Pipe frosting blossoms. Pipe big, messy stars all over the cake. You don’t actually want them to look like stars, so twist and turn the bag as you pipe them to make them a free-form blossom shape. Layer them on top of each other so they don’t look too neat. When you’re finished with a cake and done with that color combination, remove the extra frosting in the plastic wrap, and add a different cylinder of frosting. (It’s an easy way to change colors without changing piping bags!) Repeat until all of the cakes are decorated.
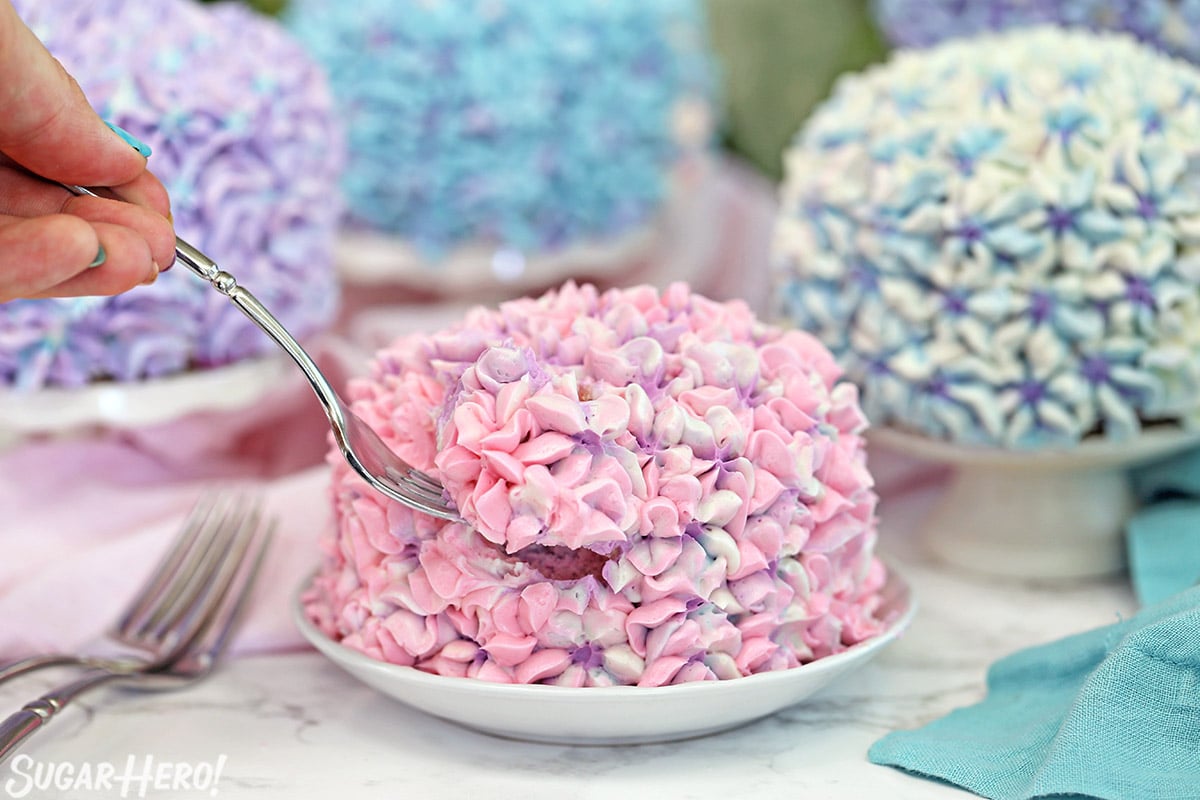
- Serve. For the best taste and texture, serve them at room temperature.
Video

Recipe Notes
Measuring Tips
Our recipes are developed using weight measurements, and we highly recommend using a kitchen scale for baking whenever possible. However, if you prefer to use cups, volume measurements are provided as well. PLEASE NOTE: the adage “8 oz = 1 cup” is NOT true when speaking about weight, so don’t be concerned if the measurements don’t fit this formula.
Want to learn more about baking measurements and conversion?
Nutrition
📸Photo Tutorial: Decorating Instructions
Here’s a tutorial showing how to decorate these Hydrangea Cakes! Check out the full video in the recipe card to see the process from start to finish.
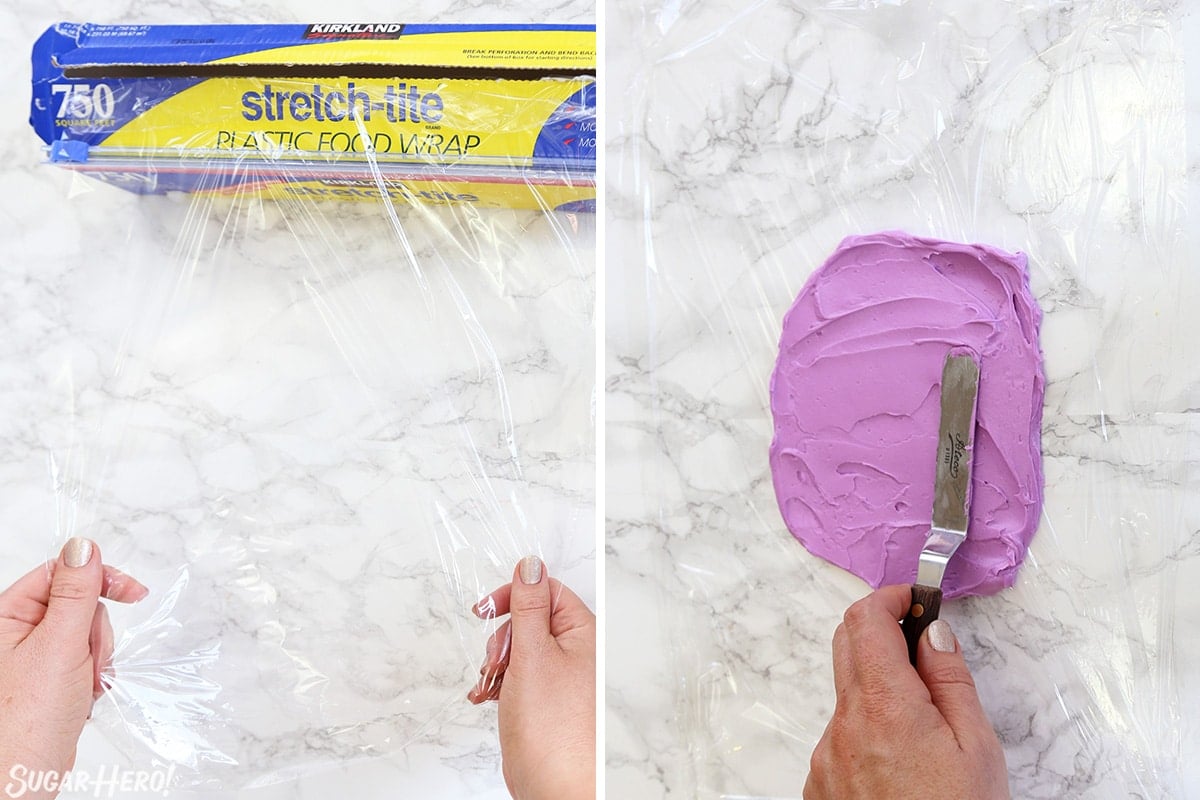
- Place plastic wrap. Spread out a long piece of plastic wrap on your work surface.
- Add first layer of frosting. Spread a rectangle of colored frosting on the plastic wrap. This will be the outside color in your blooms.
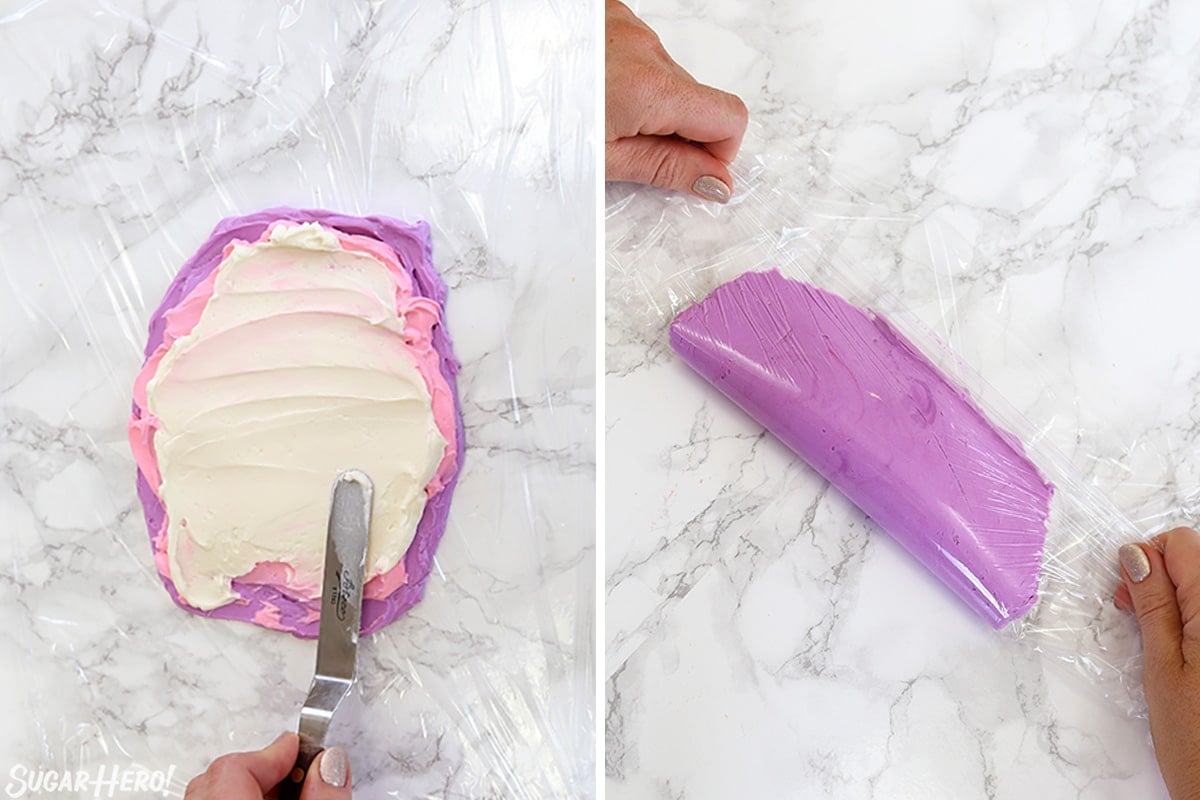
- Cover with additional color(s). Take a second color of frosting and spread it on top of the first. If desired, add a third or even a fourth color on top.
- Roll frosting, twist ends. Roll the frosting over itself to make a cylinder. Grasp the ends of the plastic wrap in each hand, and twirl it quickly so the frosting is burrito-shaped and the ends of the plastic are tightly twisted.
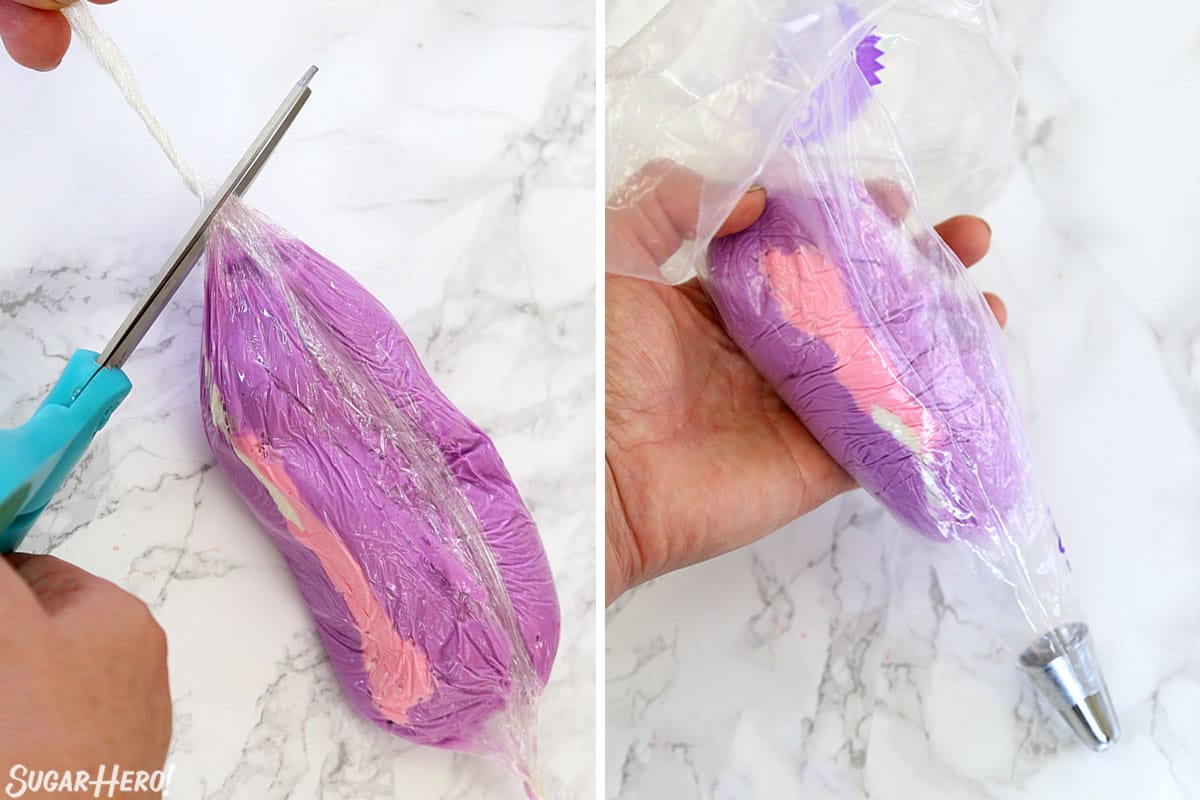
- Cut off one end. Snip off one of the plastic wrap “tails.”
- Prep piping bag. Fit a piping bag with a drop flower tip, and insert the frosting cylinder into the piping bag, snipped-side down.
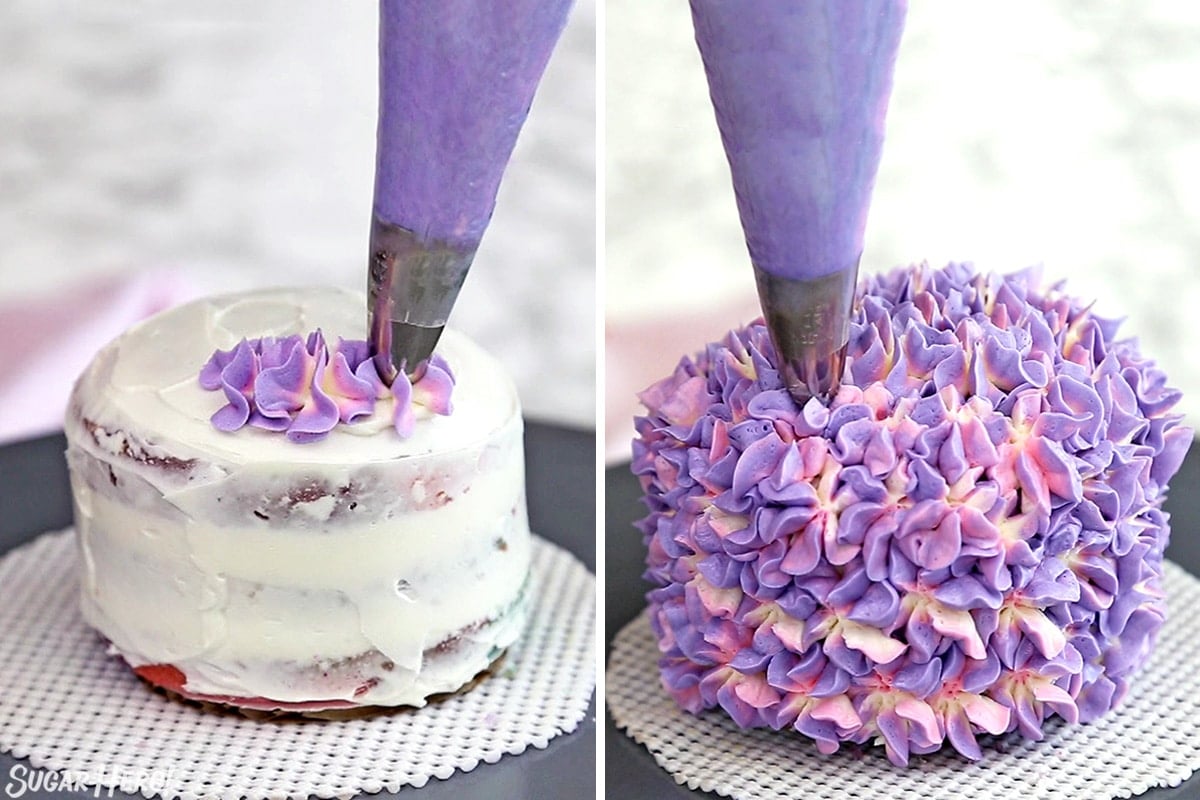
- Pipe blossoms. You’ll first need your mini cakes to be layered and covered with a thin coat of frosting (a “crumb coat.”) No need for it to be pretty, because it’s all going to be covered up soon! Pipe big, messy stars all over the cake. You don’t actually want them to look like stars, so twist and turn the bag as you pipe them to make them a free-form blossom shape.
- Cover cake. Continue to pipe stars until the whole cake is covered, layering them on top of each other in different directions so they look organic.
- Experiment with different color combinations. When you’re finished with a cake and done with that color combination, remove the extra frosting in the plastic wrap, and add a different cylinder of frosting. (It’s an easy way to change colors without changing piping bags!)
💭Variations
- Large cake. Instead of six mini cakes, bake the batter in 8″ or 9″ cake pans instead, and make one giant hydrangea cake!
- Cupcakes. Or, use this same technique on cupcakes and make a bouquet of hydrangea blooms.
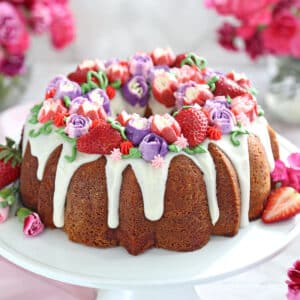
- As decoration. Frost a cake as you normally would, then add a few hydrangea blossoms growing up the side and on top. This also makes a gorgeous wedding cake decoration!
- Add flavoring. You can swap out the flavoring extract to make different flavors or cake. Try almond, coconut, lemon, or orange. Or to continue the floral theme, try adding some rose water to make a delicate rose-flavored cake!
💡Tips and FAQs for Success
Although each cake is only 4 inches, they have a lot of frosting, and I would say each one can serve at least 2 people, maybe even 3, depending on appetites. So while the recipe makes six mini cakes, it can serve between 12-16 people, and even more if some of those people are smaller children.
If you don’t have cake flour, you can make your own with all-purpose flour and corn starch! For each cup of cake flour the recipe calls for, take 1 cup of all-purpose flour, and remove 2 tablespoons. Add 2 tablespoons of corn starch to the all-purpose flour, and whisk together.
Yes! I love a good homemade cake, but sometimes that’s just not in the cards. I recommend using a white cake mix and adding additional vanilla flavoring. You can also follow the instructions for coloring the batter before baking, if you’d like. You will probably need to use two mixes to create the number of cakes this recipe makes.
The frosting can be made several days ahead of time, and then kept in the refrigerator until ready to use. Let it come to room temperature completely — this might take several hours depending on environmental conditions. Then mix the frosting well to restore the creamy texture. The cakes can also be baked in advance and be frozen, well-wrapped, for up to 3 months.
The cakes can be left at room temperature for several hours, but for longer term storage, they should be refrigerated in an airtight container. You can even wrap them in plastic wrap once they are chilled and the frosting is solid. For the best taste and texture, these cakes should be served at room temperature. Cold cake is dry, and cold frosting is hard and very unappetizing! So be sure to let them sit for an hour or so out of the refrigerator so the soft and creamy texture is restored.

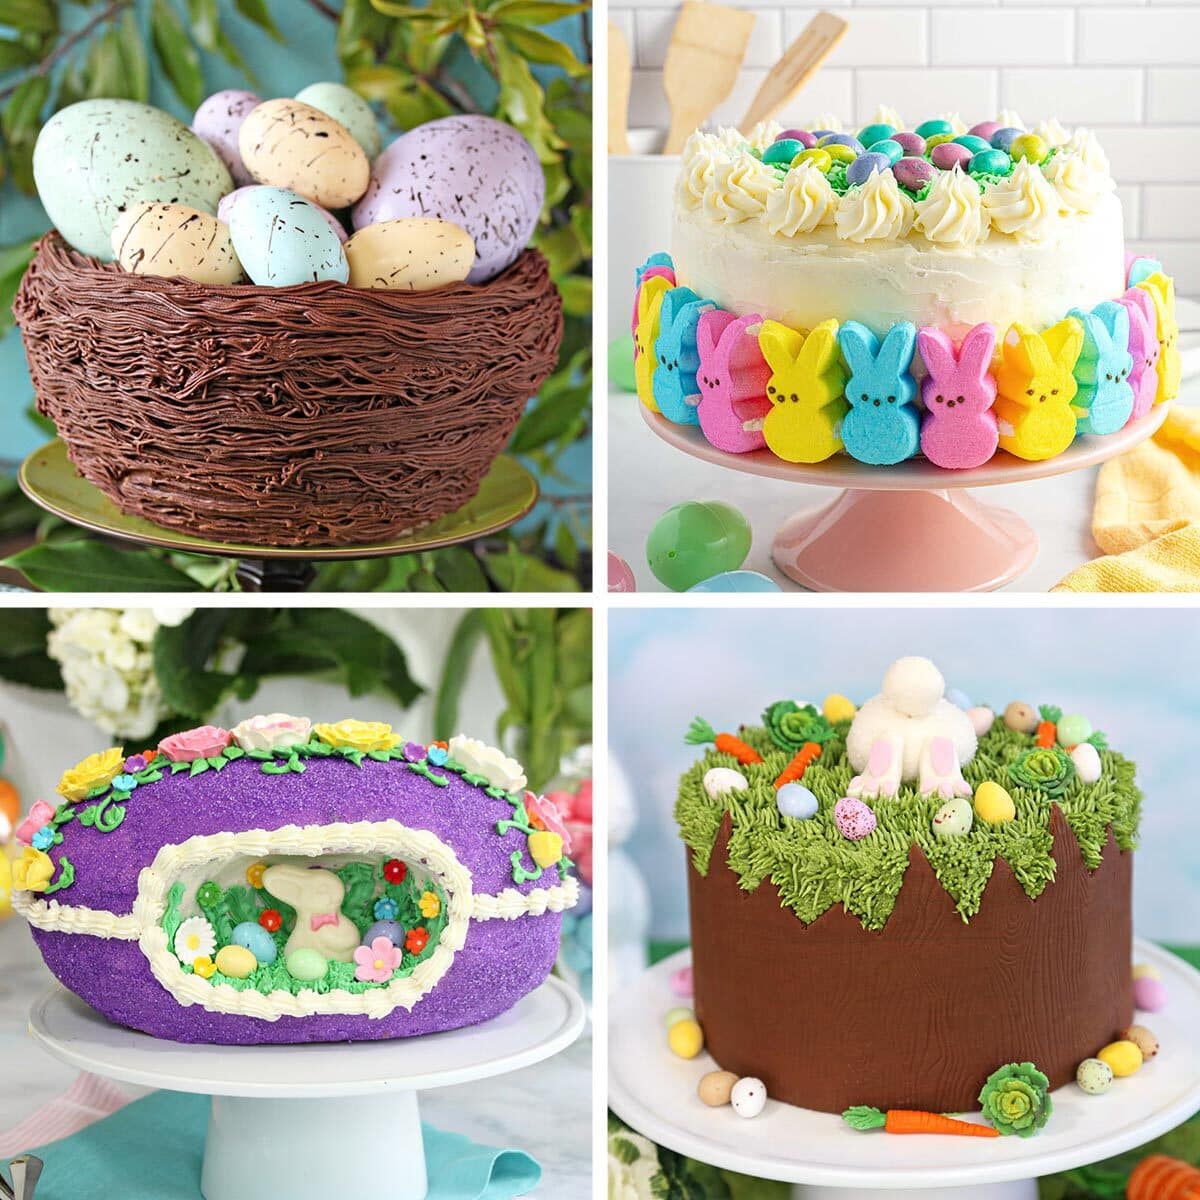
EASTER CAKE RECIPES 🐇
We’ve rounded up 35 adorable Easter cake recipes that will make your holiday extra-special — click here to get all the recipes!


I really want to become a sugar hero, but I am only 9 years old! I love baking!
This was so fun to make and absolutely stunning! Thank you for making it easy! 🙂
Thank you for your comment Kris! I’m so glad you enjoyed it 🙂
A beautiful and fun cake to make! I can just blend my favorite colors in the frosting and comes out pretty! I used purple and pink!
Thanks Mirlene! It is so fun to play around with different color options 🙂
I’m always a little nervous about cake decorating, but your instructions make it so easy. It turned out super cute and tasty.
I love hearing the instructions were helpful to you! Thank you for sharing!
I’ve seen these cakes everywhere and finally decided to try them. They turned out great and I will be making for all special summer occasions!
So happy to hear they turned out well! They sure are fun 🙂 Thank you for your comment!