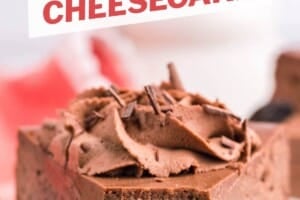
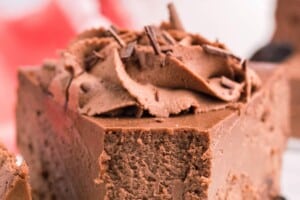
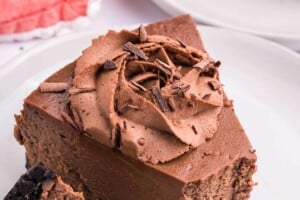
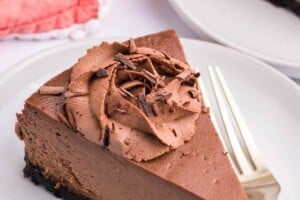


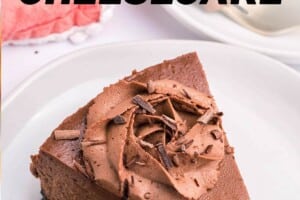
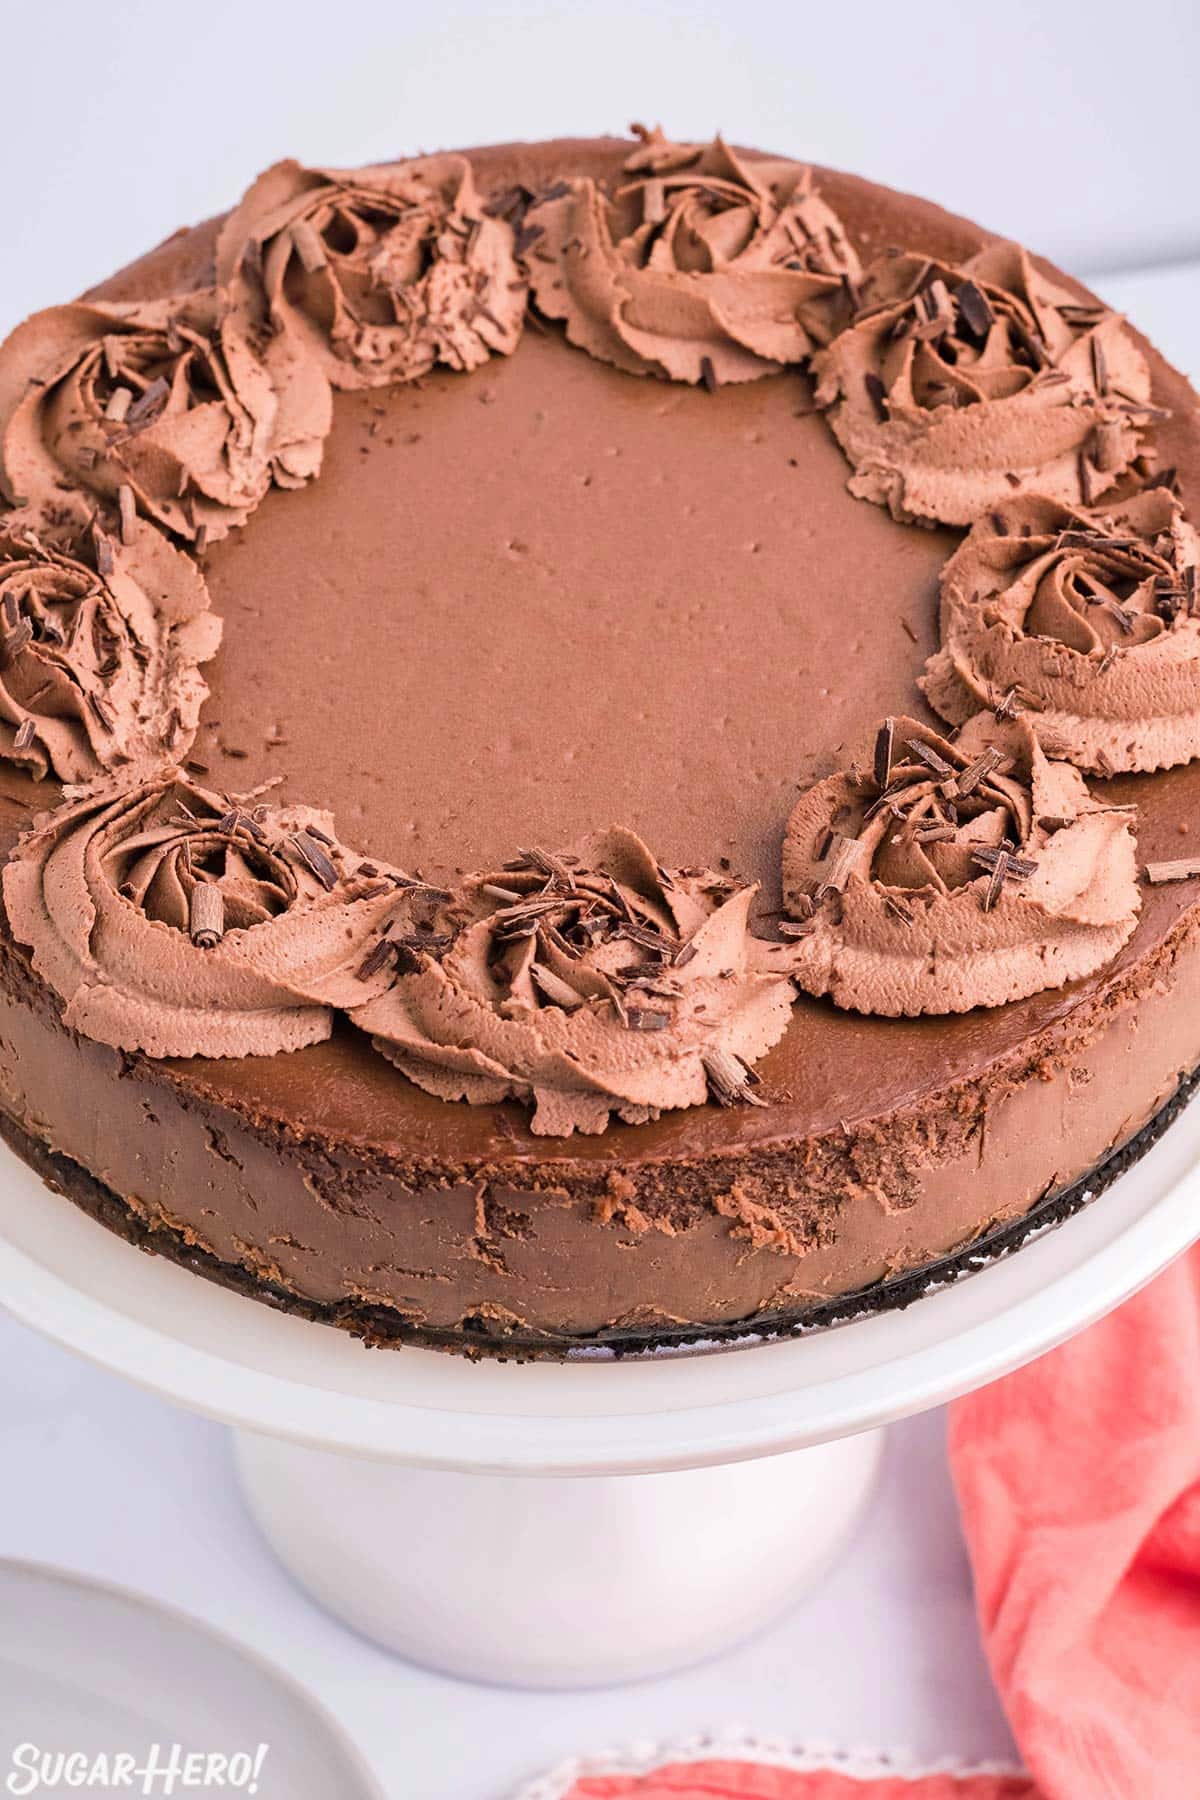
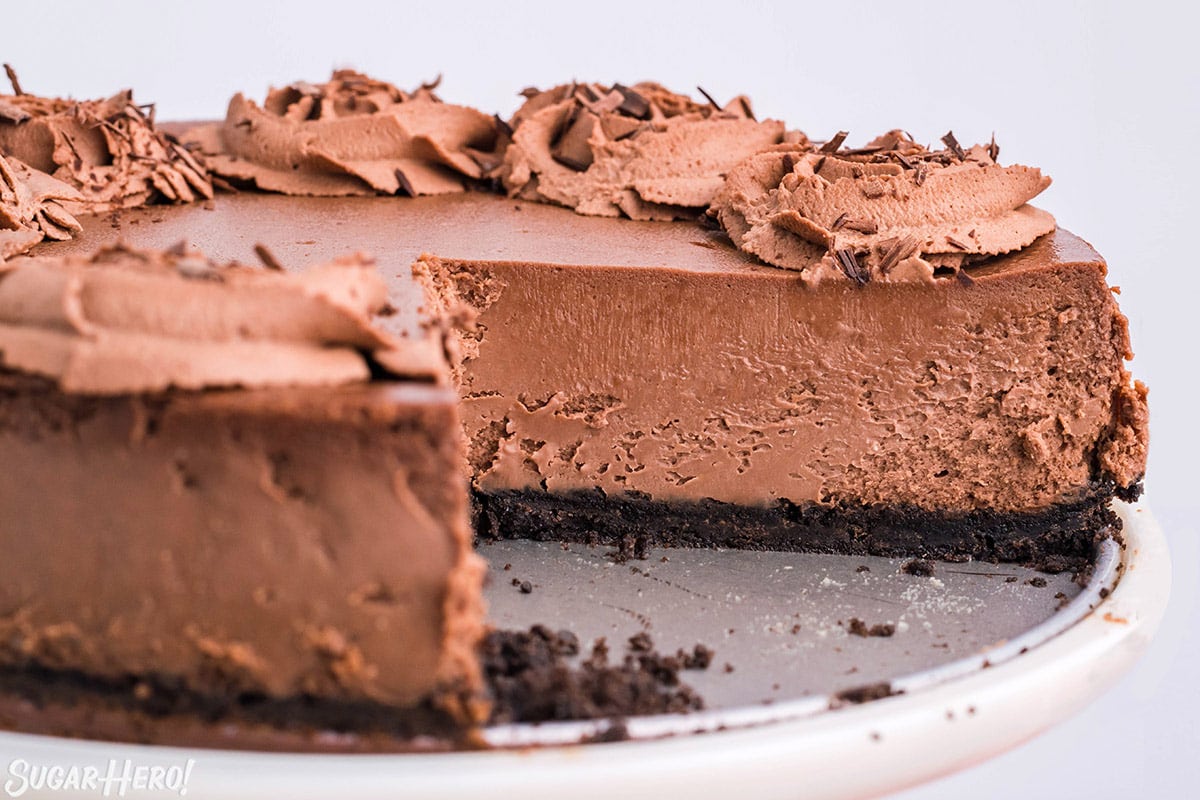
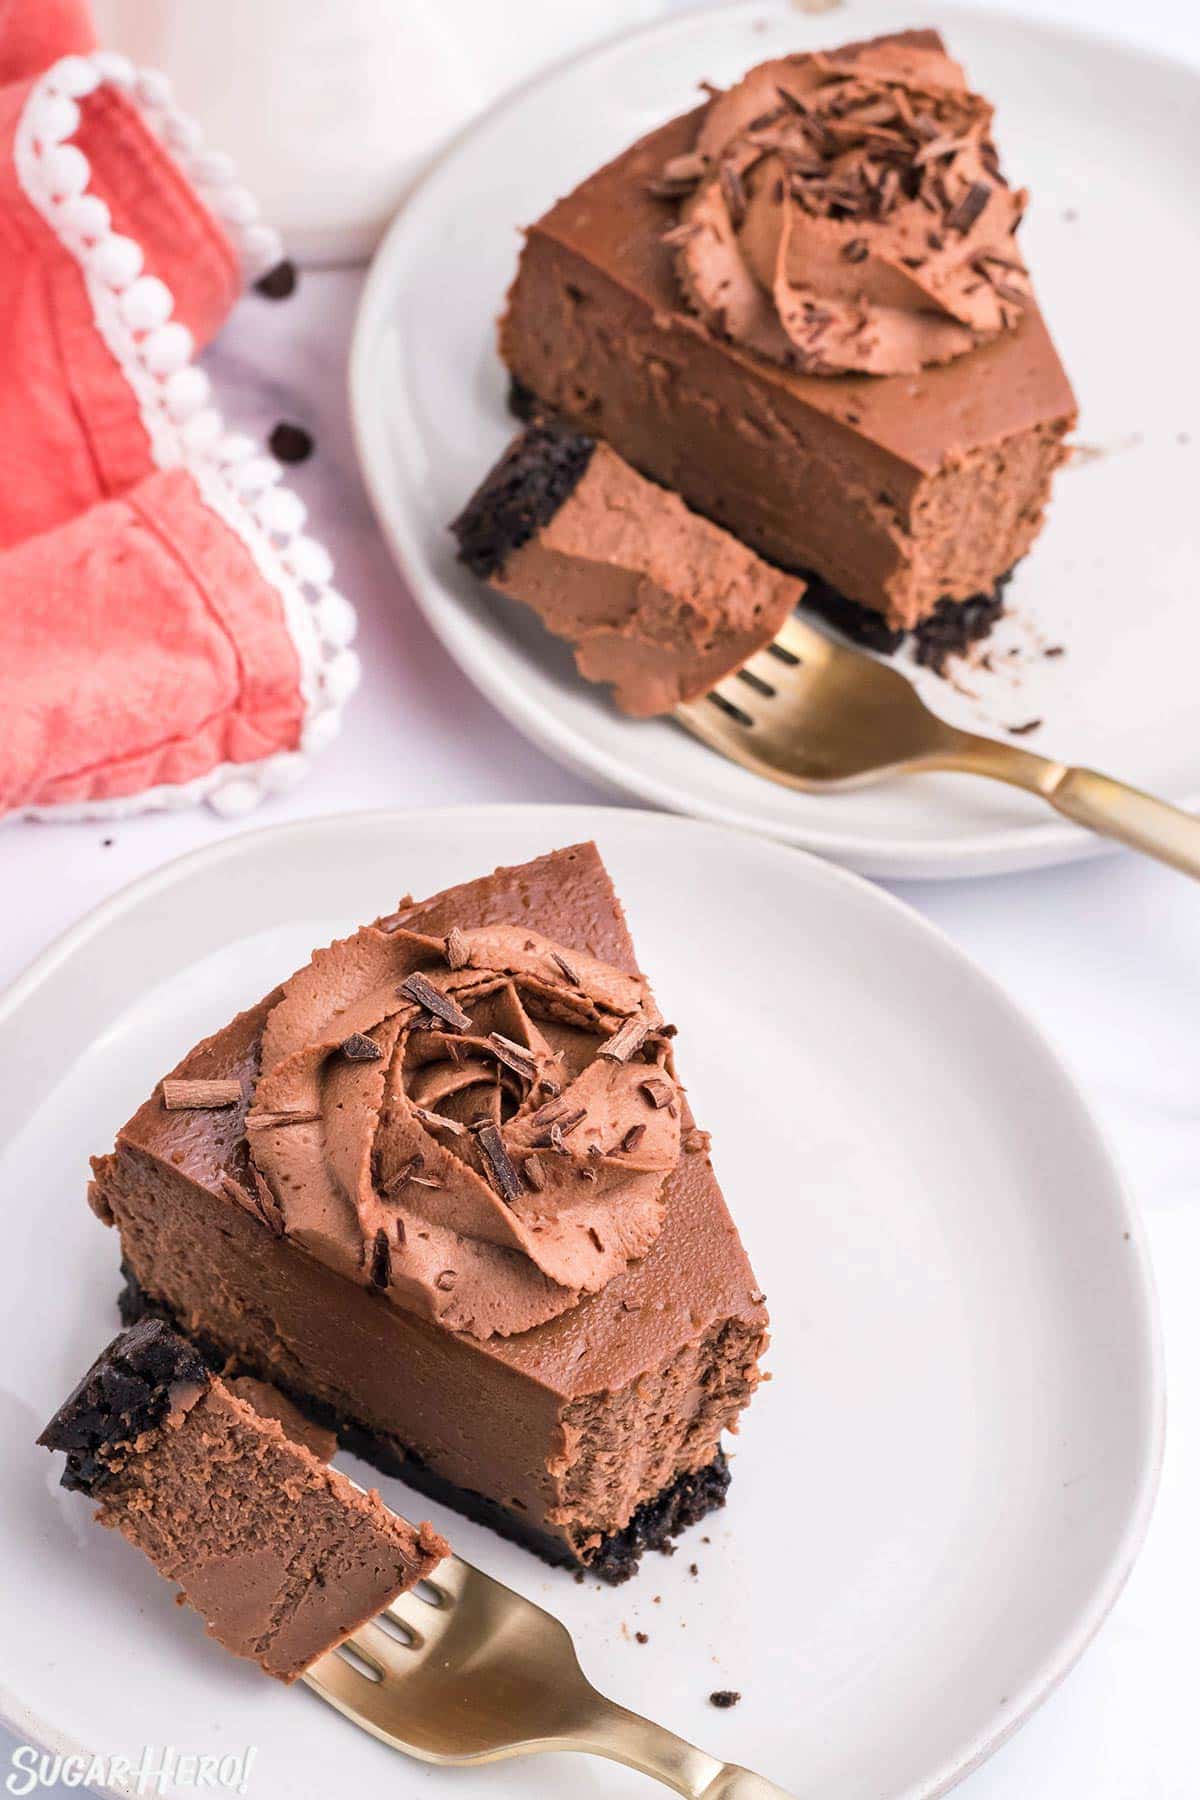
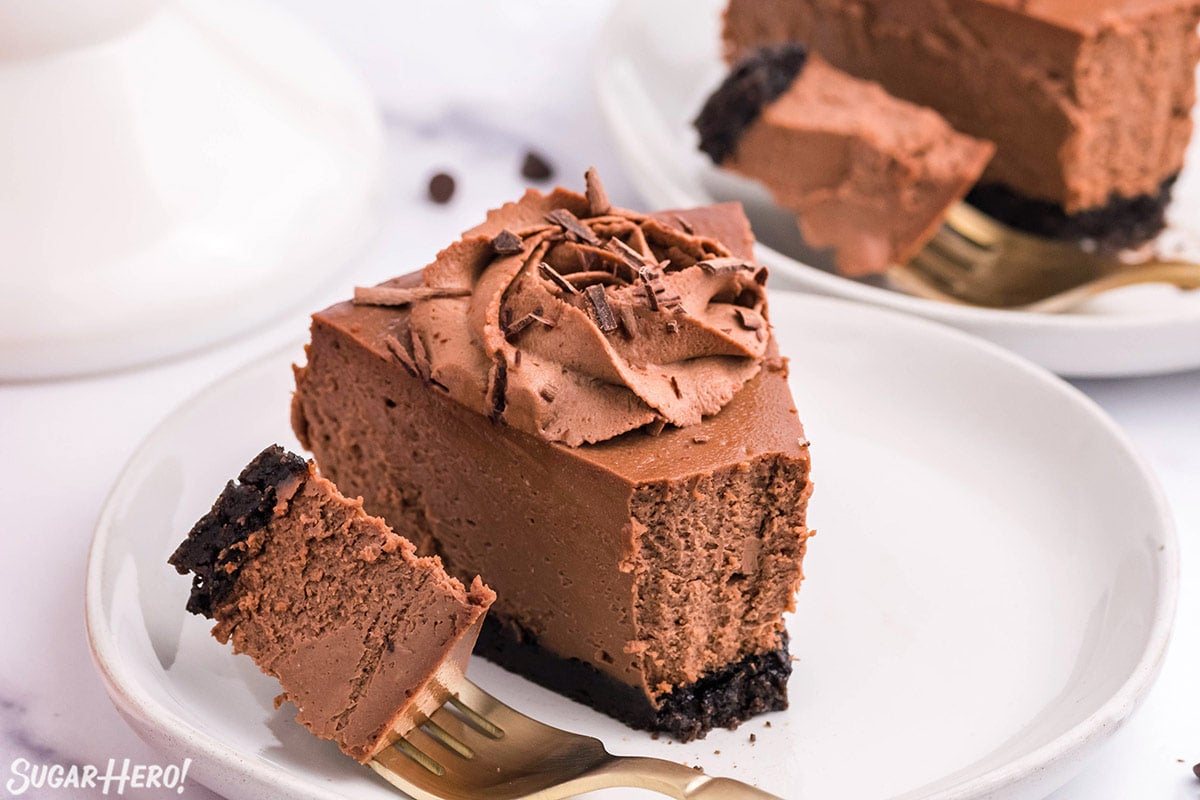
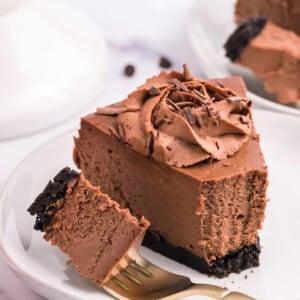
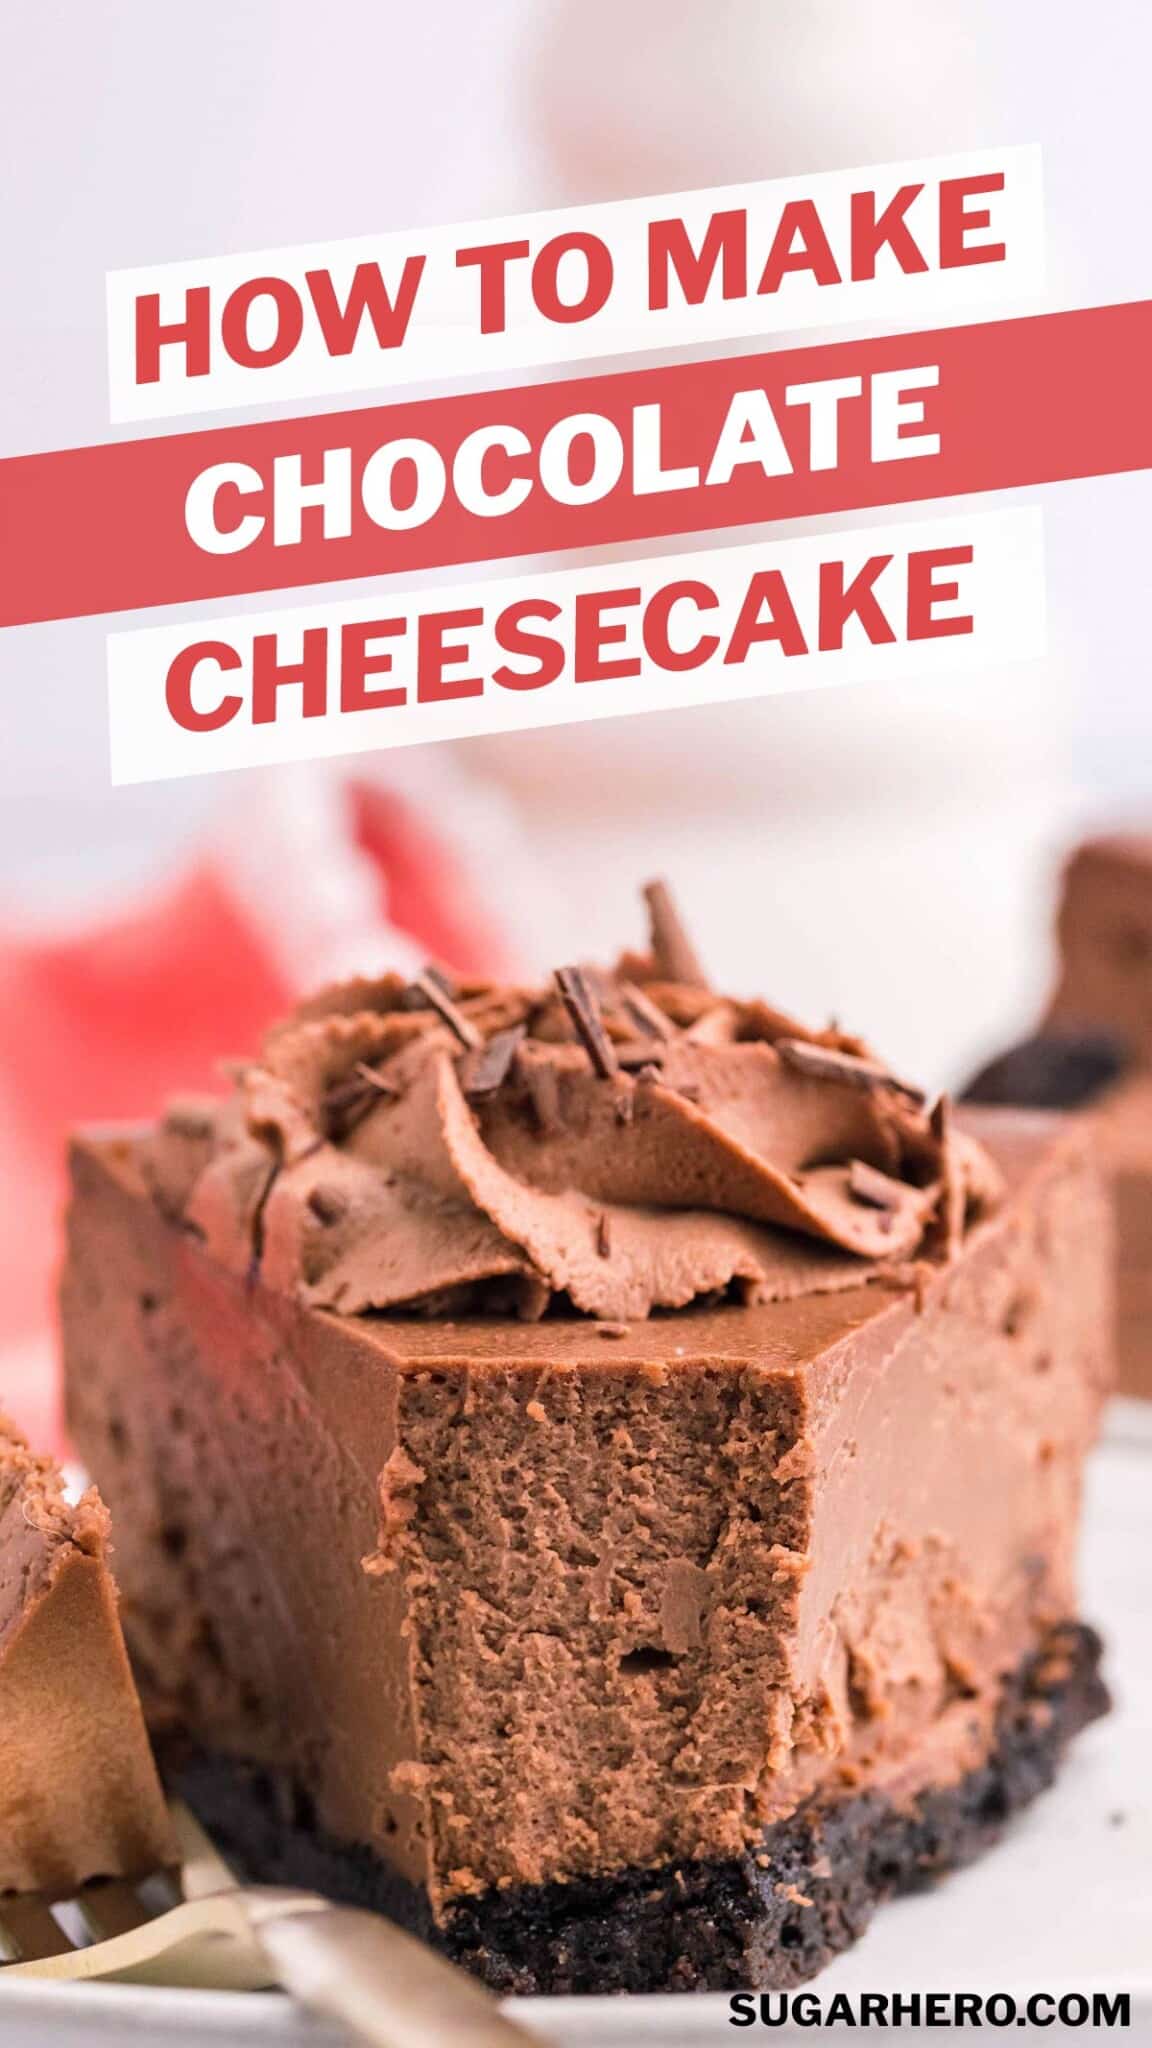
This rich and creamy Chocolate Cheesecake recipe is everything a classic chocolate cheesecake should be! With a crunchy Oreo cookie crust and a decadent chocolate cream cheese filling, it’s perfect on its own, or topped with chocolate whipped cream, chocolate curls, or hot fudge.
🍫 The BEST Chocolate Cheesecake Recipe
There are times when you want to indulge . . . you NEED to indulge . . . and are caught in the age-old dilemma: chocolate or cheesecake? Well, that dilemma ends here and now. It’s time for chocolate lovers and cheesecake lovers to unite!
Don’t get me wrong, layer cakes are great and brownies really hit the spot — but nothing can compare with a slice of dense, chocolatey cheesecake when it comes to ultimate chocolate indulgence. How chocolatey is it, you ask? Let me count the ways:
- crisp Oreo cookie crust
- a thick, rich chocolate cheesecake filling with both cocoa and melted chocolate
- chocolate whipped cream on top
- a sprinkle of chocolate shavings, to really take it over the top!
Best of all, this cheesecake requires NO WATER BATH! You don’t have to worry about hot water sneaking into your cheesecake while it bakes – just make it and bake it!
If you love cheesecake, we have a ton of cheesecake recipes here at SugarHero, including New York Style Cheesecake, Candy Cane Cheesecake, Chocolate Peanut Butter Cheesecake, Pumpkin Spice Cheesecake, and Gingerbread Cheesecake.

Table of Contents
🧾 What You’ll Need
Ingredients & Substitutions
Here’s what you need to know as you get ready to make this chocolate cheesecake:
(Links are affiliate links and I earn a small commission from qualifying purchases.)
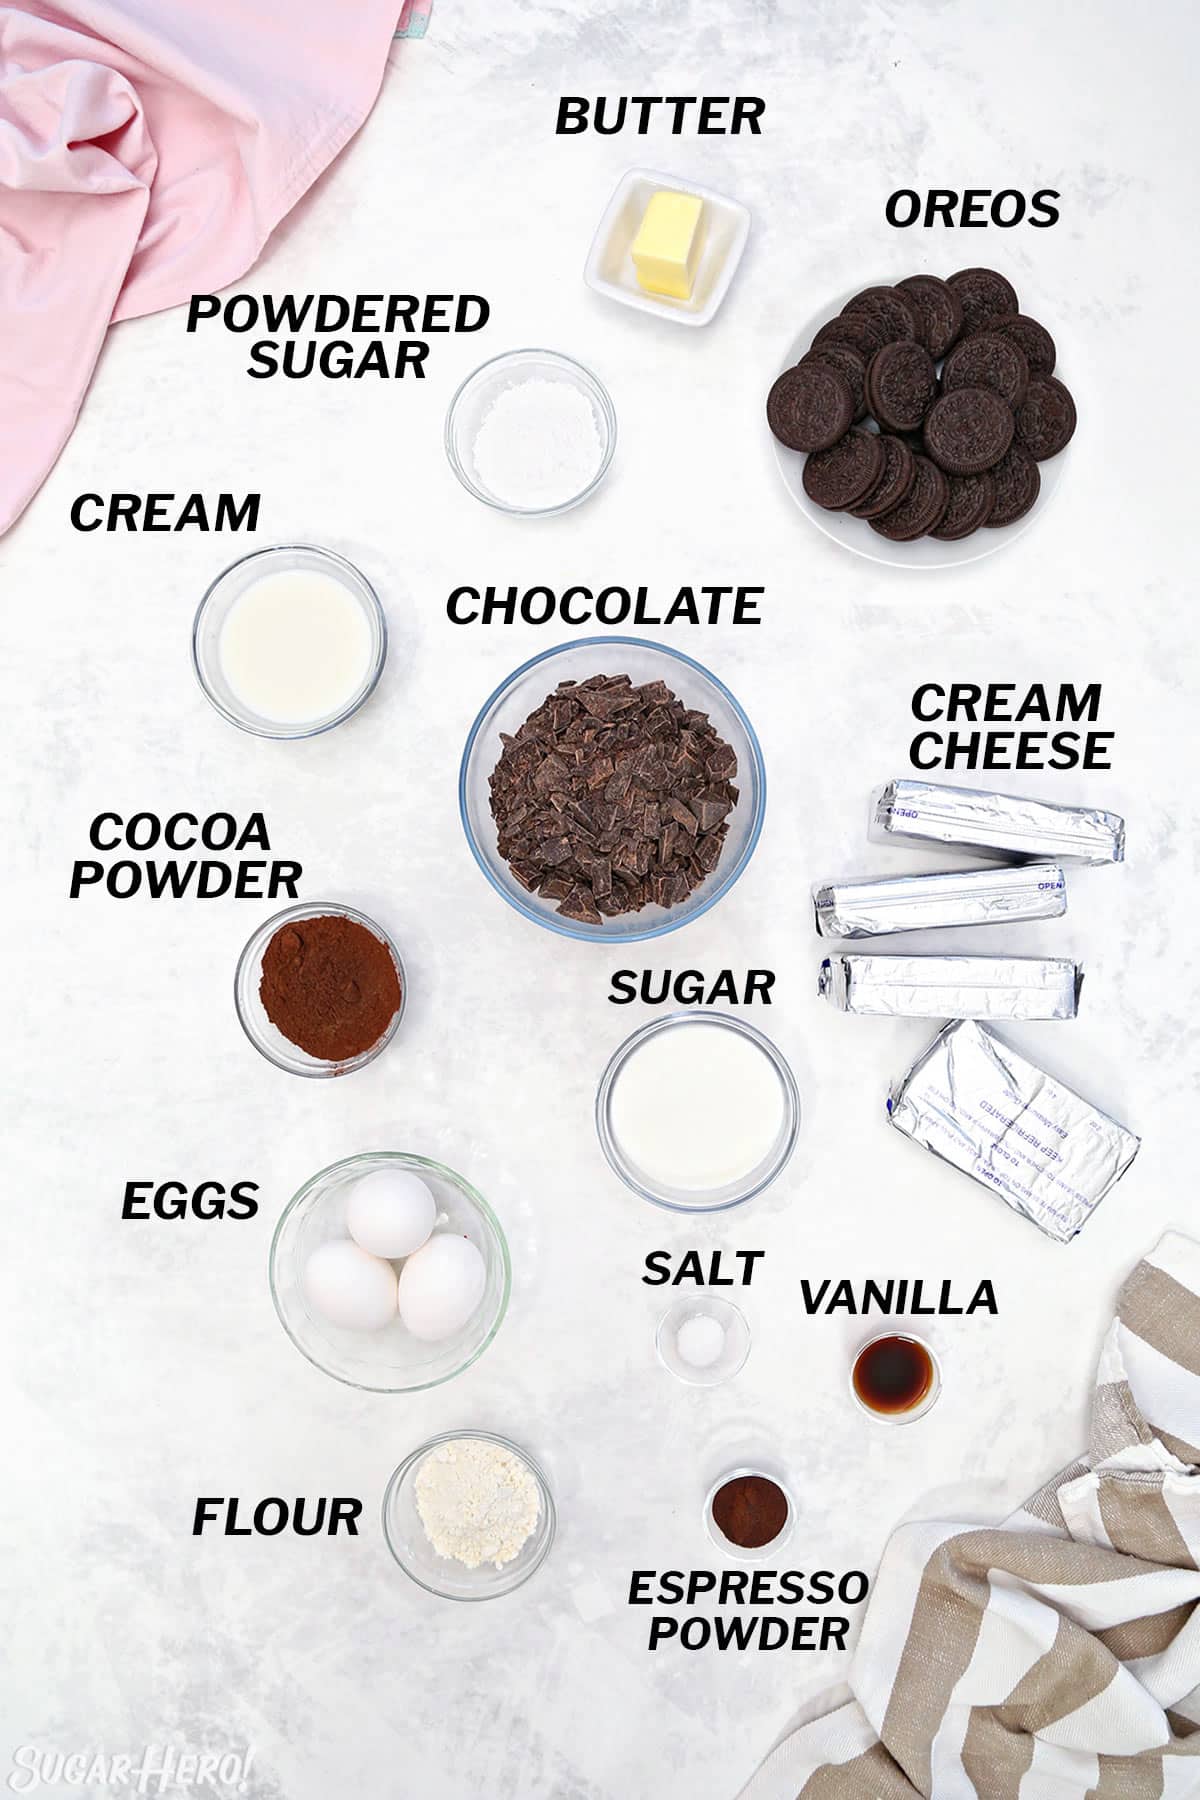
- Cream cheese: This is extremely important: be sure to use full fat blocks of cream cheese for the best results. Avoid “light” and “whipped” cream cheese, and any cream cheese sold in a tub. Some of these products have additives or stabilizers that will negatively impact your cheesecake’s texture. I recommend using Philadelphia brand cream cheese when possible–I have had mixed experiences with store brands. Also, make sure your cream cheese is at room temperature before you begin. This will give you the smoothest, creamiest results.
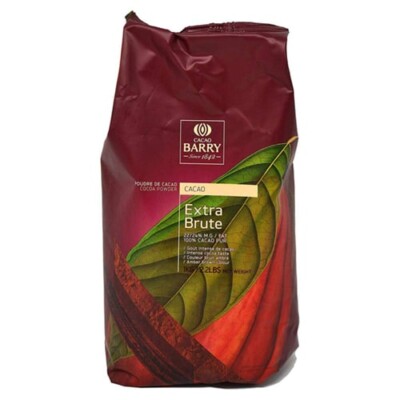
- Cocoa powder: Since cocoa powder provides much of the chocolate flavor, I recommend using a high-quality cocoa powder. Cheap cocoa powders can be nearly flavorless, or worse, impart a bitter, dusty, or stale flavor. My personal favorite is Cacao Barry Extra Brute – it hits that sweet spot between very high quality but also pretty affordable since it is sold in bulk. Look for cocoa that is dutch-processed (also known as alkalized), because it has a deeper, richer flavor and color. However, you can swap in regular unsweetened cocoa powder without needing to make any other adjustments. The cheesecake will take on a lighter color and might have a lighter cocoa flavor.
- Oreo cookies: Ready-made Oreo crumbs can be difficult to find in stores, so we’ll be using about 10 Oreo cookies to make make our own crumbs for the crust.
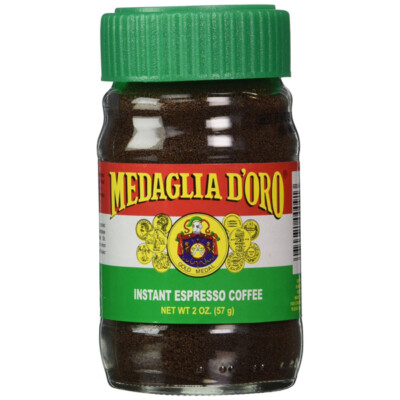
- Espresso powder: a bit of instant espresso powder deepens the chocolate flavor (without making the cheesecake taste like coffee!). You can omit it if you don’t have it on hand.
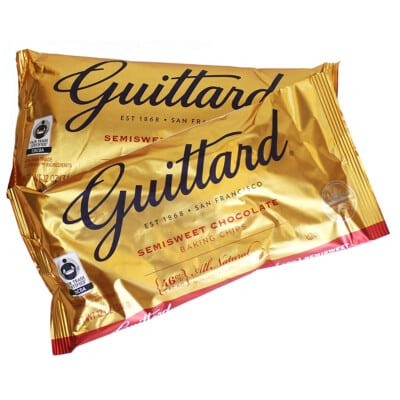
- Semi-sweet chocolate chips: You can use chocolate chips or chopped chocolate bars in this recipe – just make sure you use a high-quality, flavorful chocolate that you enjoy the taste of.
- Cream: Heavy cream will get you the best results – the high fat content adds to the creaminess of the cheesecake. But whipping cream or half-and-half will also work. I do not recommend substituting milk for the cream.
- Eggs: You’ll want to use large eggs at room temperature. Either let them sit out for 20-30 minutes before you begin, or submerge them in a bowl of warm water for a few minutes to warm them up quickly.
Equipment
You won’t need much in the way of specialty equipment to make this decadent dessert–just a few baking basics! (Links are affiliate links and I earn a small commission from qualifying purchases.)
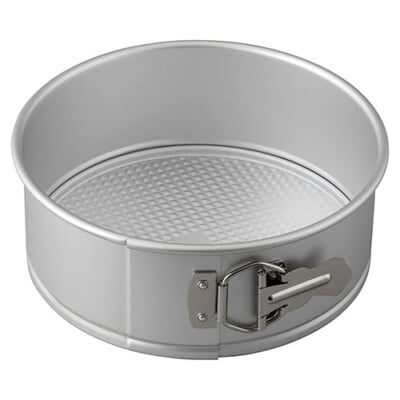
- Springform pan: a springform pan is a MUST for making cheesecakes. Unlike most cake pans, the sides of this pan expand so you can easily remove the cheesecake from the pan without damaging it. This recipe calls for an 8-inch pan, but you can also use a 9-inch pan to make a shorter cheesecake.
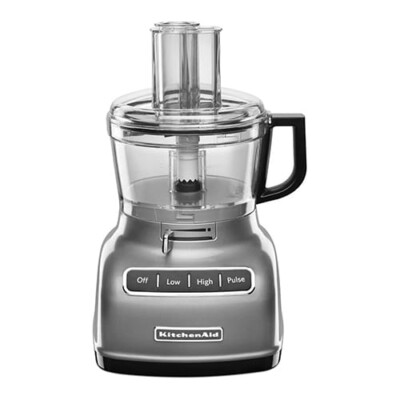
- Food processor: a food processor is another one of my must-have kitchen tools. It will make short work of chopping the Oreo cookies for this recipe, and so much more in the future! If you don’t have one, you can use a rolling pin (and some elbow grease) to crush the cookies.
- Mixer:a hand mixer or stand mixer will both work in this recipe.
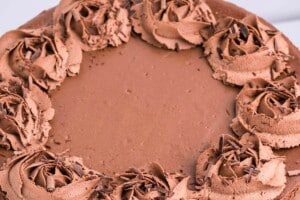
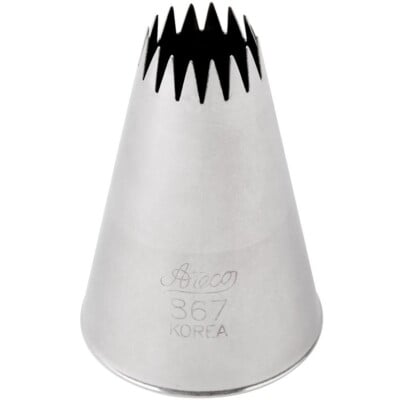
- Piping bag and tip: I like these disposable piping bags (I wash them and re-use them to reduce waste!). I used large star tip for the whipped cream rosettes.
- Large knife: When you get ready to serve this cheesecake you’ll want a large knife like this 8″ chef’s knife. It will make slicing the cake a dream and create nice even cuts.
📋 Instructions
Here’s a step-by-step overview of how to make this creamy cheesecake! Full instructions are included in the recipe card down below.
Make the chocolate cookie crust
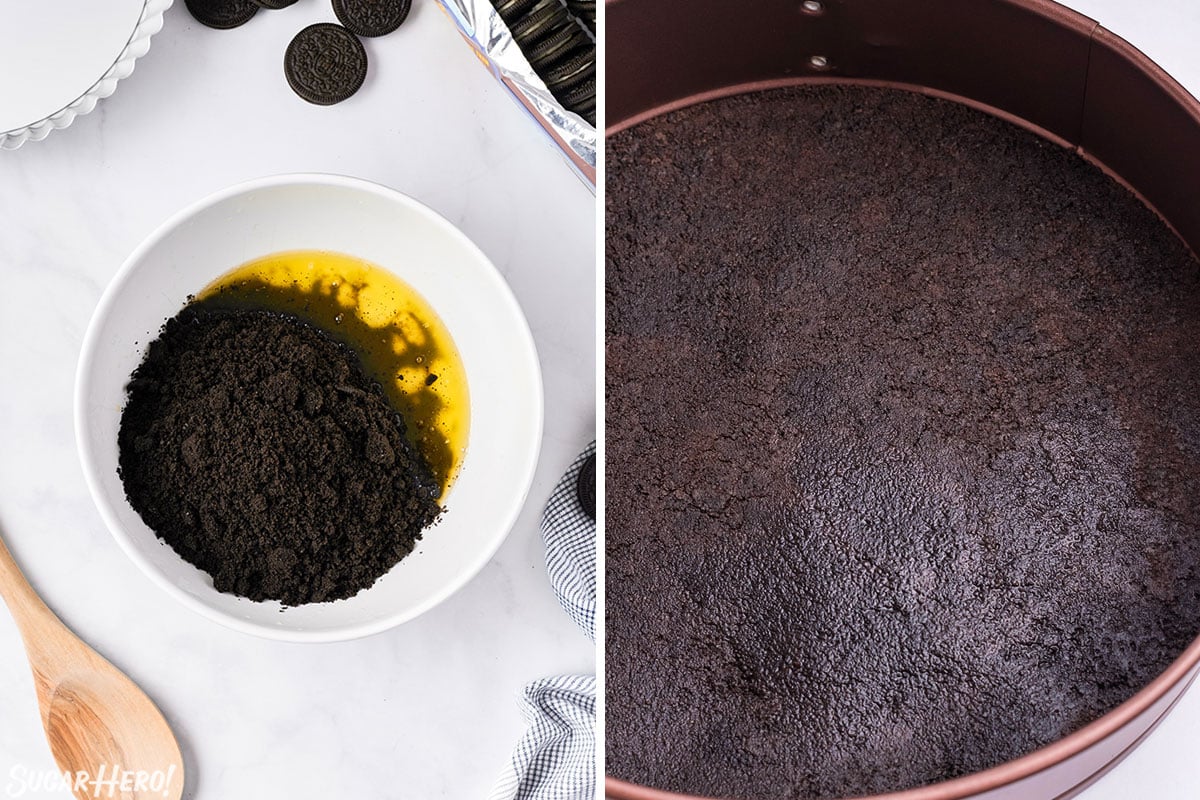
- Add Oreo cookies to a food processor and pulse until they’re in fine crumbs. Add melted butter to the processor bowl, and pulse until well combined.
- Pour the Oreo crust mixture into a springform pan and gently press the crust into an even layer. Bake for 10 minutes, then cool on a wire rack while you prepare the filling.
Make the chocolate filling
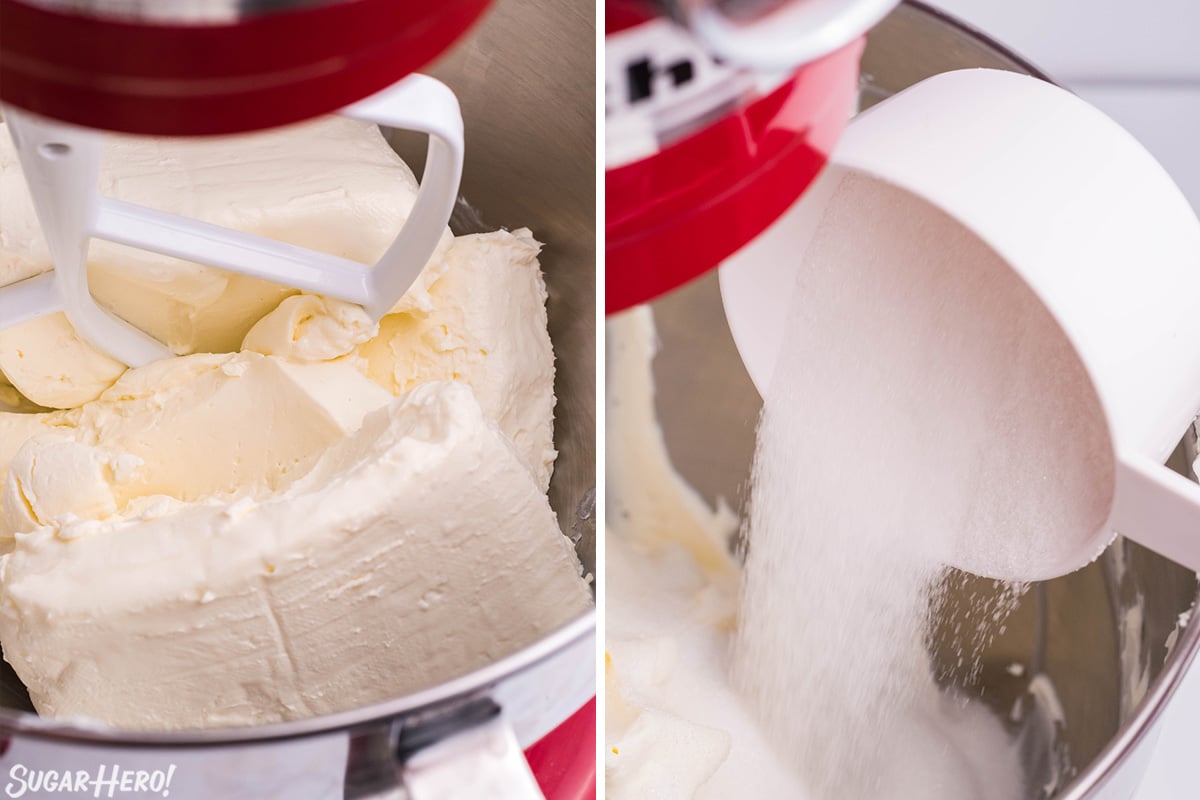
- Add the room temperature cream cheese bricks to the bowl of a stand mixer and mix the cream cheese for 4-5 minutes or until light and fluffy.
- Add the sugar and flour and mix until just combined.
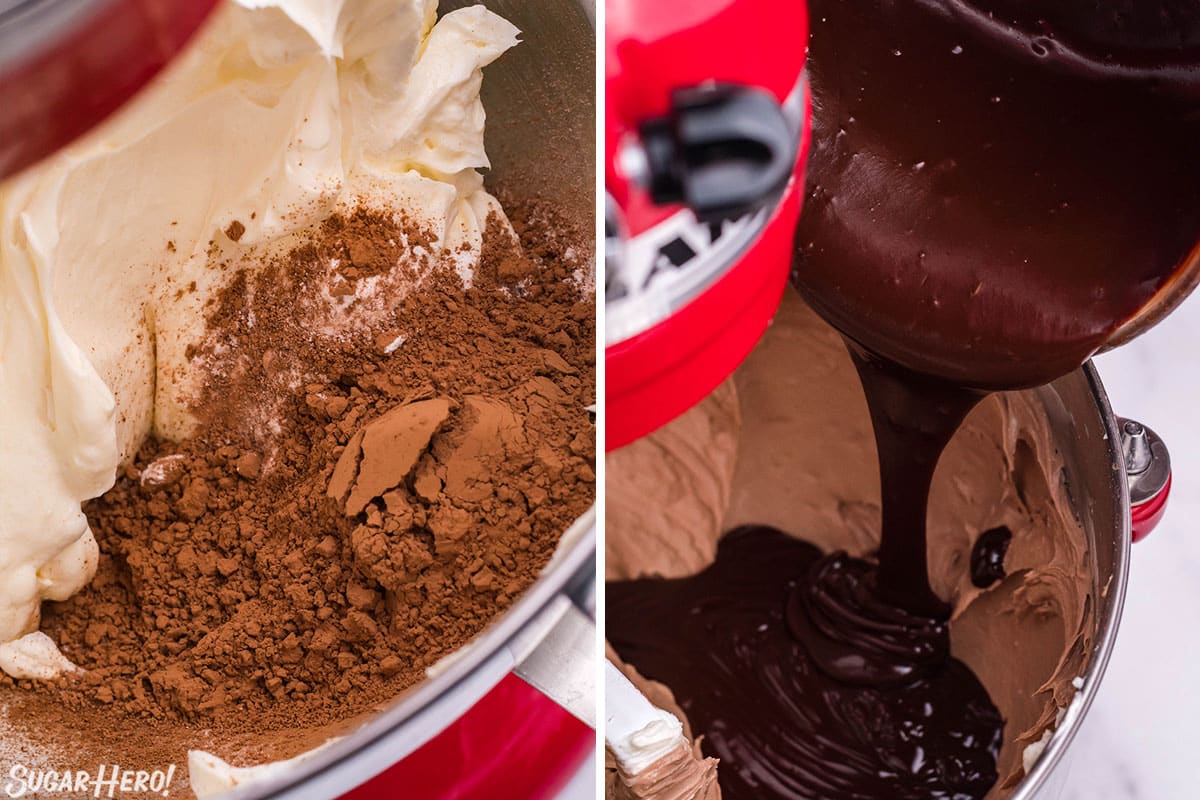
- Add cocoa powder, instant espresso powder and vanilla. Mix until just combined.
- In a separate bowl, heat the heavy cream until hot (but not boiling). Add in the chocolate chips and allow them to set/melt for 2-3 minutes. Then whisk until smooth.
- With the mixer on low speed, slowly pour in the chocolate mixture and blend until just combined and smooth.
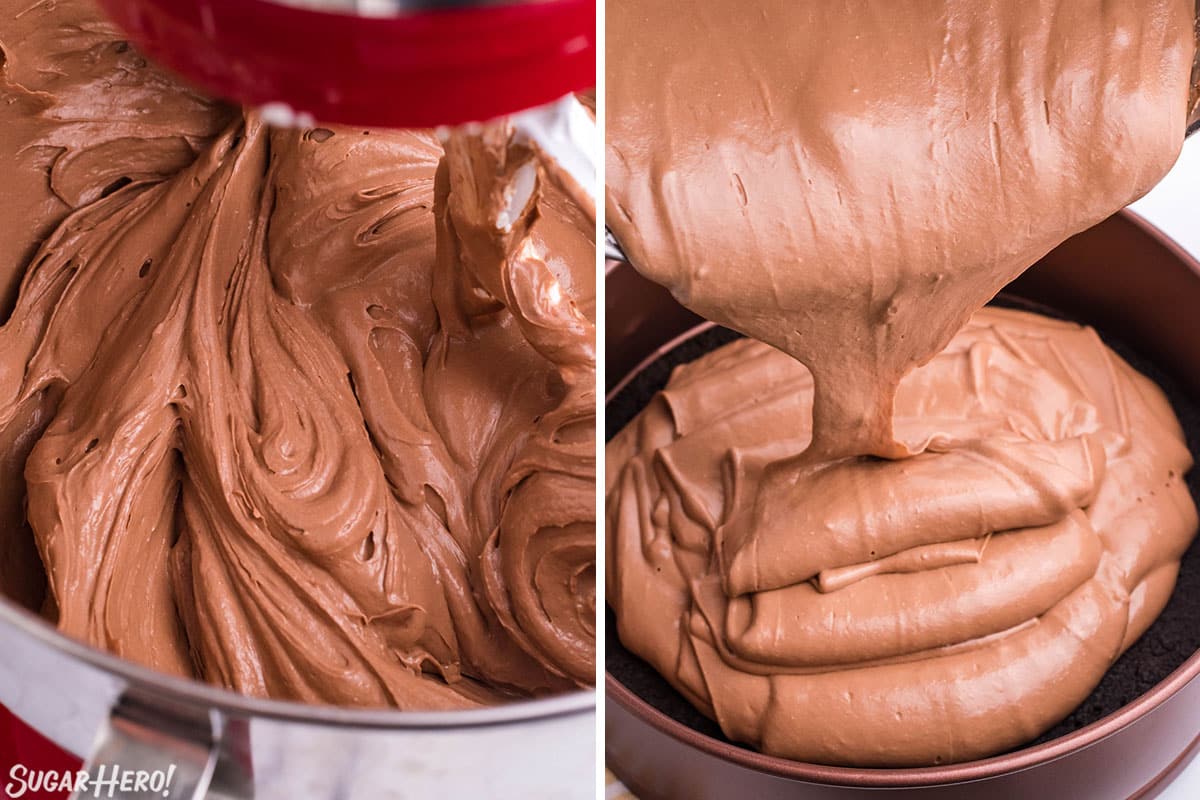
- Add the eggs, one at a time, and mix until JUST combined and the yolk disappears. Be careful not to overmix.
- Pour the batter into the springform and smooth the top. Bake, cool, embellish and enjoy!
💭 Variations
- Make the crust with chocolate-filled Oreos for a double dose of chocolate flavor. Or, make the crust with another specialty Oreo cookie flavor.
- Drizzle with chocolate fudge sauce, caramel sauce or your favorite fruit sauce.
- Sprinkle crushed Oreos on top.
- Embellish with chocolate truffles, chocolate curls, sliced fruit or chopped nuts.
- Add chocolate chips or swirl in a couple spoonfuls of chocolate espresso sauce.
- Swirl your favorite fruity jam into the batter before you bake it.
- Serve with a delicious cup of Slow Cooker Hot Chocolate, Salted Caramel Hot Chocolate or Nutella Hot Chocolate!
💡 Tips and FAQs
- Use cream cheese bricks. You want full-fat cream cheese bricks for the best texture. “Whipped” or “light” cream cheese won’t have the same effect. I cream the cream cheese for 4-5 minutes at LEAST to make sure it is completely smooth and there are no lumps before adding in any other ingredients. This insures you have a smooth, consistent batter.
- Use room temperature ingredients. Make sure to bring the cream cheese and eggs to room temperature before using them in the cheesecake. This ensures that everything incorporates together easily.
- Add the eggs last and don’t overmix. You want to mix only just until the yolk disappears otherwise the texture of the cheesecake will be affected.
- To check if the cheesecake is done, gently wiggle the pan. If the edges are set but the center jiggles slightly, it is done.
- Cool slowly. After the initial 50 minutes of bake time, turn the oven off but do not take the cheesecake out. Instead, crack the oven door and let it sit for another 20-30 minutes to allow it to cool down slowly. If it cools too quickly, cracks will form.
- Chill overnight. For the best results, let the cheesecake chill in the refrigerator overnight or for at least 6 hours before serving.
To Refrigerate: Leftover baked cheesecake will last for up to 1 week in the fridge. Wrap well with plastic wrap or place in an airtight container.
To Freeze: Cheesecake can be frozen for up to 3 months. To freeze the cheesecake, wrap it in plastic wrap followed by foil and store it in the freezer. If you are going to freeze it for a long time, you might also consider putting it in an a freezer-safe container after wrapping it. It will need some time to thaw, so place it in the fridge the day before you need it, and let it thaw overnight.
Caramel Cheesecake-Topped Brownies
Deep Fried Cheesecake
Leave a Review!
If you make this recipe, let us know! Leave a ⭐️⭐️⭐️⭐️⭐️ rating on the recipe below, and leave a comment, take a photo and tag me on Instagram @elabau, or use #sugarhero on IG!
Chocolate Cheesecake
Ingredients
For the Oreo cookie crust:
- 20 Oreo cookies, (to yield about 8 ounces / 2 cups of cookie crumbs)
- 2 oz unsalted butter, (4 TBSP), melted
For the filling:
- 32 oz cream cheese, at room temperature, see Note below
- 7 oz granulated sugar, (1 cup)
- 0.80 oz all-purpose flour, (3 TBSP)
- 1 oz unsweetened cocoa powder, (1/3 cup)
- 1 tsp instant espresso powder
- 1 tsp vanilla extract
- 8 oz semi-sweet chocolate chips, (1 ⅓ cup)
- 6 fl oz heavy cream, (¾ cup)
- 3 large eggs
For the topping:
- 3 fl oz heavy cream, (½ cup), cold
- ¼ cup powdered sugar
- 1 TBSP unsweetened cocoa powder
Instructions
Make the crust:
- Prepare to bake: Preheat your oven to 350°F and prepare an 8-inch springform pan by spraying generously with non-stick spray. Set aside.
- Crush Oreos: Place the Oreos in the bowl of a food processor–no need to remove the cream filling. Process them in long bursts until they are very fine crumbs. (Alternatively, place them in a zip-top bag and roll over them with a rolling pin until very finely crushed.) You should end up with about 2 cups of cookie crumbs.
- Mix crumbs and butter: Combine the cookie crumbs and melted butter and stir until well-combined. The mixture should have the texture of wet sand, and hold together a bit when you squeeze it between your fingers.
- Press into pan: Pour the crumbs into the bottom of the springform pan and use the back of a spoon or measuring cup to press them firmly into the bottom of the pan. Bring the crumbs about an inch up the sides of the pan.
- Bake and cool: Bake for 10 minutes, then remove and allow to cool.
Make the filling:
- Beat cream cheese: Add the room temperature cream cheese bricks to the bowl of a stand mixer fitted with a paddle attachment, or a large bowl if using a hand mixer. Mix the cream cheese on medium speed for 2-3 minutes, until smooth and creamy.
- Mix in additional ingredients: Add the sugar, flour, cocoa powder, and instant espresso powder and mix until just combined. Add in the vanilla extract and mix until just combined.
- Finish mixing: Scrape the sides and bottom of the bowl and mix for an additional 30 seconds.
- Heat cream and chocolate: In a microwave-safe bowl, heat the heavy cream for 1 minute or until hot (but not boiling). Add in the chocolate chips and allow them to melt into the cream for 2-3 minutes, then whisk until smooth.
- Add chocolate mixture: With the mixer on low speed, slowly pour in the chocolate mixture and blend until just combined and smooth. Scrape the sides and bottom of the bowl and mix for an additional 30 seconds.
- Whisk and add eggs: Whisk the eggs together in a small bowl. Add the eggs slowly with the mixer running on low. Mix just until combined–some streaks of eggs remaining are okay! Finish mixing by hand, scraping the bottom and sides of the bowl. Be careful not to overmix, and stir just until everything is incorporated.
- Pour batter in pan: Pour the batter into the springform pan, over the baked and cooled Oreo crust, and smooth the top.
- Bake: Place the cheesecake in the oven, on a middle rack, and bake at 350°F for 15 minutes. Then, without opening the door, reduce the heat to 200 F for an additional 50 minutes.
- Cool slowly in oven: Once the 50 minutes is up, turn off the oven and slightly crack the oven door allowing the cheesecake to cool slowly for 30 minutes.
- Cool slowly at room temp: Remove from the oven after 30 minutes and allow the cheesecake to cool to room temperature on the counter.
- Chill: Transfer to the refrigerator to chill for at least 6 hours (overnight is recommended) to allow the cheesecake to set completely.
Make the topping and finish:
- Make chocolate whipped cream: In the bowl of a stand mixer equipped with a whisk attachment, whip the heavy cream, powdered sugar, and cocoa powder on high speed until stiff peaks form.
- Finish cheesecake: Add to a piping bag with a large star tip (like Ateco #867) and pipe swirls of whipped cream around the outside of the cheesecake. Top with chocolate shavings if desired and serve.
- Storage: Store leftovers well-wrapped with plastic or in an airtight container in the refrigerator for up to 1 week. Cheesecake can be frozen for up to 3 months. Wrap it in plastic wrap followed by foil and store it in the freezer. Thaw overnight in the fridge the day before you need it.
Recipe Notes
Measuring Tips
Our recipes are developed using weight measurements, and we highly recommend using a kitchen scale for baking whenever possible. However, if you prefer to use cups, volume measurements are provided as well. PLEASE NOTE: the adage “8 oz = 1 cup” is NOT true when speaking about weight, so don’t be concerned if the measurements don’t fit this formula.
Want to learn more about baking measurements and conversion?
Nutrition


This cheesecake is perfect! So creamy, easy and bursting with real chocolate flavor. This is a must make especially if you love chocolate!
Love this Chocolate Cheesecake recipe, looks delicious and will make it for the family. Thanks for sharing L(
You’re welcome Elisa! I hope they love it as much as I do! Cheers!
So decadent and totally delicious! This was quite straightforward to make too, so I’ll definitely make it again.
Hi Amanda! I’m so glad the recipe was easy to follow for you. Thanks for dropping a comment!
Oh wow! This chocolate cheesecake looks absolutely incredible. Such a wonderful texture and I especially love the crunchy Oreo cookie crust.
Hi Tara. I’m a big fan of Oreo crusts. It adds so much flavor. YUM! I hope you get to try the recipe soon. All the best.
Do you not need to do water bath baking? That excitea me as it it’s a pain. But what about cracking if no water bath?
This looks so silky, smooth and delicious! I just need a fork and I’m ready to dig in!
Hi Andrea. Thanks for commenting! I really hope you enjoy the recipe! Cheers.
I want to try this receipe for my grandson bday in July. But Im use to baking cheesecake in water bath & this doesn’t say to do that & I’m really glad to hear that cause it is pain to do. But wondering about cheesecake cracking?
Hi Norma! That’s right, this recipe works without a water bath. 🙂 There are 2 big things that often lead to cracked cheesecakes: over-beating the ingredients (especially once the eggs are added!) and sudden temperature changes. My recipe specifically has you add the eggs at the very end and mix a minimal amount, so the batter doesn’t get too much air incorporated. And the baking and cooling process is VERY slow and steady, including a long cooling-off period in the oven once it’s turned off, so the cheesecake very gradually cools down and doesn’t crack.
However, you can also bake it in a water bath if you’re more comfortable with that – you will probably have to adjust the cooking time, though, since that can make cheesecakes take longer. But I do hope you give it a try and let me know how it goes, and I’m also always available if you have more questions! 🙂