


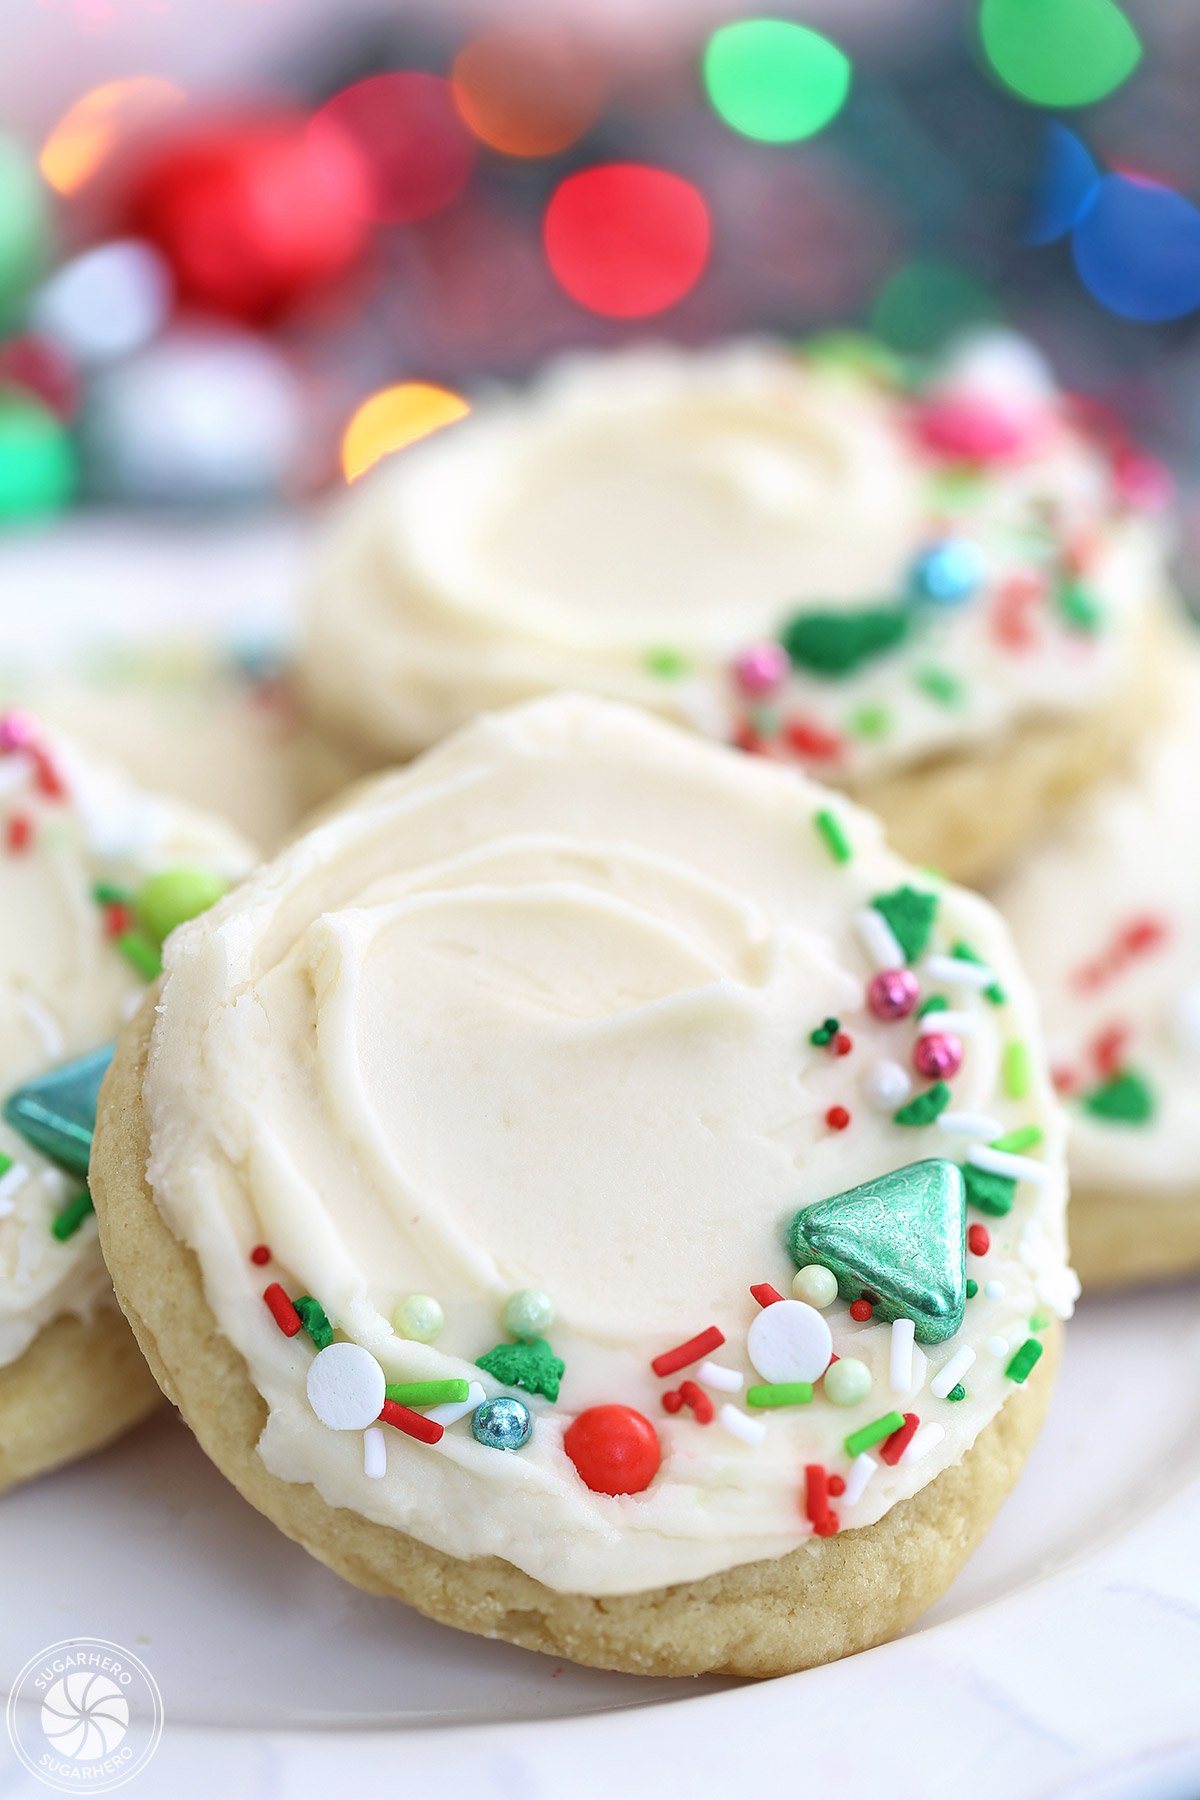
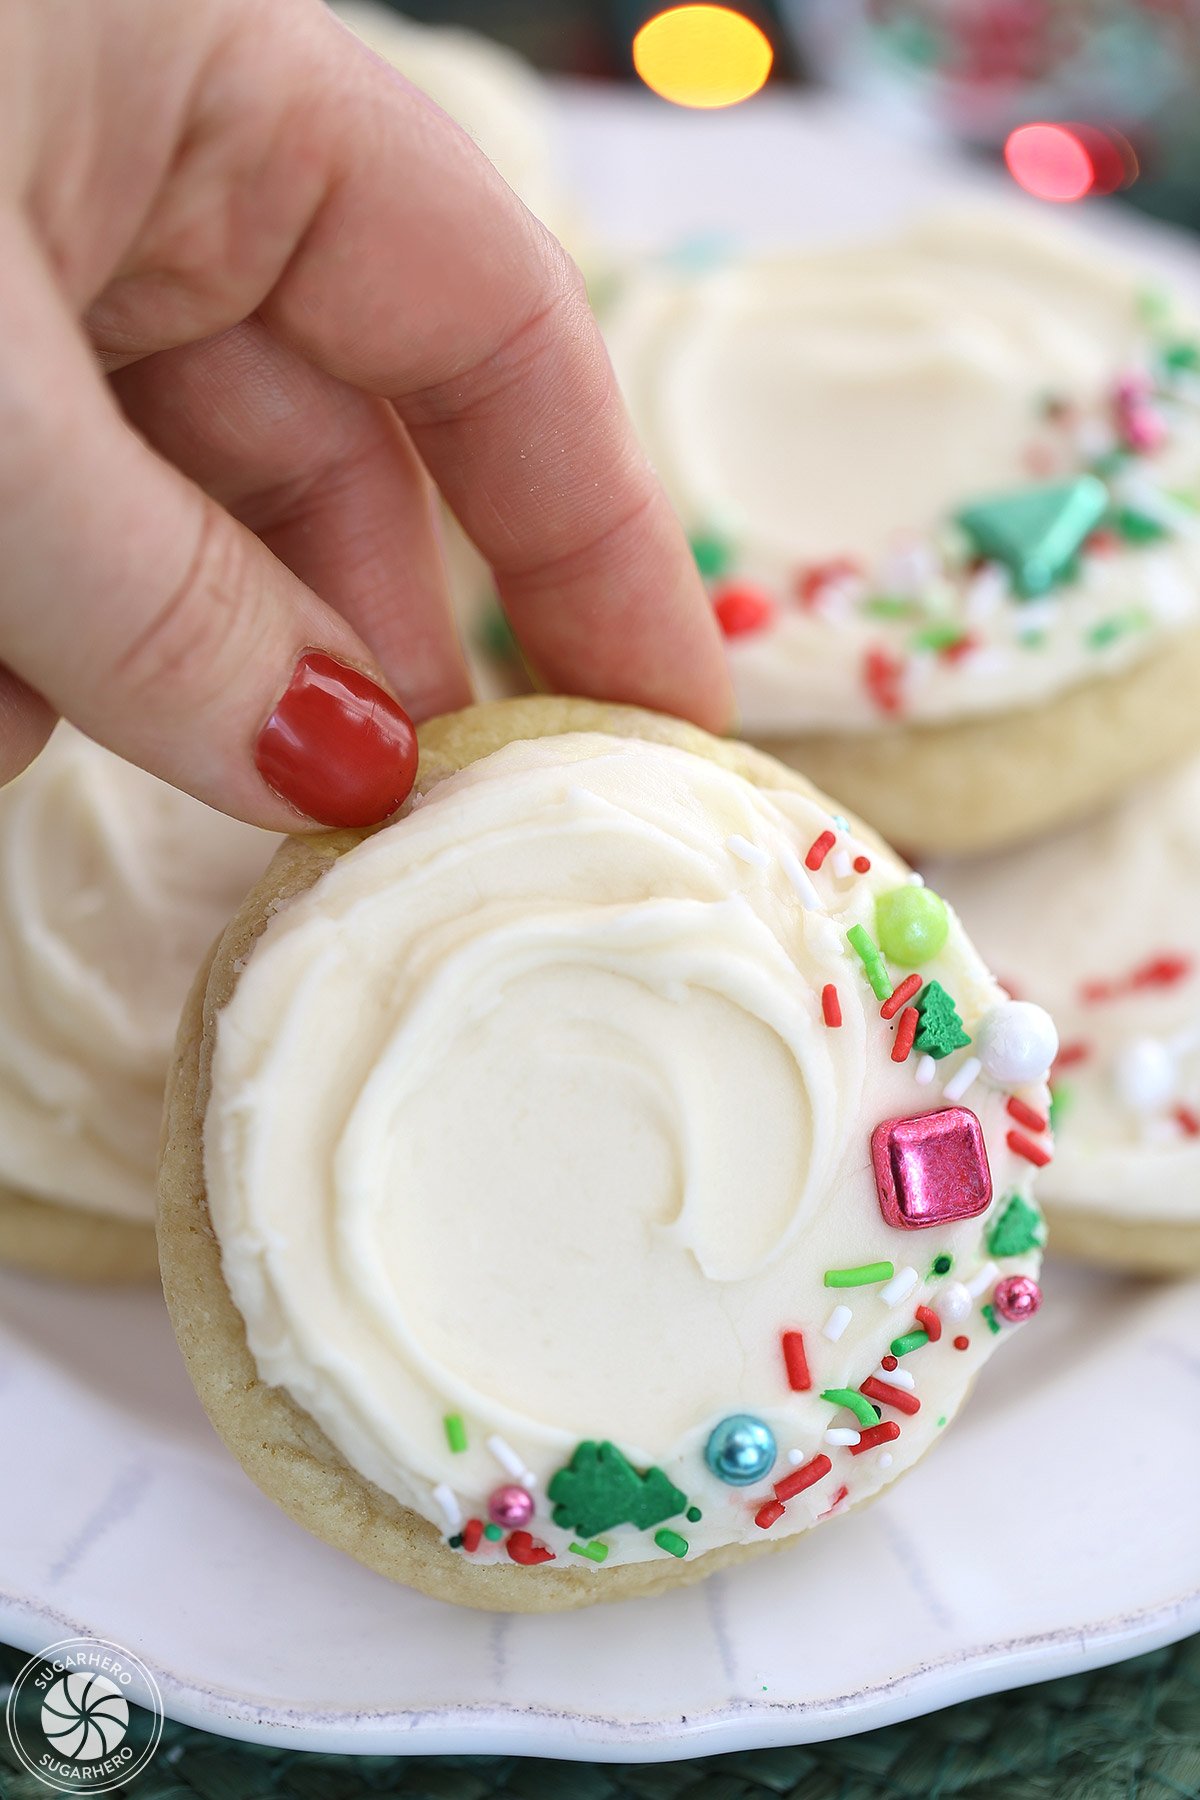
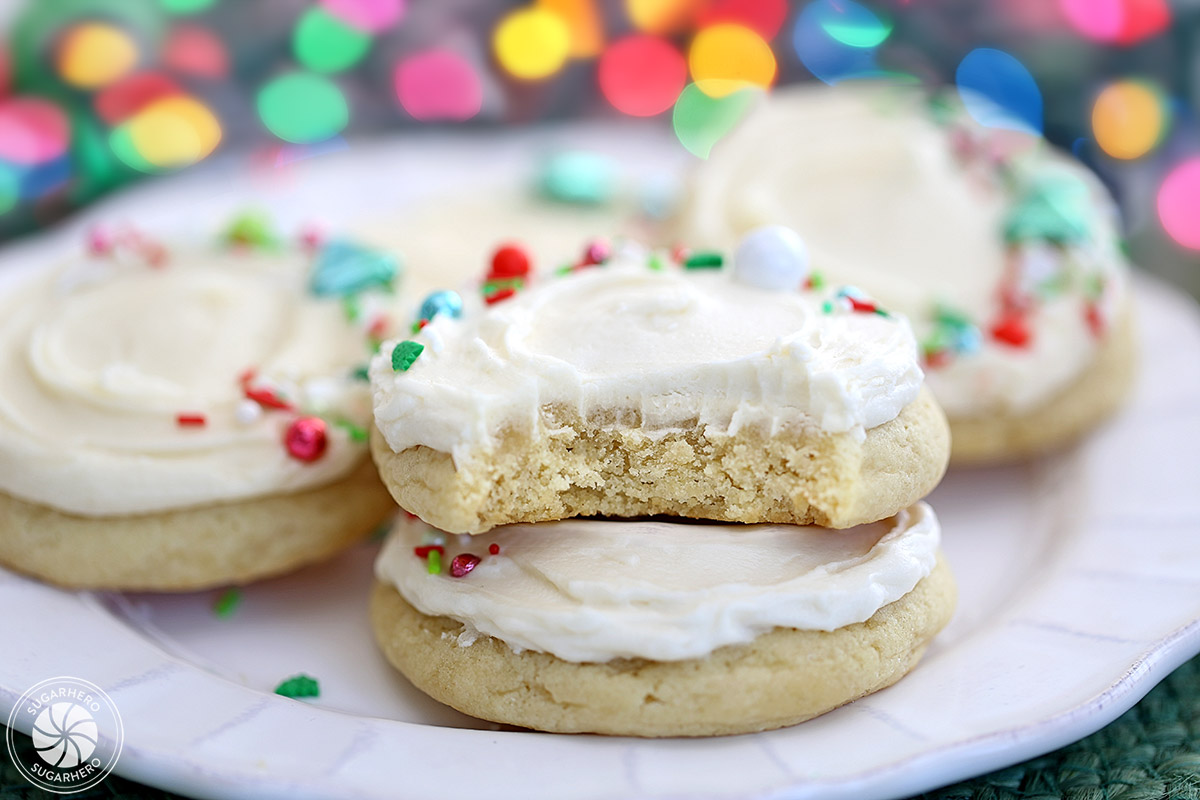
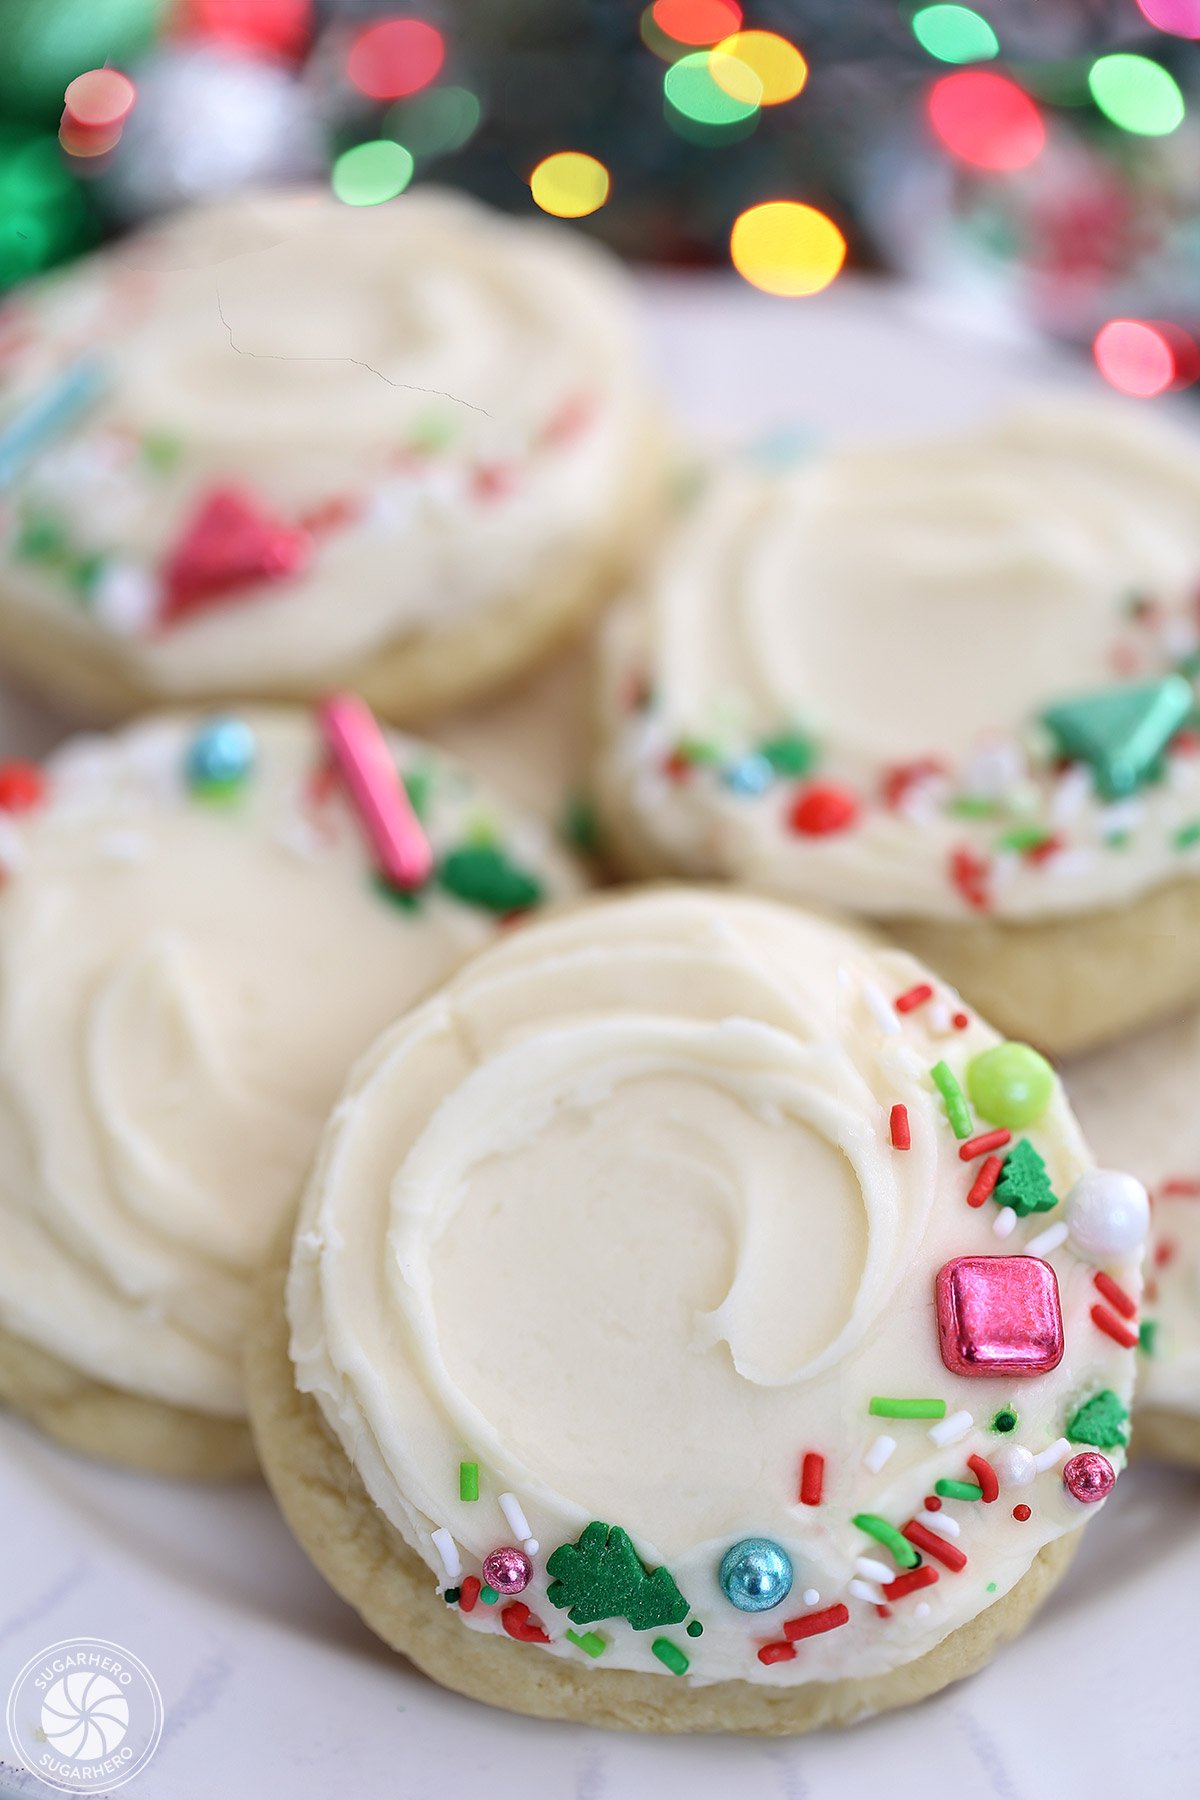
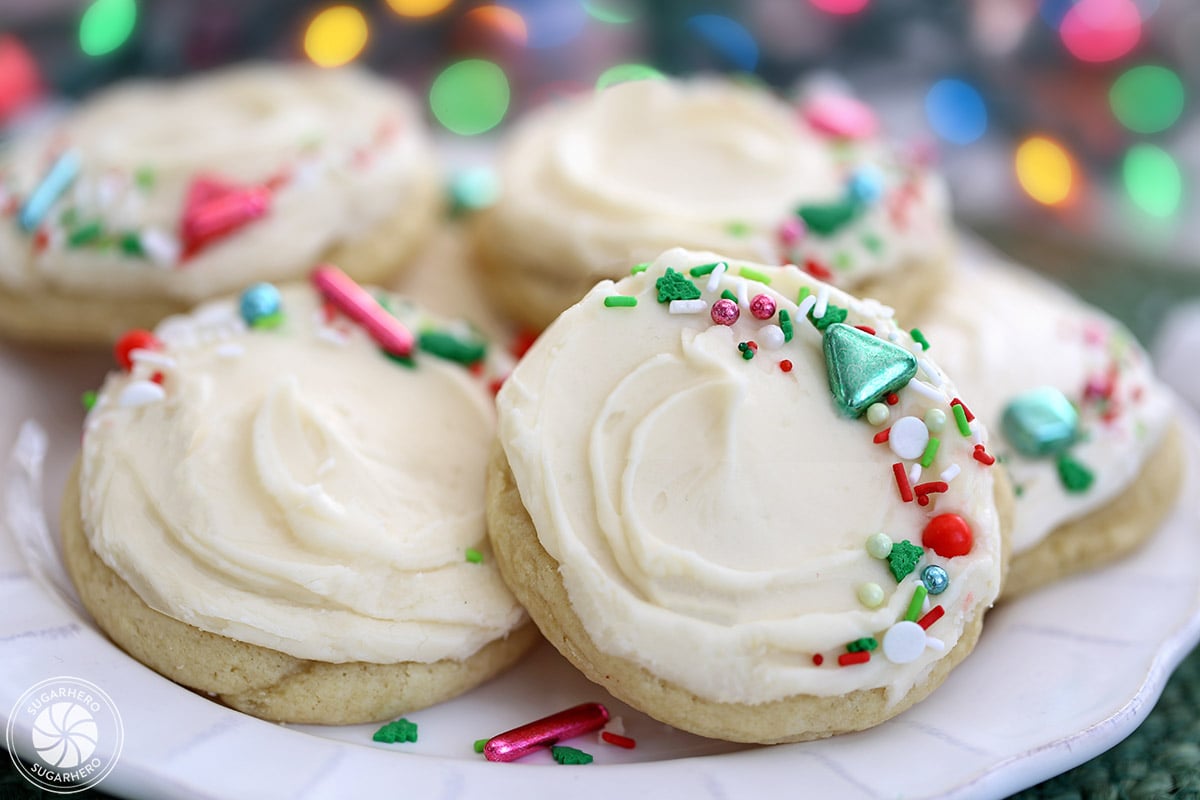
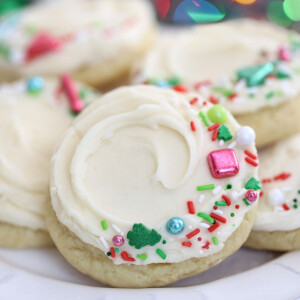
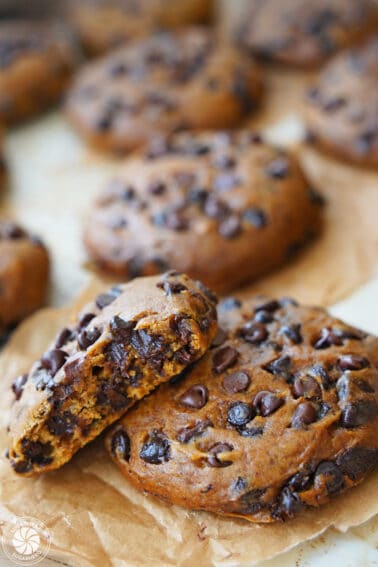
This is the ultimate frosted sugar cookie recipe! These large bakery-style sugar cookies have a tender, fluffy texture and a big swirl of frosting on top. They stay soft for days, so they’re a great make-ahead recipe as well.
😍 Our Favorite Frosted Sugar Cookie Recipe
Sugar cookies are the little black dress of the baking world–endlessly versatile, customizable, and they go with everything.
They can be dressed up with colorful royal icing, topped with fondant decorations, decorated with watercolor designs, or kept super-simple without any toppings at all. They can be rolled into pinwheels, cut into stars and stripes, or twisted into candy canes – in short, they can do it all!
Table of Contents
💗 Why You’ll Love These Cookies
These fluffy frosted sugar cookies have been a beloved reader favorite since they were first published in 2017, and if you try them, I think you’ll agree with all the 5-star reviews. Here’s why you’ll love them:
- They have a tender, pillowy texture that stays soft for days. No stale sugar cookies here!
- They’re topped with a thick swirl of vanilla frosting. It’s creamy and smooth, but it crusts on the top, making these cookies easier to stack and package.
- They don’t require any chilling, rolling, or cutting. Just make and scoop!
- They’re freezable, giftable, perfect for any holiday, and — oh yeah — SERIOUSLY delicious.
🧾 What You’ll Need
Ingredients
This recipe uses standard baking ingredients, so chances are you have most of the necessities on hand. Here are a few tips to keep in mind as you gather ingredients. (Links are affiliate links and I earn a small commission from qualifying purchases.)
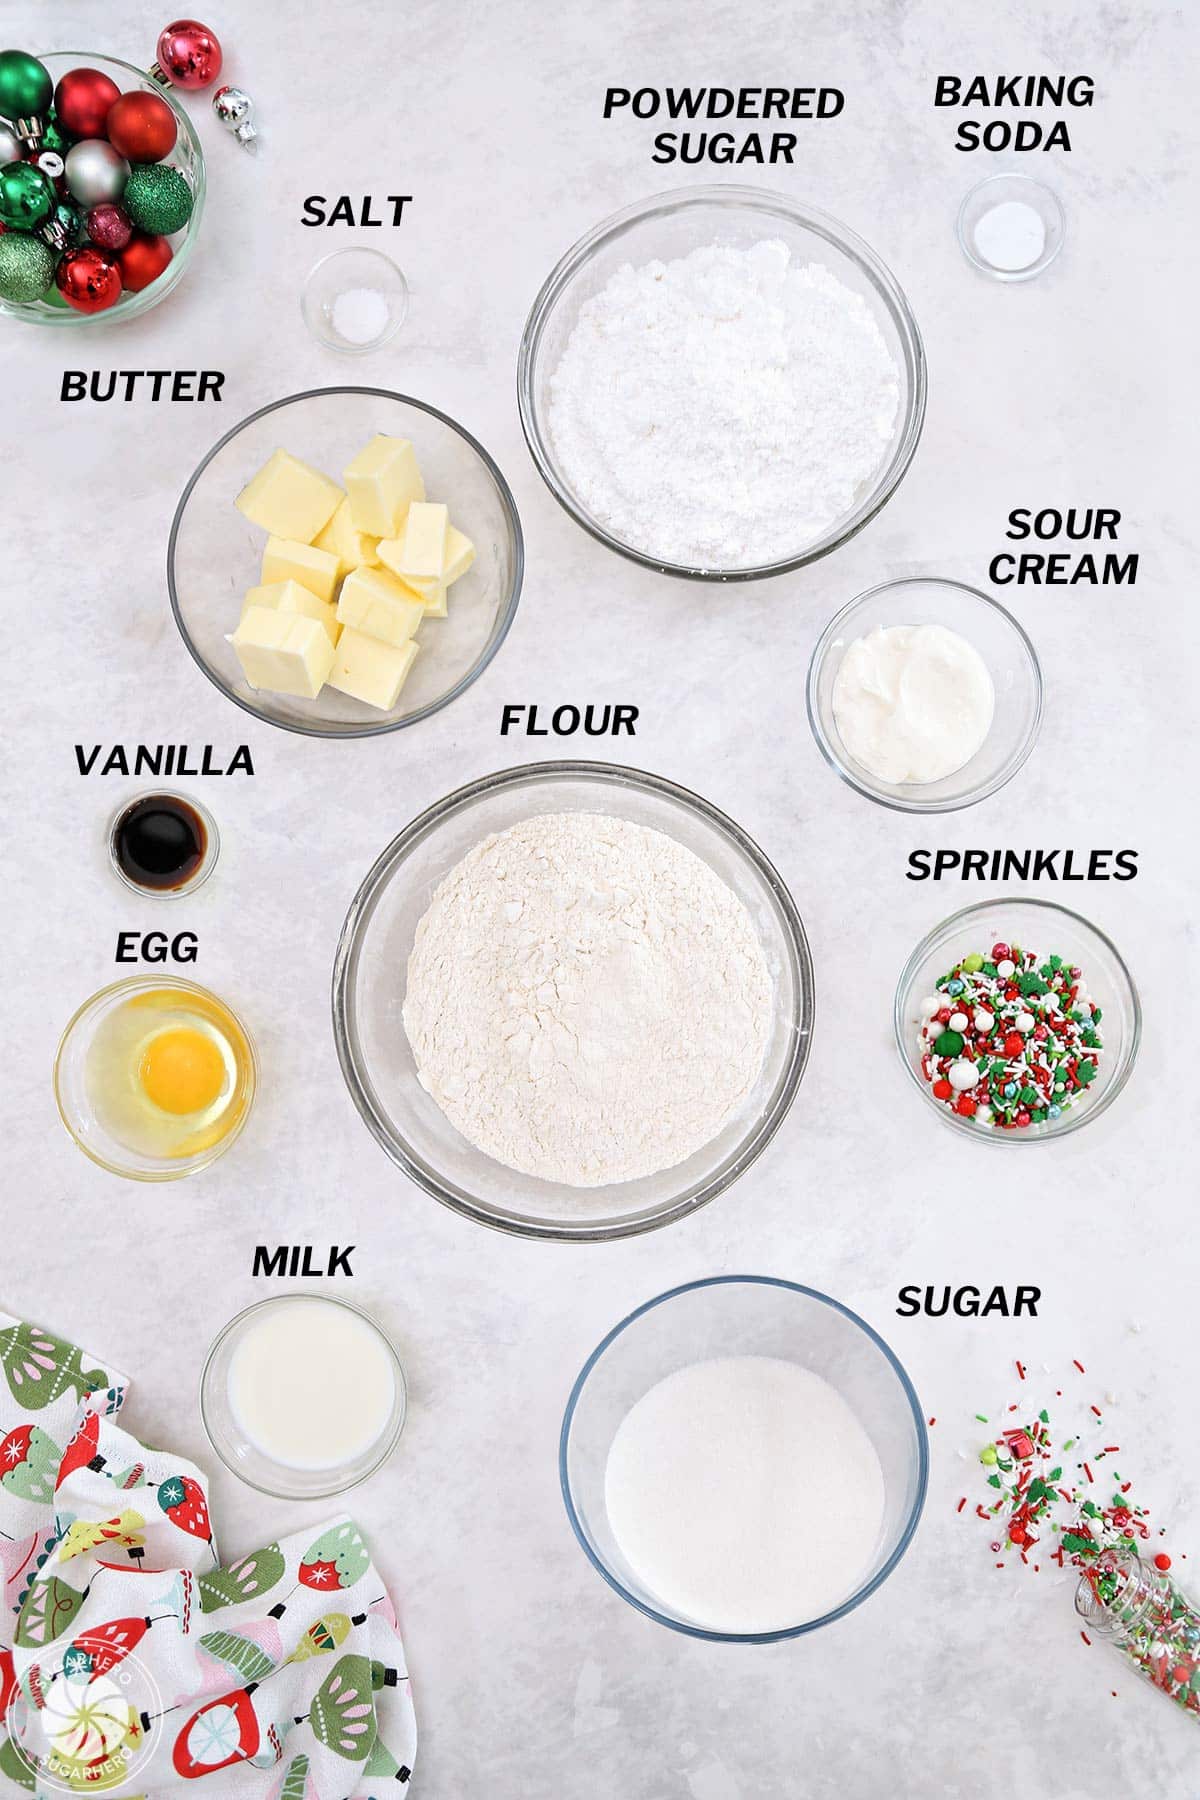
- Unsalted Butter: Your butter should be at room temperature to make these cookies. This means it’s soft and pliable. In the winter, rooms are sometimes very cool, and even if your butter is “room temperature,” it is firm and difficult to cream. If this is the case, microwave it for 5-8 seconds before beginning so that it is truly soft (but not greasy or melted!) before you begin.
- Sour cream: Adding sour cream to the cookies makes them extra-soft and tender, and I love the very subtle tang it gives to them. Make sure your sour cream is at room temperature so everything blends together nicely. You can substitute full-fat, thick Greek yogurt for the sour cream if you’d like.
- Milk: Have your milk at room temperature. Any fat percentage of milk should work, or you can even use half-and-half.
- Egg: Use a large egg at room temperature. Either let it sit out for 20-30 minutes, or submerge it in a bowl of warm water for a few minutes to warm up quickly.
- All-purpose flour: It’s best to use a scale to measure ingredients, but if you don’t have one, make sure you’re measuring your flour using the spoon-and-scrape method. Spoon flour into your measuring cup, then use the back of a knife to level off the top of the cup. This method is better and more precise than just dipping your measuring cup in the flour bin to fill it.
- Vanilla Extract: Vanilla is the classic sugar cookie flavor, but you can experiment and add other extracts in addition to or instead of vanilla. Try almond or lemon extract, or use vanilla bean paste for a really intense vanilla vibe.
- Powdered Sugar: It may seem strange, but I am very picky about my powdered sugar. Some brands have too much corn starch, or are too coarse, leading to a rough, gritty texture in frosting. This is my powdered sugar of choice! It’s made from cane sugar instead of beet sugar, and produces smooth, consistent results.
- Sprinkles: I decorated these with a Christmas theme, but of course you can use different colored sprinkles to make these cookies festive for any holiday!

Equipment
Just a few important notes to make sure your cookies turn out perfectly:
- Baking sheets:this is important! To get tall, puffy cookies, you’ll want to use uninsulated aluminum baking sheets like these. Dark cookie sheets cause over-browning on the bottom of the cookie. Insulated sheets will give you pale bottoms, but the cookies are flatter and spread more. Uninsulated, light-colored sheets are just right!
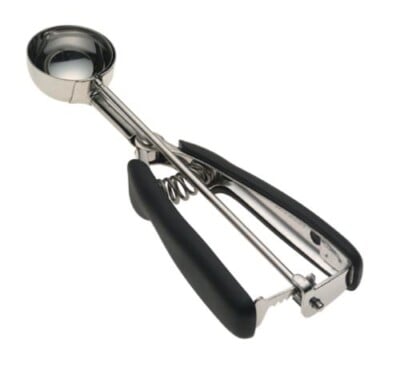
- Cookie scoop:For these big cookies, I use a #24 disher. (This is culinary talk for “big ole cookie scoop.”) This size holds about 3 TBSP / 1.75 oz of cookie dough. For smaller cookies, I recommend a #40 disher (1.5 TBSP, 1 ounce of dough) and bake for about 12 minutes — this produces 2-inch cookies.
- Mixer:You will need some kind of mixer to properly make the frosting and dough. Either a stand mixer or hand mixer will work fine.
- Parchment Paper:Save time and cleanup by using silicone liners or parchment paper when baking cookies.

🍪 Tips for Making Puffy Sugar Cookies
The most common issue readers have is that their cookies either spread too much and are not as tall or puffy as they’d like them to be, or they don’t spread enough and are domed like scones. Here are my top troubleshooting tips for perfectly puffy cookies:
- Follow the recipe exactly. If you make substitutions, or skip steps, or change the method, I can’t guarantee your results. This includes making sure your ingredients are the right temperature, that you’re using the right equipment, and that you’re paying attention to mixing and baking times.
- Measure with precision. Either use a kitchen scale (the best!), or be attentive when using measuring cups and spoons, especially when it comes to flour. Measure your flour by spooning flour into your measuring cup, then use the back of a knife to level off the top of the cup. This method is better and more precise than just dipping your measuring cup in the flour bin to fill it. When you dip your cup in to fill it, the flour gets compacted and you end up with more flour per cup than the recipe calls for. More flour = dry cookies that don’t spread.
- Cream the butter and sugar together for 2 minutes, until it has lightened in color and has a fluffy texture. Under-creaming = cookies that don’t spread and have a coarse texture. Over-creaming = cookies that are too flat.
- Use the right baking surface. You want to bake these cookies on parchment, on an aluminum, light-colored, non-insulated baking sheet. Don’t grease the parchment, and don’t use insulated sheets or dark-colored baking sheets.
The cookies pictured above are from the same batch of dough. The ONLY difference is that the ones on the left were baked on an insulated baking sheet, and the ones on the right were baked on a non-insulated sheet. You can see how much of a difference the baking sheet makes!
Insulated cookie sheets cause the cookies to spread more, and you’ll end up with pale bottoms, non-crispy edges, and flat cookies. Dark-colored sheets prevent the cookies from spreading enough, and your cookies are more likely to be tall and domed.
If this is all you have, of course, feel free to use them – just be aware that your cookies might not look like the ones in the photos.
💭 How to Keep Sugar Cookies Soft
These cookies are great “keepers,” and they’ll stay soft for days as long as they’re stored in a container and not left exposed to the air.
The frosting layer also helps keep them soft, so if you’re looking to store them, I recommend frosting them, letting them sit at room temperature for several hours to give the frosting time to crust over and harden, and then storing them in an airtight container.
One of my favorite cookie tricks is to store them with a slice of bread or a soft roll. The moisture from the bread adds humidity to the storage container and keeps the cookies from drying out as fast. Hawaiian rolls are my favorite to use because they’re super moist!
💡 Troubleshooting FAQs
No, this dough is not a roll-out cookie dough–it’s too wet and soft, and you’ll just end up frustrated. If you want a roll-out dough that holds its shape, here’s my favorite cut-out sugar cookie recipe.
If your cookies spread too much and are too flat, the most common reasons are:
– the butter and sugar were creamed together for too long
– your baking soda is old and not as effective
– not enough flour was used
– insulated baking sheet was used
– oven runs cool (temperature not high enough)
Check my equipment recommendations and puffy cookie tips above, and also consider chilling the dough before baking for extra insurance.
If your cookies didn’t spread after baking, or have a lumpy or coarse texture, the most common reasons are:
– the butter was too cold
– the butter and sugar weren’t creamed together for long enough
– too much flour was used
– dark baking sheet was used
– oven was too hot
It is important that any refrigerated ingredients be at room temperature before beginning, and that you cream the butter and sugar together for several minutes, until light and fluffy. Under-creaming the butter/sugar can result in a coarse cookie that doesn’t spread properly, and ingredients cream together easier when they are not cold.
Cookie dough balls: The cookie dough can be scooped into balls and refrigerated or frozen until you are ready to bake them. The best method for storing scooped cookie dough really depends on how long you plan to wait before baking them. If it’s just a few days, refrigerate them. If it will be longer, it’s better to freeze them. And, in either case, you can cook room temperature cookie dough balls or refrigerated (chilled) cookie dough balls. Keep in mind that baking chilled balls will make the cookies spread less and will probably take a minute or two longer to bake. So, if you want a really tall, puffy cookie, bake the balls cold. If you want a cookie that is more spread out, bake them from room temperature.
If possible don’t bake the cookies from completely frozen dough balls; even giving them 15 minutes to sit out at room temperature would help the cookies bake better. If you really want to try baking them from frozen, just do a couple tester cookies to see what you think and adjust the cooking time to fit your oven.
Baked cookies and frosting: Both the cookies and frosting can be made in advance! Baked cookies can be stored in the freezer for up to 4 months, while prepared frosting can be frozen for 3 months (or refrigerated for 2 weeks). For the frosting, make sure to store it with plastic pressed tightly to the top so it doesn’t form a crust. Allow it to come to room temperature and re-whip before using to restore the creamy texture.
Frosted and decorated cookies: I recommend letting the cookies sit at room temperature for several hours to give the frosting time to crust over and harden, and then storing them in an airtight container between layers of waxed paper. Store at room temperature for 4-5 days, or in the refrigerator for up to 2 weeks. They can also be frozen for a few months.
The sprinkles pictured are from a few different holiday mixes, but I suspect most people are asking about the eye-catching metallic sprinkles – those are from Sweetapolita.
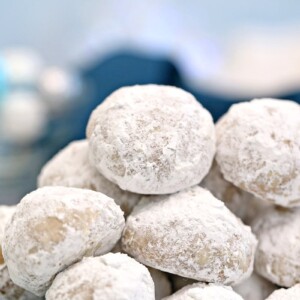
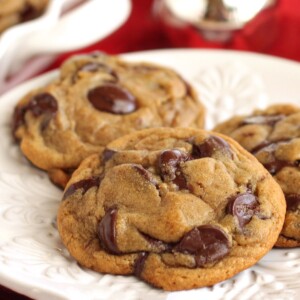
🎄 More Holiday Cookies


Leave a Review!
If you make this recipe, let us know! Leave a ⭐️⭐️⭐️⭐️⭐️ rating on the recipe below, and leave a comment, take a photo and tag me on Instagram @elabau, or use #sugarhero on IG!
Big Soft Sugar Cookies
Ingredients
For the sugar cookies:
- 12.5 oz all-purpose flour, (2 ¾ cups)
- ½ tsp baking soda
- ½ tsp salt
- 6 oz unsalted butter, (¾ cup), at room temperature
- 7 oz granulated sugar, (1 cup)
- 1 large egg, at room temperature
- 1 TBSP vanilla extract, or Princess Bakery Emulsion
- 2 oz sour cream, (1/4 cup), at room temperature
- 2 fl oz milk, (1/4 cup)
For the frosting:
- 4 oz unsalted butter, (1/2 cup), at room temperature
- 12 oz powdered sugar, (3 cups)
- 2 TBSP milk
- 1 tsp vanilla extract, or Princess Bakery Emulsion
- ½ tsp salt
- Sprinkles, to decorate
Instructions
To make the sugar cookies:
- Preheat the oven to 350 F. Line two baking sheets with parchment paper. For the best results, I recommend using non-insulated, light-colored baking sheets.
- In a medium bowl, whisk or sift together the flour, baking soda, and salt. Set aside for a moment.
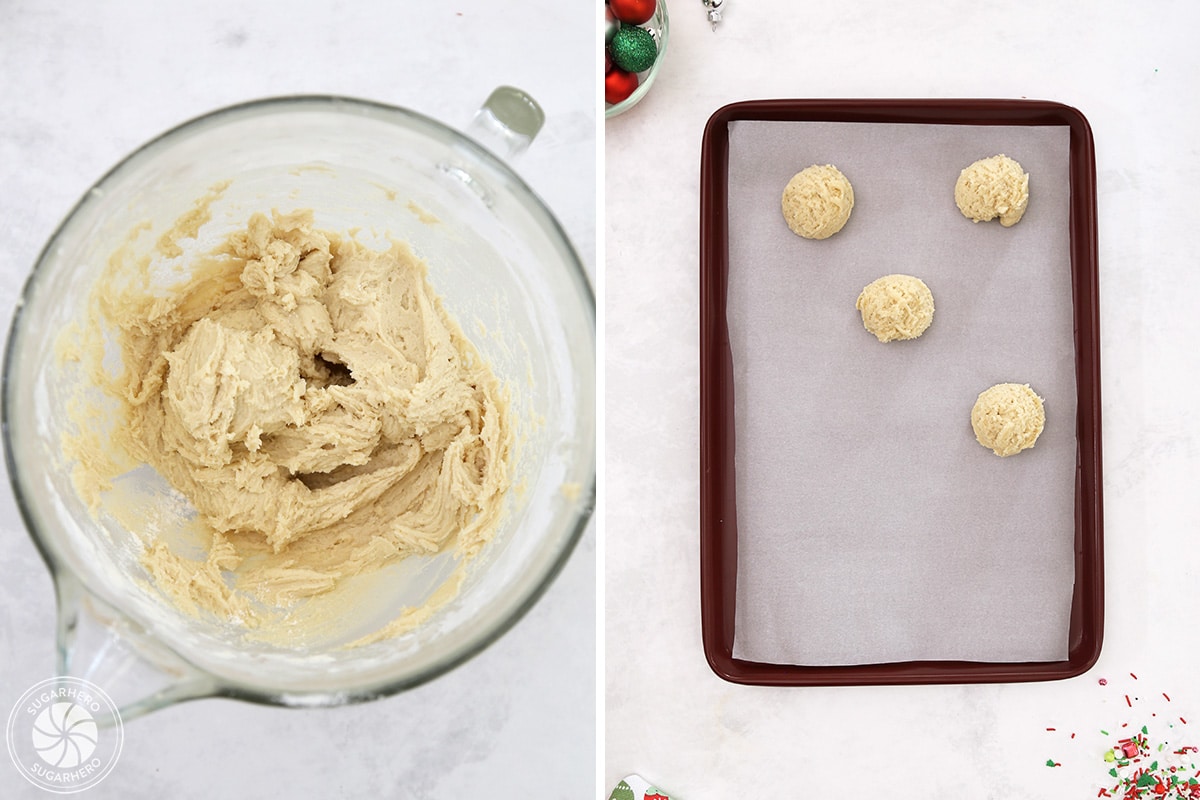
- In the bowl of a large stand mixer fitted with a paddle attachment, combine the butter and sugar. Beat on medium speed for 2 minutes, until light and fluffy.
- Add the egg, vanilla, sour cream, and milk, and mix until well combined. It is normal for it to look a bit broken at this point – don't worry! It all comes together when the flour is added.
- Turn the mixer speed to low, and gradually add the flour mixture. Mix until just a few streaks of flour remain. Do not overmix here– stop the mixer just when the flour is incorporated. After you stop the mixer, give the dough a few good stirs by hand with a rubber spatula, being sure to scrape the bottom and sides of the bowl so everything is well-mixed.
- Use a #24 cookie scoop (3 TBSP, or 1.75 oz) to scoop large balls of cookie dough —you should get about 18 cookies from this recipe. Roll the balls between your hand and place them a few inches apart on the parchment-covered baking sheet.s
- Bake at 350 F for 16-18 minutes, until the cookies are puffed and just starting to take on color around the edges. The tops should still remain virtually colorless.
- Let the cookies cool completely before frosting.
To make the frosting and decorate:
- Beat the butter with an electric mixer fitted with a whisk attachment on medium speed for 2-3 minutes, until creamy and light in color.
- Add the powdered sugar, milk, vanilla, and salt, and mix well, until light and fluffy.
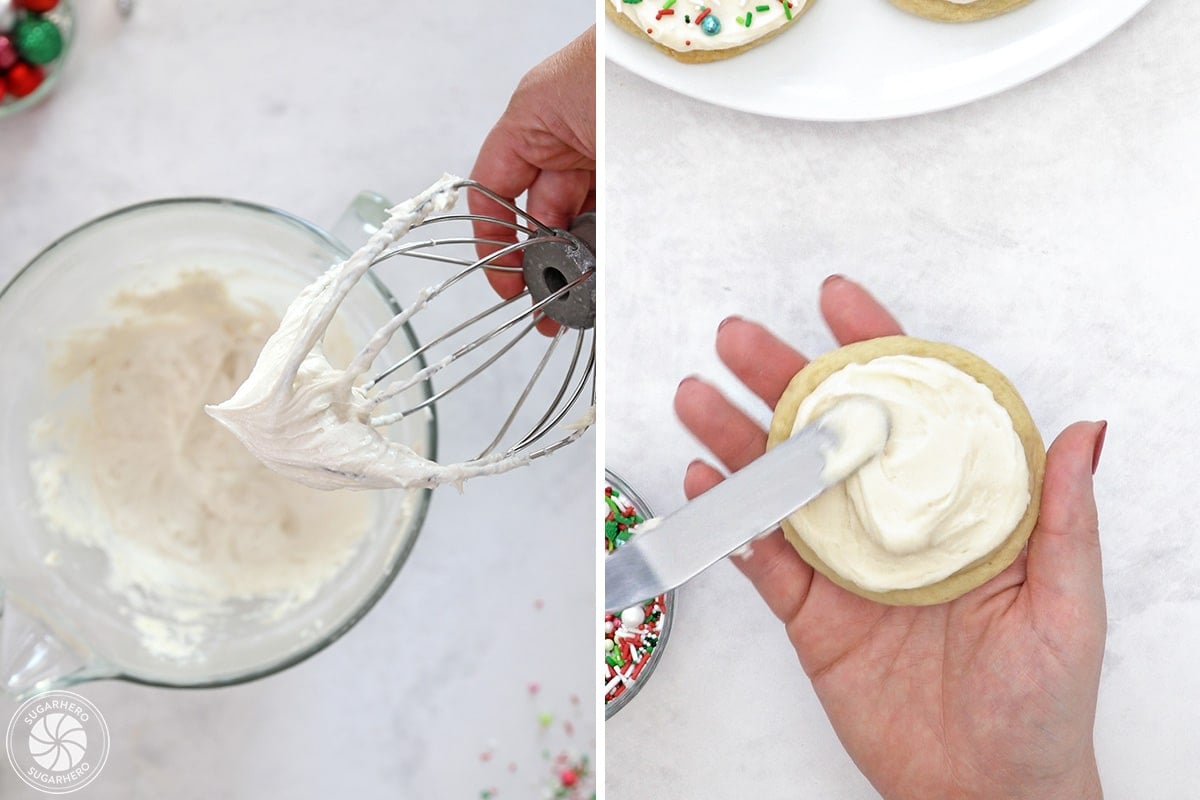
- If the frosting is too stiff for your liking, you can add more milk, a bit at a time, until you get a texture you like. If it is too soft, add a few spoonfuls of powdered sugar to adjust the texture.
- Put a generous dollop of frosting on top of each cookie, and spread it around evenly over the top. Finish with a big pinch of sprinkles or other decorations.
- Store the cookies in an airtight container. They can be kept for about a week, but the taste and texture is best if enjoyed within 3-4 days.
- The cookies and frosting can both be made in advance, and the cookies can be stored in the freezer for up to 4 months, while the frosting can be frozen for 2 months or refrigerated for 2 weeks. Make sure to store it with plastic pressed tightly to the top so it doesn’t form a crust. Allow it to come to room temperature and re-whip before using.
Video

Recipe Notes
- Creaming the butter and sugar together properly is a very important step. If they’re not mixed enough, the cookies won’t spread and will have a coarse texture, more like a biscuit or scone. If your “room temperature” butter is on the cooler side (very common in winter months!), soften it in the microwave for 5-8 seconds before beginning, and/or be sure to cream it a bit longer, so that the mixture is truly lighter in color and fluffy.
- While you can under-mix the butter and sugar, you can also over-mix, which is equally undesirable. Over-mixing means too much air gets incorporated into the dough, causing the cookies to spread too much.
- When measuring flour, either use a kitchen scale, or measure it by spooning flour into your measuring cup, then use the back of a knife to level off the top of the cup.
- Don’t use an insulated baking sheet. Insulated sheets results in the cookie bottoms being slow to cook and “set,” so they have more time to spread out during baking.
- Don’t use a dark-colored baking sheet. This results in cookies that don’t spread enough and have dark bottoms.
- Don’t butter, grease, or spray the cooking surface. Use ungreased parchment paper for best results.
- If you want to make smaller cookies, you can use a 1.5 TBSP scoop (like a #40, 1-ounce scoop) to get about 27 cookies from the recipe. Bake them for about 12 minutes at 350 F.
- This recipe has been modified and revised from its original version. You can find a copy of the old recipe here.
Measuring Tips
Our recipes are developed using weight measurements, and we highly recommend using a kitchen scale for baking whenever possible. However, if you prefer to use cups, volume measurements are provided as well. PLEASE NOTE: the adage “8 oz = 1 cup” is NOT true when speaking about weight, so don’t be concerned if the measurements don’t fit this formula.
Want to learn more about baking measurements and conversion?
Nutrition
📋 Step-by-Step Instructions
Here’s an photo guide to making Big Soft Sugar Cookies. You can find full instructions and a tutorial video in the recipe card.
Make the Sugar Cookies
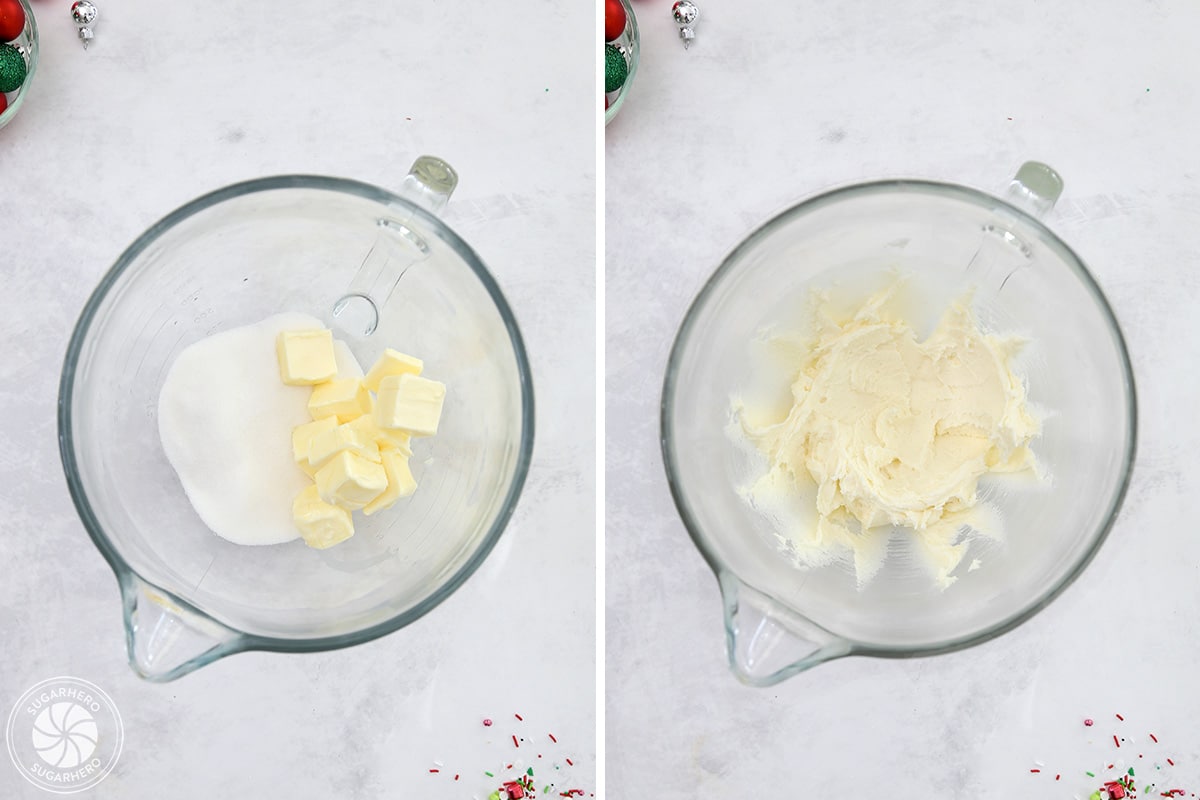
- In the bowl of a large stand mixer fitted with a paddle attachment, combine the butter and sugar. Beat on medium speed for 1-2 minutes, until light and fluffy.
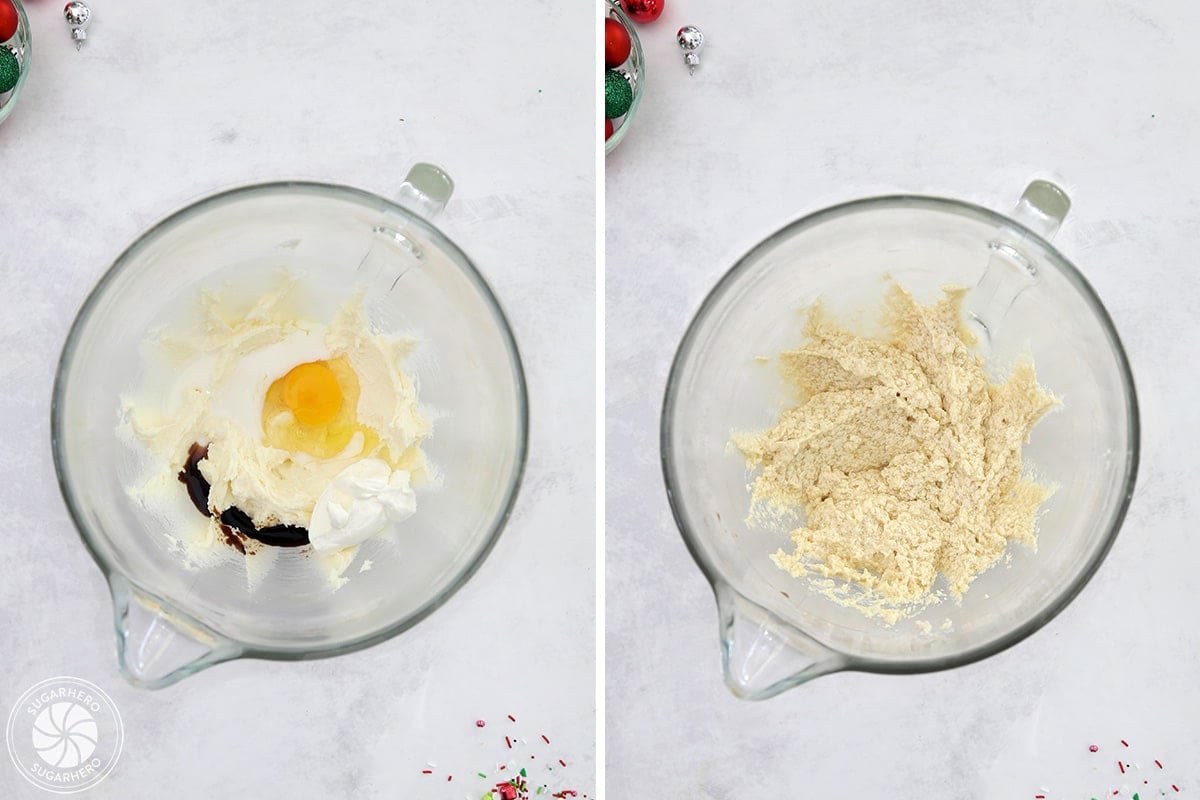
- Add the egg, vanilla, sour cream, and milk, and mix until well combined.
- At first it might look crumbled or broken (R picture), especially if some of your ingredients were not room temperature. But if you keep mixing, it will smooth out.
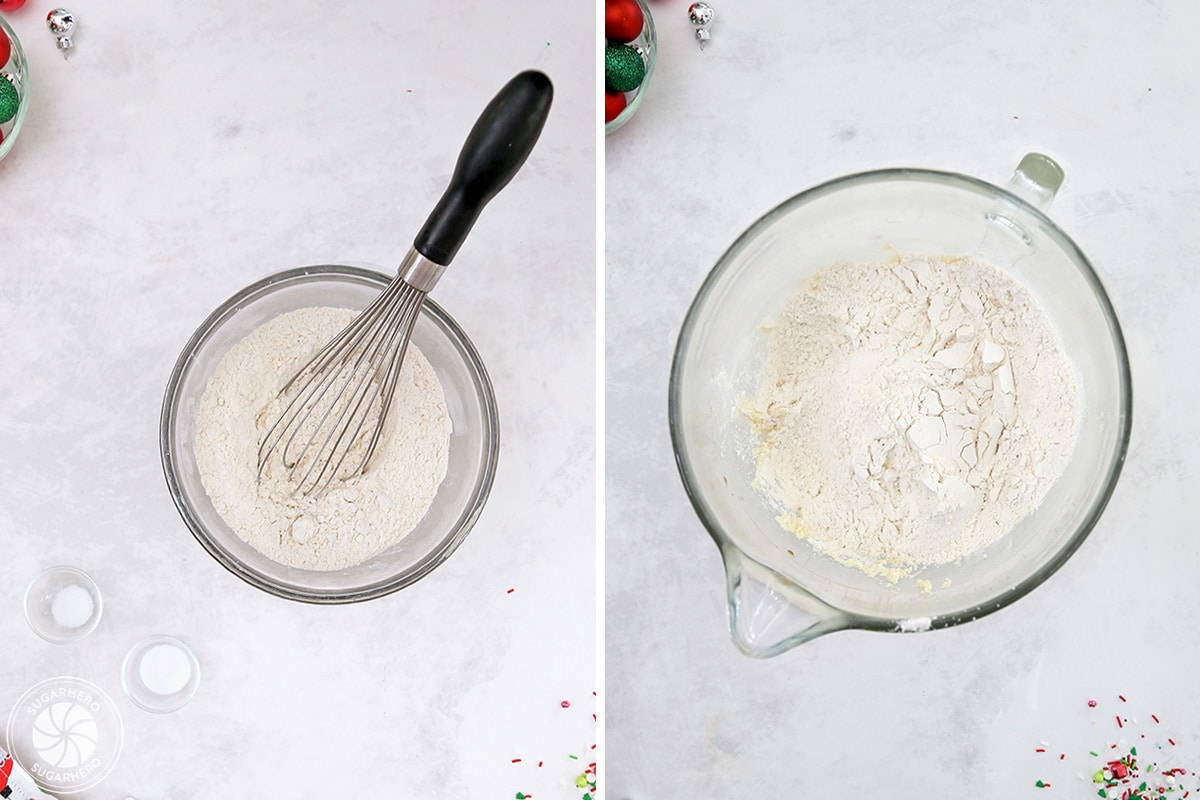
- Whisk together the flour, baking soda, and salt in a small bowl.
- With the mixer running on low speed, stream in the flour until almost combined and just a few streaks of flour remain.
- Stop the mixer and finish mixing by hand, being sure to scrape the bottom and sides of the bowl well with a rubber spatula.
- Scoop the dough out into large 3-4 TBSP balls onto the baking sheets—you should get about 18 cookies from this recipe.
- Bake at 350 F for 16-18 minutes, until the cookies are puffed and just starting to take on color around the edges. The tops should still remain virtually colorless.
- Let them cool completely before frosting.
Make the Sugar Cookie Frosting
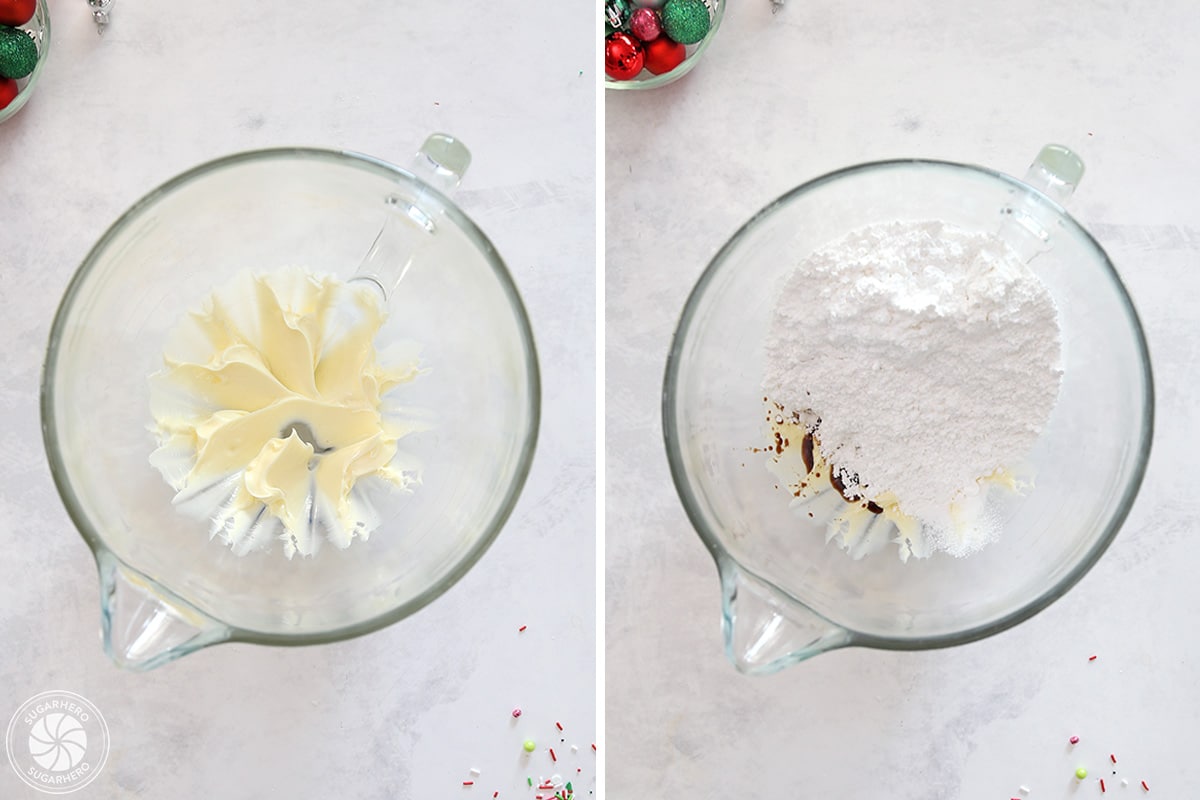
- Beat the butter with an electric mixer on medium speed for about 1 minute, until creamy and light in color.
- Add the powdered sugar, 2 TBSP of milk, vanilla, and salt, and mix well, until light and fluffy.
- If the frosting is too stiff for your liking, slowly stream in the remaining spoonful of milk a bit at a time, until you get a texture you like.

Candy Cane Cookies

Chocolate Peppermint Kiss Cookies


I made these tonight for my kids for Christmas. They are DELISH!! Not only were they so good it was kind of fun to make because everyone got to help frost them and then they added their favorite colored sprinkles. You won’t regret making these. Thanks for the recipe.
These came out so good!! I’m making my second round of them today (I even made the first tray a little too small and they still came out perfect). I’m not usually an icing on cookies fan, but you’re right, that completely makes these cookies. Have an amazing holiday!
i just made these..i could not get my round…to sticky to roll in a roll, so mine was ok…taste good…thank u…
Just made a batch of these. I’m going to leave them plain because I have no icing sugar to make the frosting with. I’m surprised any of them made it to the oven…the batter was sooooo good! 😉
I made a few adjustments, only because I didn’t have everything on hand. I subbed the sour cream with vanilla Greek yogurt and cut the amount of vanilla down to 1 1/2 tsp, and I didn’t have any creamer so I used half and half (10% cream, usually used for coffee). The babies are baking now…the house smells incredible. I’m sure they’ll be delicious.
Elizabeth, thanks for being just a little bit awesome! 😀
Delicious. Amazing. Tasty, easy to make. Have shared with anyone who will listen.
Hi! I love your recipes, I used the Pull Apart Wreath Cake as my Christmas cake last year which went really well!
Because I live practically in the middle of nowhere, is the sour cream necessary or can it be substituted?
Thank you so much, Em! I love to hear that. You can definitely substitute the sour cream. My first choice would be thick green yogurt (plain or a neutral flavor like vanilla) but whipping or heavy cream would also work. I think the cream option might make the cookies a bit flatter, but there might be no change, and they’ll still taste wonderful. 🙂
I loved these cookies and my co-workers did too. I changed the way they were decorated to make Santa Bellies that I saw on Pinterest since the cookie kept this great puffed shape, I didn’t have to use the marshmallow to give the belly shape. Can’t wait to make them again this year. Though I need to use a different brand for red food coloring, the Wilton one I had didn’t give me the red I wanted and had to use almost the whole jar to get it as red as I did. Any suggestions on another company with better red food coloring would be appreciated.
Hey Mitzi, my preferred brand is Americolor the color you would want is super red. Also just to let you know colors deepen more over time in frosting so that is something to keep in mind. Thank you so much!
Elizabeth, Would you have a CHOCOLATE COOKIE version of this recipe ?
In Our Family, CHOCOLATE Is a Food Group.
Hey Joan, I don’t have one currently. However that sounds delicious and I am right there with you and your family! That is something I will want to work on and get out there! I will say though, these may not be sugar cookies but they are chocolate and stay soft a lot like sugar cookies do. They do have a gingerbread taste but they are delicious! https://www.sugarhero.com/soft-chocolate-gingerbread-cookies/ If you give them a try I would love to hear how it goes!
Loved the big soft sugar cookies. Flavor is amazing,but mine did not spread at all.. I am going to try again, maybe with less flour. Any reason as to what happened or what I did wrong?
Family still ate them all. Thanks for great recipes.
Cookies are really good. But I make golf ball size, which makes 33 cookies and bake for 10 minutes. They are perfect. I think, looking at your video, your cookie size is an ice cream scoop or tennis ball size..
Hey Nancy, glad you like the recipe! Sorry for the confusion, I guess golf ball could have been a bit misleading. I will have to change that so it is more clear. Thanks so much!!
can this recipe be doubled or tripled?????
Hey Debra, You betcha! On the top of the recipe card there is actually a servings section and you can change it to how ever many cookies you need. It will do the math for you and everything! I would love to hear how it goes once you give it a try! Thanks!