

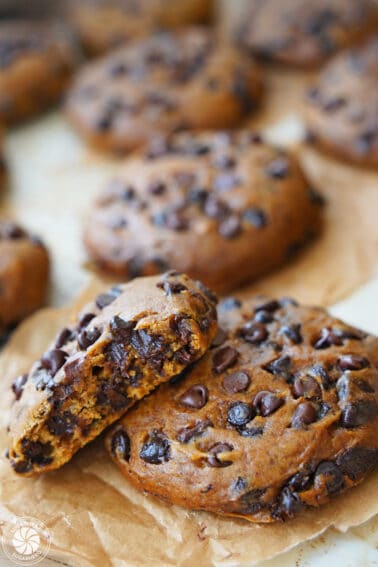
These Brown Butter Heart Cookies are a gourmet twist on sugar cookies! They have a deep, rich, caramelized taste, and are decorated with beautifully painted fondant designs that are also SUPER easy to make!

Brown Butter Sugar Cookies
At first glance, these simple hearts may look like standard sugar cookies, but they’re actually much more exciting. These roll-out cookies are made with brown sugar and brown butter, which gives them a caramelized, nutty, ever so slightly savory flavor.

The depth of flavor and the richness from the brown butter is especially important, since they’re topped with (cute! adorable!) fondant decorations. Fondant can quickly become too sweet if it’s not balanced out with other flavors, so pairing these toppers with a brown butter cookie base helps keep the fondant from becoming too cloying.
To deepen the flavor, this dough also contains brown sugar. Not only does it give the cookies a delicious caramel flavor, but it also produces a really tender dough, and helps the cookies stay soft for days!


Just look at those flecks of brown butter love!
The dough holds its shape beautifully during baking, and the resulting cookies are crisp around the edge and wonderfully tender in the center (I can’t hang with sugar cookies that are crisp all the way through.) I imagine this dough might work well as a tart crust, too, and you can bet I’ll be testing that hypothesis soon.

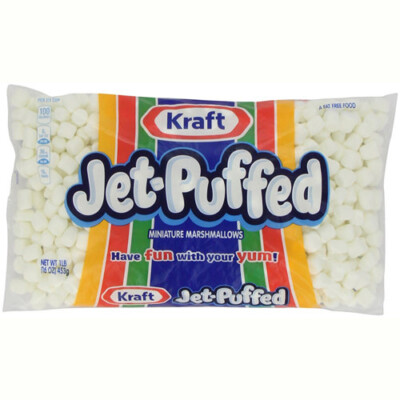
These cookies are topped with fondant plaques–I used homemade marshmallow fondant, but any type would work. Royal icing may seem like the obvious choice, but I wanted the top layer to be really clean and have perfect edges, and fondant seemed like the faster, easier option for a royal icing avoider such as myself. It’s also great at protecting the cookies and keeping them softer for longer periods of time.

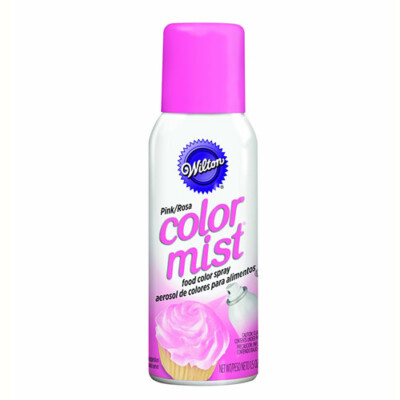
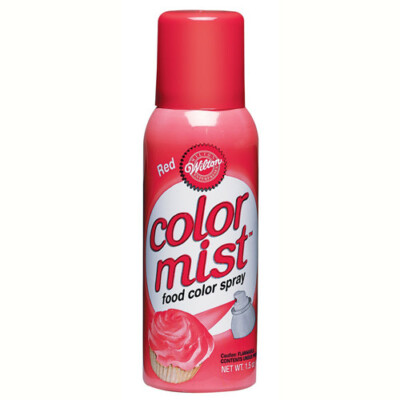
But enough about the components, let’s talk about this sexy paint job these cookies are sporting! It’s my favorite part of this recipe, and it’s SO easy to do, because they’re made with Wilton’s Color Mist sprays. and I love how it looks like they’ve been airbrushed, when really all it took was a $3 can of edible food spray from the craft store.
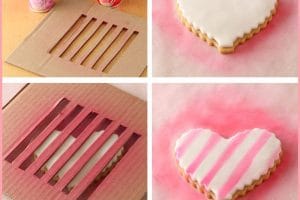
The ombre effect is the simplest. I first saw it done on the Sweet Sugar Belle blog, and there’s a great tutorial there if you’re interested in recreating the look. Basically, you just cover a portion of your cookies–I started about 1/2 inch down from the top–with a sheet of paper, and spray the rest of the cookie with a light mist of color.
Next, move the sheet up another 1/2-inch or so, and spray again, so the cookie gets a bit darker. Continue to move the sheet of paper up the cookie and spraying, creating gradually darkening layers of color. It looks fancy, but it seriously takes less than 5 minutes!

The gingham design also uses Color Mist sprays, for a quick and easy effect. Start by cutting thick horizontal lines–almost like bars–out of very stiff cardstock, or thin cardboard. You want to be able to really press it down on top of the cookie and keep the spray from sneaking underneath the stripes where it doesn’t belong.
Then lay your template at an angle across a cookie and spray. Switch the template to the opposite angle, spray again, and voila! Instant gingham. Here’s a photo tutorial showing how it’s done:

Also, with both of these designs, make sure that you cover your work station well! I ended up with a pink tinge to my entire tabletop and the surrounding floors, even though I thought I did a good job of covering them. Pink coloring belongs on cookies, NOT the soles of my feet.

There you have it–cookies with a fun and easy decorating trick! You can use these techniques with other shapes and colors, too, and if you experiment, I’d love to see what you come up with!
💗More Valentine’s Day Recipes
- Red Hot Love Cookies
- Emoji Cakes
- Valentine’s Day Cupcake Recipes
- Big Soft Sugar Cookies with Frosting (plus Video!)
- Truffle-Topped Heart Cake
- Box of Chocolates Cake

Valentine’s Day Sugar Cookies
Don’t miss our collection of the 10 Best Valentine’s Day Cookies – see the whole web story here!

Brown Butter Heart Cookies
Ingredients
For the cookies:
- 6 oz unsalted butter, (3/4 cup)
- 9.5 oz all-purpose flour, (2 cups + 2 tbsp)
- 2 tbsp cornstarch
- 3/4 tsp salt
- 3.75 oz brown sugar, (1/2 cup)
- 3.5 oz granulated sugar, (1/2 cup)
- 1 large egg
- 1 tsp vanilla extract
For the marshmallow fondant:
- 6 oz mini marshmallows, (about 3 cups)
- 12 oz powdered sugar, (3 cups)
- 4 tsp water
Instructions
To make the cookies:
- Place the butter in a medium saucepan over medium heat. Allow it to melt and come to a gentle boil. Continue to cook it, stirring occasionally and scraping the bottom of the pan, as it grows darker in color. After about 8-10 minutes it should be golden brown and fragrant, with brown bits on the bottom. Remove the pan from the heat and pour the butter into a large mixing bowl. Let it cool to room temperature.
- While you wait for the butter to cool, mix together the flour, corn starch, and salt in a small bowl. Set aside.
- Once the butter is cool, add the sugars to the mixing bowl and mix everything together on medium speed until fluffy and well-mixed. Add the egg and vanilla, and mix again. Finally, stop the mixer and add the dry ingredients. Mix together on low just until the drys are nearly incorporated and just a few streaks of flour remain. Finish mixing everything with a spatula, scraping the bottom and sides of the bowl.
- Divide the dough in half and press each into a thin disc, wrapping well with plastic wrap. Refrigerate until firmer but not hard, about 30 minutes.
- When you’re ready to bake the cookies, preheat the oven to 350 degrees Place a disc of dough between two sheets of parchment or waxed paper, and roll out until it is 1/4-inch thick. (I did not need to add any extra flour during the rolling process, but you may find a light dusting helps.) Cut out your shapes and place them on a parchment-lined baking sheet. Put the sheet in the freezer for 10 minutes before baking to help the cookies hold their shape.
- Bake the trays of cookies for 10-12 minutes, until the edges are golden and they have lost the raw shine in the middle. Let the cool on the baking sheet for 5 minutes, then remove to wire racks to cool completely. Re-roll scraps of dough together to cut out more cookies. If at any point it becomes too warm to work with, chill it briefly in the refrigerator until you can once again roll and cut cookies easily.
To make the fondant:
- Combine the marshmallows and water in a large microwave-safe bowl. Microwave for 1 minute, then stir well. If the marshmallows are not fully melted after this time, microwave again in short increments until it’s melted and smooth.
- Add the powdered sugar and stir well. The mixture will be sticky and stiff, and it will seem as if there’s too much powdered sugar. Dump the contents of the bowl out onto your work surface, and knead it together by hand. The fondant will gradually smooth out and incorporate more and more of the powdered sugar. If it is still too sticky once all of the powdered sugar is used, continue add small amounts until you get a smooth, pliable paste. Marshmallow Fondant can be made days in advance and kept, well-wrapped in cling wrap, at room temperature until ready to use.
- To top the hearts, dust a work surface with powdered sugar. Roll the fondant out until it is about 1/8-inch thick. Use the same cutter you used for the cookies to cut the fondant into shapes. Brush a cookie with a very thin layer of corn syrup, and press the fondant on top to get it to adhere. If desired, spray it with ColorMist spray in an ombre or checkerboard pattern.
- Let the food coloring dry before storing. Store cookies in an airtight container at room temperature for up to a week.
Measuring Tips
Our recipes are developed using weight measurements, and we highly recommend using a kitchen scale for baking whenever possible. However, if you prefer to use cups, volume measurements are provided as well. PLEASE NOTE: the adage “8 oz = 1 cup” is NOT true when speaking about weight, so don’t be concerned if the measurements don’t fit this formula.
Want to learn more about baking measurements and conversion?
Nutrition


Hi if brown butter isn’t available is there a substitute? Something that could work well will the fondant and the cookie reipe.
thanks Smita
Hi Smita, brown butter is just butter that you boil until brown, so if you have any butter available at all, you should be able to make this recipe! If not, you can use any roll-out sugar cookie recipe of your choice and decorate the cookies with the fondant as shown.
Love all these recipes and videos!!!
Hey Doris, Thank you so much! I appreciate your feedback!
I don’t usually bother with cut-out cookies, Elizabeth, but this recipe spoke to me. I made it and baked half the dough, to send cookies to my granddaughter for her birthday. I glazed them and sprinkled with various toppings rather than make the fondant. My husband, a/k/a Mr. Fussy, ate one and was surprised at how good it was; he thought it would be just another bland sugar cookie.
Question about the remaining dough: Okay to store in refrigerator until I bake them in c. 10 days, or should I freeze it?
Hey Marlene, Thank you so much, I really appreciate your feedback and was glad to hear it worked so well! As for the dough I think 10 days may be a little long. It isn’t that it will go back it just wont have the best of texture. Usually if its going to be longer than 4-5 days I freeze it. Thanks again! I love to hear that my recipes speak to people.
I just made the dough and it was crumbly. (made exactly as directed) It was difficult to roll out. Is there something I can try and do differently next time? (the weather is raining by the way if that makes a difference) Thanks for the help. I bake cookies all the time but I’ve never had this problem.
Hey Kimberly, I am sorry to hear that. Because of the way brown butter is made it is possible that you could have ended up with a little less liquid in the batch. That could be the reason they ended up being too dry and crumbly. I would love to help you troubleshoot in the future if you want to email me with more specifics. Thanks for your feedback, and I would love to hear if you try it again!
This recipe was amazingly delicious! My brown butter didn’t get the specks like yours though! But the flavor and ease of the dough was wonderful
I am so happy to hear it worked out for you! It sounds great. Thanks so much for your response!
I had the same problem as Kimberly with the crumbly dough. I suspect some “shrinkage” or evaporation because I let the butter boil for quite some time before it browned; I used a squat pot instead of a pan with a greater flat surface area for browning. Tasted phenomenal though. I haven’t iced them yet and will do that tomorrow but I suspect they may be a little too fragile; we went ahead and shaped the crumbly dough as best we could. 🙂 I may try to increase the butter next time. I like how the brown butter turned out in the squat pot versus our larger pan… Thanks for the delicious recipe!
Hey Miki, I am glad to hear you were able to make it work! I also love hearing that you are enjoying the recipe! That makes me so happy, I hope they frost well! Thank you for your feedback, I really appreciate it! Thanks again!
These look delicious, I love anything that has brown butter in it! Can these cookies be frozen once baked?
I had a question do I have to incorporate the corn starch. If I don’t have it could I add more flour?
Hi Nick, if you want to skip the cornstarch, you can sub with an equal amount of flour.
Can these cookies be made ahead of time and frozen? I’m looking for a brown butter cookies that don’t spread so I can make number 3 cookies and monster truck cookies for my son’s birthday but I’d like to be able to make them in batches and freeze. I plan on using some fondant decorating and some royal icing decorating.
Hi Renee! Your party ideas sound so cute. You can definitely make these in advance and freeze them until you’re ready to decorate. (I don’t recommend freezing decorated cookies.) I hope your party is amazing! Cheers!
Yummers! These cookies are perfect! I wet my hands to roll out the last of the dough when it got crumbly from the flour. They didn’t spread at all from the 10min freezing! Time to try making the fondant!
Hi Andrea! Thanks for the comment. So glad you are enjoying the recipe. Happy Valentine’s Day!