
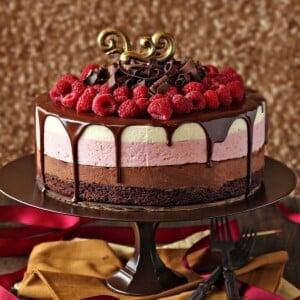
This stunning Chocolate Raspberry Mousse Cake has a moist, fudgy brownie base, three layers of light mousse—chocolate, raspberry, and vanilla, and then a glossy topping of chocolate and a tangle of raspberries and chocolate curls on top. Perfect for any occasion!

Stunning Chocolate Raspberry Mousse Cake
I don’t go around calling things “food porn” on a regular basis, so instead, can we just agree that this cake is, for lack of a better term, a sexy beast? It has a moist, fudgy brownie base, three layers of light mousse—chocolate, raspberry, and vanilla, and then a glossy topping of chocolate and a tangle of raspberries and chocolate curls on top. Oh, behave!

I was so obsessed with the honey mousse I made for these Honey Pots with Honey Mousse, I couldn’t stop thinking of ways to use that quick and easy mousse in other recipes. It turns out it’s easy to adapt that mousse for other flavors, so I made a few tweaks and soon found myself with chocolate, raspberry, and vanilla bean variations. You’ll love it—no separating eggs, no whipping whites or yolks, and no stress.
What kind of pan should I use?
You need a 9-inch pan with sides at least 3-inches tall, and the ability to remove the bottom. Either a cake pan with a removeable bottom or a 9″ springform pan will work.

The mousse is firm enough to hold up in layers and cut cleanly when it’s refrigerated, but as it comes to room temperature, it develops the most delicious silky, pillowy texture. It’s the perfect contrast to the chewy, fudgy brownie base, and the juicy berries embedded in the raspberry layer!
How to unmold a mousse cake so it has neat, clean edges:
I used acetate cake collars to line the cake pan and get clean lines when unmolding the mousse. They’re inexpensive and very handy for lots of kitchen projects, but if you don’t have them, you can use waxed paper or parchment paper instead. The cake will still unmold, but the outside might not be as neat and clean.

Of course I couldn’t let my tart leave the house naked, so it’s covered in a glossy chocolate ganache that drips just a bit down the sides. You could also cover the sides completely in ganache, so the four layers are a fun surprise when you cut the cake open. I can never resist showing off, so I like to put them on display, but perhaps you are less of a braggart than I am.

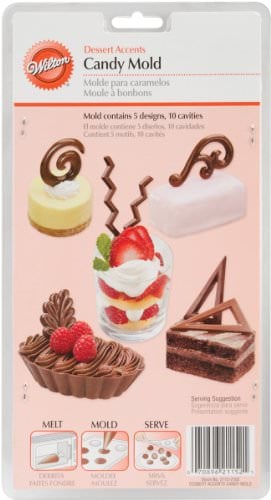
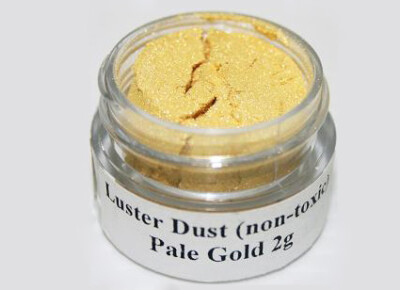
Finish the tart with a big pile of fresh raspberries and chocolate shavings. The gold decoration (or “doodad,” as we call them in the biz) was made using this Wilton chocolate mold and then dry-brushing it with gold luster dust. Totally unnecessary, totally cute. (That should be the tagline of my site, yes?)
Enjoy!

💡FAQs
If you can’t find quality fresh raspberries, you can use frozen berries to make the puree. Don’t use frozen berries in the mousse layer or to decorate on top. They won’t look pretty and will change the texture of the mousse.
Another solution would be to substitute fresh strawberries in place of raspberries.
The most common reason whipped cream collapses is because it has been overworked (whipped for too long). Perfectly whipped cream should have the texture of shaving cream — thick, with a lot of body. It should hold peaks but still have some softness to it. Stop whipping the cream just before stiff peaks start to form. This will give you a little more wiggle room when you start folding the whipped cream into the mousse.
Most likely, the chocolate is a little too cool when you start adding the whipped cream. When the chocolate comes in contact with the cream, it starts setting prematurely. I recommend mixing them together when the chocolate is a bit warmer. The chocolate should be about body temperature, or slightly above, to mix properly with the cream. It’s definitely a balancing act, because you also don’t want the chocolate to be too hot and melt the cream.
You can make your cake 2-3 days in advance. Wrap it well and store it in the fridge. Thankfully the mousse layers won’t collapse since they are made with gelatin. It really helps with stability and longevity. However, with time the mousse will begin to dry out which eventually creates a less appetizing texture.
You can also make the cake several days in advance and freeze it. You’ll need to wrap it well, or cover the pan with a lid, so that it doesn’t dry out. Thaw it overnight in the fridge the day before you plan to eat it.
Whether you store it in the fridge or freezer, I also recommend waiting to dress it with the ganache, whipped cream, and toppings until the day you plan to eat it. Happy Baking!
🍰 More Cake Recipes You’ll Love
Don’t miss our collection of Fun Valentine’s Day Dessert Ideas – see the whole web story here!
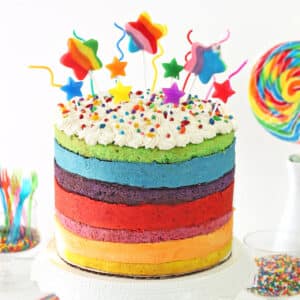
Rainbow Mousse Cake

Orange Mousse with Cranberry Sauce
Chocolate Raspberry Mousse Cake
Ingredients
For the Brownie Layer:
- 3.33 oz all-purpose flour, (3/4 cup)
- 2 oz unsweetened cocoa powder, (2/3 cup)
- 1/2 tsp salt
- 1/2 tsp baking powder
- 4 oz unsalted butter
- 7.75 oz granulated sugar, (1 cup +2 tbsp)
- 2 large eggs, large, at room temperature
- 2 tsp vanilla extract
For the Chocolate Mousse:
- 9 oz semi-sweet chocolate, finely chopped
- 1 3/4 cups heavy cream, divided use
- Pinch of salt
- 2 tsp unflavored powdered gelatin
- 2 TBSP water
For the Raspberry Mousse:
- 1 1/2 cups fresh raspberries, see Note below
- 9 oz white chocolate, finely chopped
- 1 1/2 cups heavy cream, divided use
- Pinch of salt
- 2 tsp unflavored powdered gelatin
- 2 TBSP water
- pink gel food coloring, optional
For the Vanilla Mousse:
- 9 oz white chocolate, finely chopped
- 1 1/2 cups heavy cream, divided use
- 4 TBSP honey
- Pinch of salt
- 2 tsp unflavored powdered gelatin
- 2 TBSP water
- 2 tsp vanilla bean paste, can substitute vanilla extract
To Finish:
- 4 oz semi-sweet chocolate, finely chopped
- 4 oz heavy cream
- 1 pint fresh raspberries, see Note below
- Chocolate curls , or other decorations
Instructions
To Make the Brownie Layer:
- Preheat the oven to 350 F. Line a 9-inch cake pan with parchment and spray well with nonstick cooking spray. Whisk together the flour, cocoa powder, salt, and baking powder in a small bowl. Set aside for now.
- Cube the butter and place it in a medium saucepan over medium-low heat. Stir occasionally as the butter melts. Add the sugar and stir it into the melted butter until combined.
- Remove the pan from the heat, and let it cool to lukewarm. Once it has cooled, add the eggs, one at a time, whisking well between each addition. The mixture will start out grainy, but as you add the eggs, it will become shiny and smooth. Whisk the vanilla in. Finally, add the dry ingredients, and stir them in with a spatula.
- Scrape the brownie batter into the prepared pan, and bake it for 22-24 minutes, until a toothpick comes out with just a few moist crumbs attached. Cool the brownie layer completely before proceeding.
To Make the Mousse Layers:
- Prepare your pan. You need a 9-inch pan with sides at least 3 inches tall, and the ability to remove the bottom. Either a cake pan with a removeable bottom or a 9" springform will work. Line the inner wall with an acetate cake collar or strip of aluminum foil, parchment paper, or waxed paper. Make sure the acetate collar or other lining is long enough so that it overlaps itself. Also, if you are using foil/parchment/waxed paper, make sure you cut the strip tall enough to extend at least an inch over the pan’s sides, since the cake is about 4 inches tall.
- Place a cake cardboard in the bottom of the pan, then carefully place the baked brownie on top of the cardboard.
- Prepare the chocolate mousse layer: combine the chocolate, 3/4 cup of cream, and salt in a microwave-safe bowl. Microwave in 30-second increments, stirring every 30 seconds, until the chocolate has melted and the mixture is smooth. Pour it into a large bowl, and let it cool to slightly above room temperature, stirring occasionally.
- While you wait for the chocolate mixture to cool, prepare the gelatin. Whisk together the gelatin and the cold water in a small bowl, and set it aside to let the gelatin absorb the water. When the chocolate is sufficiently cooled, microwave the bowl of gelatin for 15 seconds, until it is melted. Then whisk the melted gelatin and chocolate together.
- Whip the remaining 1 cup heavy whipping cream to just before firm peaks form (see FAQ for more tips). Fold half of the whipped cream into the warm chocolate. Once it’s incorporated, gently fold in the remaining whipped cream. Scrape the mousse on top of the brownie, and spread it into an even layer. Refrigerate the cake for 25 minutes, until the mouse has started to set and is firm enough that a second layer can be added.
- Prepare the raspberry mousse layer: make a quick puree by blending 1/2 cup fresh raspberries in a blender or food processor. Pour them through a fine mesh strainer to remove the seeds, and measure out 1/4 cup raspberry puree. Extra puree can be saved and used for other purposes.
- Combine the white chocolate, raspberry puree, 1/2 cup heavy whipping cream, and salt in a microwave-safe bowl. Continue to make the raspberry layer the same way you made the chocolate layer, by melting and cooling the chocolate mixture to about 95-100 degrees C, whisking in melted gelatin, and folding in whipped cream. Add a few drops of pink food coloring to boost the pink color, if desired. At the very end, stir in the remaining 1 cup of fresh raspberries and pour the mousse over the chocolate mousse layer. Spread it into an even layer, and refrigerate again for about 25 minutes.
- Prepare the vanilla bean layer: combine the white chocolate, 1/2 cup heavy whipping cream, honey, and salt in a microwave-safe bowl. Continue to make this layer the same way you made the previous two layers by allowing the chocolate mixture to cool, whisking in the gelatin, and folding in the whipped cream. After completing those steps, stir in the vanilla bean paste and pour the vanilla mousse over the raspberry mousse layer. Refrigerate to set the mousse layers very well, at least 4 hours or overnight.
- To finish the cake: push the bottom out from the pan, or unhinge the sides, and unwrap the acetate strip. Transfer the cake to your serving platter. Make a quick chocolate ganache by putting the chopped chocolate in a small bowl and heating the cream to a simmer. Pour the hot cream over the chopped chocolate and whisk gently until the chocolate melts and you have a smooth, shiny mixture.
- Pour the ganache over the top of the cake, and use a spatula to nudge it right to the edge and over in evenly spaced drizzles. Don’t worry if the top is not smooth—it will be covered up! Add the fresh raspberries and chocolate curls on top of the cake. Refrigerate to set the ganache.
- For the cleanest slices, cut the cake when it is well chilled. Use a large sharp knife, and wash it frequently between cuts. For the best taste and texture, allow the cake slices to sit at room temperature for 10-15 minutes before serving.
- Store Chocolate Raspberry Mousse Cake, well-wrapped, in the refrigerator for up to a week.
Recipe Notes
Measuring Tips
Our recipes are developed using weight measurements, and we highly recommend using a kitchen scale for baking whenever possible. However, if you prefer to use cups, volume measurements are provided as well. PLEASE NOTE: the adage “8 oz = 1 cup” is NOT true when speaking about weight, so don’t be concerned if the measurements don’t fit this formula.
Want to learn more about baking measurements and conversion?
Nutrition
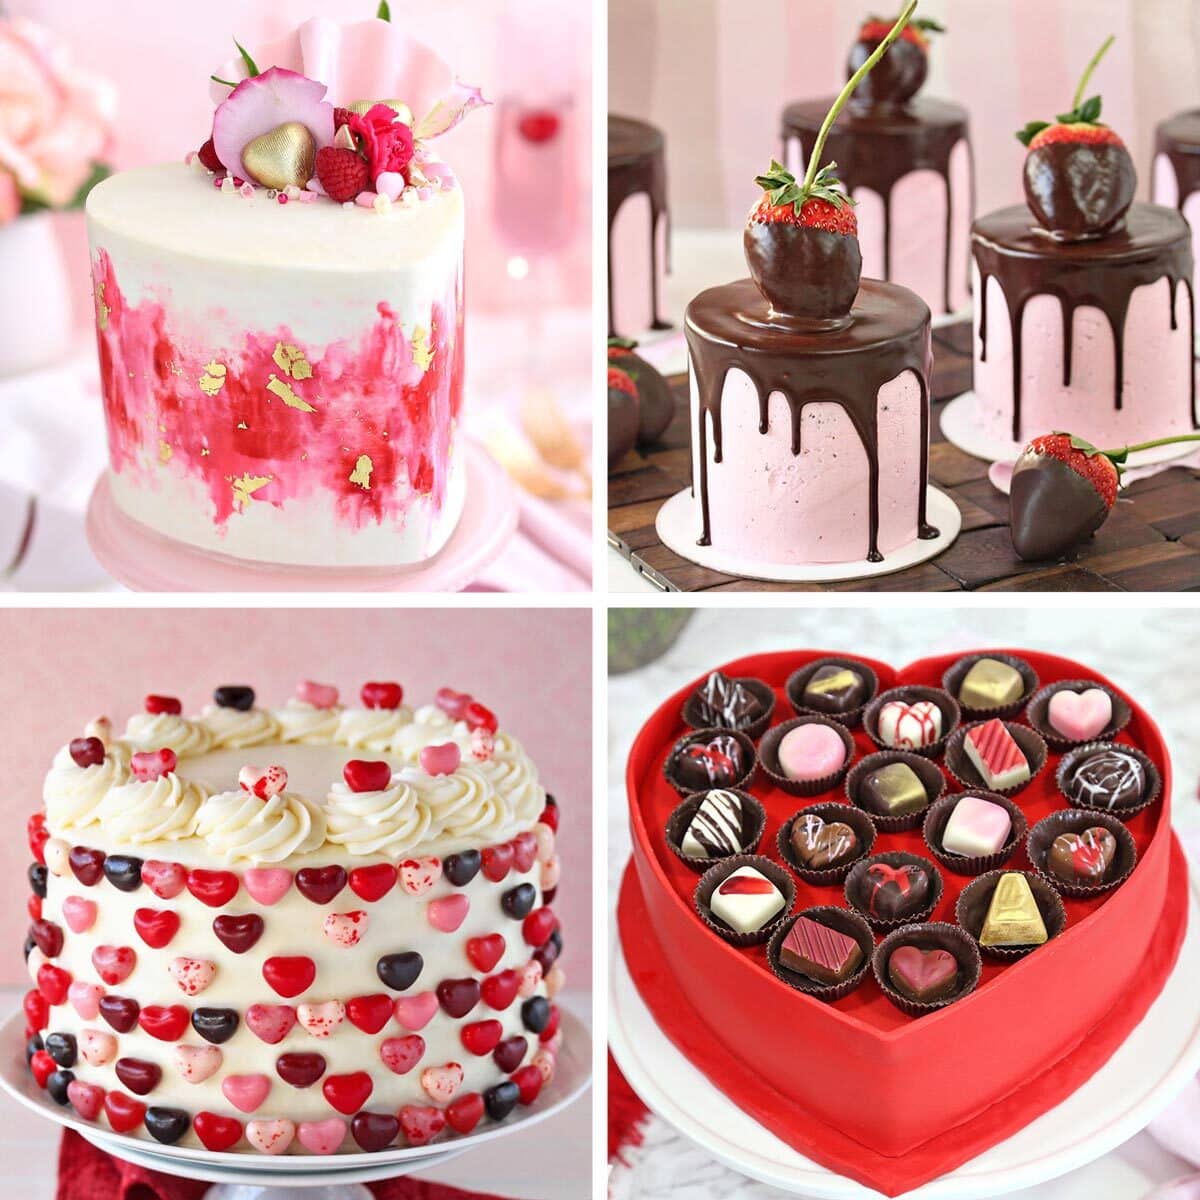
THE BEST VALENTINE’S DAY CAKES
Check out our collection of the 27 best Valentine’s Day cake ideas — click here to get all the recipes!


Very pretty cake and easy to make but way too sweet can’t taste anything except white chocolate:( Heavy whip cream made it so heavy and dense.
Hi Anna. Thank you for your honest review. Sorry it wasn’t to your liking.
Made this
Awesome flavour
Beautifully presentation
Delicious cake recipe!! The brownie base is so good that I will just double it when I’m making brownies
Hello Anastasia! I’m so glad you enjoyed the recipe. It’s definitely a fan favorite. Great idea for making brownies!!
I have used this recipe for years! Every time it is a show stopper and I get oodles of compliments.
I have over the years done mini versions in both one person spring forms and parfait cups / mousse cups. This is a great addition to my home recipe notebook
Hi Cristie. Thank you so much for your recipe review and ideas. I’m so glad this has become a favorite for you. Happy baking!
Hands down the best cake ever! Hard to fail too.
Hi Clare! So glad you enjoyed this recipe. It’s definitely one of my favorites. Thanks for leaving a rating. Cheers!
Hi! I’m just wondering why the brownie layer isn’t cooked in the same springform pan as the rest of the cake? I was thinking to do it that way so everything is uniform but wasn’t sure if there was a reason for not doing it
Hi Sarah. Good question. The mousse layers of the cake are not cooked in the oven. They actually need to be refrigerated for several hours to set. So, you make the brownie layer separately so that it is fully cooked (and cooled!) before layering the mousse on top. I hope that helps to clarify the process. Let me know if you still have more questions. All the best to you.
I bake a lot and I think this may be the best tasting cake I’ve ever made. The raspberry layer is what dreams are made of. I’ve have gotten out of bed two nights in a row to sneak some from the fridge. I lied and told my family it was all gone so I could take the last couple pieces to work with me lol. Never thought I would like a mousse cake this much, but here we are!
Jessica, you are my kinda girl! I’ve been known to sneak a slice from time to time as well. LOL. So glad you enjoyed the recipe! Cheers!
Hello. With what I can replace the white chocolate? I did this cake in the past and is very good. Now I want to make the mousse but not with white chocolate. Is there something to replace it? Thank you!
Hi Kari! In the cake, the white chocolate layer is flavored with vanilla. You could still use white chips, but flavor it with almond extract. Or, you could use milk chocolate chips and make a sweeter, lighter layer of chocolate mousse (you could also flavor it with almond . . . I think almond, chocolate and raspberry blend together really well. Honestly, you can replace the white chocolate chips with any other high quality baking chip flavor you think would pair well with chocolate and raspberry. Does that help? Let me know if you have more questions.
I’ve made this cake a few times a year because everyone loves it so much! Fresh home grown raspberries and some real white chocolate instead of the “chips” really take it to another level
Hi Ruby!! Thank you so much for sharing! We love hearing reviews. Thanks again!
Hi, this cake looks incredible and I want to make it for a dinner party. I have a question about using cups. I read you piece on using cups for measuring liquids. Am I right in thinking that the cream and pureed raspberries should weigh 8 fluid onz per cup?Hope I’m making sense.
Hi Emma! You are on the right track. Let me see if I can clarify it for you a little more. Typically when we learn to cook at home or at school we are told that 1 cup = 8oz. That’s true for a lot of ingredients but can be problematic for some ingredients. For example, if flour is compacted you can fit way more than 8oz of flour into a 1 cup measuring cup. Adding too much flour to a cake will make it dense and heavy. In this example, weighing the flour is a much better option to ensure that you don’t add too much flour to the batter. Liquids work the same way. Cream is safe to measure in cups because 8 fl oz = 1 cup (just like we are taught in school). The berry puree is a little trickier because depending on how fine the puree is or how many seeds/water were in the berries, the puree might be heavier or lighter. Other than making a batch of puree and weighing it, I don’t have an exact weight measurement to give you. However, this recipe is set up to use a set weight of raspberries to make the puree. If you start with the 9oz of raspberries the recipe asks for, your puree should turn out to be the correct amount for the recipe. If you are curious about knowing how much the puree weighs, you can always test it out just for fun. I hope that helps. Please don’t hesitate to reach out if you’ve got follow up questions. All the best to you.
I’m going to make this for christmas dessert this year – how far ahead can I make it do you think? (I’ve made this for years too! Such a show stopper)
Yay! So glad to hear that it’s a beloved favorite for you! 🙂 In general mousse cakes freeze very well, so I’d say you can safely make it a few weeks in advance and you’ll be fine. I recommend letting it set completely in the refrigerator, then wrapping it well in several layers of plastic wrap, then freeze. (You can unmold it from the pan if you need the pan, or leave it in the pan for extra protection in the freezer if you don’t.)
You can ganache it before or after freezing. If possible, my recommendation would be to do it after – let the mousse cake defrost in the refrigerator overnight, then add the ganache the day of serving. The freezing/defrosting process will cause condensation to form on the ganache that can mar its shiny texture. It will still taste the same, but visually it will be a bit different. (But that’s nothing a few more chocolate curls can’t cover, haha!) Hope this helps and of course feel free to reach out with any more questions. I’d love to hear how it goes this year!
Please use the standard formatting which calls for Tablespoon to be capitalized and teaspoon to be lowercase. I saw tablespoon for both gelatin and liquid used for blooming. It mostly turned out ok anyway, but the top layer was more like pudding and was too sweet. In addition, the ganache was too stiff and didn’t drip properly. And it was still an impressive-looking cake, but after spending all day on it and $85 on good chocolate for it, it was nonetheless a disappointment to me.
Hi Anne Marie. Sorry you had some hiccups with the recipe. I know how frustrating it can be to spend all day trying to make a dessert and not have it turn out the way you were hoping. I will look into your suggestions for the recipe.