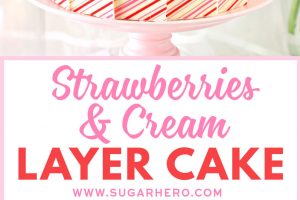
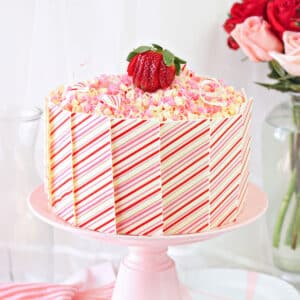
This Strawberries and Cream Layer Cake is a moist strawberry cake full of whipped cream and fresh berries. Decorated with white chocolate panels and curls, it’s a real show-stopper!

Homemade Strawberry Cake
Strawberry cake is a flavor that can be tough to get right! Adding too many fresh strawberries or strawberry puree runs the risk of producing a cake that is dense and gummy. Strawberry extract and strawberry cake mixes can work, but can also quickly veer into “artificial flavor” territory if you’re not careful. What’s a strawberry cake lover to do?

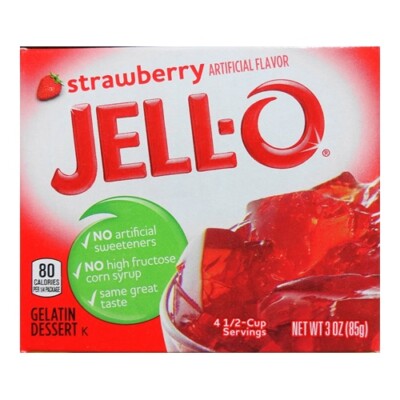
To solve the great strawberry dilemma, this strawberry cake recipe uses two forms of strawberry for flavor. It calls for strawberry puree, made from real berries, to give the cake a fresh, authentic taste. But it also uses a bit of strawberry Jell-O to boost the berry flavor.
Using too much Jell-O, or using the flavored gelatin exclusively, would make the cake taste too “fake.” But using it in combination with the berry puree produces a cake that’s soft and moist, with a bold, vibrant, realistic strawberry flavor. It’s the best of both worlds!

How to Make A Stable Whipped Cream Filling
There are lots of fresh berries stuffed in this cake too, if you can see them peeking out of the fat whipped cream layers. I used my favorite vanilla bean paste in the whipped cream—there is nothing better than seeing all those specks of vanilla beans in the whipped cream!
I stabilized the inner whipped cream filling with just a little (unflavored) gelatin. I like to either use a stabilizer product like Whip It (which is basically corn starch) or gelatin when I’m filling and frosting a cake with whipped cream. I like my layer cakes to slice cleanly and have a bit of staying power at room temperature, so stabilizing wimpy whipped cream is a must.

This cake is lovely on its own, and would work well with a simple covering of whipped cream or buttercream. But if you want to go all-out and add the white candy panels like I did, you’ll want to pick up some white candy coating and perhaps a chocolate transfer sheet. (I can’t find the exact one I used online, but I think this red heart version would be cute!) Full instructions for making the panels are down below in the recipe card.

In my experience, if you stick the panels on the freshly-frosted cake, before it’s had a chance to really set in the fridge, they’ll stick nicely and you won’t need to do much to secure them (unless you’ll be traveling with the cake or something.) But if you do have trouble with getting them to stay, wrapping the outside of the cake with a decorative ribbon is beautiful and effective!

It goes without saying that this isn’t the easiest cake to cut neatly, since removing one slice sends an avalanche of curls down Mount Cake. But if you can get over losing half of your beautiful curls to the plate, you’ll be rewarded with a delicious dessert. It’s fresh and springy and oh-so-romantic. This is perfect for Valentine’s Day, of course, but would also make a lovely dessert for birthdays, showers, Easter, or Mother’s Day!

If you want a double dose of strawberry flavor, you can pair this cake with a strawberry buttercream, like in this Chocolate-Covered Strawberry Cake recipe!
💗More Layer Cakes You’ll Love:

Strawberry-Dusted Shortbread Stars
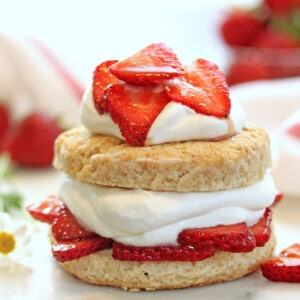
Grown-Up Strawberry Shortcake
Don’t miss our collection of the 10 Best Valentine’s Day Cakes – see the whole web story here!
Strawberries and Cream Layer Cake
Ingredients
For the Strawberry Velvet Cake:
- 4 oz unsalted butter, (1/2 cup), at room temperature
- 4 oz vegetable oil, (1/2 cup)
- 14 oz granulated sugar, (2 cups)
- 3 oz powdered strawberry gelatin, like Jell-O brand (not sugar-free variety)
- 3 large eggs, at room temperature
- 1 tsp vanilla extract
- 12.75 oz all-purpose flour, (3 cups)
- 1 TBSP baking powder
- 2 tsp salt
- 8 oz buttermilk, (1 cup)
- 4 oz fresh strawberry puree, (1/2 cup), See Note below
For the Whipped Cream and Assembly:
- 2.5 tsp unflavored powdered gelatin, (1 envelope, I like Knox brand)
- 3 TBSP water, cold
- 3 cups heavy cream, cold
- 1/2 cup powdered sugar
- 2 tsp vanilla bean paste, or 1 TBSP vanilla extract
- 1 lb fresh strawberries, washed, dried, hulled, and chopped into small pieces
For the Optional Decorations:
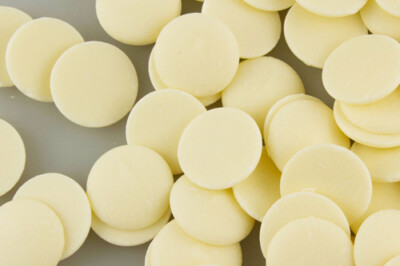
- 8 oz white candy coating melts, I like Merckens brand
- Chocolate transfer sheet, (at least 10×16 inches – if smaller use two sheets)
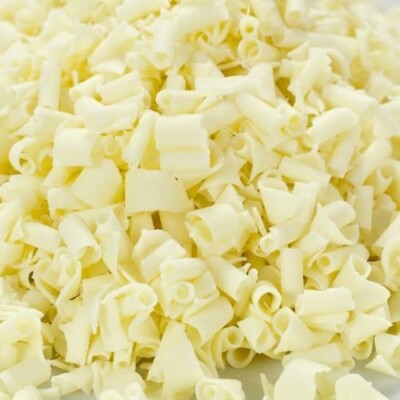
- 6-8 oz white chocolate curls, or pink chocolate curls
Instructions
To Make the Strawberry Velvet Cake:
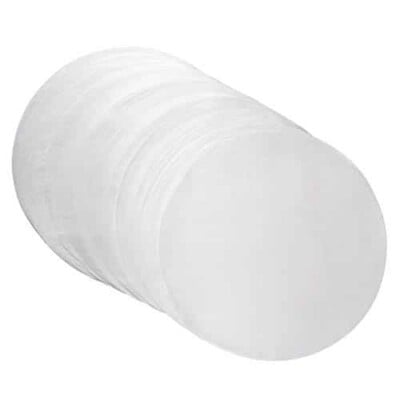
- Preheat the oven to 350 F. Line four 8″ round cake pans with parchment paper, and spray the pans with nonstick cooking spray. (9″ round pans can also be used, you will just have thinner cake layers and will need to reduce the cooking time a bit.)
- Combine the butter, oil, granulated sugar, and gelatin in the bowl of a large stand mixer. Mix on medium speed with the paddle attachment until light and fluffy. Add the eggs in one at a time, mixing well after each addition, then add the vanilla.
- Sift together the flour, baking powder and salt in a medium bowl, and in a separate bowl mix the buttermilk and strawberry puree together.
- With the mixer running on low speed, add a third of the dry ingredients and mix until just a few flour streaks remain, then pour in half of the buttermilk. Continue to alternate adding dry and wet ingredients, ending with the drys. Stop right when the flour is mixed in.
- Finish mixing the batter with a rubber spatula, stirring around the bottom and sides of the bowl to make sure that all of the stray flour is incorporated. Divide the batter between the prepared pans. If you have a kitchen scale, each pan should get 13.5 oz of batter.
- Bake the cakes at 350 F for about 30 minutes, until they start pulling away from the sides and a toothpick inserted into the center comes out clean. These cakes won't dome much, so you won't be able to tell from how much they've rise—better to use the toothpick test here.
- Let them cool completely before assembling the cake. They can be made in advance, wrapped well in plastic wrap, and stored in the refrigerator for up to 5 days or in the freezer for up to 4 weeks. If frozen, let them partially defrost before assembling.
To Make the Whipped Cream and Assemble:
- In a small bowl, whisk together the powdered gelatin and the cold water, and let it stand until the gelatin absorbs the water. Once absorbed, microwave the bowl for 10-15 seconds, until the gelatin melts. For this recipe, it should be melted but barely warm—certainly not hot. Let it cool if it is too warm.
- Microwave 1/3 cup of cream for 10-15 seconds, until it is room temperature. Whisk the room temperature cream into the gelatin and set aside for just a moment.
- In the bowl of a large stand mixer fitted with a whisk attachment, add the remaining 2 2/3 cups of cold cream, the sugar, and the vanilla bean paste or extract. Whip the cream with the sugar until it starts to thicken and the beater leaves traces in the cream.
- Pour in the cream and gelatin mixture, and continue to beat until the cream forms stiff peaks. Be careful not to overwhip the cream and cause it to separate. This cream will get stiffer as it sits, so it should be used to decorate and assemble the cake immediately.
To Assemble the Cake:
- Place one cake round on a cardboard cake round, and top it with a generous cup of whipped cream. Use an offset spatula or knife to spread the cream evenly to the edge of the cake. Top the cream with a third of the fresh strawberries, keeping them away from the very edges of the cake. Press down gently to embed them in the cream.
- Press a second cake round on top, and repeat layering the cream and strawberries. After all the cake layers are added, spread the remaining cream over the top and sides of the cake. If you follow my decorating suggestions the cream will be covered by chocolate panels and chocolate curls, so it doesn’t have to look pretty, but try not to have any bare patches since the chocolate will need something to adhere to.
- Press the chocolate panels into the sides of the cake, overlapping them slightly. They should stick to the whipped cream, but if for some reason they aren’t stable, consider tying a ribbon around the outside of the cake to stabilize them and add a pretty touch. Sprinkle chocolate curls on top of the cake. Refrigerate the cake for at least an hour, so that the whipped cream can firm up and the cake will be less messy to cut. Store the cake in the refrigerator for up to 5 days.
To Make the Optional Chocolate Panels:
- If you want to make the optional chocolate panels, first cut your 10×16-inch transfer sheet in half lengthwise, so that you have two 5-inch tall long strips. If there is a border around your sheets, cut it off so the pattern goes to the very edge. Set them rough side up on a long sheet of parchment or waxed paper.
- Melt the white chocolate coating in a bowl in the microwave, stirring after every 30 seconds so it doesn’t overheat.
- Pour the coating across the top of the two strips. Use a metal offset spatula to spread it in an even layer across the tops of the transfer sheets, extending past the edges so every bit of the sheets are covered. Carefully lift up the chocolate sheets and scoot them to a clean section of parchment—this will make sure that the sheets have clean edges all around, and it’s easiest to do before the coating starts to set.
- Let them sit for another 3-4 minutes, so that the coating has begun to set but is not yet hard, and cut your chocolate panels. Decide how wide you want your panels to be—I went with panels a little less than 2″ wide. Using a large sharp chef’s knife, press the knife down into the chocolate to cut it into rectangles. If you find that a large amount of chocolate is sticking to the knife, or is being “dragged” through the cuts, wait another minute or two for the chocolate to set further. After you have made the cuts, let the chocolate set completely at room temperature.
- Once set, carefully peel the chocolate off of the transfer paper. The design will be transferred onto the rectangles, and you’re now ready to use them to decorate your cake!
Recipe Notes
Measuring Tips
Our recipes are developed using weight measurements, and we highly recommend using a kitchen scale for baking whenever possible. However, if you prefer to use cups, volume measurements are provided as well. PLEASE NOTE: the adage “8 oz = 1 cup” is NOT true when speaking about weight, so don’t be concerned if the measurements don’t fit this formula.
Want to learn more about baking measurements and conversion?
Nutrition

THE BEST VALENTINE’S DAY CAKES
Check out our collection of the 27 best Valentine’s Day cake ideas — click here to get all the recipes!


I want to make this cake for my daughter this weekend but, can you clarify how much unflavored gelatin to use? You say “1 tsp powdered unflavored gelatin (2 1/2 packets)” but I found that the Knox Gelatine website says that 1 envelope = 7 g = 2 1/2 teaspoons; how much gelatin is exactly needed, 1tsp or 2 1/2 packets?
Hey Elida, I’m so sorry I had it backwards! It should be 2 1/2 tsp or one packet. I will make sure to change that. I hope that helps, if you have anymore questions be sure to let me know! I would love to hear how it goes and see pictures!
Everything sounds so yummy ,want to try this recipe ,well all of them really, thanks for the recipes.
Hi Marie, I am so glad to hear it! I hope you do try some, and enjoy them as much as I do! Thank you!
Can you use frozen strawberries in the place of fresh ones?
Hi Janice! Yes, you can. I would defrost the frozen strawberries and drain the excess liquid before using them. 🙂