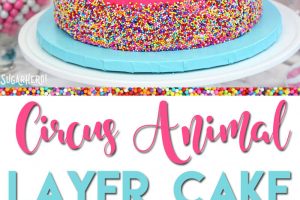
This Circus Animal Layer Cake is big and bright, with funfetti cake layers, chopped up circus animal cookies inside, and a cool upside-down ganache drip decoration!

This cake is a LOT, in the best way possible. It’s big and it’s blindingly bright and it’s full of cake and frosting and chopped-up cookies and there are sprinkles EVERYWHERE, and just when you think you’ve come to grips with it, you realize there’s a freaking unicorn cookie on top.
In short, it’s way too much of everything and I love it.
I actually made this cake last year, and never got around to posting it before other seasonal recipes took over. Now that it’s (fiiiiinally) warm and sunny where I live, it feels like the perfect time to bust out a super bright and cheerful cake!

This cake may look huge–and don’t get me wrong, it’s not tiny by any means–but the layers aren’t QUITE as massive as they might appear. It’s made with two 8″ and two 5″ cakes, each split in half to make four layers. It can still feed quite a crowd, but since it can be hard to estimate scale in photographs, be assured that it’s not approaching giant wedding cake size!

One of my favorite things about this cake is the fun upside-down ganache drip layer. This is a technique I think I first saw on the Sugar Monster Sweets Instagram page a year or two ago, and I completely fell in love! It’s just as easy as doing a regular ganache drip, but the effect is so striking and unexpected, it’s a fun twist on the drip-style cake.

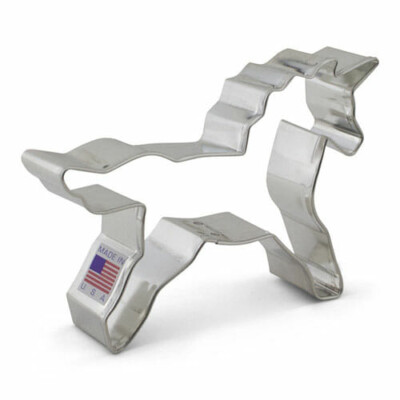
For the topper, you could–and probably should–use regular circus animal cookies. I had just bought a fun unicorn cookie cutter, and was a little bit obsessed with making a hot pink sprinkle-covered unicorn (and really, who doesn’t feel that way sometimes?!) so I made a small batch of funfetti sugar cookie dough and baked off a few unicorn cookies. But it would be a little silly to recommend that you make a cookie just to use as a cake topper, so I think that topping it with frosting rosettes and a few mini animal cookies is an equally good plan.

Finally, the cake itself! It’s a homemade white cake with a sweet vanilla flavor and a tender crumb. I layered finely chopped cookies in between the cake layers, but even if I hadn’t done that, the sweet vanilla flavor and occasional crunch of the nonpareil sprinkles would have definitely called to mind the nostaligic taste of frosted circus animal cookies!

You’ll notice in the picture and video that I did alternating layers of funfetti and pink cake batter, and alternating layers of white and pink frosting, but to be honest, when I make this cake again I’m going to keep the cake layers all funfetti, and the frosting in the middle all pink. The colors of the layers weren’t as clean as I hoped they would be, especially with the cookie pieces in the middle making it hard to get a neat slice!
I wrote the recipe this way (with all funfetti layers) but you can definitely play around with the colors of the cake and buttercream to suit your taste. Enjoy!
🎂 More Fun Party Cakes
- Curious George Cake
- Mini Banana Split Cakes
- Striped Buttercream Balloon Cake
- Watermelon Cake
- Unicorn Cakes
- Piñata Cake

Birthday Present Mini Cakes
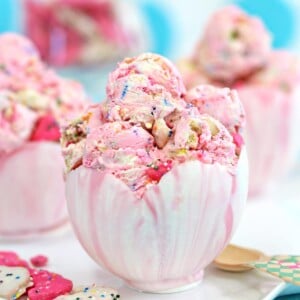
No-Churn Circus Animal Ice Cream
Leave a Review!
If you make this recipe, let us know! Leave a ⭐️⭐️⭐️⭐️⭐️ rating on the recipe below, and leave a comment, take a photo and tag me on Instagram @elabau, or use #sugarhero on IG!

Circus Animal Layer Cake
Ingredients
For the Cake Layers:
- 14 oz granulated sugar, (2 cups)
- 14 oz cake flour, (3 1/2 cups)
- 5 tsp baking powder
- 1 tsp salt
- 5 fl oz large egg whites, (about 5 large whites)
- 1 1/3 cups milk
- 1 TBSP vanilla extract
- 8 oz unsalted butter, at room temperature
- 2/3 cup rainbow nonpareil sprinkles
For the Buttercream:
- 8 fl oz pasteurized liquid egg whites, (3/4 cup)
- 32 oz powdered sugar, (6 cups)
- 3/4 tsp salt
- 32 oz unsalted butter, at room temperature
- 2 TBSP vanilla extract
- pink gel food coloring, I used Americolor
To Assemble:
- 2 cups rainbow nonpareil sprinkles
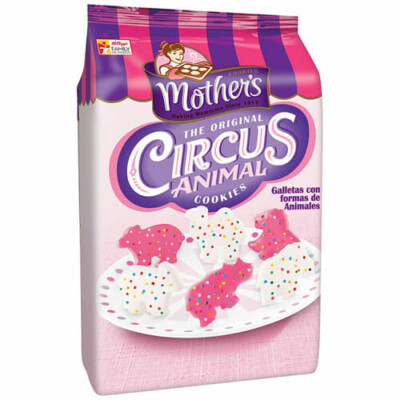
- 10 oz frosted circus animal cookies, (about 3 cups), finely chopped
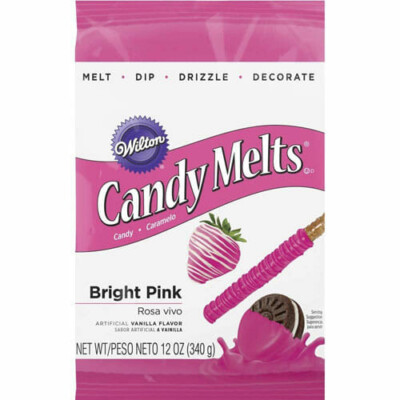
- 3 oz bright pink candy coating melts, (1/2 cup)
- 3 TBSP heavy cream
Instructions
To Make the Cakes:
- Preheat the oven to 350 F. Line two 5-inch cake pans and two 8-inch cake pans with parchment rounds, and spray the parchment and pan sides with nonstick cooking spray. (Note that you can make these cakes in different sizes depending on what size pans you have. If you change the pan size, just watch them closely as the baking time will most likely change as well.)
- Combine the sugar, cake flour, baking powder, and salt in the bowl of the stand mixer fitted with a paddle attachment. Mix on low speed for about a minute to combine the dry ingredients.
- Lightly whisk together the egg whites together with a quarter of the milk and the vanilla extract, and set aside for now.
- Add the remaining milk and the softened butter to the large mixing bowl and mix on low speed until the dry ingredients are moistened. Turn the mixer to medium speed and mix for a minute and a half.
- Add the egg white mixture in three batches, mixing for 20-30 seconds after each addition, until you have a smooth batter. Scrape the bottom and sides of the bowl with a rubber spatula, and give the batter a few more stirs to make sure everything is incorporated. Add the rainbow nonpareil sprinkles, and stir just a few times to mix them in—don’t over-mix, or the batter will be streaky.
- Divide the batter between the pans, filling each about half full. The 5” pans should get about 9 oz of batter, and each 8” pan should get about 18 oz of batter. Bake the cakes at 350 F for 30-35 minutes, until the sides just start pulling away from the pan, and a toothpick inserted into the center comes out clean.
- Let the cakes cool on a wire rack for 10 minutes, then gently turn them out and let them cool completely. I find it’s easiest to cut and stack cakes that have been chilled, so if you have time, wrap them with plastic wrap and put them in the freezer for at least 30 minutes, until they are firm but not frozen all the way through. If you are making these in advance, they can stay in the freezer for up to several weeks. Let them partially defrost, until they are firm but not rock-hard, before assembling.
To Make the Buttercream:
- Combine the whites, powdered sugar, and salt in the bowl of a large stand mixer fitted with a paddle attachment. Mix everything together on low speed, until the sugar is moistened and no dry patches remain. Turn off the mixer, scrape down the sides and bottom of the bowl with a spatula, then turn the mixer to medium speed. Beat on medium for 5 minutes.
- After 5 minutes, turn the mixer to medium-low and start adding the softened room temperature butter, 1-2 tablespoons at a time. Once all of the butter is incorporated, add the vanilla extract and mix it in. Stop the mixer and scrape down the bottom and sides once more. Turn the speed to medium and beat the buttercream for 10 minutes. At the end, you’ll have a frosting with a wonderfully light and creamy texture.
- Separate out about three-quarters of the frosting, and add enough pink gel food coloring to get a bright, vibrant pink that matches the color of your animal cookies. (I used Americolor Electric Pink, and found that the brand of cookies I bought were more “hot pink” than “soft pink.” Your milage may vary!) Keep the remaining quarter of the frosting white.
To Assemble:
- Slice each cake round in half so you have four rounds of each size. Place an 8-inch cake on a cake cardboard and place it on a cake turntable. Place a big dollop of pink frosting on the cake layer—about 2/3-3/4 cup—and use a metal spatula to spread the frosting into a layer going all the way out to the edges of the cake.
- Sprinkle a handful of the finely chopped cookies on top of the frosting, leaving a margin around the edge, and press gently to embed them. Add a little more frosting—about ¼ cup—on top of the cookies, and spread it out on top.
- Top the cake round with a second cake layer, and repeat the frosting and cookie process again. Do it with a third layer, and finally, add the last cake layer. Cover the top and sides of the cake with a very thin layer of pink frosting—this is the crumb coat, which locks crumbs into the frosting and also provides some stability to the cake. Refrigerate the cake for 30-45 minutes, until the crumb coat is set and the cake feels firm and stable.
- Cover the top and sides of the chilled cake with a thicker layer of pink frosting. Use a bench scraper or metal spatula to smooth out the sides and top of the cake as much as possible. Chill for 30-45 minutes, until firm.
- Pour the rainbow sprinkles into a shallow bowl, and supporting the cake in one hand, use the other hand to pick up a handful of sprinkles and press them against the bottom of the cake. Go around the entire bottom edge of the cake adding a border of rainbow sprinkles. Even though the frosting is chilled, the moisture from the frosting should be enough to cause the sprinkles to stick. If they’re falling off, let it soften at room temperature for a bit and then try again.
- For the top tier of the cake, repeat the slicing and filling process with the 5-inch cake layers. This time, use the white frosting for the crumb coat and final coating on the cake, and refrigerate the assembled cake for at least an hour, until very firm.. When you’re ready to apply the drip, set a piece of parchment on top of the cake, top it with a cardboard round, and flip it over so the bottom is now the top.
- Prepare the ganache drip by combining the candy melts and cream in a small bowl, and microwave for 45 seconds. Whisk well, and if any chunks of candy coating remain, whisk again briefly until it is completely melted and smooth.
- Transfer the glaze to a squeeze bottle with a narrow tip. Squeeze a dime-sized amount of glaze along the top edge (which is actually the bottom!) of the chilled cake, and nudge it gently so it starts to slide down the side. Repeat right next to the first drip, and continue around all the edges of the cake. Refrigerate the cake round for 15-20 minutes, until the glaze is completely set.
- Place bottom tier of the cake on your serving plate or cake stand. Insert 4 cake dowels in a ring in the center of the cake, and trim them so they’re flush with the top of the cake. Add a dab of buttercream on top to adhere the top layer, then add the second cake on top.
- To finish the cake, you can top it with an oversized sugar cookie made to look like a circus animal cookie, or to simplify things, just add a few buttercream rosettes and top with regular frosted animal cookies.
- For the best taste and texture, serve this cake at room temperature. Leftovers can be stored in an airtight container in the refrigerator for up to a week, but will taste best when eaten within 3-4 days.
Video

Measuring Tips
Our recipes are developed using weight measurements, and we highly recommend using a kitchen scale for baking whenever possible. However, if you prefer to use cups, volume measurements are provided as well. PLEASE NOTE: the adage “8 oz = 1 cup” is NOT true when speaking about weight, so don’t be concerned if the measurements don’t fit this formula.
Want to learn more about baking measurements and conversion?


Beautiful Cake recipe and i will use your recipe for my kid birthday..thanks for sharing
Hey Rahul, that is so exciting! I love hearing that, I am so glad you found it. I would love to hear how it goes once you give it a shot!
This looks so fun!! I plan to make this for my niece’s 5th birthday coming up and would love to make the cookies as well. Can you share the cookie and frosting recipe for those as well? Thanks!
Certainly! I used the no-spread cookie dough from this post, with some colorful jimmies mixed in. I didn’t actually use frosting to cover them–I used melted candy melts so they would stay fresh and not get soggy on top of the frosting. Please let me know how the cake goes!
https://www.sugarhero.com/vintage-christmas-card-cakes/
Beautiful and delicious!
Fantastic, so glad to hear that you enjoyed it!